Those who ended up upgrading Windows 7 or 8/8.1 to Windows 10 since it was offered as free upgraded are now regretting due to random freezing and handing issue of Windows 10. Its not only restricted to users having their old Windows straight upgraded to Windows 10, even uses with fresh install has been complaining about constant system freezing every now and then. Widows 10 freezing not only impacts users in terms of loss of productivity but you may also end up losing your work and data when there is no other way to get system to respond back other than force rebooting Windows 10. If you are facing abrupt Windows 10 freezing and hanging then here is the detailed step by step guide to fix it forever.
Table of Contents
Why does Window 10 keep freezing?

The most common cause of Windows 10 freezing randomly is incompatible drivers. When you perform Windows 10 upgrade, the old drivers are still intact which may not be compatible with Windows 10. Other known reasons for Windows 10 freezes are, failing hard disk, low system memory, faulty hardware including graphics card and RAM or corrupted system files. If you tend to perform lots of data read and write on your system hard disk, high system IO often makes the system unresponsive and freezes for seconds. There are many Windows 10 processes which are known to also cause 100% CPU and hard-disk usage (Windows Modular Installer Worker, dismhost.exe, Modern Setup Host) which are also one of leading cause of Windows 10 freezing.
Fix alt+tab not working & USB devices not recognized on Windows 10.
How to Fix Windows 10 Freezes Randomly
In order to successfully fix this issue on your computer, we have provided various methods in this article. Each and every one of these methods takes a different approach to this issue. As a result, by going through each one of these, you will be able to successfully fix the Windows 10 Freezes issue on your computer. The best part about all of these solutions is that they are quite easy to follow and use. Due to this, even if you are not an advanced Windows 10 user, you can successfully fix the Windows 10 Freezes issue by going through the following methods one by one:
1. Update Device Drivers in Windows 10 via the Device Manager
All of the device drivers installed on your Windows 10 computer are quite important for the proper functioning of your computer. These essentially provide a communication bridge between the different application programs installed on your computer and the hardware devices connected to your PC. Due to this, if anything goes wrong with these device drivers, you can face various kinds of issues on your computer. It can even result in Windows 10 freezing issues for some users. In such a case, you can try updating all the device drivers installed on your computer which will fix them if they are corrupted. Thankfully, Windows 10 allows its users to this quite easily. You have to simply follow the given steps one by one to successfully all the device drivers of your computer via the Device Manager:
- First, press Windows Key + X on your keyboard and open Device Manager in Windows 10.
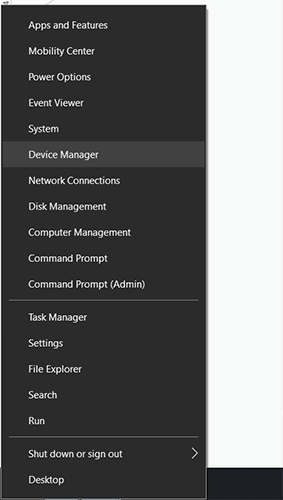
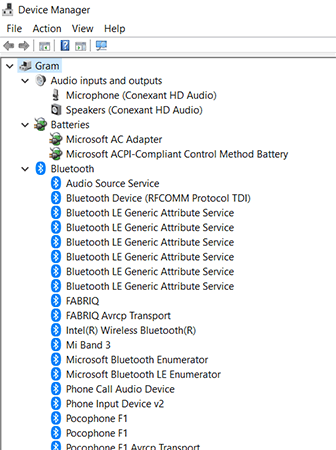
- In here, expand all of the different device sections one by one to access all of the hardware devices connected to your computer.
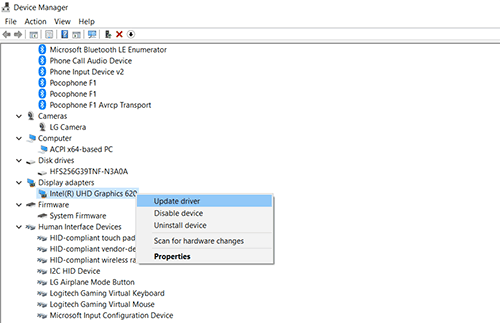
- Now, right-click on one of these devices and select Update Driver which will open a new window on your screen.
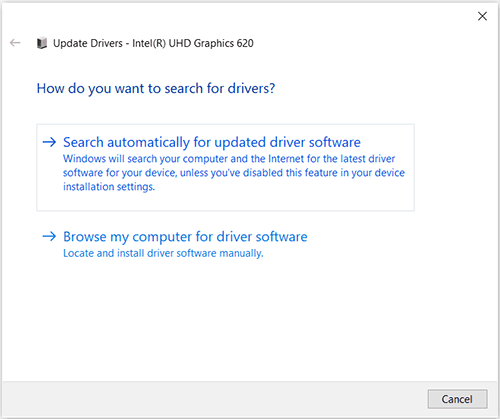
- After that, select the Search automatically for updated driver software option which will successfully update the device drivers for that hardware device.
- You have to now repeat this process for all the hardware devices visible in the Device Manager in Windows 10. Once you have successfully updated all of the device drivers, reboot your computer to fix the Windows 10 freezing issue.
Fix Windows Update Stuck at 0% and Update Assistant Stuck at 99%.
2. Scan and Fix Corrupted Windows 10 System Files
Windows 10 has thousands of system files that are highly important for the proper functioning of all the functions on your computer. And any of these files get corrupted or missing, you can run into a number of possible issues. In such a case, you have to scan and fix any corrupted system files on your Windows 10 computer. Fortunately, Windows 10 allows its user to do so on a computer quite easily. This is possible by using the Command Prompt in Windows 10 and a set of some specific commands. You can simply follow the given steps to enter these commands to scan fix any corrupted system files on your Windows 10 PC:
- Open the Command Prompt on your computer as an Administrator using the Windows Search Feature.
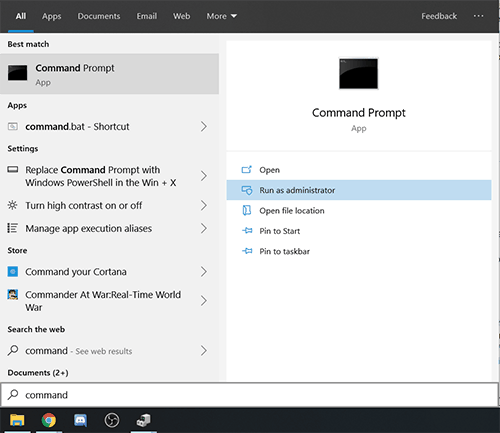
- In here, type the given commands one by one and press Enter on your keyboard after each and every command:
sfc /scannow
Dism /Online /Cleanup-Image /CheckHealth
Dism /Online /Cleanup-Image /ScanHealth
Dism /Online /Cleanup-Image /RestoreHealth

- Once you have done that, Windows 10 will start scanning all of the system files on your computer. And if it finds any corrupted system files, it will automatically repair them. As a result, any issues like Windows 10 freezing will get fixed after entering these commands on your computer.
Fix Nvidia Control Panel Missing & Guide to Fix Application blocked from accessing Graphics hardware.
3. Clear Temporary Files from your Windows 10 Computer
There are several programs and applications installed on any Windows 10 PC computer. While these programs and applications are quite useful for the user in many ways, they can create a lot of temporary files on your system. And these temporary files can consume your system resources including your storage and memory which can cause the Windows 10 freezing issue. As a result, cleaning these temporary files every now and then is quite important. Thankfully, deleting these temporary files is as easy as deleting any other file and folders stored on your computer. You can simply follow the given steps one by one to successfully delete all of the temporary files from your computer:
- Press Windows Key + R on your keyboard at the same time to open Windows Run.
- In here, type temp and press Enter on your keyboard which will open the temporary folder on your Windows 10 PC.
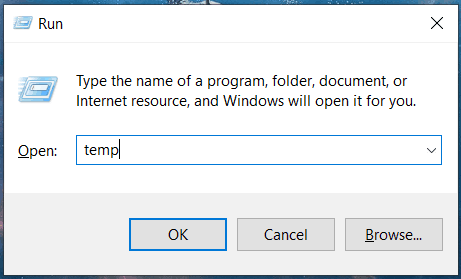
- This folder contains all of the temporary files and folders created by the various programs installed on your computer.
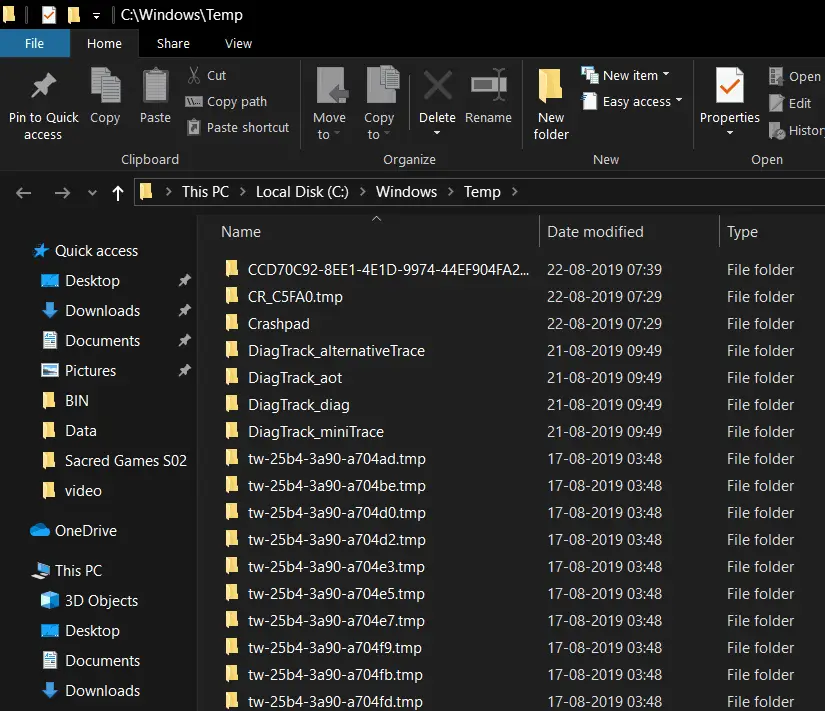
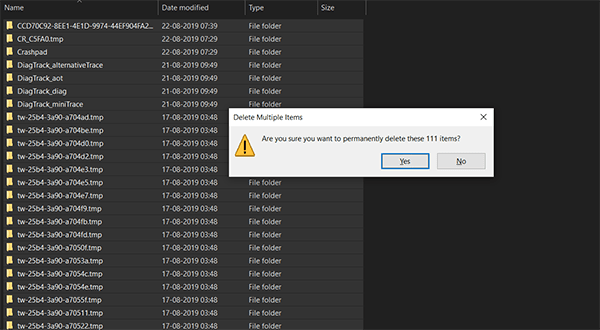
- Finally, you can simply select all of these files and folders by pressing Control + A on your keyboard and delete them. But make sure to permanently delete these temporary files by pressing Shift + Delete on your keyboard. Doing so will get rid of all these temporary files and subsequently fix the Windows 10 freezing issue.
4. Check for Memory Issues on your Windows 10 PC
The memory of any computer is highly important for running any tasks. It stores all of the data which is currently being accessed by the processor. As a result, if there are any issues with the memory of your system, you can face different kinds of issues. Such issues can even include the Windows 10 freezing issue. As a result, making sure that your computer’s memory is working properly is extremely important. Since there are many users out there who keep facing memory issues every now and then, Windows 10 allows you to check for memory errors quite easily. This is possible via the Windows Memory Diagnostic tool which comes included with Windows 10 by default. And you can follow the given steps one by one to check for any memory errors on your Windows 10 PC:
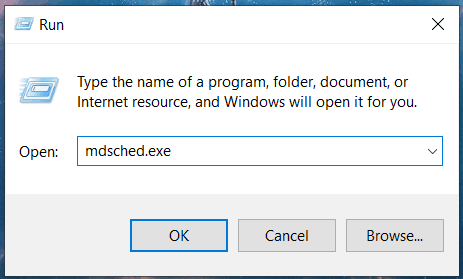
- First, press Windows Key + R on your keyboard to open Windows Run.
- In here, type mdsched.exe and press enter to open the Windows Memory Diagnostic tool.
- Now, click on the Restart now and check for problems (recommended) option in the Windows Memory Diagnostic window.
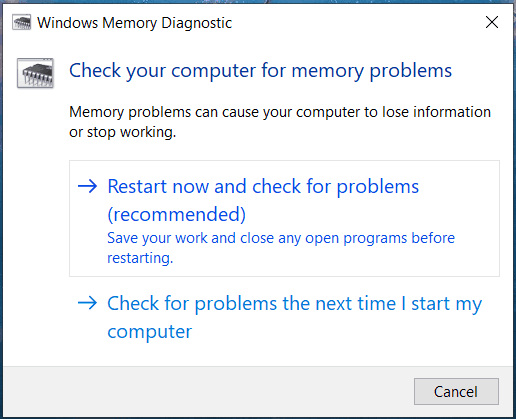
- Once you have done that, Windows 10 will automatically check for any issues with the memory of your computer and fix it.
5. Perform System Restore or do the clean Windows 10 install
Despite trying all the possible solutions mentioned about, if your Windows 10 still freezing and becoming unresponsive, then you could try to do the System Restore. Please keep in mind, system restore will only help if you have recently installed new hardware with its drivers or software. If you have installed updates, then you have to use rollback feature to uninstall updates on Windows 10. To perform Windows 10 System Restore,
- Press Windows key + S keyboard shortcut and search for “restore”
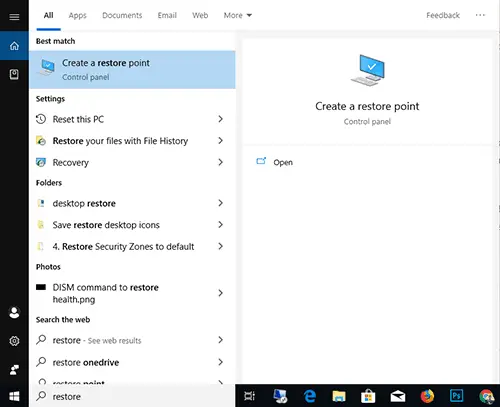
- From the results, click and open “Create a restore point”.
- Click on System Protection tab under System Properties window.
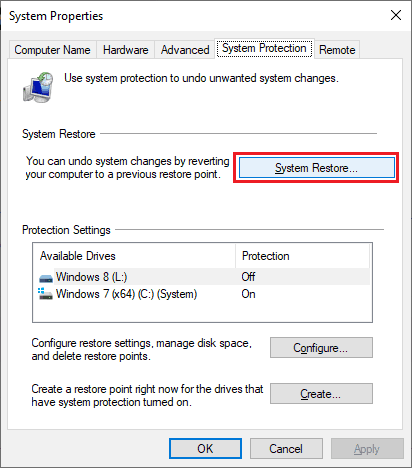
- This will open System Restore wizard, click on next button and the list of all the available restore points with dates will be displayed.
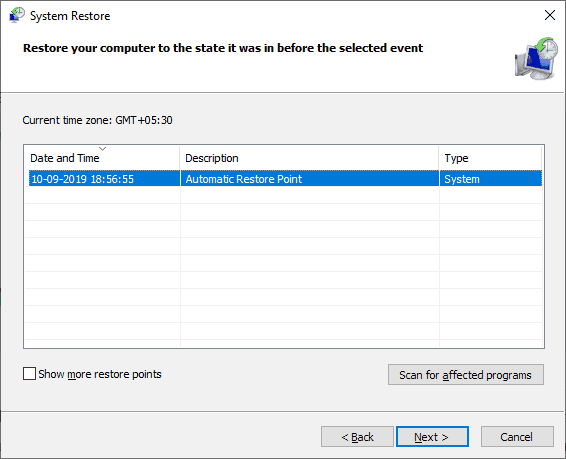
- Now select the suitable restore point and click on Next. Click on “Finish” button to confirm your action.
- Windows will now perform the system restore automatically and restore your files and settings to selected restore point.
It may take some time to complete the system restore fully. Do not panic. Once completed check if Windows 10 freezing is fixed or not. If the problem still persist then as a last resort go for clean Windows 10 install. Do make sure to backup your user data before formatting your system drive for Windows 10 install.

