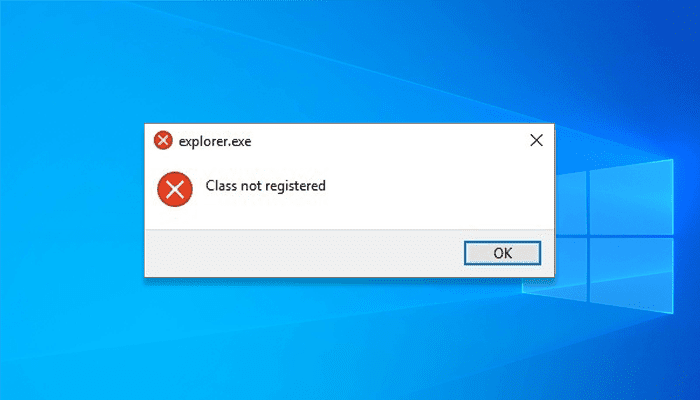
Are you trying to launch a program or an app, but your windows computer fails? Do you get explorer.exe class not registered Windows 10 Error message frequently but don’t know what to do? Don’t worry. We know the proper fixes to solve this problem. So, try these 10 fixes for the explorer.exe class not registered Windows 10 Error. Learn and perform them with the step-by-step guide and know which fix works best for you.
Table of Contents
How to Fix Explorer.exe Class Not Registered Error
Fix 1: Restarting The Windows Explorer on your PC
Restarting the windows explorer is the quickest and simplest fix for the explorer.exe class not registered Windows 10 Error. It is the first fix you must do whenever you encounter an issue. Kindly follow the steps to perform the fix efficiently.
- Go to the Start icon and right-click on it.
- Select ‘Task Manager’ from the options and open it.
- Select the ‘Details’ and find out ‘explorer.exe’ from the menu. A drop-down menu will show. Right-click on the ‘End Task’ option on the drop-down menu.
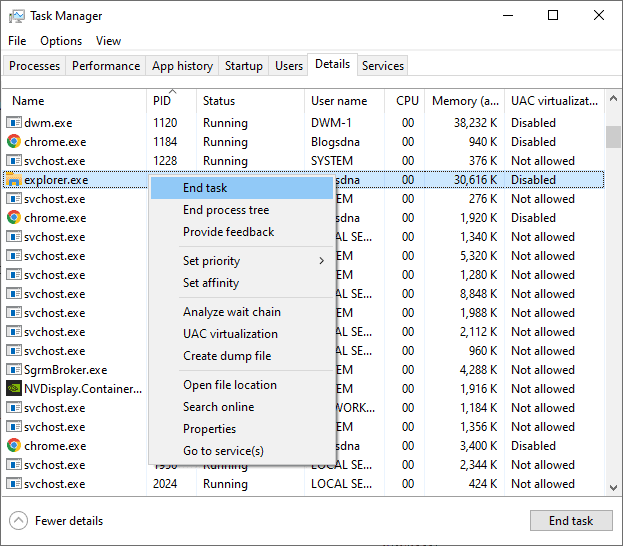
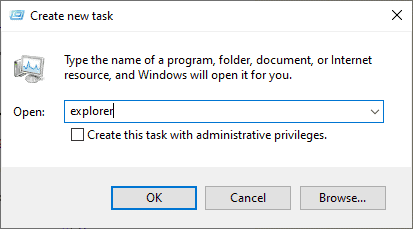
- After that, click on ‘File’ and select ‘Run New Task.’ This will launch the Explorer.
- You need to restart Explorer by typing ‘explorer’ on your keyboard and pressing OK or Enter.
Fix 2 – Restarting The Internet Explorer Explorer ETW Collector Service
Another brilliant fix for explorer.exe class not registered Windows 10 Error is disabling the internet explorer ETW collector service. This service gathers and scrutinizes ETW events in real-time. So, you must try a restart this service to resolve the issue you are facing. Here is the step-by-step guide to performing it accurately.
- Press on Windows + R as a shortcut to open Run.
- When the Run search bar opens, you must type ‘services.msc’ and then press Enter.
- Find ‘Internet Explorer ETW Collector Service’ from the varied list of services and right-click on it. It will show a drop-down menu from which you need to click on Start.
Fix 3 – Run SFC And DISM
Missing or corrupted files can be linked to the issue of explorer.exe class not registered Windows 10 Error. Fix that with these easy steps below.
- Open the windows search box. After it opens, type cmd.
- From the command prompt output menu, select ‘Run as Administrator.’
- On the command prompt window, type the below-mentioned the command accurately –
SFC/scannow.
- After entering the command, press Enter.

- Windows will run a scan, and you must wait for it patiently. Then Restart your system.
For an alternate fix, you must run DISM by following the steps mentioned below –
- As an administrator, open the Command Prompt.
- Type the command written below correctly and then press Enter.
DISM /Online /Cleanup-Image /ScanHealth
- Wait for the scan and enter the following command only after the scan is over.
DISM /Online /Cleanup-Image /restorehealth
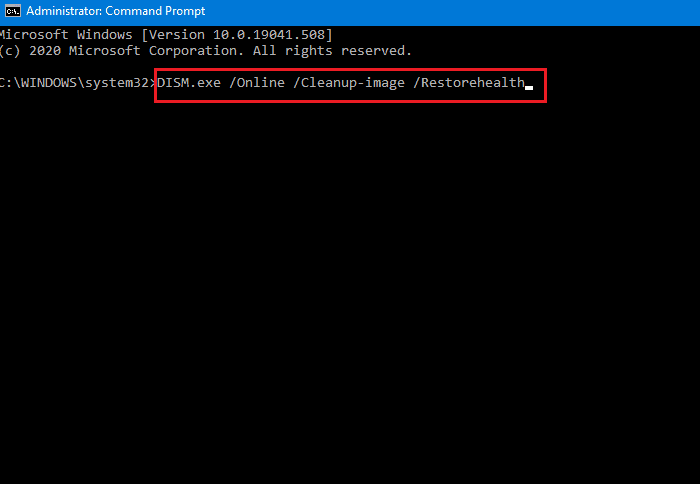
- Then press Enter.
Fix 4 – Resetting Default Apps
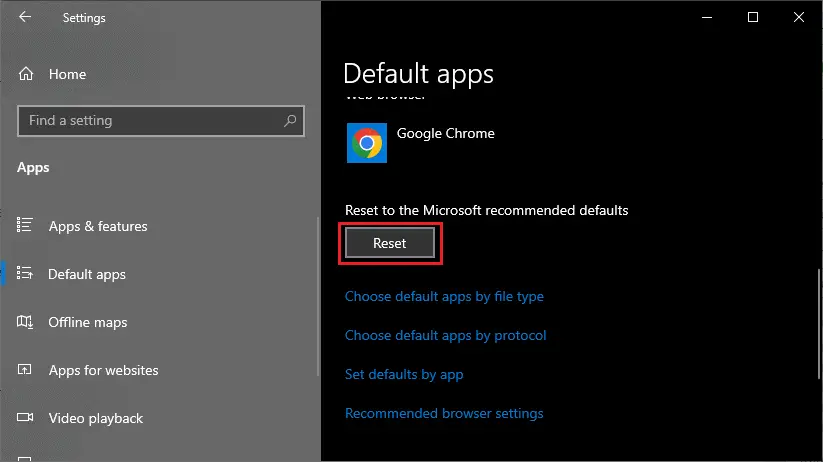
Resetting default apps is a necessary fix you should perform when you face explorer.exe class not registered Windows 10 Error.
- Click on Start and then open settings.
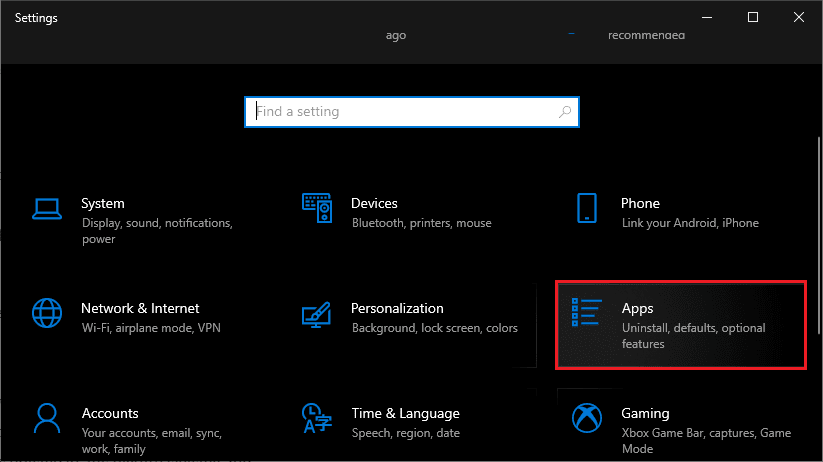
- Select ‘Apps’ and then select ‘Default Apps.’
- Scroll down to get to the bottom of the menu. Then reset the device by clicking on the reset button.
Fix 5 – Setting Windows Photo Viewer To Default Image Viewer
Windows photos viewer is a unique and helpful software. Follow the steps below to set it as a default image viewer.
- Right-click on any photo, and you will notice a menu appearing.
- Click on ‘Properties’ and then click on ‘Change.’
- Now you must select Windows Photo Viewer on the list.
- If you want Windows Photo Viewer to show you photos every time, you must select that option.
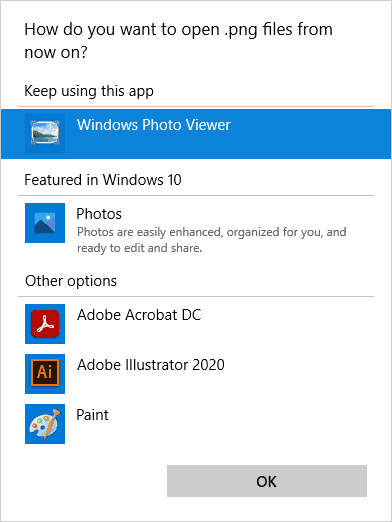
- You must use this software to open jpg files. Save the changes by clicking on Ok.
- To avoid making any registry modifications, you can easily download any picture viewing app.
- Open a jpg file and change the default image reader to Windows Photo Viewer.
Fix 6 – Disabling iCloud and its Services
iCloud can sometimes be the root cause of the issue. So, if other fixes are not working, you need to disable them.
- Hit Windows + R to open Run and then type ‘taskmgr’ in the dialogue box. Then hit Enter.
- Select the Startup Tab and search for iCloud from the list. Then right-click on it and press Disable.
- After that, you must restart your PC.
Fix 7 – Installing the Latest Windows Updates
You must ensure to install the recent windows update always. However, if you don’t know how to do it, here is your ultimate guide –
- Hit Windows + S and type ‘Windows Update’ when the search bar opens.
- Now you must open the Update settings and select ‘Check for Updates.’ It will make Windows automatically search for updates and install them.
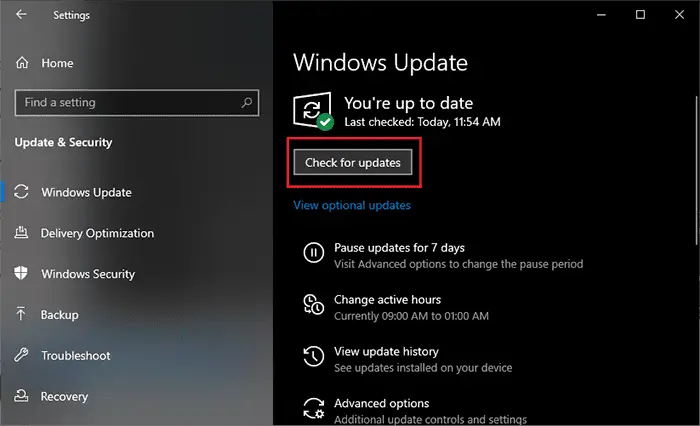
- After the update is over, restart your PC.
Fix 8 – Performing a System Restore/Doing a Clean Install
Restoring your system will remove all the data. So make sure to have a backup before performing this fix.
- Hit Windows + S and type Restore. Now select the first program option you see.
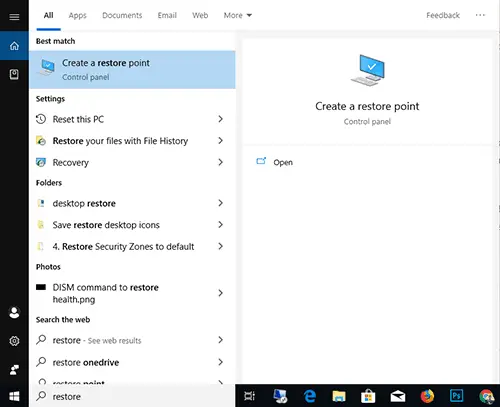
- Open the Restore settings and click on System Restore. You will find it under the tab named System Protection.
- You will notice a Wizard opening the full navigation of the restore process. Continue to press on Next to proceed.
- You will notice a list of several options from which you must select the Restore point. Then click Yes when the window confirmation of beginning the process shows up.
- Restore your computer and log in to it.
Fix 9 – Checking Your Hard Drive
You must check if your hard drive is working aptly or not. You might need to replace it. Check your hard drive by following the process –
- Search for ‘Prompt’ and open Command Prompt.
- Enter the command correctly –
“wmic diskdrive get status”
- Now hit Enter.
- Confirm that every hard drive bears an OK status. If you notice a Bad or Unknown situation, you might need to consider replacing your hard drive.
Fix 10 – Using Component Services
Another way of fixing the explorer.exe class not registered Windows 10 Error issue is by using component services. Learn how to do it correctly from the steps below.
- Open Run and type ‘dcomcnfg’ in the Run search box. Then press on entering.
- Now scroll down to Component Services and then click on ‘Computers.’ Then, press ‘My Computers.’
- Double click on the “DCOM Config” in the middle panel.
- Now you should close the window of component services. If the issue still lingers, consider restarting your computer.
Wrapping Up
We hope a fix has worked for you and solved your explorer.exe class not registered Windows 10 Error issue. Don’t forget to bookmark this article to keep the easy fixes handy at all times.

