Antimalware Service Executable (Also knows as MsMpEng.exe) is a service administrated by Windows Defender. This service basically scans the system in real-time for security purposes. As this process is always active, it consumes a lot of resources including CPU and your HDD. As a result, the system slows down due to a lack of resources. Many times, when a system is running at a low pace, users have found Antimalware Service Executable is the culprit behind it.
Table of Contents
What Causes Antimalware Service Executable (MsMpEng.exe) High CPU & Disk Usage?
As a process running continuously in the background, Antimalware Service executable needs continuous processing power to analyze the threats and generate the results. It also needs constant disk access to scan certain folders as well as to save the logs of scans. If you have a broadband connection, you might also notice high network usage because Windows Defender also requires a steady internet connection to communicate with Microsoft’s threat library. It uploads the threats or malicious files over to the server and also updates its library from time to time. This will also hog your bandwidth, giving you a slower and unsteady internet connection.
Most of the time, this problem goes away when the scheduled scans are finished. But sometimes, these scans go on for hours. This creates a lot of problems for average users. We would recommend you to wait an hour or so before taking any necessary steps to fix this problem. As this would keep your system safe at all times.
If you are still undergoing this problem even after a significant amount of time, you should try the solutions for this problem as mentioned in this article.
How to Fix Antimalware Service Executable High CPU & Disk Usage
There are a few proven solutions to this problem. These solutions have worked out for many users in the past and hopefully for you s well. Just make sure you pay close attention to each step and follow the method thoroughly to avoid any unnecessary problems in the future.
1. Reschedule The Windows Defender Scans
As mentioned above, these real-time scans are automatically scheduled by the Windows Defender Antivirus. Windows Defender is continuously monitoring your system usage and schedules the scan when the system is ideal. But, there is always room for error. Due to some unintended interruptions, Windows Defender’s scheduled scan times might have been misplaced. But, you can fix that yourself by following some simple steps given below:
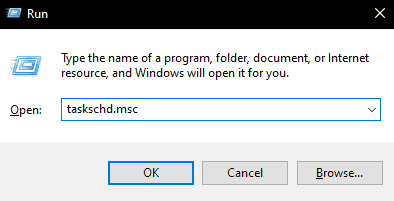
- Press “WindowsKey+R” to open the “Run” window.
- Now, type “taskschd.msc” in the empty space and hit enter.
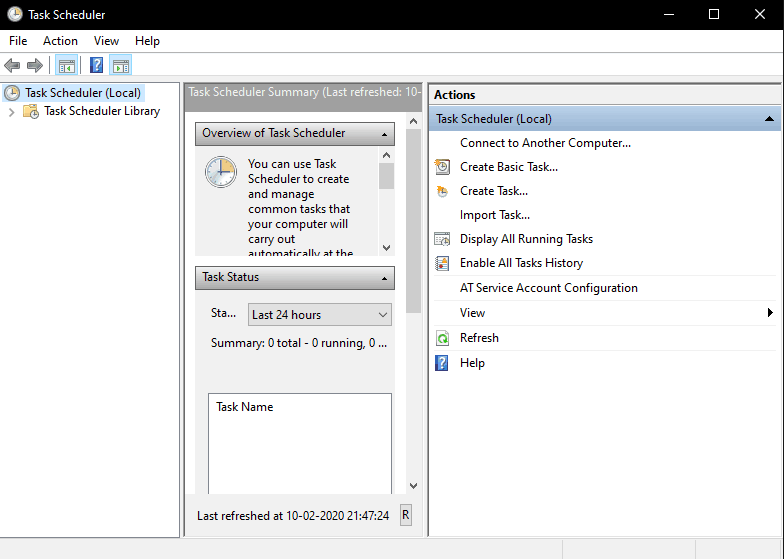
- This will open the Windows Task Scheduler window. From here, you can change the timeframe for various system processes as well as third-party apps.
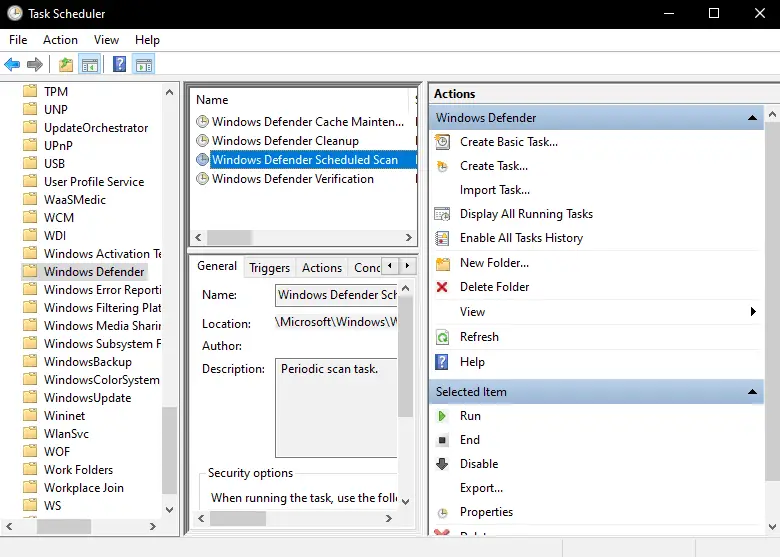
- Follow the path given below to access Windows Defender settings in Task Scheduler:
Task Scheduler>Microsoft>Windows>Windows Defender - Now, double click on the “Windows Defender Scheduled Scan” option to move ahead.
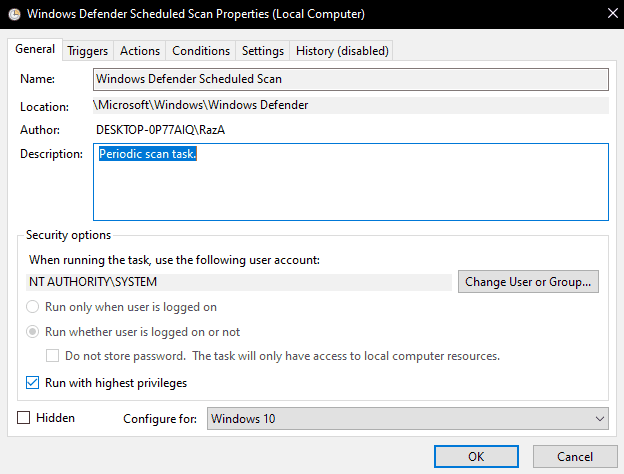
- In the next window, click on the “General” Tab.
- In this window, make sure that the “Run with highest privileges” option is checked.
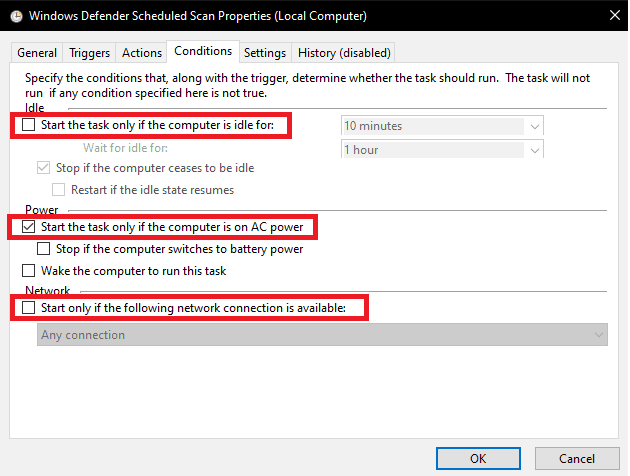
- Now, head over to the “Conditions” page for more.
- In here, check the three options as shown in the image below:
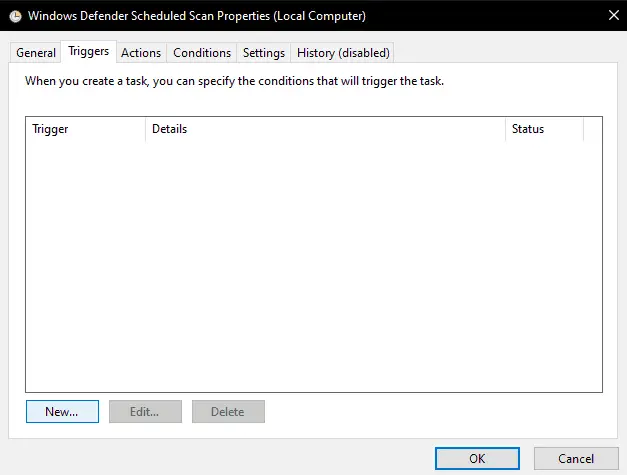
- In the end, we need to set a scheduled time for this process. For that, click on the “Triggers” tab.
- Then, click on the “New” option. This will open a new window.
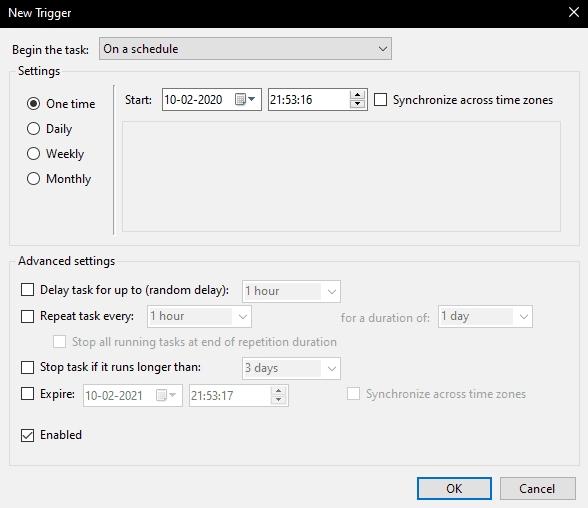
- In this window, you can set your desired time for the scans. Once you are done with that, click on the “Enabled” check-box and press “Ok”.
- Restart the system for changes to take effect.
Check out: How to fix high CPU usage by Windows Module Installer Worker & Dismhost.exe.
2. Use Windows Defender’s Exclusion Feature
Windows Defender comes with yet another useful feature knows as “Exclusions”. Here, you can add certain programs as well as folders that you want to be excluded from the scans. We can utilize this feature to prevent high CPU and Disk usage from Antimalware Service Executable. To do this, follow the steps given below:
- Press “Windows+I” keys together to open the Windows settings window.
- Head over to the “Update and Security” section.
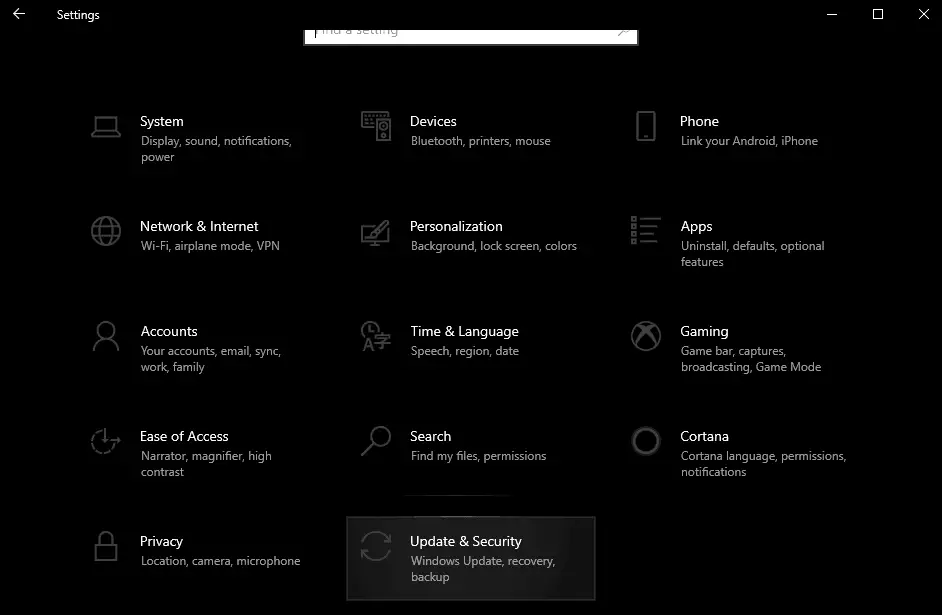
- Now, click on “Windows Security”. This will open Windows Security settings. Now select “Virus and Threat Protection” and Virus and Threat Protection Settings”.
- Now, scroll down until you see the “Exclusions” option at the bottom.

- Now, you will see an option that says “Add an exclusion”. Click on that to add an exclusion.
- In the drop-down menu, select the “Processes” option.
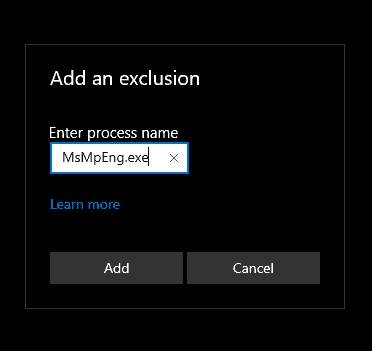
- After that, Windows will ask you to put down a process name. Put “MsMpEng.exe” in the empty field and click on “Add”.
3. Turn Off Windows Defender
1. Turn Off Windows Defender Temporarily
If you don’t have any genuine third-party Antivirus installed in your system, Windows Defender is your only protection against malicious software and viruses. So, we recommend you always keep Windows Defender turned on while you have an active internet connection and before plugging in any USB storage device.
To turn off Windows Defender temporarily, follow the steps given below:
- Open the Windows Defender antivirus settings. (Follow Solution #2 till Step #3)
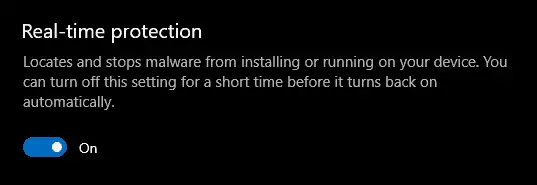
- On this screen, you will see the “Real-Time Protection” option on the top. By default, this option will be turned on.
- Click on the button to turn the Windows Defender Antivirus.
- If you get a UAC pop-up, click on “Yes”.
- This will turn off the Windows Defender Antivirus temporarily.
- Check if the High CPU, as well as Disk usage, is fixed or not.
- If the problem is resolved, continue with your daily routine. The Windows Defender Antivirus will turn on again after the next system reboot.
- If the problem is not resolved, follow the solution below.
2. Turn Off Windows Defender Permanently
There is a lot of Antivirus software available on the internet. Many software does not consume as many resources as the Antimalware Service Executable while performing identical tasks. Thus, if you have found a decent alternative to Windows Defender Antivirus, you can turn off Windows Defender permanently by following the steps given below:
- Launch the “Run” window by pressing the “WindowsKey+R” combination simultaneously.
- In the empty space, type “gpedit.msc” and hit “Enter”.
- This will open the “Local group policy editor”. Form here, you can change the preferred option for almost all system applications.
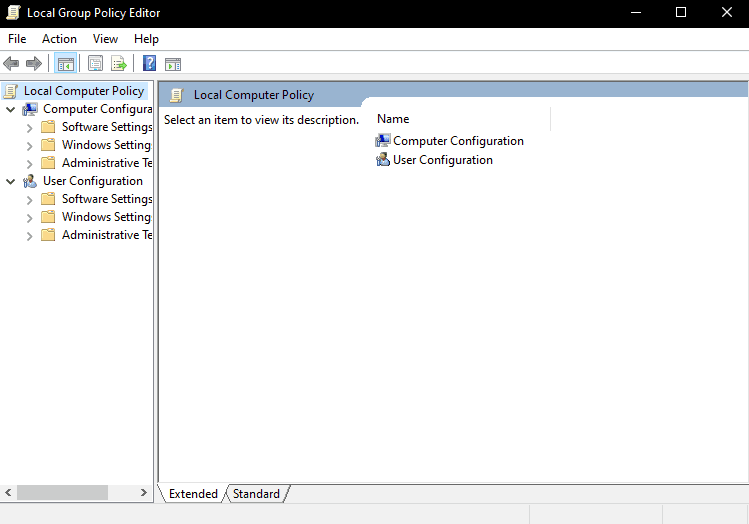
- Now, follow the path given below to open the Windows Defender parameters window.
Computer Configuration>Administrative Templates>Windows Components>Windows Defender Antivirus
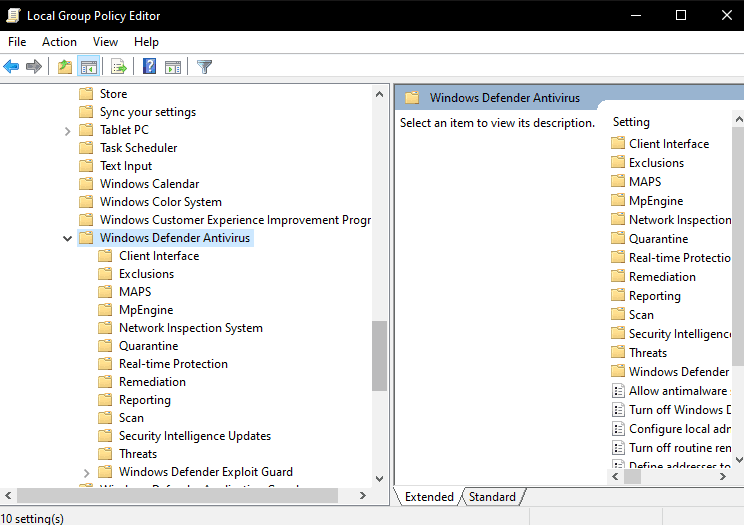
- Now, the Windows Defender parameters will be displayed on the right side.
- Here, locate the “Turn Off Windows Defender” option.
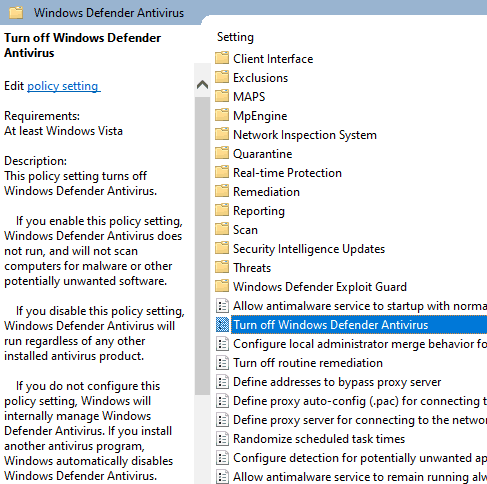
- Double click on the parameter to open the preference option.
- In the parameters window, Check the “Enabled” option and click on “Apply”.
- Now, click on “Ok” to exit the window.
- Restart your computer for changes to take effect.
Note: The Windows Defender Antivirus Software will NOT turn back on automatically again unless you change this option again.
Guide to fix Modern Setup Host high CPU Usuage in Windows 10.
4. Use the Command Prompt to fix the problem
Just like any other software, Windows Defender Antivirus also operates under local files saved on your hard drive. As these files are not immune to corruption, they can be damaged due to certain reasons and cause problems in the operation of Windows Defender.
You can remove such files completely with the help of a few command lines in the command prompt. Windows Defender will automatically re-download these files from the Microsoft database and your problem will be solved.
Follow the steps given below to fix the problem:
- Click on the Windows Logo to open the “Start Menu”.
- Type “Cmd” in the search field.
- Right-click on the “Command Prompt” option and select “Run as Administrator” option.
- Select “Yes” in the User-Account-Control pop-up.
- The command prompt will be launched now with administrative privileges.
- Now, copy the following command and right-click in the command prompt to paste it.
%PROGRAMFILES%\Windows Defender\MPCMDRUN.exe” -RemoveDefinitions -All
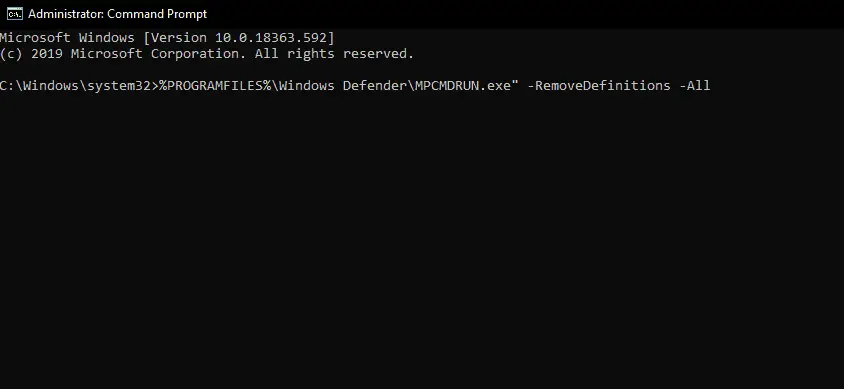
- Once the command is pasted in the command prompt, hit “Enter” to run the command.
- After the first command is successfully executed, do the same for the second command given below:
%PROGRAMFILES%\Windows Defender\MPCMDRUN.exe” -SignatureUpdate - Restart the system and start the system update to replace the deleted files.
- Once the update is completed, the system will prompt you for another system reboot.
- After this reboot, your problem will be fixed.

