Many users have encountered the error USB device not recognized upon trying to connect a USB drive. The USB device wouldn’t work in such a situation.
Table of Contents
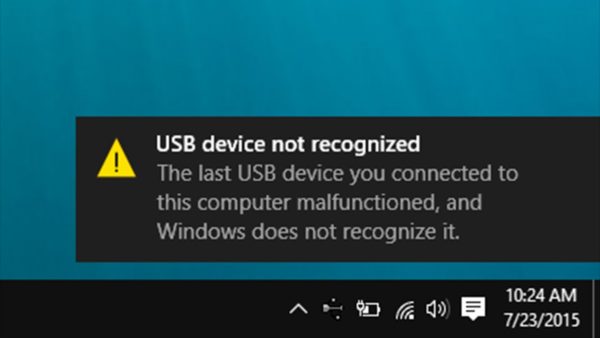
What is USB Device Not Recognized?
The issue could be with three elements in the connection: the USB device, the USB port, or the computer itself. In either of the cases, the issue could be both with the hardware and the software.
To isolate the cause, try plugging the USB device with another computer of similar configuration and check if it works fine with the other system. If yes, verify the compatibility of the USB stick with your system. If the device worked fine with your system earlier, it should be compatible with the same.
As for checking the USB ports, try connecting the USB stick to a different port on your system. There is a hard chance that the hardware of all the USB port could bad at the same time. Another possibility is that the USB drivers could be outdated. We will discuss it later.
How to Fix USB Device Not Recognized [Windows 10]
Once you have isolated the above possibilities, proceed with the following solutions to fix the issue:
1. Plug out all other USB devices
Too many USB devices cause conflict. Usually, newer computers are powerful enough to handle the situation, thus you might never face the problem. But in case you encounter the error USB device not recognized, it would be a wise idea to plug out all other USB devices, at least temporarily. If doing so doesn’t resolve the issue, proceed to the following solutions.
2. Restart the computer preferably in the clean boot state
While you might not know what exactly causes the issue, if the USB device was working fine with your system earlier, a recent change might have caused the problem. A good way to reset many parameters to default is to restart the system.
In case any third-party software is causing interference with the USB device, that fact could be isolated through a clean boot of the system. The procedure for performing a clean boot of a system is as follows:
Press Win + R to open the Run window and type the command msconfig. Press Enter to open the System Configuration window.
In the Services tab, check the box for Hide all Microsoft services. Then click on Disable all.
In the Startup tab, click on Open Task Manager.
Now, right-click and select Disable for all the services which are currently Enabled.
Close the Task Manager and select OK for the System Configuration dialogue box.
Restart the system.
When you restart the system in the clean boot state, no third-party program would be triggered at the Startup itself thus isolating the probability of any such interference.
3. Update the USB port drivers
Drivers are necessary for communication between the hardware and software of a system. If a driver is outdated or not functioning properly, the associated hardware device might cease to work. This is true with USB port drivers as well. Thus updating the drivers would be a good idea in case you are facing the issue in discussion. The procedure for the same is as follows:
Press Win + R to open the Run window and type the command devmgmt.msc. Press Enter to open the Device Manager window.
Expand the list for Universal Serial Bus controllers.
Right-click and select Update driver for all the USB drivers one by one.
Restart the system once you are done.
Alternatively, you could download the drivers from the manufacturer’s website and install them.
4. Change the Power Management settings of the USB ports
At times a policy set to save power on the system disables the USB ports. You might not be able to use any USB device in that case. To resolve this possibility, change the Power Management settings of the USB ports the procedure for which is explained as follows:
Press Win + R to open the Run window and type the command devmgmt.msc. Press Enter to open the Device Manager window.
In the list of USB drivers, you would find options named USB Root Hub. There could be multiple USB Root Hubs.
Right-click on USB Root Hub and select Properties.
In the Power Management tab, uncheck Allow the computer to turn off this device to save power and click on OK to save the settings.
Repeat the process for all the USB Root Hub drivers.
5. Turn OFF fast startup
Some devices might not understand Fast Startup and thus would not work with the same. Turning OFF fast startup could be helpful in this case. The procedure to turn OFF fast startup is as follows:
Press Win + R to open the Run window and type the command control panel. Press Enter to open the Control Panel window.
Go to Hardware and Sound > Power Options.
On the list on the left-hand side, click on Choose what the power button does.
Now click on Change settings that are currently unavailable.
Scroll down to Shutdown settings and uncheck Turn on fast startup.
Click Save settings to save the changes.
Restart the system and check if it helps in resolving your problem.
6. Modify the USB selective suspend settings
Modifying the USB selective suspend settings could be helpful in resolving your problem. The procedure to modify the USB selective suspend settings is as follows:
Open Control Panel as explained in solution 7 and click on Power Options.
Select Change plan settings corresponding to your current power plan.
On the corresponding window, select Change advanced power settings.
Expand the options for both USB settings and USB selective suspend settings.
Disable the settings for both On battery and Plugged in modes.
Click on Apply and then on OK to save the settings.
Restart the system.
7. Run the Hardware and Devices troubleshooter
If everything else fails, you could consider running the Hardware and Devices troubleshooter to check for all possible issue with the hardware.
Click on the Start button and then on the gear-like symbol to open the Settings menu.
Go to Updates and Security >> Troubleshoot.
Select the Hardware and Devices troubleshooter from the list and run it.
Restart the system once done.

