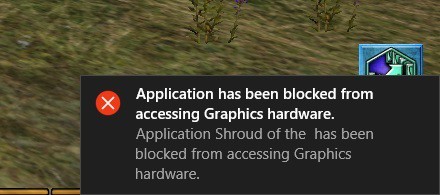
Have you ever faced the “Application blocked from accessing Graphics Hardware” error on your Windows 10 computer? This error usually shows up when your operating system is not able to communicate with the graphics hardware. This can happen due to a corrupted driver database or because of a hardware issue with the GPU.

The error usually shows up when a program is using the graphics processor intensively and it can be a game or a simple browser like Google Chrome that is pushing your computer’s GPU to its limit and causing this error. In this post, we will guide you through a bunch of solutions that you can apply to get rid of the error. Let’s get started!
“Application has been blocked from accessing Graphics hardware”, How to Fix?
Solution #1: Reinstall Your Graphics Drivers
The two main graphics processor or GPU companies in the current PC market are NVIDIA and AMD. Both of these companies have their own GPUs in a different price range and they release driver updates for their GPUs quite frequently. Intel also has their own integrated graphics processor in their CPUs which means no matter which computer you use, there will be a graphics processor which handles all the visuals on your computer.
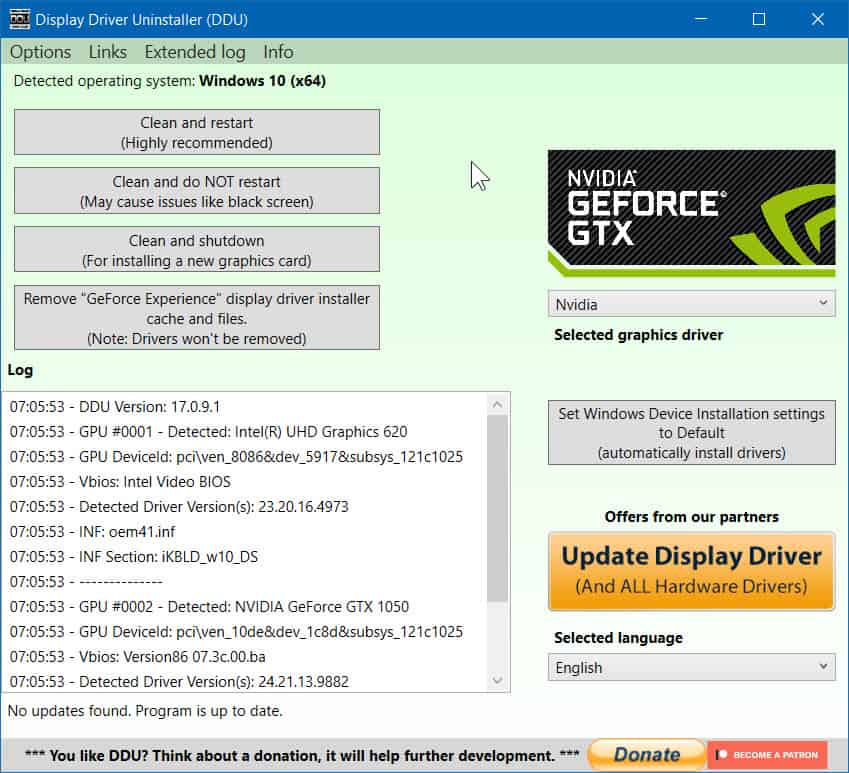
In order to solve this error, you can try uninstalling the current graphics drivers and then reinstall them again which will solve the case of a corrupted graphics driver database for your GPU. Keep in mind that a simple uninstall from Control Panel isn’t going to work and we need to use a third-party program called Display Driver Uninstaller or DDU in order to remove the current drivers.
- Head over to this link and download the latest Display Driver Uninstaller on your computer.
- After DDU has been downloaded, extract the files and save it in a safe location that you can access easily.
- Now reboot your computer into Safe Mode and to do that:
- Open the Start Menu and keep the SHIFT key pressed on your computer and then click on the Power button in the Start Menu.
- Now keep the SHIFT key pressed and then click on Restart.
- The computer will reboot and you will see a bunch of options.
- Click on Troubleshoot > Advanced options > Startup Settings > Restart.
- When you click the restart button, you will be presented with a bunch of options to start your PC in certain modes.
- To start your PC in Safe Mode, just press the number corresponding to the option that reads Enable Safe Mode.
- The computer will then start in Safe Mode.
- Now that you’re in Safe Mode, you can start the Display Driver Uninstaller program and it will identify the GPU that you are running.

- Click on the button that reads Clean and restart and the tool will uninstall the graphics driver properly.
Once the graphics driver has been uninstalled, you can download the latest drivers for your GPU and then install it and see if this fixes the problem. Move on to the next solution if you’re still facing the issue even after a fresh installation of your GPU drivers.
Solution #2: Uninstall extra software bundled with your GPU drivers
The NVIDIA GPU drivers come with the GeForce Experience program which brings a lot of features like ShadowPlay, bulk game optimization and more to the users. In the very same way, AMD used to have its own Raptr program which was shut down last year in September.
These extra programs sometimes interfere with the way your programs communicate with your GPU and this interference can cause the error. To fix this, all you need to do is use the Display Driver Uninstaller with the same steps mentioned above and instead of uninstalling the drivers, click on the button that reads “Remove “GeForce Experience” display driver installer cache and files”.

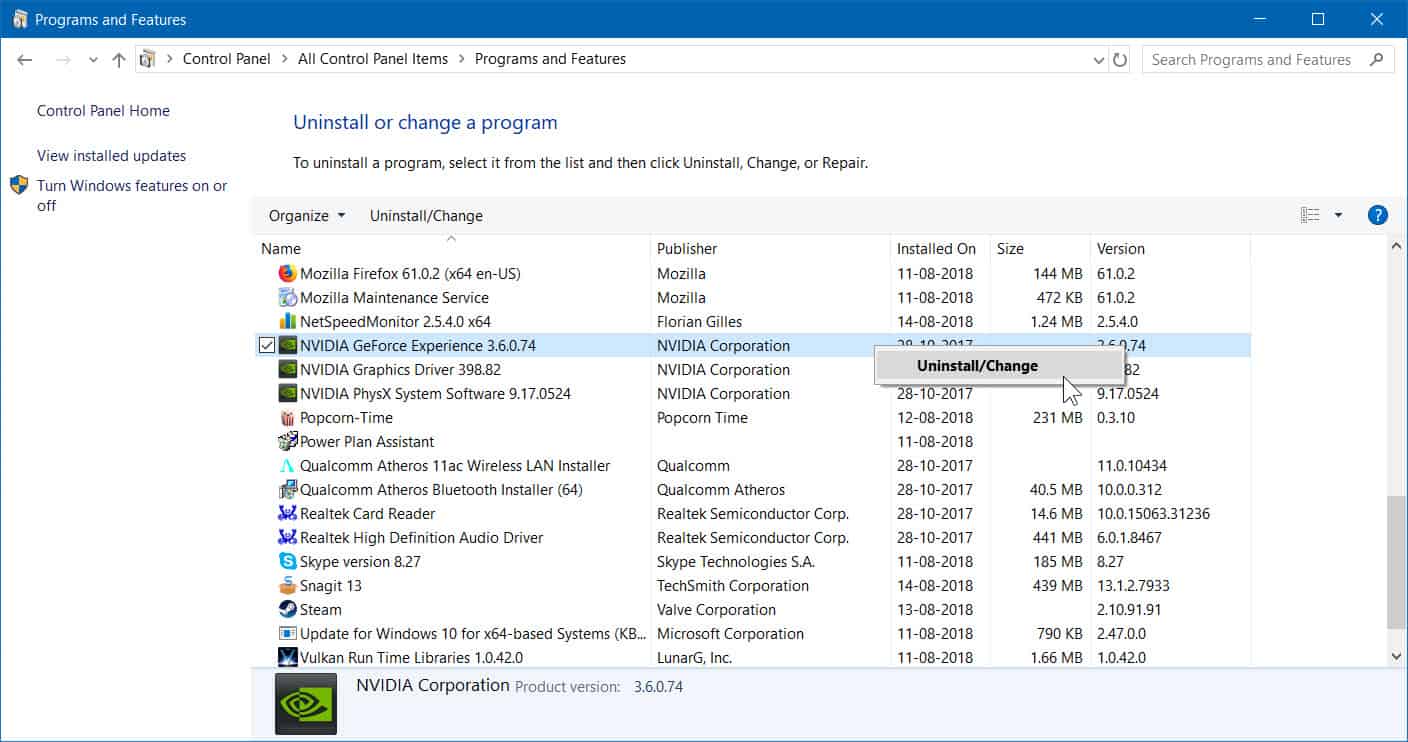
Alternatively, you can open Control Panel on your computer and then browse to Programs and Features and then uninstall the program from there.
Solution #3: Try this Registry tweak
A simple edit in the Registry can help you get rid of this error. We will be disabling TDR which stands for Timeout Detection and Recovery and changing the time duration from 2 seconds which is the default value to 8 seconds. Follow the steps given below.
- Open the Windows Run dialogue box by simultaneously pressing the Windows key + R key combination.
- In this Run dialogue box, type “regedit” without the quotes and press ENTER. Click Yes on any prompt that pops up.
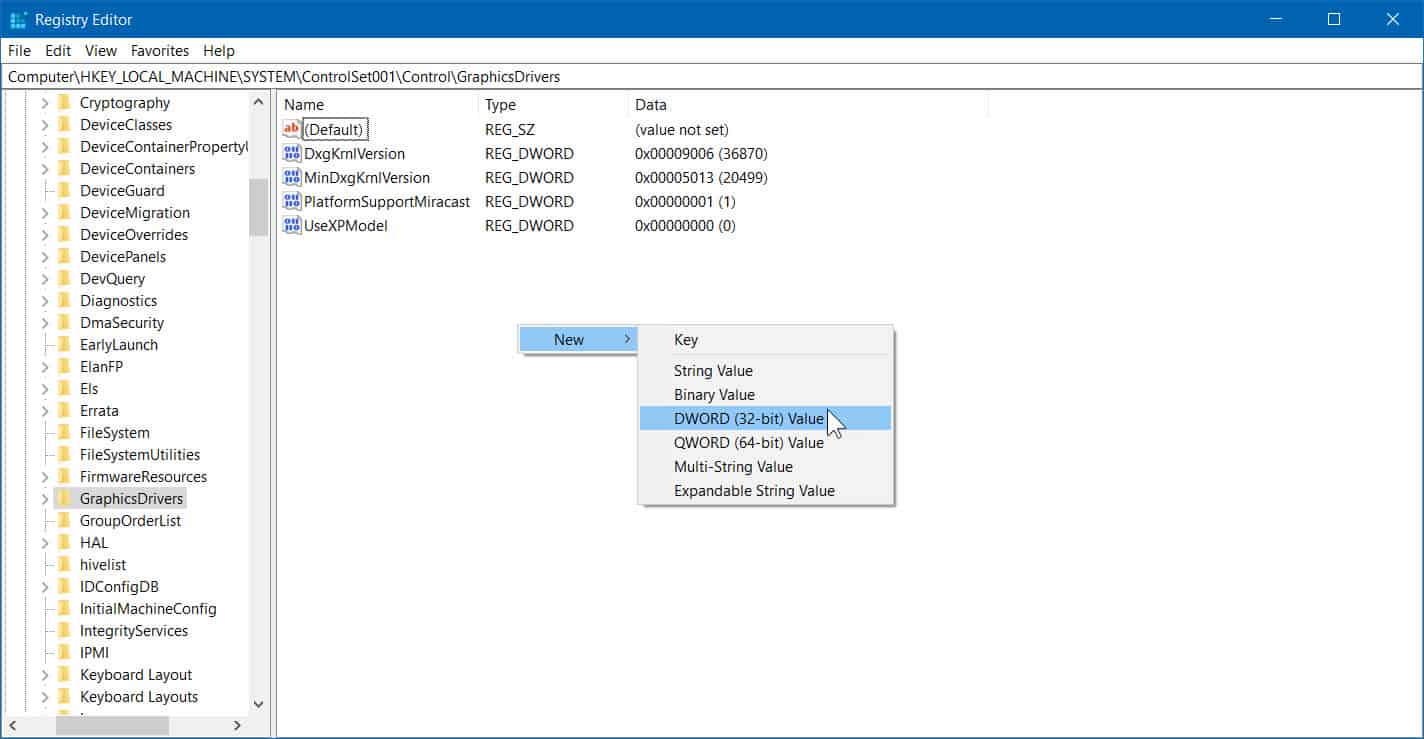
- You will see that Registry Editor will open up and now you have to browse to the following path in the editor.
HKEY_LOCAL_MACHINE\SYSTEM\ControlSet001\Control\GraphicsDrivers
or
HKEY_LOCAL_MACHINE\SYSTEM\ControlSet002\Control\GraphicsDrivers
- Now that you have opened the right path, identify if you are running a 32-bit version of Windows or a 64-bit version.
- If you are running on the 32-bit version, follow the steps below.
- Now right click on the empty space in the window and choose New > DWORD > Type “TdrDelay” without quotes.
- Double-click the newly created entry and enter the numeric 8 for the Value field.

- In case you have a 64-bit version of Windows, follow the below mentioned steps.
- Right click on the empty space in the window and choose New > QWORD > Type “TdrDelay” without the quotes.
- Enter the numeric 8 in the value field by double-clicking on the newly created QWORD entry.
This will basically increase the TDR from 2 seconds to 8 seconds. To check if this works, go ahead and restart your computer and try running the app again. If it worked, great and if it didn’t then remove the values you just created and restart your PC.
Get your Graphics Processor RMA’d
If you have tried everything mentioned above, you should now approach the manufacturer of your computer or contact the brand from which you bought your GPU in order to get it RMA’d. But before you send your GPU for RMA, go back to the Solution #1 and reinstall fresh drivers. After your drivers have been installed, just go ahead and perform a GPU stress test using a benchmark app like FurMark which will put your GPU under a lot of load and if its an issue related to hardware, you should see the error again while running the test.
If you see the error while running the test, it is a clear confirmation that the GPU has a hardware related issue and needs to be sent for RMA.

