If you are close or even remotely related to the desktop gaming genre, you must know Steam. Steam is the biggest gaming platform for desktop gamers from all over the world. Steam was originally developed by Valve, a huge gaming company, to release and distribute their own products. But, they opened the Steam market place for all the companies a little way down the road. Which in turn benefited valve as well as many small scale companies by providing them wide marketing opportunities. Currently, Steam is the leading platform for many brands to release their product and obtain at least breaking point sells.
Table of Contents
Steam provides games along with several important services which are essential for the true gaming experience. These services include Cloud saving, Social communication, Item trading, Community Market, Community Workshop, Built-in Anti-cheat service called VAC (Valve Anti-Cheat) and many more. Every Steam service comes completely free of cost except the games themselves. You will need to buy the games from the Steam market to avail above-mentioned services. The Steam community hub has a small ($5) fees to unlock it, which is also considered if you buy any game from the Steam market having a price tag of $5 or above. Steam also provides a huge sale twice a year (Summer sale and Winter Sale) where the game prices drop up to 50% or sometimes even up to 20% of their original price. This is a cherry on top for everyone.
Steam Content File Locked?
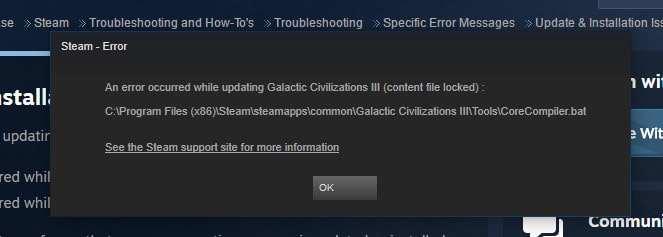
An error occurred while updating ….(content file locked):
As you already know from above, Steam is an amalgamation of many services running at once. Hence, some error here and there are expected to occur every once in a while. This error generally occurs when you are trying to update a game, trying to install a newly released patch or while downloading the latest DLC (Downloadable content) of your favorite game. When such an error pops up, you cannot finish the update of your game, which will render the game or games unplayable.
The Reason behind Steam content file locked error
If you are using Steam for a long time, you already know that Steam saves local games files on your hard disk and makes changes to these game files at the time of the update. If Steam content file locked error occurs in your system, it probably means that Steam is unable to make changes to previously downloaded game files and/or game directory folder. There can be many reasons for this problem. Whether Steam does not have administrative privileges to write the files in system drive or the files are corrupted somehow and Steam cannot read or change those files.
Here is where Steam screenshot folder and steam games stored.
How to Fix Steam Content File Locked
We are pretty sure that such errors are quite frustrating and hard to deal with. Anyhow, It is possible to repair this problem on your own without any technical assistance from Steam official support. There are a few basic solutions which you can apply to check whether the issue can be resolved or not. These solutions are proven to resolve the issue in the past for many users and we hope that the same works out for you as well.
Here is how to fix steamui.dll , steam not opening & fix Unable to Initialize SteamAPI error on Windows 10.
Following are some solutions to resolve the Steam content file locked error:
Method 1: Run Steam as Administrator
As we already mentioned, Steam must have Administrative privileges to make changes to files located in system drive (‘C:’ drive in most cases). For that, you must launch Steam with administrative rights and then try to install the update.
To do so, follow the simple steps given below:
- First, close Steam if it is running in the background. For that, open task manager by pressing “Ctrl+Shift+Esc”.
- Now, click on “More details” option.
- Here, you can see all the processes running in the background. Find “Steam Client Bootstrapper” in the list of processes.
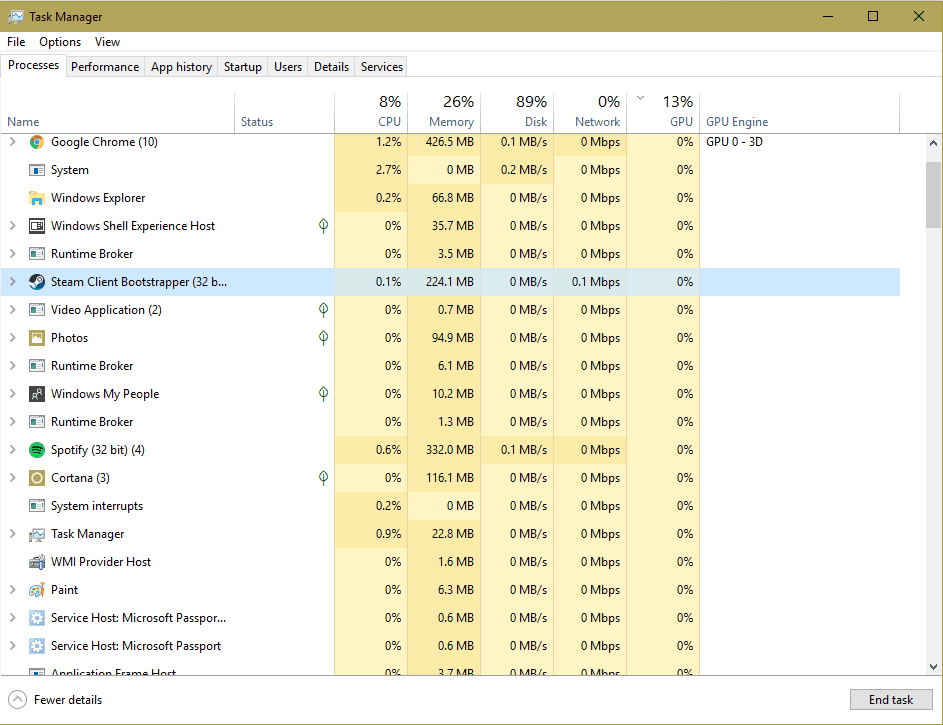
- Now, simply right click on the service and select “End Task” option.
- Do the same for any other Steam processes active in the background (E.g, Steam Client Service, Steam Client WebHelper)
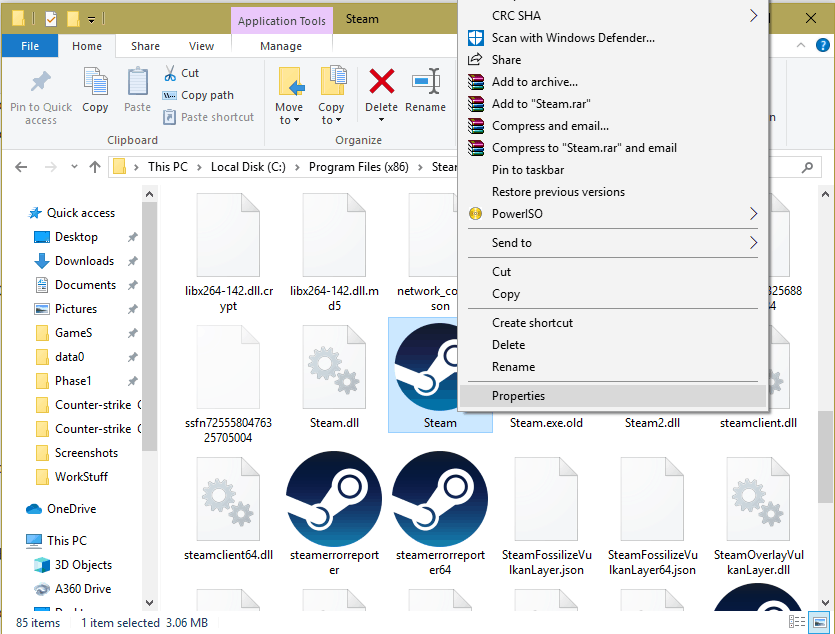
- Now, locate the Steam installation directory. Generally, It is C:\Program Files (x86)\Steam.
- In the installation folder, you can find the Steam.exe file. Just right click on the Steam launcher and click on properties.
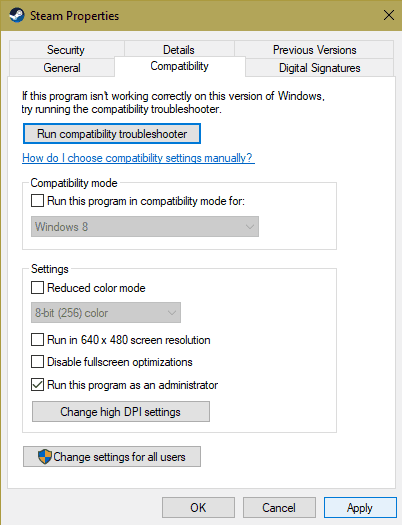
- Now, head over to the “Compatibility” tab in Steam launcher properties.
- Here, you can see the checkbox that says “Run this program as an administrator”. Simply click the checkbox once and click on “Apply”.
- Now, launch the Steam from the Steam.exe launcher and try to download the update.
- The problem must be resolved by now as Steam now have administrative rights.
Here is how to fix unable to connect to steam server.
Method 2: Add Steam folder to Antivirus exclusion list
It is possible that some third party Antivirus that you have installed in your system or sometimes even Windows Defender starts interfering with Steam. Thus, the antivirus does not allow Steam to modify the files which are required to be updated.
To resolve this issue, follow the steps provided below:
- To add Steam into your Antivirus’ exclusion list, first, launch the Antivirus program.
- Then, head over to the “Exclusion” list of your Antivirus.
Note: Every Antivirus have a different UI so the method to reach the exclusion list might differ from software to software. The steps provided below are applicable for Windows Defender Antivirus. - To go to the Windows Defender’s exclusion, Open Windows Defender Antivirus program.
- Then, click on “Virus & Threat protection settings”
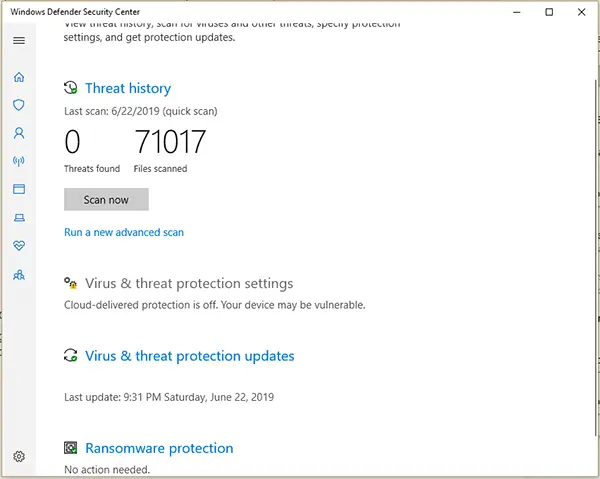
- After that, scroll down until you you see the “Exclusion” option. Click on the exclusion option to open the exclusion options.
- In the next window, click on “Add an exclusion”.
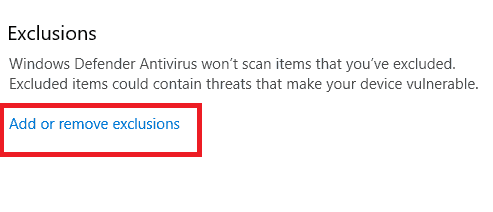
- In the drop-down menu, click on “Folder”.
- This will open the “Select Folder” window. Here, Simply put the following path in the Address bar.
C:\Program Files (x86)\Steam - Make sure you change the drive designation letter according to your Steam installation directory.
- Then, click on “Select Folder” button in the lower right corner.
- If you see a UAC (User Account Control) pop-up, simply select “Yes”.
- Now, close Windows Defender and Re-launch Steam to check the status of the error.
Method 3: Verify game files Integrity
Steam also provides a very convenient service called “Verify Files Integrity”. What this option does is basically compares each and every file of a game to the official database. Thus, if there’s a file missing or corrupt, Steam automatically detects and repair or Re-download the file once the process is done.
To Verify game files integrity, follow the steps provided below:
- First, Launch steam from the Steam.exe launcher.
- Then, click on the “Library” option in the upper left corner to open your Steam game library.
- Here, you can see all your purchased Steam games.
- Now, Right-click on the game which is ending up with “Steam content locked” error.
- After that, click on “Properties”.
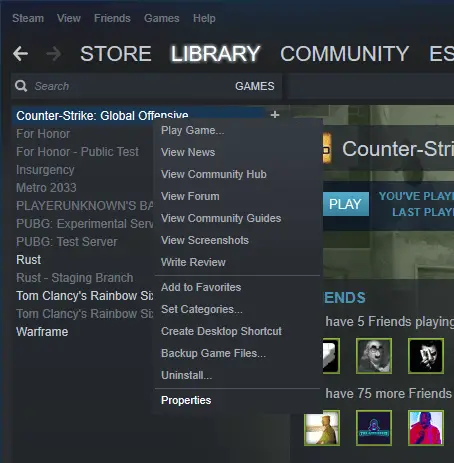
- This will open the game properties window. Now, head over to the “Local Files” tab.
- Here, you can see the “Verify integrity of game files” option. Click on the button to begin the process.
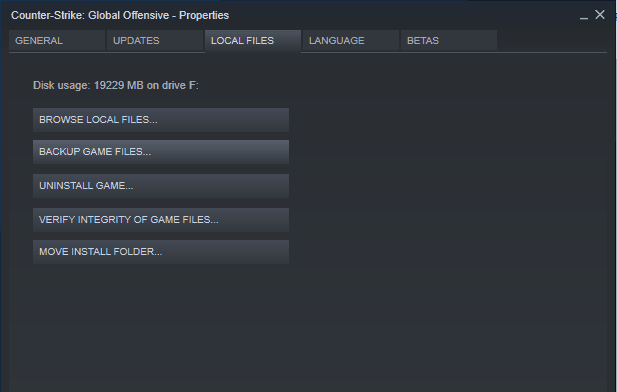
- Now, Sit back and relax while Steam does all the work for you.
- Once the verification is done, close the window.
- Now, Steam will download any missing/corrupted files.
- Once the files have been downloaded, restart the update to see if the error is fixed or not.
Method 4: Re-download the game files in a different directory
If none of the above methods worked out for you, Then, unfortunately, you have to go through the lengthy process of Re-installing the completely. This can probably fix the issue if Steam was unable to access the previous installation directory.
To do so, follow the steps provided below:
- Open Steam from the taskbar or Steam.exe launcher.
- Then, click on the “Library” option.
- Now, right-click on the game and select the “Uninstall” option.
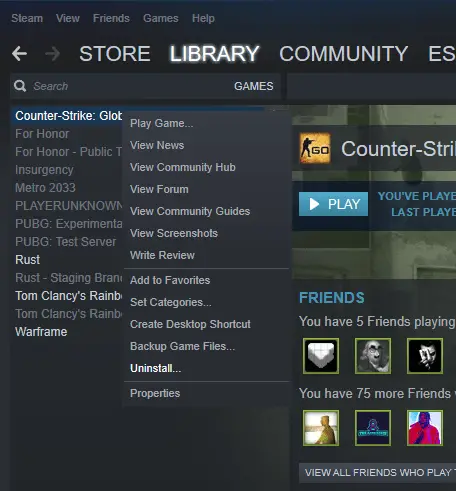
- After that, click on the “Delete” button in the ‘Pop-up” window.
- This will uninstall the game from your system.
- Now, instead of “Play, “Install” option will appear on the game window.
- Click on the “Install” button to download the game in your system again.
- Now, Steam will ask you to choose a location for the installation.
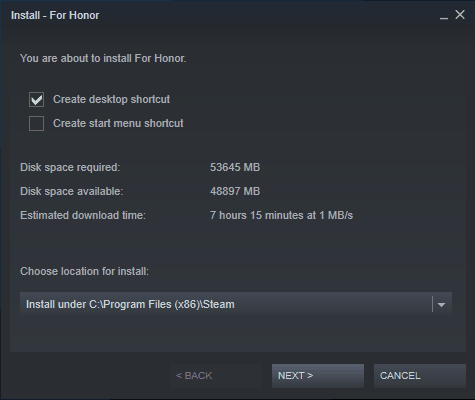
- Select any drive on your hard disk except the previous one which might’ve been causing the issue.
- Now, wait until the download is completed.
- Once the download is completed, you will be able to launch the game directly instead of updating it again as the Steam downloads latest version of the game.
Method 5: Run a Disk Check
If the above methods did not work out for you, it means that your hard drive might have developed some bad sectors which are causing the problem. Running the disk check can help you find and fix the corrupted disk sectors.
To run a disk check scan, follow the steps given below:
- Open the “Run Window” by pressing “Win key+R”
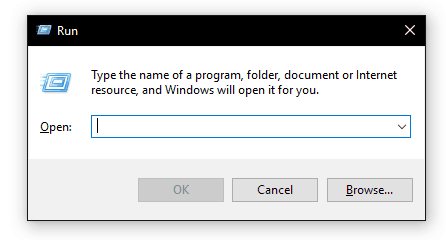
- Now, type “cmd” in the empty space and press enter to open the command prompt window.
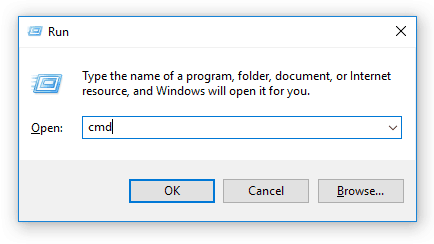
- In the command prompt, put the following command:
chkdsk c: /f
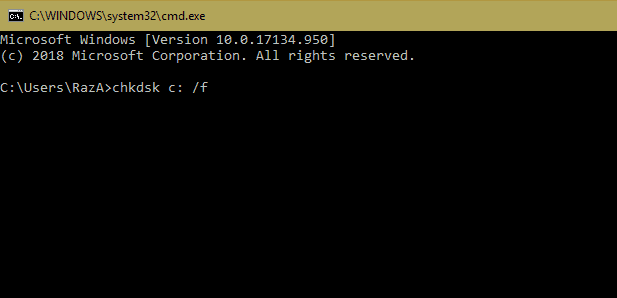
Change the drive letter according to your Steam installation directory. - Now, the command prompt will ask you to confirm the command. For that, simply type “y” and press enter.
- The disc check scan will begin now.
- Be patient as the disc check scan takes a considerable amount of time to complete.
- Once the scan is completed, close the command prompt.
- Now, open the Steam again to check the status of the problem.
This is it! This was all of the solutions for repairing “Steam content file locked” error. Make sure that you go through all the solutions thoroughly to fix the problem completely. If you have any questions regarding any method mentioned here, you can reach us via the comment section provided below.
Check out our other guides on how to fix Fallout 4 crashing at startup, League of Legend wont start and Minecraft crashing. Most high-end graphics games require DirectX 11, so make sure you have download DirectX 11 on your Windows 10 as well as have supported Nvidia drivers.

