Guide to Fix Windows 10 Error 0x80080005 – Your Device is missing important security and quality fixes.
According to pretty much every report out there, Windows 10 is the most popular desktop PC operating system out there. And Microsoft updates Windows 10 regularly to fix security vulnerabilities, bugs and to bring new features. Windows 10 mostly gets two major updates a year. One around March and the other around September.
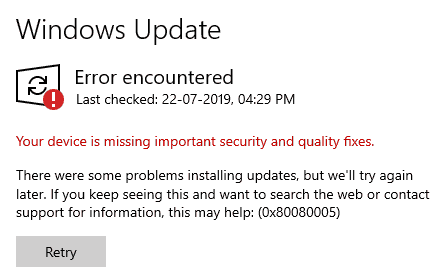
But some Windows 10 users have complained about an error that prevents them from updating their versions of Windows 10. On the Windows Update page in Settings mostly the error message reads, “Your device is missing important security and quality fixes.” with reported error code 0x80080005. However, this mostly happens due to users not updating regularly and updating at once whenever a major update gets released. If you are also suffering from this issue, even using the Windows update helper from Microsoft would not help. It would still show the same message even after installing all the updates. This bug serves as a reminder to everyone to keep their PCs updated. But it can be significantly annoying to some users as well. So to know how you can fix it, continue reading this article on fixing the “Your device is missing important security and quality fixes” Windows 10 update error.
Table of Contents
Fix Your device is missing important security and quality fixes
1. Delete Previous Versions Of Windows
Sometimes when an update gets installed, the older Windows files may still stick around, clogging up the boot drive. Windows 10 does not need these files to operate correctly. So not only performing the steps below help with resolving the Windows 10 update error, but it also frees up a lot of valuable space on your boot drive, which in most instances, is an SSD if you haven’t performed the cleanup ever before. Do note, if you want or need to go back to a previous version of Windows in the future, we do not recommend you to perform these steps. Because going back to an older build after deleting these files would require you to reinstall an older version of Windows from an installation media carrying the same.
Steps:
- At first, open File Explorer and open the root folder of your boot drive. By default, it should be your C drive. So double click on it to open it.
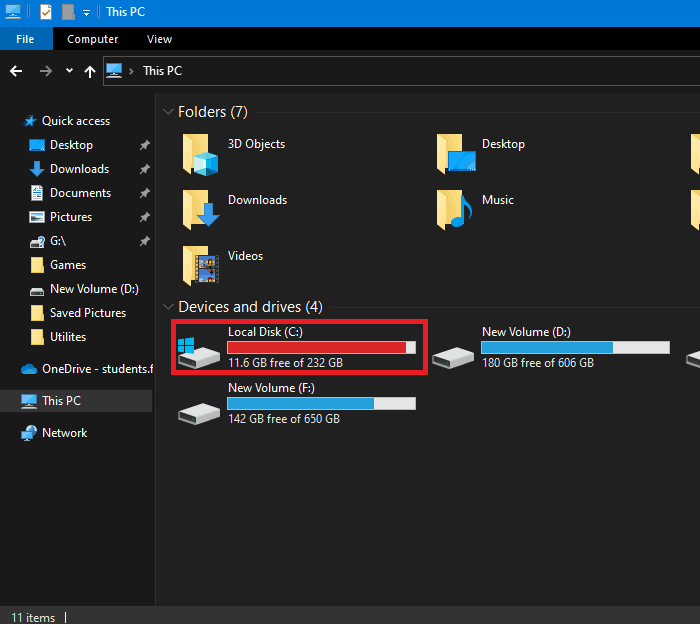
- After that, right-click and click on Properties.

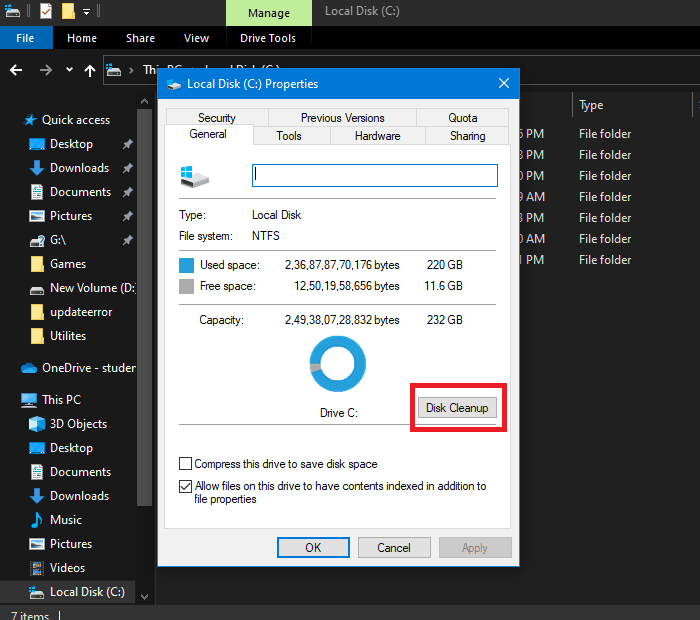
- Then under the General tab, click on Disk Cleanup.
- Now click on “Clean up system files.”
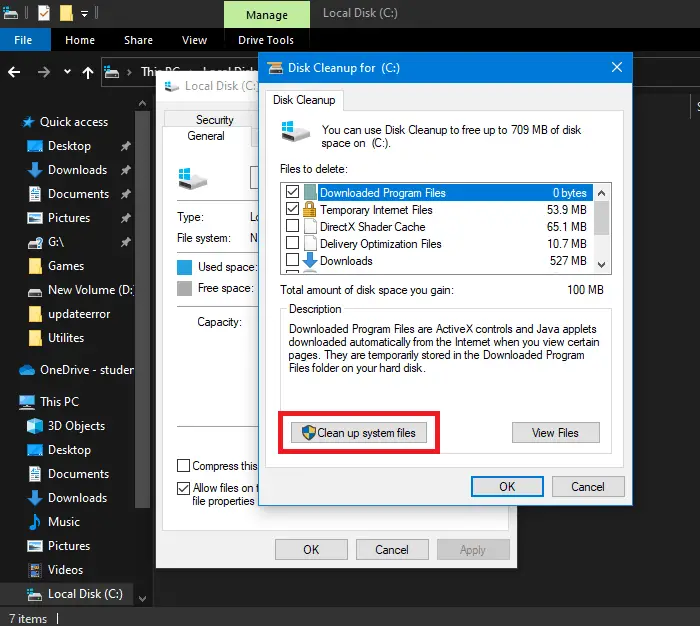
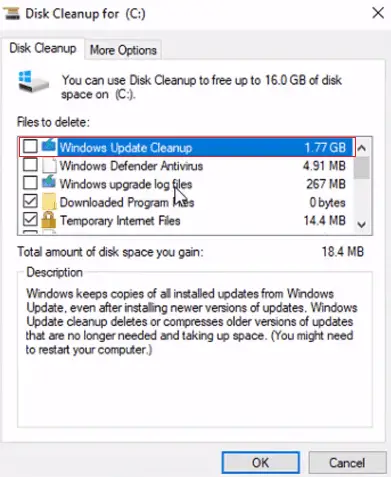
- Then scroll down and check the Windows Update Cleanup option.
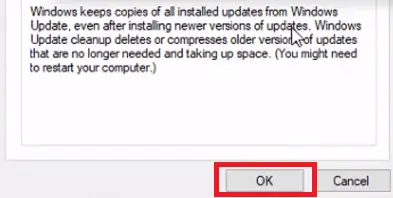
- In the end, click on, OK. If prompted, click on Delete Files as well.
Also, if you have recently upgraded to Windows 10, chances are you might have a folder named ‘windows.old’ in your boot drive’s root folder. Reduction in SSD pricing over the years has made most users switch or upgrade to an SSD as their boot device in their PCs. Nowadays, most prebuilt PCs ship with an SSD to boot out of the box as well. That folder usually takes up a lot of valuable storage space in your boot drive. This, including having low storage space on your boot drive, can cause various Windows update errors. Although ten days after upgrading to Windows 10, according to Microsoft, the folder should get automatically deleted, sometimes it doesn’t. But you can remove it safely yourself. Although, you should not just delete the folder directly. There is a proper way to do it, and here is how:
Steps:
- First of all, open up File Explorer and open the root folder of your boot drive. In most cases, it is your C drive. So double click on it to open it. You should see the windows.old folder here.

- Then, right-click and go to Properties.

- After that, click on Disk Cleanup.

- Now click on “Clean up system files.” It should do a scan of your boot drive and give you some information about what data is there that needs to be cleaned. When that comes up, you can see the number of the things that are checked would be deleted.

- Then scroll down and check “Previous Windows installation(s).”
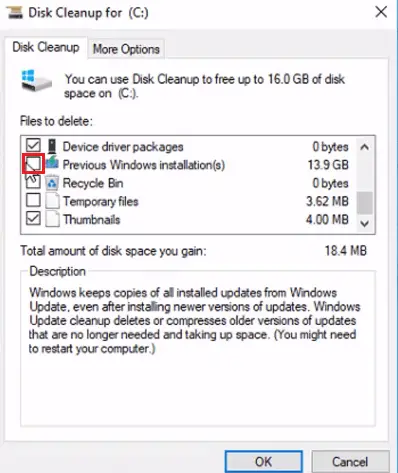
- At last, hit OK. Again, if prompted click on Delete Files. This should run the disk cleanup utility and clear out your windows.old installation. After a few minutes, when it is all done, hit OK to close that window. The windows.old folder should now be gone.

Check out – How to Fix 0x8024a105, 0x80004005, 0x800705b4 Windows Update Error
2. Uninstall And Reinstall The Updates
Sporadically, corrupted installation of specific Windows updates can cause issues. Thankfully Microsoft lets users uninstall and reinstall them. Here is how you can perform the procedure of doing it.
Steps:
- At first, we need to open up the Settings UWP metro app. So click on the Start button. Alternatively, you can press the Windows button labeled with a Windows logo on your keyboard.

- Then click on the Settings cogwheel (?) on the left side.

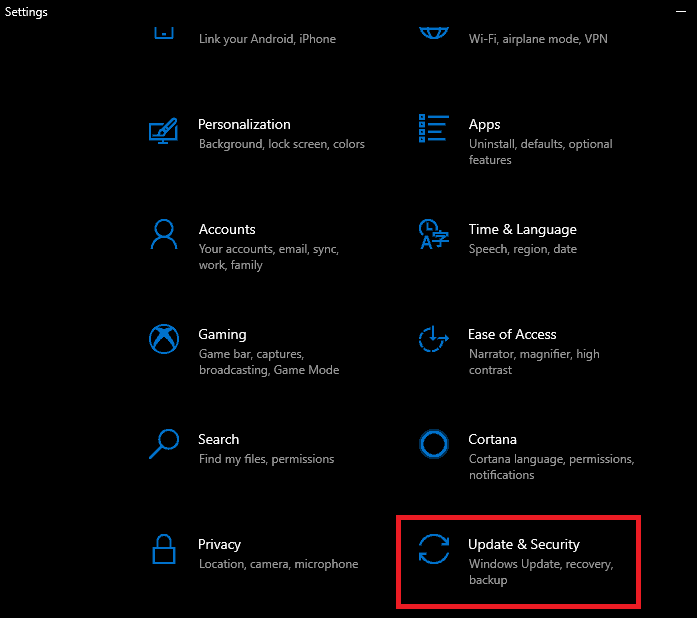
- After that, click on the Update & Security option.
- In the Windows Update section, click on “View update history.”
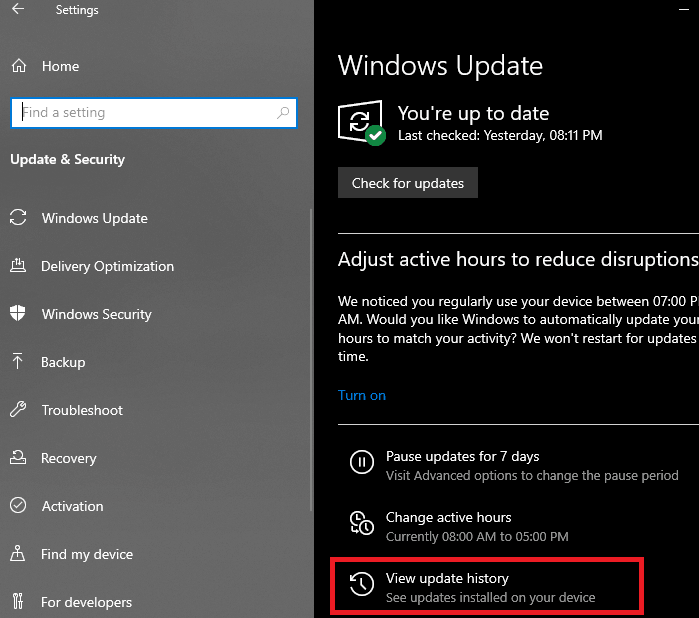
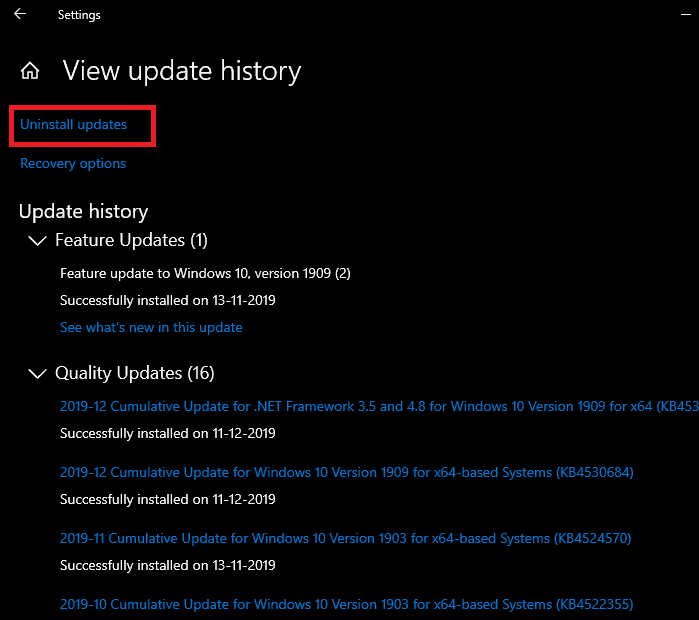
- Now, if you want, you can scroll through this page for tracking down failed update installation attempts for troubleshooting purposes. Just click on “Uninstall updates” for now.
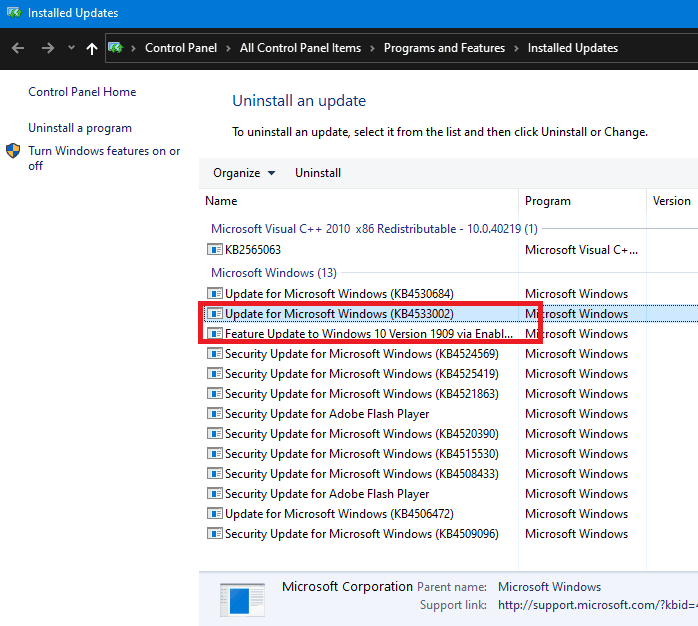
- A control panel window should now pop up. From here, find the updates that are uninstallable by right-clicking on them. As of writing this, the only updates that are uninstallable are KB4533002 and Windows 10 1909 update.
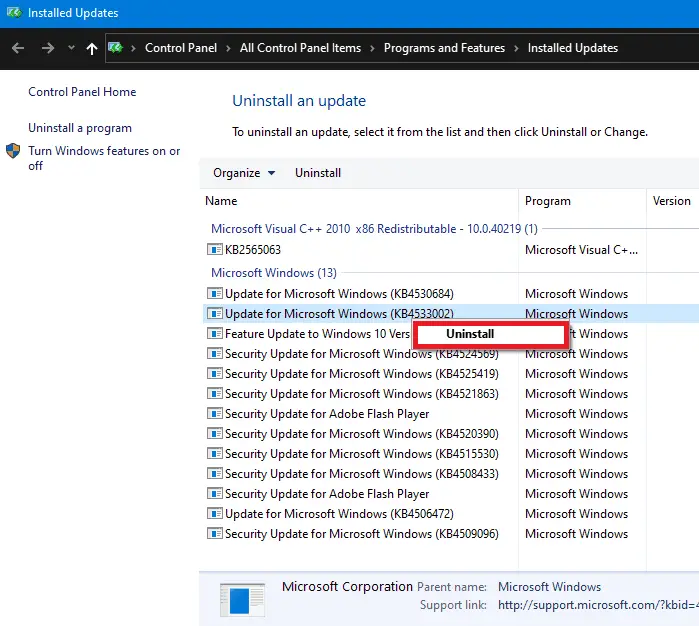
- Next, click on uninstall.
- Then restart your PC and go into your Settings app again as instructed before.

- Finally, go to the Windows Update section of Update & Security again and click on “Check for updates.” The uninstalled updates should now start downloading and installing again.
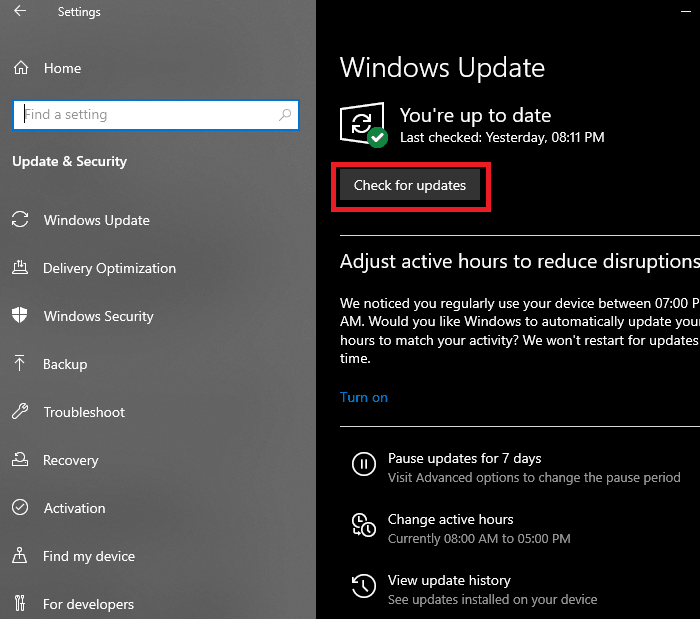
Guides to fix “Windows update cannot currently check for update” and potential windows update database error detected on Windows 10.
3. Change The Telemetry Level Settings
Microsoft’s UTC (Universal Telemetry Client) service uploads telemetry (system) data to Microsoft to identify bugs, glitches, reliability issues, security vulnerabilities, and many more to fix them. If the previous methods did not help, changing this setting can resolve the Windows update error. Do note; if you are running Windows 10 Home, this method will not work for you. In that case, You should follow the other methods to fix the error.
Steps:
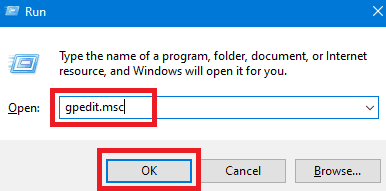
- First of all, hold the previously mentioned Windows key and press the R key on your keyboard.

- Now type ‘gpedit.msc‘ and hit enter. Doing this should open up the Local Group Policy Editor window.
- Then navigate to Computer Configuration>Administrative Templates>Windows Components>Data Collection and Preview Builds from the left pane.
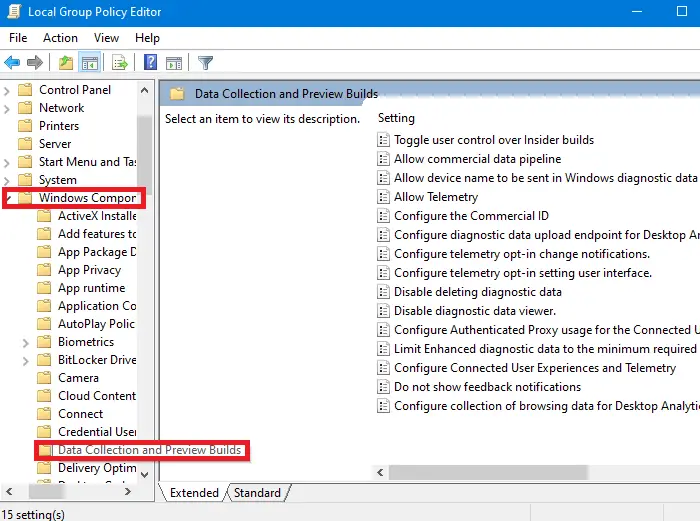
- Now find and double click on the Allow Telemetry option from the right pane. You can also select the option by clicking on it once and then click on “Edit policy setting.”
- By default, it should be on Not Configured. Click on Disabled. In your case, if it is already disabled, click on Enabled and select Enhanced from the drop-down menu. However, you can choose anything but “Security only” from here.
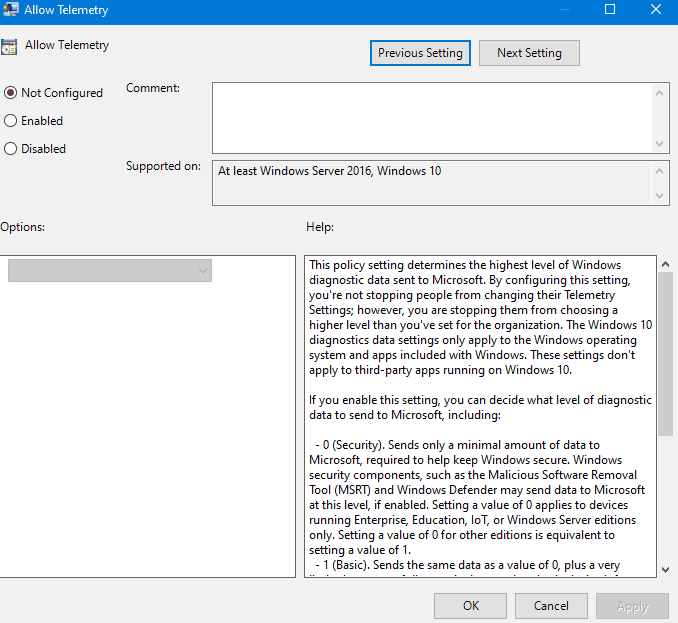
- In the end, click Apply and OK and restart your PC.
4. Run The Windows Update Troubleshooter
The Windows Update troubleshooter is immensely helpful for resolving update errors. You can either grab the troubleshooter from here and run it, or you can go to your Update Settings as described above and click on Windows Update from the Troubleshoot section. After it runs and fixes the issue, restart your PC and try checking for updates again. The error should be gone.
5. Try Resetting Windows Update Service
If even changing the telemetry level settings and running the Windows Update troubleshooter doesn’t help, there might be a problem with the update service. To reset it, do the following:
Steps:
- First, click on the Start button and type CMD.
- After that, right-click on Command Prompt and click on “Run as administrator.”
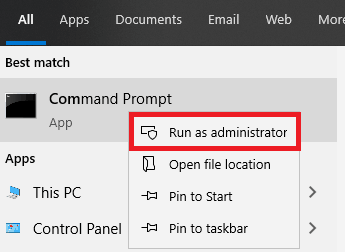
- Now enter the following commands, one by one and hit Enter.
“net stop wuauserv“
“net stop cryptSvc“
“net stop bits“
“net stop msiserver“
“Ren C:\Windows\SoftwareDistribution SoftwareDistribution.old“
“Ren C:\Windows\System32\catroot2 Catroot2.old“
“net start wuauserv“
“net start cryptSvc“
“net start bits“
“net start msiserver“
If you do not want to go through the hassle of writing these commands one by one, you can download the script consisting of all the commands mentioned above from here and run it as an administrator. It does everything for you. After it finishes, restart your PC and check for updates again.
is your Windows 10 Update Stuck or stuck at 0% or update assistant stuck at 99%?
Wrapping Up
In this article, we have provided detailed instructions on how you can fix “Your device is missing important security and quality fixes” Windows 10 Update error. If you are still having issues, there might be some damaged system files that are causing the problem. To fix this, you can run the System File Checker tool command (sfc/scannow) or repair your Windows installation using an installation media. If you do not have an installation media, you can create one using the Windows Media Creation Tool, and that should fix your problem. You can download the tool from here. Now you can finally update your PC to the latest version of Windows and enjoy the new features Microsoft has to offer.


1 thought on “Fix “Your device is missing important security and quality fixes” – Windows 10 Update Error”
Hey man. Thanks so much. Tried so many things from Google but finally deleting the old windows files helped.