Windows 10 comes with an automated update system which updates your Windows installation in the background without intruding the work that you’re doing. The new update service works exceptionally well and comes with a lot of improvements. But sometimes you might run into issues or errors like “Windows update cannot currently check for updates“. These issues can pop up because of a lot of reasons but they are very easy to fix as well.
We are going to mention a bunch of solutions that will help you get rid of this error. You can try these solutions one by one and see which one works the best for you.
Windows Update Cannot Currently Check for Updates, How to Fix?
- Check your Internet Connection
- Delete Update Log
- Rename SoftwareDistrubution Folder
- Microsoft Update TroubleShooter
- Create New Hosts File
Solution #1: Make sure your Internet is working
To update your Windows 10 computer, it is necessary that you are connected to a proper internet connection. The bad internet can cause a lot of issues on a computer related to updates and even browsing the web. To check your internet connection, you need to do a bunch of things like checking your internet speed on Speedtest.net and checking if you are having any packet loss. To check your packet loss, follow the steps below.
- Open your Start Menu and type CMD and open Command Prompt from the search.
- After the Command Prompt window has opened up, just go ahead and type “ping google.com” without the quotes.
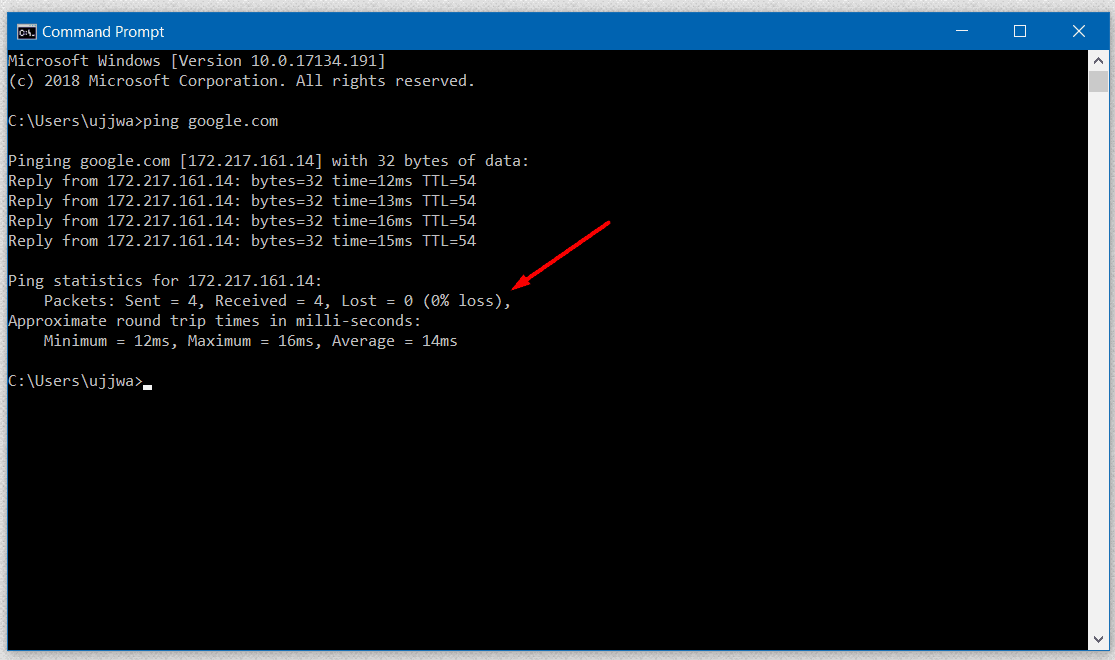
- If you see any packet loss in your output, it means your internet is having issues and can cause problems with updates.
The best way to fix it is by contacting your ISP and asking them to fix the issue since this is something that happens from ISPs end and you can only do so much to try and fix it.
Solution #2: Delete the update log
A corrupted update log can also cause this issue but it is very easy to solve. You just need to rename or delete the update log file for Windows Update to start working properly again. Follow the steps below.
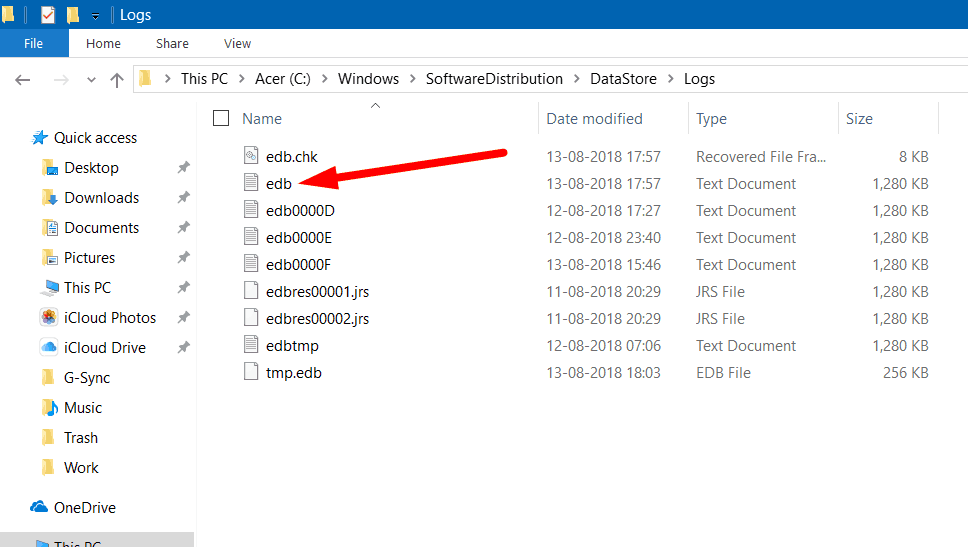
- Open your Windows 10 File Explorer and paste the following path into the address bar.
c:\windows\softwaredistribution\datastore\logs\
- Look for the file named edb or edb.log and rename it to something else like edb_backup.
- You can also choose to delete the file if you wish to do so.
- After the file has been deleted/renamed, you have to restart your PC and check for updates again.
Deleting or renaming the file will reset the log and your Windows Update should work properly now. If this doesn’t work, you might want to rename the SoftwareDistribution folder. Check how to do that in the next solution.
Solution #3: Rename SoftwareDistribution folder
The SoftwareDistribution folder is the same folder where your edb.log file is located. Renaming the folder might sometimes solve the issue and to rename the folder you need to follow the steps listed below.
- Open your start menu and type cmd. In the results, right click on Command Prompt and click on Run as administrator.
- This will open Command Prompt in admin mode which will allow you to stop services and rename system folder. We need to do this in order to stop the update service and rename the SoftwareDistribution folder.
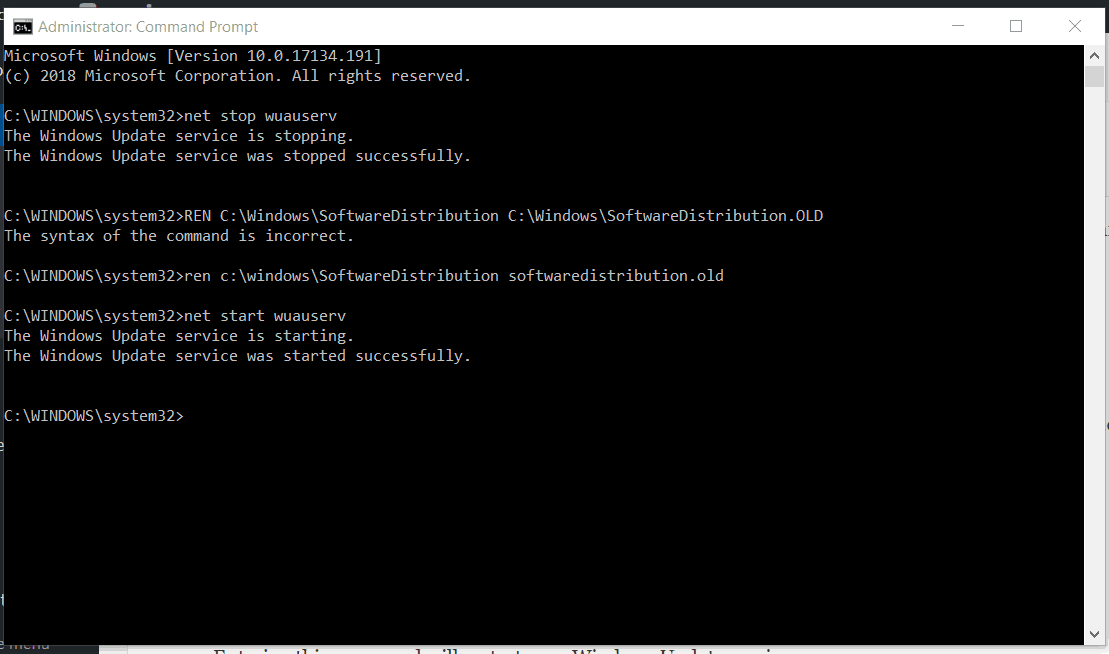
- In your Command Prompt window, type the following command.
net stop wuauserv
- This command will stop the Windows Update service and you now have to enter the following command.
ren c:\windows\SoftwareDistribution softwaredistribution.old
- The command mentioned above will rename the SoftwareDistribution folder to SoftwareDistribution.old. Now that we have renamed the folder, move on to the next command.
net start wuauserv
- Entering this command will restart your Windows Update service.
Now that the folder has been renamed, you can check for updates again and with the new check, a new SoftwareDistribution folder will be created. If you are still facing this issue, Microsoft has provided a troubleshooter specifically for Updates. Read more about that in the next solution.
Solution #4: Use the Microsoft Update troubleshooter
The Microsoft troubleshooter for updates has been made available by the company as a tool to figure out what’s wrong with the Windows Update service and then fix it. Follow the steps below to see how to use it.
- Download the troubleshooter from this link.
- After the file has been downloaded, just double click and run the tool.
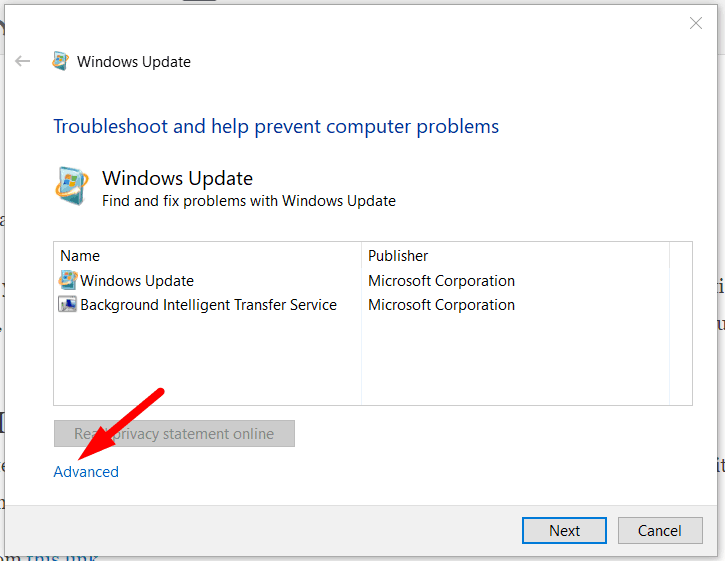
- Click on Advanced and then click on Apply repairs automatically if it is not checked already.
- After checking the repair option, click on the Next button.
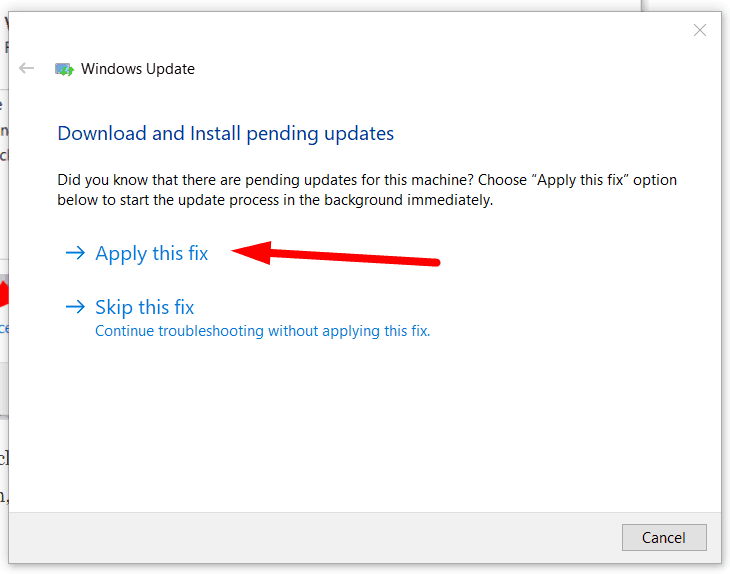
- The tool will scan for issues and ask you if you want to apply the fix. Click on Apply this fix and the tool will attempt to fix the problem for you.
After the tool has fixed the issues, the Windows Update service will start functioning normally and you will be able to update your Windows 10 installation easily.
Solution #5: Create a new Windows Host file
A corrupted Windows Hosts files can also cause this issue and this should be done as a last resort if the solutions mentioned above don’t work for you. Deleting the old hosts file and replacing it with a new one might make a few programs unstable since the file contains all the information and IP addresses that a lot of programs need to function. But the new file will be updated by the programs automatically so things should work fine.
- Browse to the following location in your Windows installation drive.
C:\Windows\System32\drivers\etc\
- Look for a file named hosts and copy and make a backup of it.
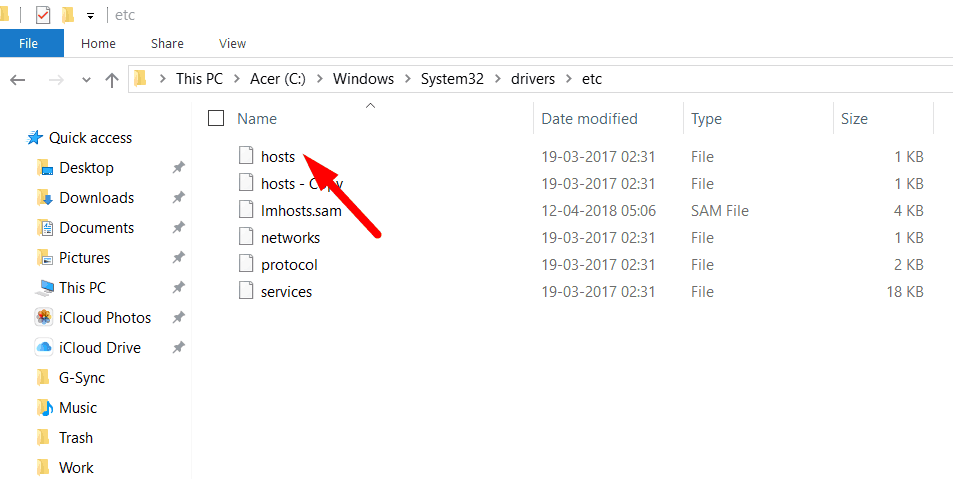
- Now right click on the file and click on Delete.
- Once the file has been deleted, go to your Desktop and right-click on an empty space and click on New > Text Document.
- Name the file as hosts and then click on File > Save As and choose the type of file to All files from the drop-down menu.
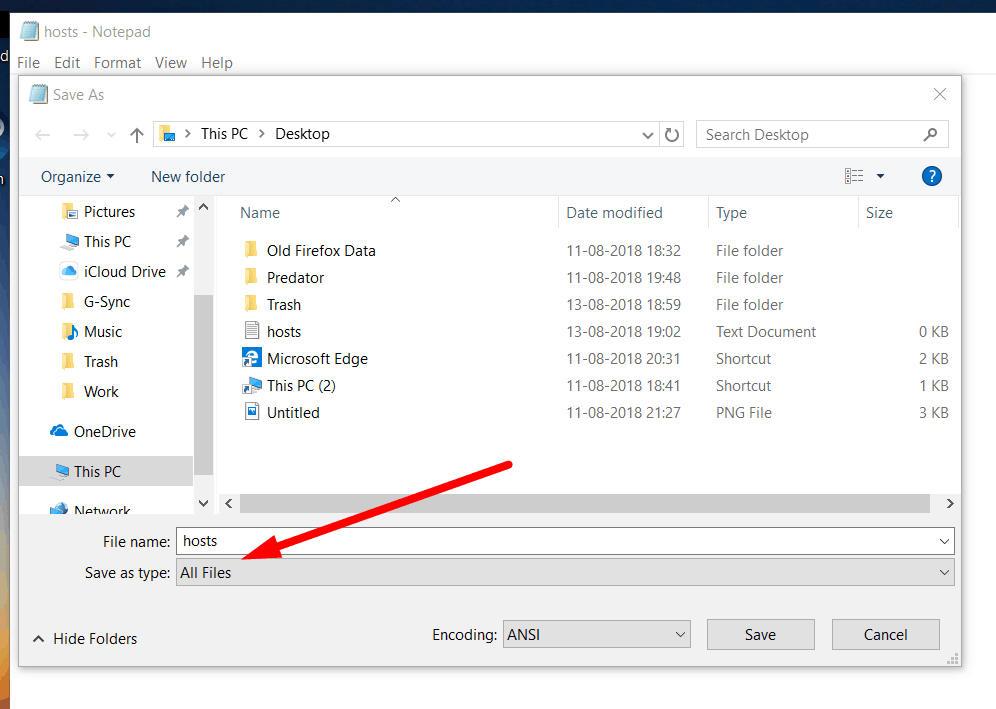
- Click on the Save button and the file will be saved.
- Now copy the newly saved file and then paste it into the same folder for which the path is mentioned above.
Restart your PC and check for updates again. These solutions should now have fixed your issue.
If all else fails, install Windows again
After trying all these solutions, you should now be able to get rid of the issue but just in case you are still facing this, you should do a clean install of Windows since this might also be happening due to more corrupted windows files which cannot be found so easily. A clean install will also help you refresh the PC where everything will be functional and working.

