Back in May of 2019, Microsoft released the next big feature update to Windows 10, the version 1903 update. With it, Microsoft introduced a slew of new features, which include a new light theme, keyboard tweaks, and many more. Also, the File Explorer icon got revamped with this update. And the Power Menu received new icons where it will have a small orange dot if there are pending updates. The update also came bundled with a new default wallpaper. On top of that, you can now also change your pointer color in custom color settings. And you get a new looking Game Bar. The update was received pretty well amongst users due to the new features and a relatively low amount of bugs. Also, the updating and installation process was pretty painless for most users. But it was not all hunky-dory for this major feature update to Windows 10.
Table of Contents
A portion of this feature update rolled out as cumulative updates for Windows 10 version 1809 Redstone users on May 10th (KB4515384), May 23rd (KB4522016), May 26th (KB4517211 & KB4512508), and June 3rd (KB4524147 & KB4508451). And this feature update fully rolled out in June. Though it was not as bad this time around, still many users faced countless errors when trying to install it. Error 0xc1900223, error 0xc190012e, error 0x8008000 are there just to name a few.
Now, this was not the first time Microsoft rolled out buggy updates for Windows 10. Back in 2018, the Windows 10 feature update version 1803 caused web browsers to freeze and crash frequently and affected overall system performance. The Windows 10 feature update version 1809 was infamous for deleting files from PCs, which Microsoft pulled shortly after the backlash from various tech websites and community forums. The “October Update” was then re-released in December 2018. Today we are going to solely focus on error 0x8008000 and any other error along the line with it. That means if you have error code 0x80080008 or Dism error 0x80080005, the following methods should also work for you. So, if you have these errors as well, continue reading this article on how to fix feature update to Windows 10, version 1903 – error 0x8008000.
How To Fix Feature Update To Windows 10, Version 1903 – Error 0x8008000
1. Windows Update Assistant
The Windows update assistant is hands down the best way to update Windows 10 if you are facing any errors. Download it from here, run it, and you should be able to update to the latest version of Windows just fine. You should be getting the next upcoming updates automatically.
2. Remove USB Storage Devices Connected To Your PC
This is an infamous problem with the 1903 update. If you have a USB storage device or an SD card through a memory card reader, then it won’t let you update. Even if you have a wireless PC accessory such as a wireless keyboard or a mouse connected through a dongle, it might cause issues. So you have to remove them, restart your PC and then try to update. And it thankfully doesn’t remove all of your downloads as it has in the past.
3. Performing A Disk Cleanup
If you use the Windows update assistant and disconnect all USB storage devices and still get the error, you can use the Disk Cleanup utility as it is known to fix a lot of Windows errors. Perform the following steps:
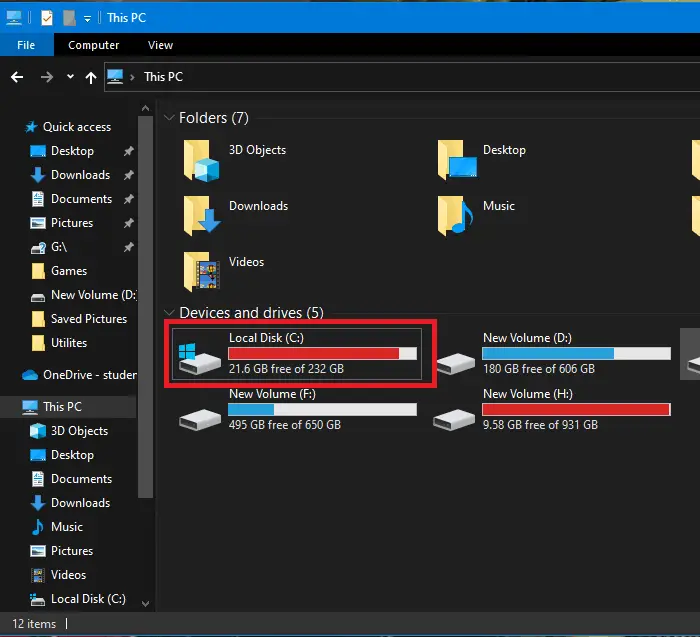
- First of all, in File Explorer, select your C drive and right-click on it.
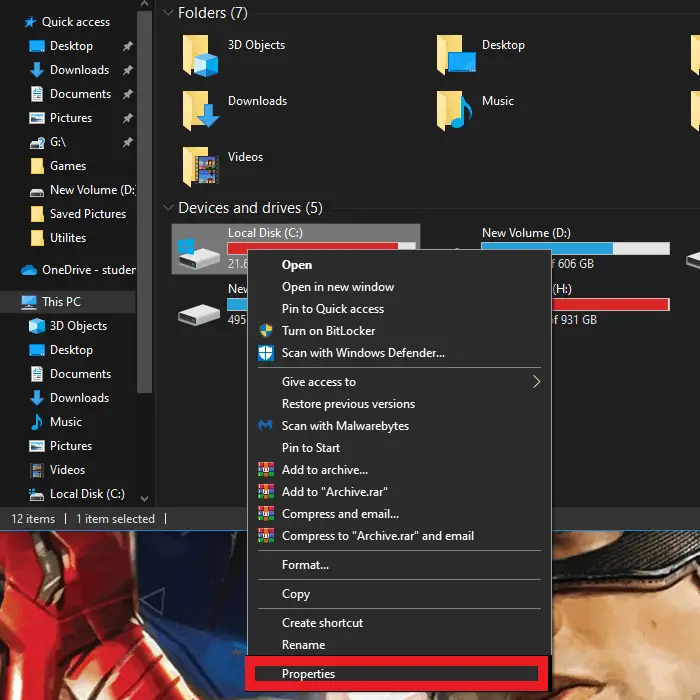
- Now click on Properties.
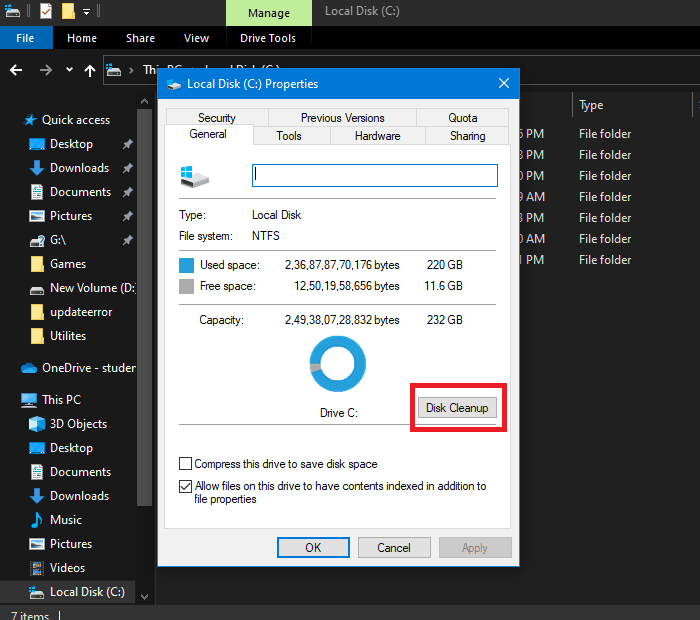
- Then under the General tab, click on Disk Cleanup.
- After that, click on Clean up system files.
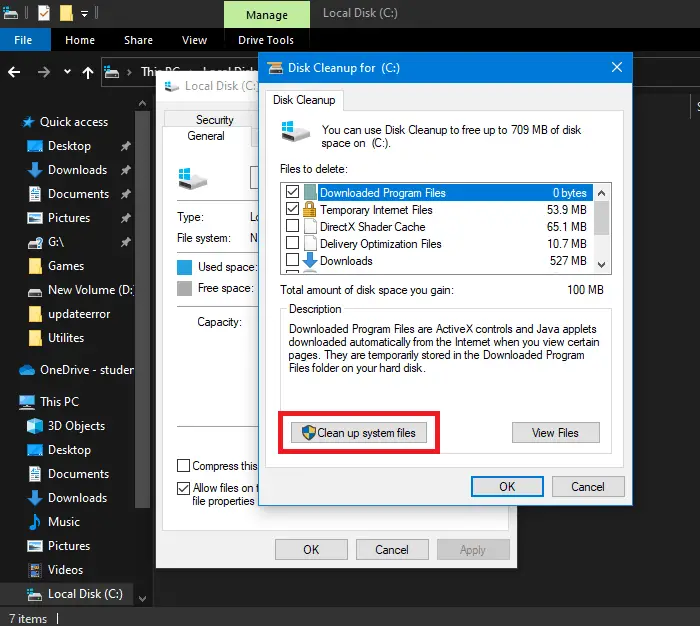
- Next, check the following options:
- “Windows Update Cleanup”
- “Windows Defender Antivirus”
- “Downloaded Program Files”
- “Temporary Internet files”
- “Previous Windows Installations”
- “Recycle bin”
- “Temporary Files”
- “Temporary Windows Installation files”
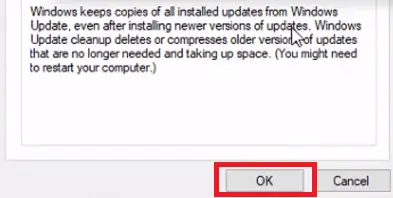
- Then click, OK.
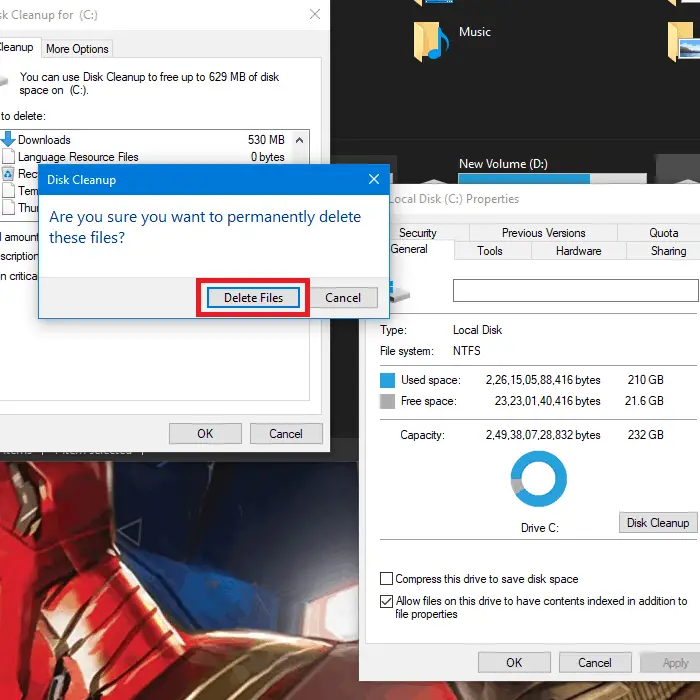
- In the end, if prompted, click on “Delete Files.”
4. Install the Latest Version Of Windows Using The Media Creation Tool
Microsoft lets users download the latest Windows ISO file through their media creation tool. Mounting the ISO file and upgrading your PC from it can result in an error-free installation. Here is how you can do it:
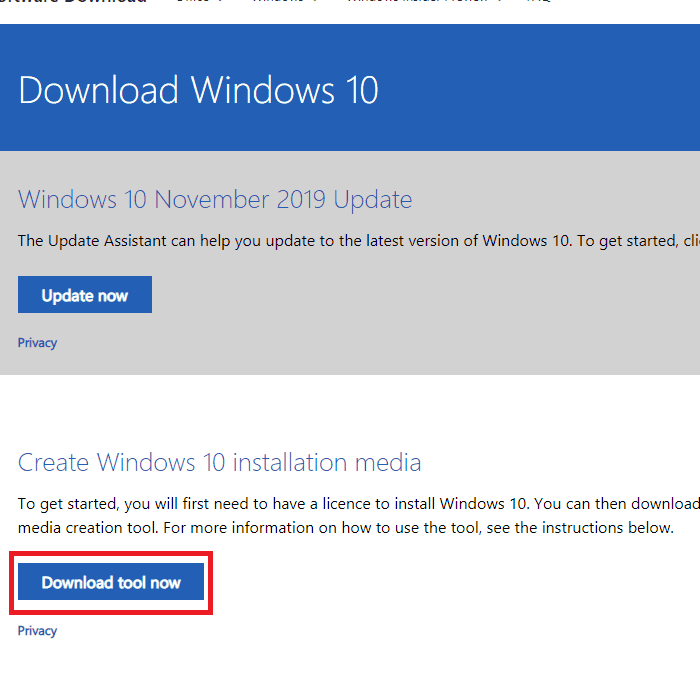
- At first, go here and click on the “Download tool now” option.
- After the download finishes, double click on it to run the tool. Also, accept the license terms.
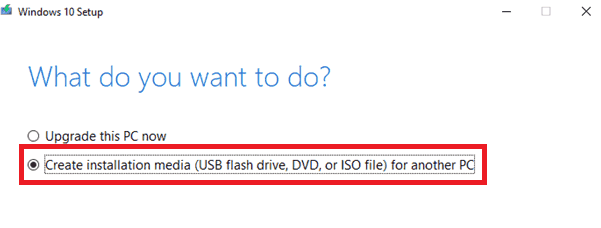
- Now select “Create installation media (USB flash drive, DVD, or ISO file).”
- Then click on Next.

- Now select the language, edition, and the architecture you wish to keep and click on Next.
- Select the “ISO file” option.
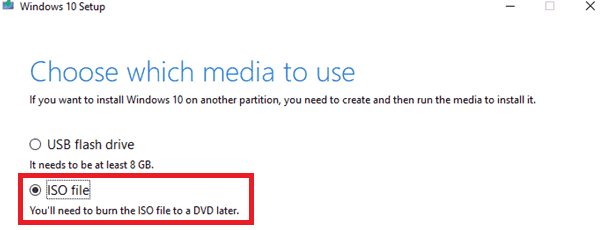
- After that, click on ‘Next.’

- Now select a location to save the Windows 10 ISO file in.
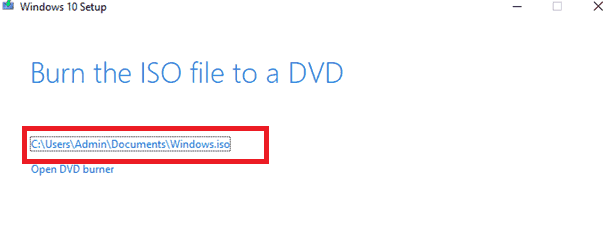
- Then click on ‘Finish’ and wait for the download to complete. This can take a while depending on your internet speed and the connection and peering to Microsoft’s CDNs.
- After the download finishes, navigate to the same location. Either double click the ISO file or right-click and click on Mount to mount the ISO file.
- After that, click on This PC and double click the mounted ISO.
- Now double click on setup to run it.
- After accepting the License Terms, make sure it says, “Keep personal files and apps.” If it doesn’t say that, proceed with your own caution as it might delete all of your apps, files.
- At last, click on ‘Install.’
Following these steps should update your PC to the latest version of Windows. However, if you are still facing errors, there may be some corrupted system files that you can fix in the following method.
5. Fix Corrupted Windows Files Using The DISM And SFC Tool
Corrupted Windows files and corrupted registry files are the reasons for many Windows errors. You can fix them using the DISM and system file checker tool in Command Prompt. Here is how:
- First of all, run Command Prompt as administrator.
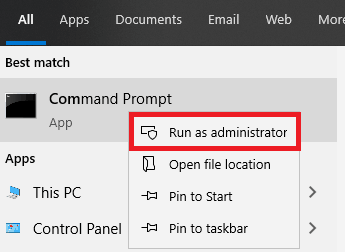
- Now type in “Dism.exe /Online /Cleanup-Image /Restorehealth” and hit Enter.
- Wait for the operation to finish. This would depend on how many corrupted files you have, and it would take longer if there are a lot of corrupted files.
- After it finishes, type in “sfc /scannow” and hit Enter.
- Again wait for the system file checker tool to find and repair the corrupted system files. This also would depend on how many corrupted files you have, and it would take longer if there are a lot of corrupted files.
- After it finishes, restart your PC and check for updates again.
Conclusion
In this post, we have provided a detailed guide on how to fix feature updates to Windows 10, version 1903 – error 0x8008000. Finally, you can update your PC to the Windows 10 1903 update without any errors and enjoy the new features Microsoft has to offer mentioned above.


1 thought on “5 Ways to Fix Feature Update To Windows 10, Version 1903 – Error 0x8008000”
Excelente, de todos las posibles soluciones en toda la red incluso de Microsoft Support, después de tanto intentar y buscar, es el único que me ha funcionado a la perfección. El causante de todo fue AusLogics. Hizo y deshizo lo que quiso sin yo saber que sería contraproducente, según es para optimizar pero al contrario. No tuve que formatear, mil gracias pro el aporte.