Are you getting stuck while capturing your artworks digitally using the Wacom tablet? Is “THE TABLET DRIVER WAS NOT FOUND” error message popping up whenever you’re connecting the device on your PC? If yes, you’ve just come to the right place. Here we’re going to share 8 troubleshooting methods to resolve the Wacom tablet driver not found issue easily. Stay glued to know everything.
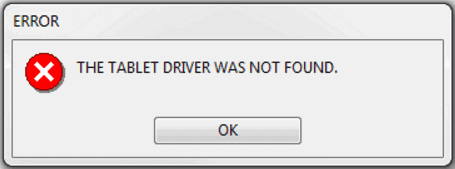
To be specific, this error occurs when your system is unable to fetch and use the dedicated driver software installed on it to run your Wacom tablet.
But why does your computer fail to use the Wacom driver? Well, there can be different reasons like corrupted or outdated Wacom drivers, incorrect configuration, or conflict with existing software.
No matter what the source is in your case, you’re going to get a resolution here. So nothing to worry as this is quite a common issue for many Wacom tablet users. You only need to learn the methods to ensure the Wacom tablet driver not responding error never bothers you again. So, have a look below.
Table of Contents
Fix Wacom Tablet Driver Not Found Error
Before starting with this list of advanced solutions, make sure you’ve performed all the basic troubleshooting methods like checking your Wacom tablet for physical damages and ensuring it is in working condition, checking your USB ports, plugging in the device into a different port, and connecting it to another system. Even after all these preliminary checks, if your “Wacom driver not running Windows 10” or on other versions of Windows, follow the below-mentioned methods.
1. Restart Wacom Service To Fix Driver Not Found Error
Restarting Wacom service means you’ll start the entire procedure once again. This will help you to refresh the present configuration, detect and discard the issues that occurred during startup in case there is any. A number of Wacom tab users could fix the driver error just by following the steps given below. Hence, you must start the troubleshooting process with this method only.
Step 1: Firstly, press the Windows logo key + R button at the same time to open the Run window
Step 2: Type in “services.msc” to open the Services window
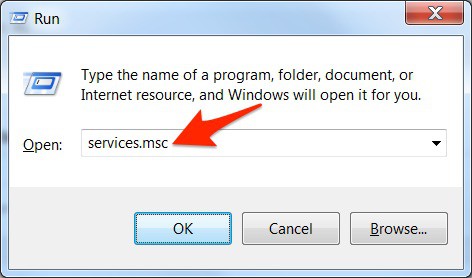
Step 3: Now, you’ve to locate “TabletServiceWacom” and right-click on it
Note: The service can be in another form as well, i.e., “Wacom Consumer Service” or “Wacom Professional Service”.
Step 4: Finally, choose the Restart option from the pop-up menu and try running your Wacom tablet again
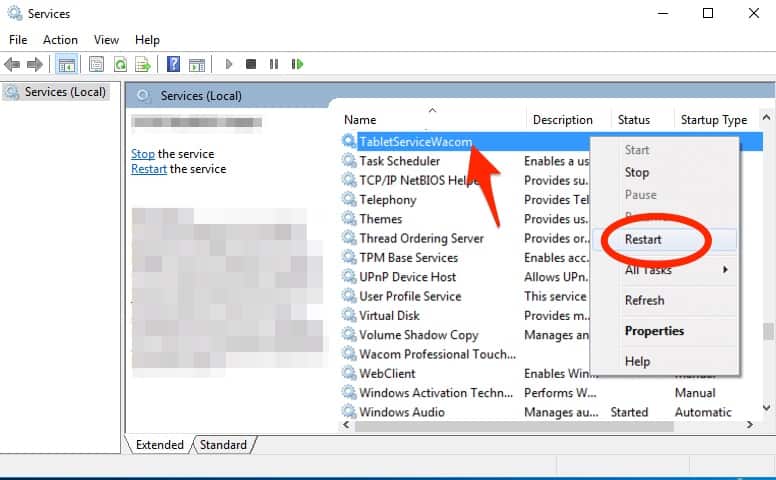
This should fix the Wacom driver not found issue if the app has faced a glitch during startup. In that case, check out the next method to ensure you never face the same issue again. If the issue persists, check out our third method.
2. Create a Batch File [Only If Method 1 Works]
When your Wacom tablet works fine after performing method 1, you should create a batch file on your Windows PC. Doing so will eliminate the requirement of restarting Wacom services manually each time you plug it in on your computer. Hence, consider this method as an extension of the previous one. Now, perform the steps mentioned below.
Step 1: Right-click on the empty space of your desktop at first
Step 2: Then, choose New > Text Document
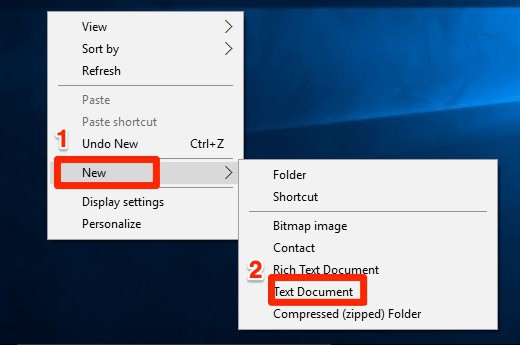
Step 3: Now type in this code-
@echo off
NET STOP WTabletServicePro
timeout /t 5 / nobreak > NUL
NET START WTabletServicePro
timeout /t 2 / nobreak > NUL

Step 4: Now save it on your desktop and change the extension from “.txt” to “.bat”
Now whenever you click this file, it will restart the Wacom tab automatically. In case you get a UAC error while clicking this, then right-click on the file and choose “Run as administrator.”
However, if the first method didn’t work for you, follow Method 3.
3. Delete Wacom_tablet.dat From System32 Folder
Sometimes certain important files in the Windows folder get corrupted. It’s because when you install a driver, it saves the configuration data in the System32 folder. This data can get corrupted anytime resulting in ‘Wacom driver not responding’. However, deleting a few files from the Windows directory will help you fix it. Here are the steps to do that-
Step 1: Firstly, navigate to this path- C:\Windows\System32 (assuming you have your Windows installed in C drive)
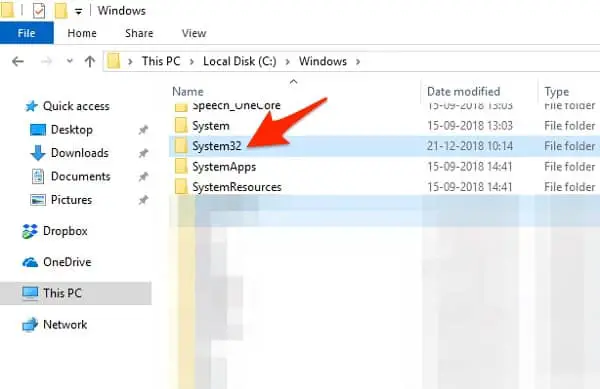
Step 2: Here go to the search bar and type “Wacom_tablet.dat”
Step 3: Now click on this file and press Shift + Delete at the same time to remove all residue of it from your PC
Step 4: Next confirm all the onscreen prompts and finally try to run your Wacom tablet again
If you’re still dealing with the Wacom driver not responding, follow the next method below.
4. Change the Power Settings
Windows OS lets the users configure it in a way that you can authorize your PC to terminate the Wacom driver and services whenever there is a power fluctuation. If you’ve customized the Power Management option previously, then it can be a potential reason to make you face the Wacom driver error, though it works fine most of the time. However, have a look at the steps below to change power settings for your Wacom driver on Windows PC.
Step 1: Press Windows logo key + R button at a time to open the Run window
Step 2: Next type “devmgmt.msc” in the empty search bar and hit the enter button
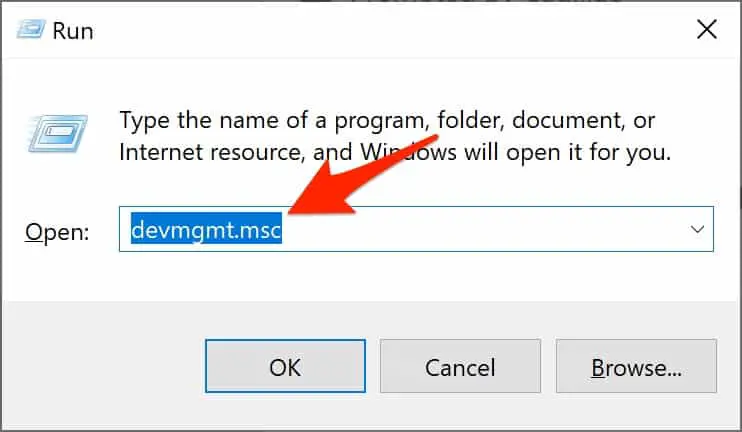
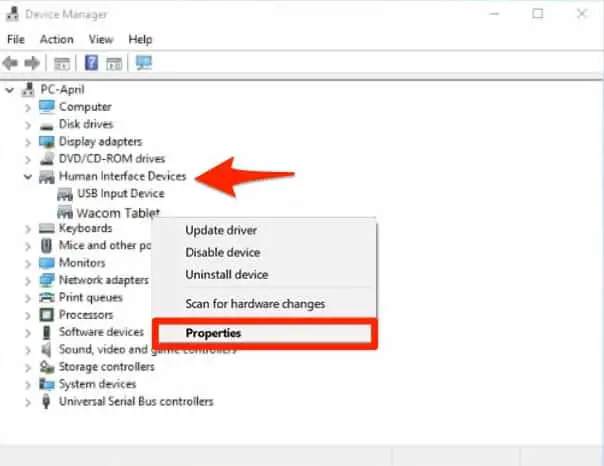
Step 3: Now navigate to Human Interface Devices and right-click on it
Step 4: Here, select Properties from the appearing menu
Step 5: In the Properties window, move to the Power Management tab and uncheck the box beside “Allow the computer to turn off this device to save Power”
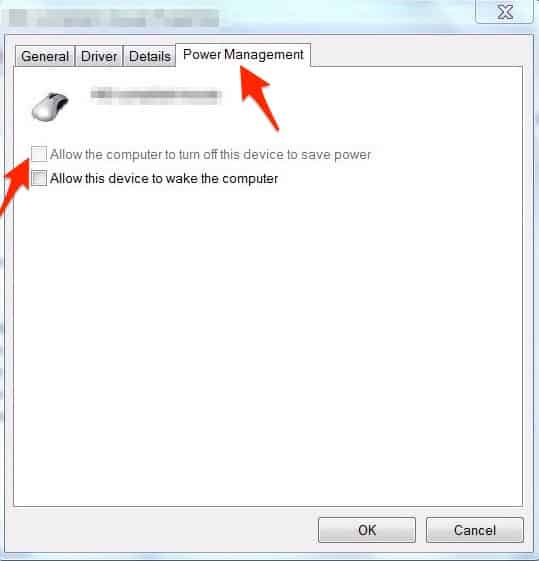
Step 6: Finally hit OK and exit
These steps must fix the issue if your power management configuration was at fault. In case you’re still unable to connect your Wacom tablet, follow the next method.
5. Disable Integrity Check To Fix Wacom Driver Not Found
There are some Wacom tablet users who could fix the Wacom driver not running issue just by deploying some commands in order to make changes in Windows’ configurations. However, if these steps are not performed correctly, it can backfire your system. So make sure you’re adhering to these steps mentioned below.
Step 1: Firstly, press the Windows key + R button to open the Run window
Step 2: Then type in “cmd” and hit Shift + Ctrl + Enter to open the command prompt
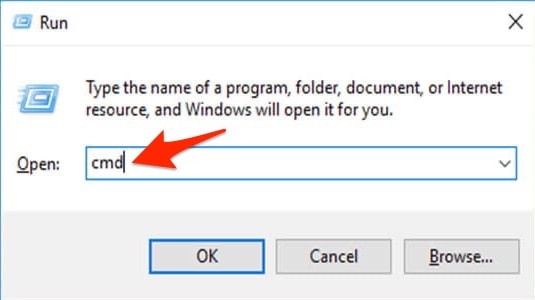
Step 3: Now type the commands below and keep hitting the enter button after each command
bcdedit.exe /set nointegritychecks on
bcdedit.exe -set loadoptions DISABLE_INTEGRITY_CHECKS
bcdedit.exe -set TESTSIGNING ON
Step 4: Once you execute the commands, check whether the Wacom Tablet is working fine or not.
6. Change the IMAGE Path
You might know that the Image Path entry in your registry is configured to load the Wacom drivers from the System32 folder. But if you’ve installed your driver in another custom path, you need to make the service load drivers from your pre-decided custom path instead of the default one. Doing so will definitely fix the error if this is the case.
Step 1: Firstly, copy the Wacom drivers from your custom path to the drive where your System32 folder is located
Note: If it’s located in the C drive, copy the files to that only.
Step 2: Now press the Windows key + R button to open the Run window
Step 3: Then type in “regedit.exe” and hit the enter button to open Registry Editor

Step 4: When in Registry Editor, navigate to this path-
Computer\HKEY_LOCAL_MACHINE\SYSTEM\CurrentControlSet\Services\WTabletServiceCon
Step 5: After that right-click on the “Image Path” from the right pane and paste the location of your Wacom Drivers which you’ve copied to the C drive in the first step.
Step 6: Now press Windows + R at the same time and type in “services.msc” then hit enter
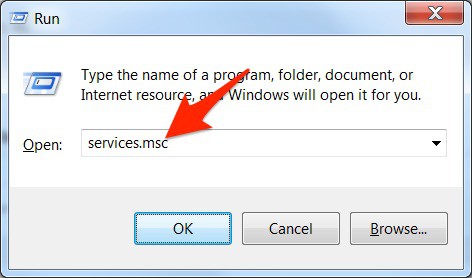
Step 7: Finally, in the Services Manager window, right-click on the “TabletServiceWacom” or “Wacom Professional Service” or “Wacom Consumer Service” whichever form is available and select Restart

Even after changing the image path if your Wacom driver is still not running on Windows 10 or on other versions, follow the next method below.
7. Update the Driver Manually & Reinstall the Related Programs
As we already mentioned that if your Wacom driver is outdated, it will trigger “THE TABLET DRIVER WAS NOT FOUND” error message. In this case, you need to update your driver to fix the problem. Alongside that, you also have to uninstall the existing Wacom programs and reinstall those again. Though it will remove all the configurations and recognize your Wacom tab just in the same way it did while you plugged it in for the very first time, still it is worth a try in order to strive for the solution. Here is how to perform this method-
Step 1: Press the Windows logo key + R button at first to open the Run window
Step 2: Next type in “devmgmt.msc” hit enter to open the Device Manager
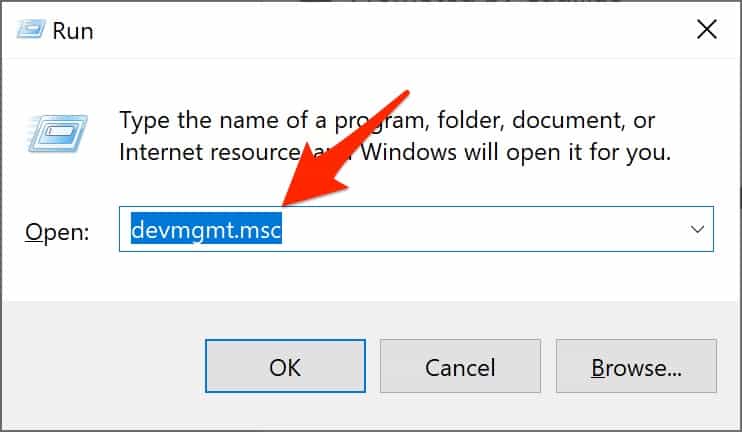
Step 3: In this window navigate to the “Human Interface Devices” section and expand it
Step 4: Now you can see Wacom Tablet is listed under this section, right-click on it
Step 5: Next choose Uninstall device from the pop-up menu
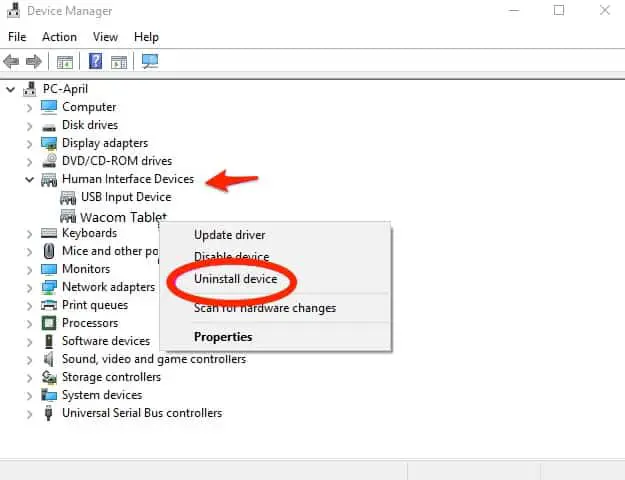
Step 6: Again press the Windows logo + R button to launch the Run window and type in “appwiz.cpl” and hit enter to open the list of installed programs on your PC
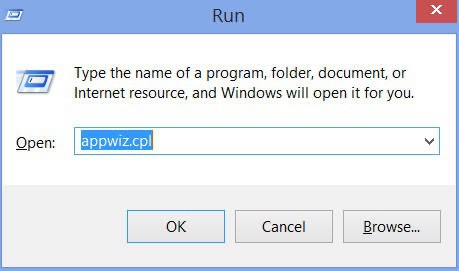
Step 7: Scroll through the list until you find the programs related to your Wacom tablet
Step 8: Once you find any, just right-click on it and choose Uninstall
Note: Repeat this step for all other Wacom programs installed on your system.
Step 9: After that, press Windows key + S to open Search
Step 10: Type in “cmd” and click on Run as administrator from the appearing list

Step 11: Now the command prompt window will open, execute the below-mentioned command
mklink /j “D:\Program Files\Tablet” “C:\Program Files\Tablet”
Note: Here, the D drive is the custom location of the Program files; you need to replace it with the location or drive where you’ve saved your Wacom program files.
Step 12: Now click here to visit the Wacom official site and download the latest available driver
Note: Make sure you save these files in an accessible location.
Step 13: Next press the Windows logo key + R to open Run and type in “devmgmt.msc” in order to open the Device Manager
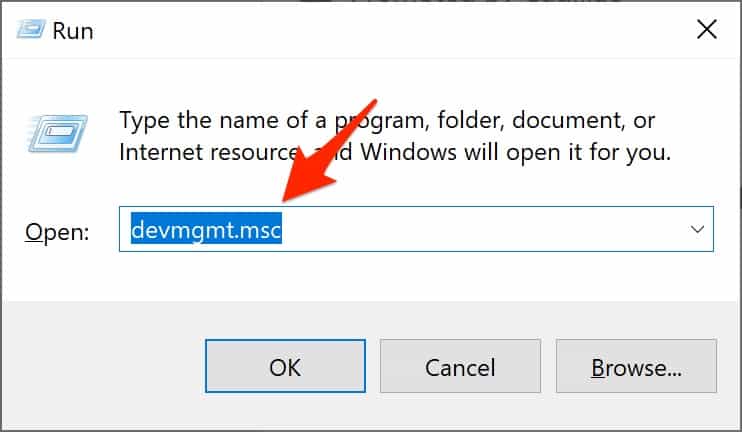
Step 14: Now find Wacom Tablet from the device list, right-click on it and choose “Update driver”
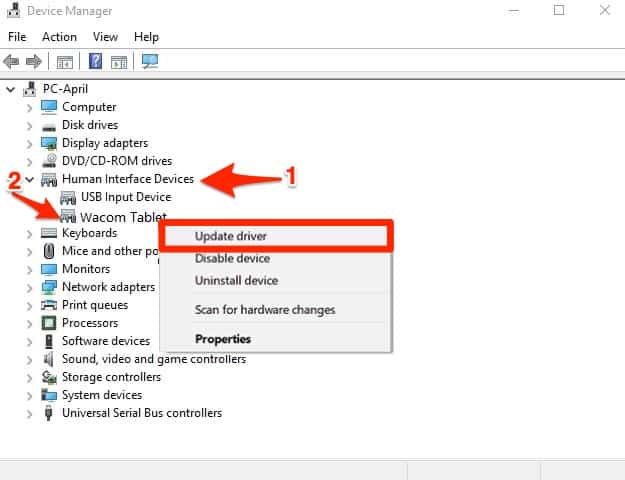
Step 15: At this point, if you face the “Location Not Found” issue, go to the Program Files and then click on the Tablet Plugins folder
Step 16: Here, you’ll get an option “fvWTPInstall_x86”, double click on it and follow the onscreen prompts afterward
Note: Once done, follow step 13 and 14 again
Step 17: Finally, on the next window, choose “Browse my computer for driver software”
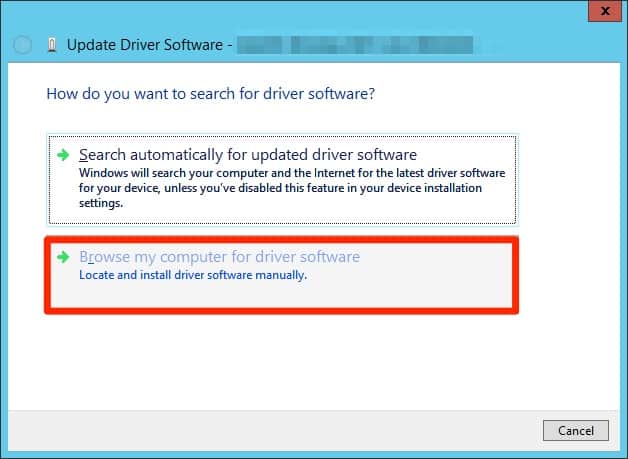
Step 18: Now move on to the location where you’ve downloaded the drivers previously and install them manually
Step 19: Next restart your Wacom tablet and plug it in again
Step 20: Press Windows key + R button and type in “services.msc”, then hit enter

Step 21: Now navigate to the “TabletServiceWacom” or “Wacom Professional Service” or “Wacom Consumer Service” whichever form is available and right-click on it
Step 22: Finally hit the Restart button to fresh start Wacom services

If the issue still persists, that means your drivers have got corrupted. Follow the next method to fix the Wacom driver not found.
8. Uninstall the Driver
When your driver gets corrupted, you ought to face “Wacom not responding.” There is nothing you can do other than uninstalling and reinstalling the driver. Hence, try this final method to uninstall the driver and resolve the error. But before you uninstall make sure your device is disconnected from the computer and then follow these steps below.
Step 1: Unplug the Wacom tablet from your computer firstly
Step 2: Then press Windows + R to open the Run window
Step 3: Next, type in “taskmgs.exe” and hit enter
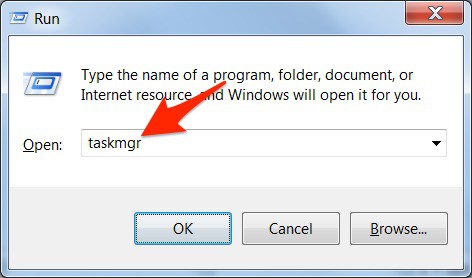
Step 4: In the Task Manager window find all processes related to Wacom and click and select End Task for each
Step 5: Next, exit Task Manager and press Win + R again
Step 6: This time type in “devmgmt.msc” and hit enter

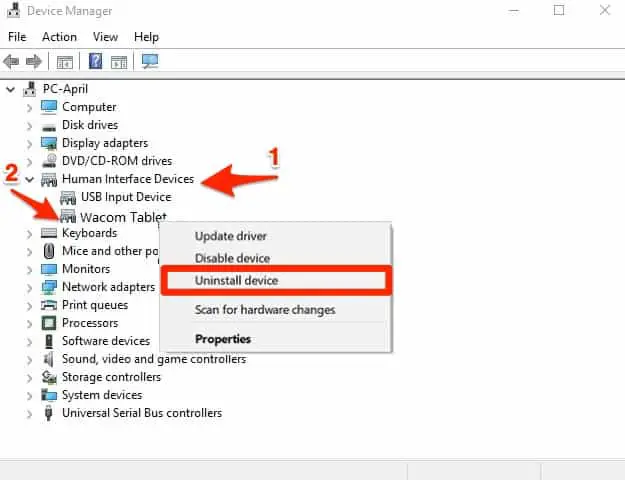
Step 7: In the Device Manager window, locate and expand Human Interface Devices
Step 8: After expanding, you’ll see the option “Wacom Tablet”
Step 9: Right-click on it and choose Uninstall device
Step 10: Now click here to find, download, and install the compatible driver for your PC to run Wacom
Step 11: Once the driver is installed, reconnect your Wacom tablet
This should fix the Wacom driver not found. If you’re still getting the error message, then disable your existing antivirus temporarily and try running your Wacom tablet. If everything works fine, add the service to your antivirus exclusion list.
These 8 methods are meant to provide you with the resolution. Let us know which one worked for you to fix the Wacom driver not running problem, through the comment box below. Stay connected for more troubleshooting guides.

