Files in your drives can get corrupted from time to time. And if your system files start getting corrupted, they get dumped off and deleted at a later time. That might not sound like that big of a deal as long as your PC works fine, and you can access all of your essential files. Windows 10 is generally pretty good at repairing itself. But problems still occur often for many users. And you also might not be able to update at all.
Error code 0x80070570 doesn’t appear often. But when it does during specific updates and file transfer progress, it’s pretty hard to get rid of. If you too are facing the same problem and want to know how to fix it, continue reading this post.
Table of Contents
Windows 10 Error 0x80070570
This error mostly shows up while trying to update Windows. You can also face this issue while trying to install any software. It can happen during moving, copying, or even deleting a file as well. Some users have even faced the error code while performing a fresh install of Windows. Also, there are a few reports of people facing this error even while trying to activate Windows. On Windows 10, it is pretty rare to encounter. But on other older operating systems (e.g., Windows XP, Vista, Windows 7), users encountered the error a lot more. This could be because those operating systems did not have much, if any auto self-repairing functionality.
Why Does The Error 0x80070570 Occur?
-
- Sectors In HDD Or SSD Going Bad- If it is a hardware related issue which rarely happens, it could be due to one or more sectors going bad on your HDD, SSD, or any other storage device.
- RAM Modules Going Bad- Another hardware related issue is your RAM sticks going bad. It is an even rarer occurrence, and you should check other fixes before starting to worry about your RAM sticks.
- Unstable Overclock- Now you might be wondering what’s unstable overclock got to do with anything? Well, while trying out the best possible overclock for CPU and memory, many enthusiastic users face what is called BSOD. It is basically the infamous Blue Screen Of Death, which you see when trying out too high of an overclock. If you’ve got a capable PC, it might seem great to push your CPU and memory to their furthest limits. But on not enough voltage ranges, your PC might BSOD, and once that happens, System Memory dump files get created. It usually stays on your boot drive. If it occurs while an important file was in use, you might see the same error code.
- Corrupted System Files- If system files (Windows files) get corrupted, you might see the same error.
- Corrupted Registry- Windows Registry is an integral part of the operating system. Registry errors or a corrupt registry certainly aren’t good at all and might cause errors like the error code 0x80070570.
- Incompatible BIOS Settings- Wrong BIOS settings can lead to errors like these or even can damage your PC if you are not careful.
- Malware- Any existing malware or spyware on your PC can corrupt your data. So later when another program tries to access the same corrupted files you might see the same error code.
Methods To Fix Error 0x80070570
1. Scan The Drive For System Errors
If you are facing the error trying to modify a file in a specific drive, this method can help. Here is how you can scan that specific drive:
- First of all, open the File Explorer<span style=”font-weight: 400;”>.
- Then go to This PC section.
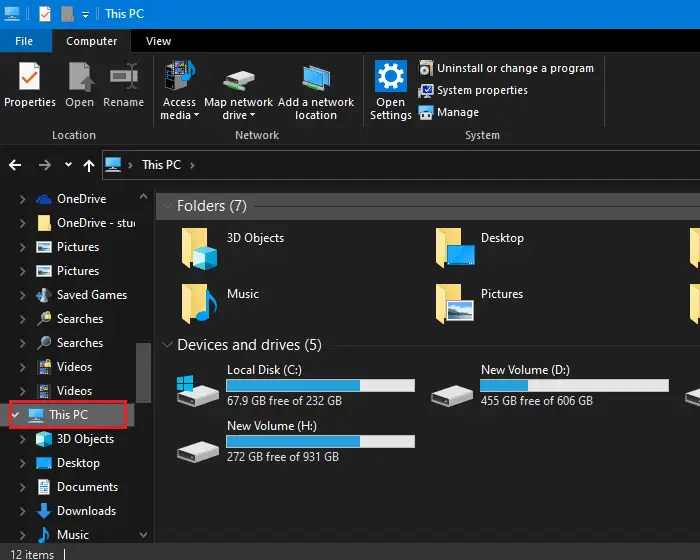
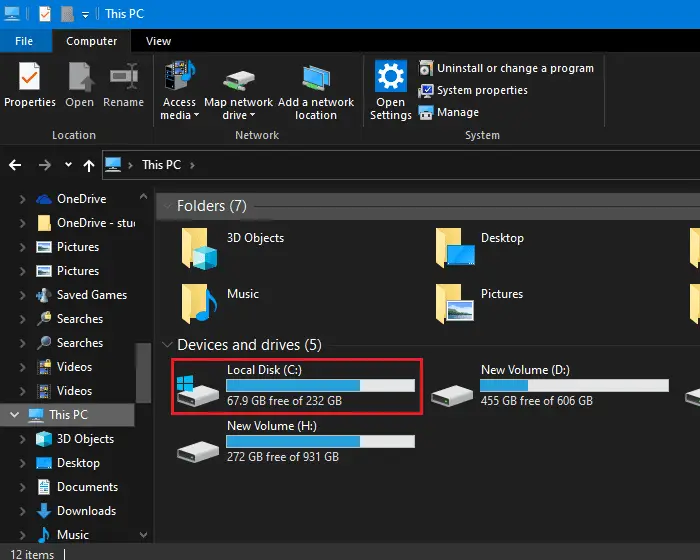
- After that, right-click on the specific drive you are having issues with. Select your boot drive (C) if you are facing the error in Windows processes.
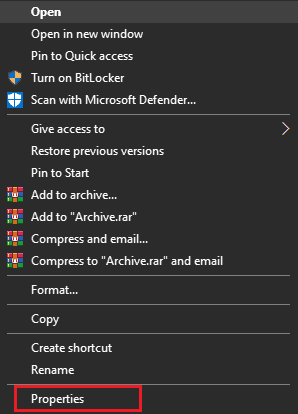
- Next, click on Properties.
- Then go to the Tools tab.
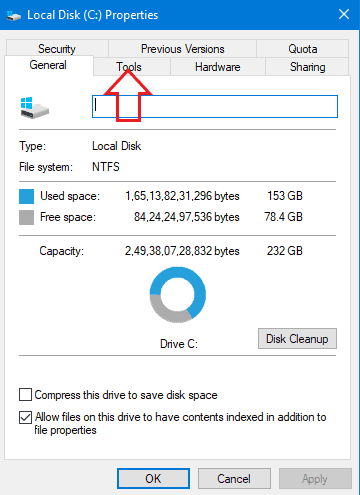
- After that, click on Check.
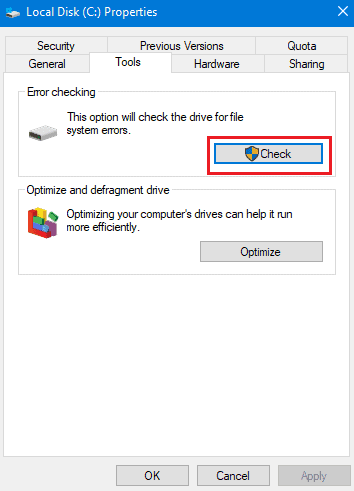
- Next on the Error Checking pop up click on Scan drive.
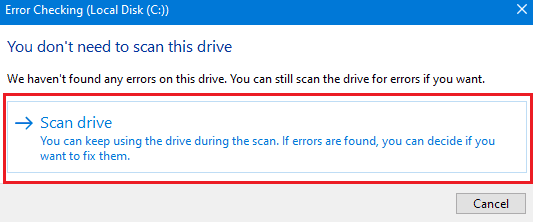
- Wait for the process to finish. If you are checking on an SSD and have a good system, it shouldn’t take too long.
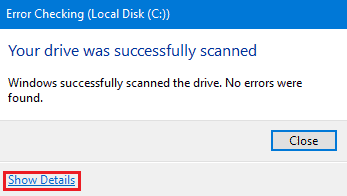
- Finally, once scanning finishes, click on Show Details. It will open up the Windows Event Viewer. From here, you can see what is causing the error and take action on that.
2. Check For Windows Update Problems Using The Troubleshooter
Many users face the error code 0x80070570 while trying to update Windows, as mentioned before. You might be able to download the update, but while installing the same update, many users see the same error. The Windows Update troubleshooter comes in handy in these situations. This utility can be accessed from the Settings UWP app. Here’s how to perform it:
- At first, click on the Start button on the bottom left corner of your desktop or press the Windows key.

- Next, click on Settings.

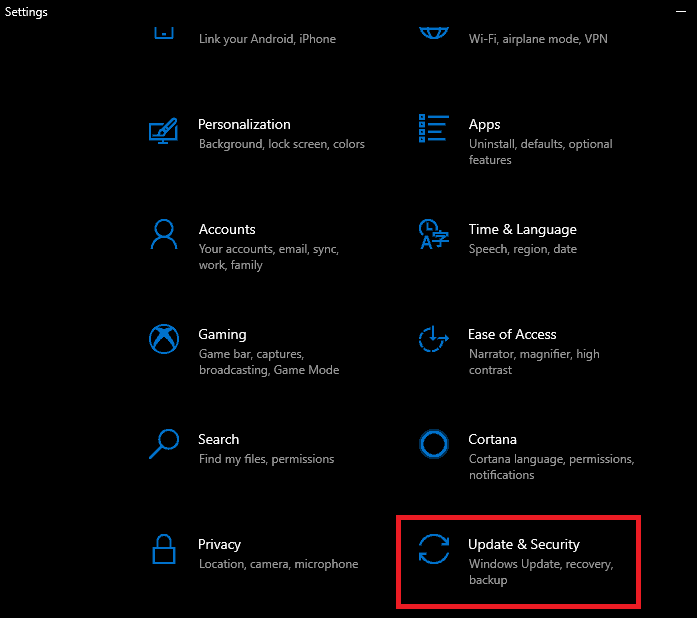
- After that, click on Update & Security.
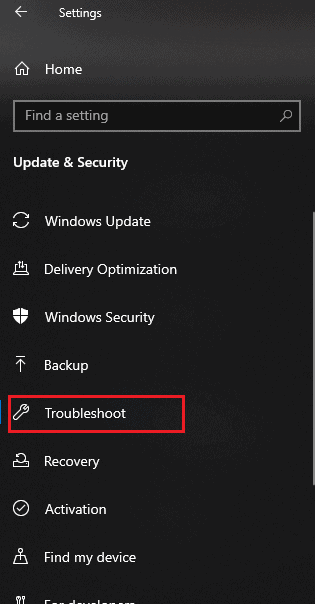
- Then go to the Troubleshoot section.
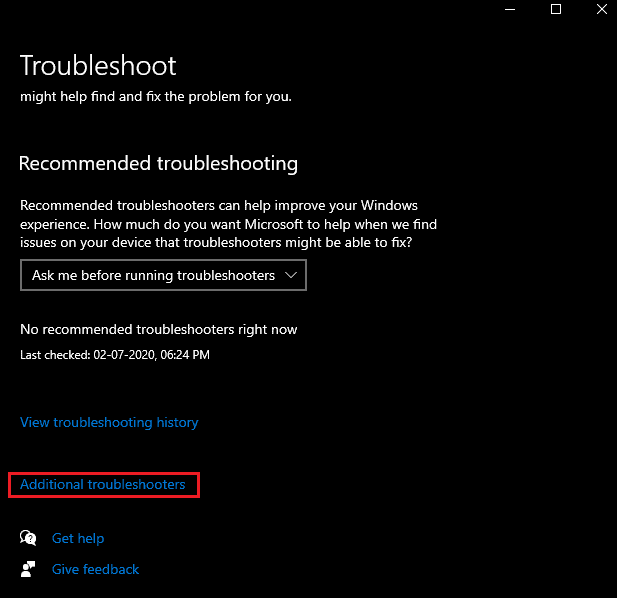
- Click on Additional troubleshooters.
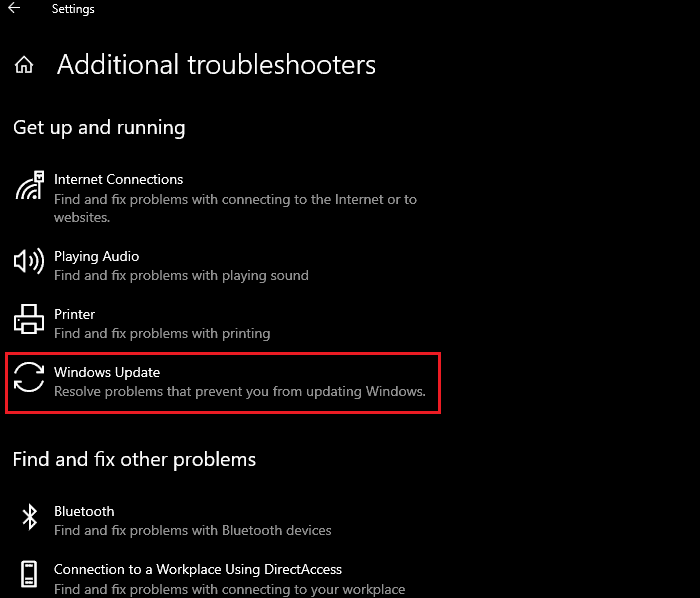
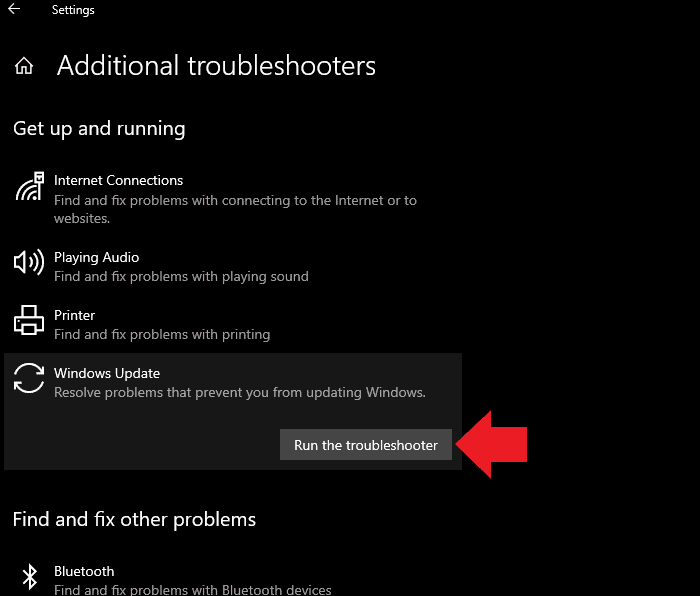
- Under “Get up and running,” click on Windows Update<span style=”font-weight: 400;”>.
- Click on Run the troubleshooter.
- Wait for the troubleshooting process to finish.
3. Use Windows 10 Update Assistant
Even after using the troubleshooter, if you can’t update Windows, you need to use the Windows 10 Update Assistant. You can download it from here. After the tool does its work, you can restart your PC. Then when you check for updates, the error should be gone.
4. Execute Commands In The Command Prompt To Scan System Files
If you are seeing that error code in a Windows-related program, you might need to scan your system files for corruption. But fret not as it is very easy to do just that. You simply need to execute a couple of commands in the command prompt. Go through the following steps:
- First, go to the Start menu again and search for CMD.
- Then right-click on Command Prompt.
- Next, click on Run as administrator.
- After that, the Command Prompt window should open up. We need to enter a couple of commands in here.
- Type in the command “DISM.exe /Online /Cleanup-image /Restorehealth” and press Enter on your keyboard. The process will now start searching for corrupted system files. And it will try and replace them with fresh new ones downloaded from the internet.
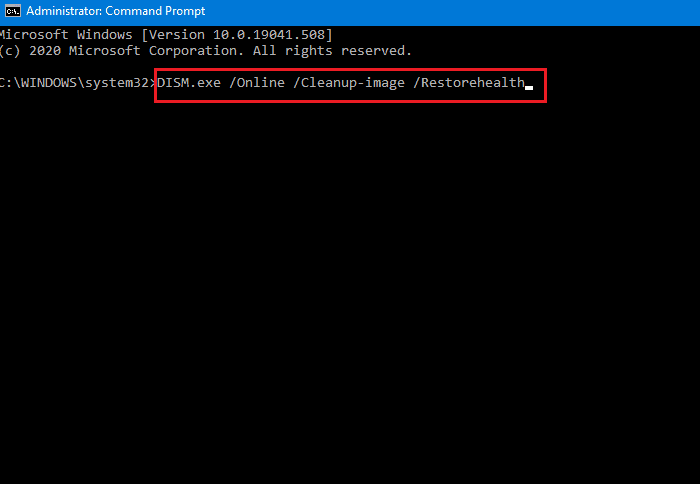
- Depending on the number of corrupted system files and your internet connection, the process may take a while. Wait for it to finish.
- Once that finishes, type in the command “sfc /scannow” and hit the Enter key on your keyboard. Wait for the process to scan through the system files.
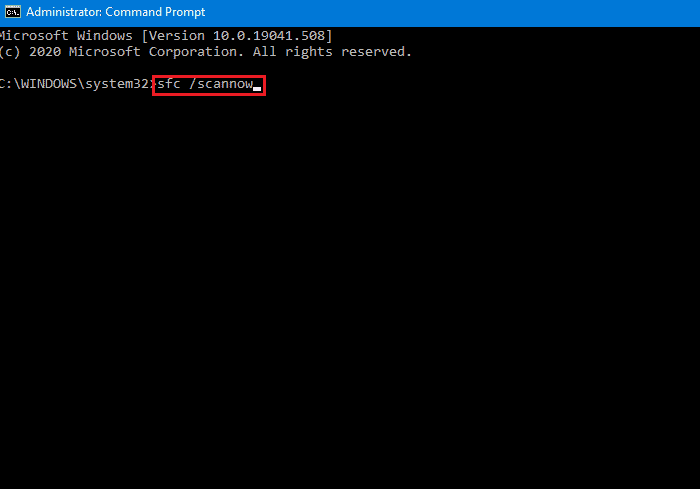
- In the end, reboot your PC to load up the fresh new files.
5. Retry Fresh Windows Install
You might see error code 0x80070570 while trying to perform a fresh install of Windows 10. If you do see that, trying to install it once again might help. You can also try reformatting your boot drive. That will clear up any junk files stuck around from the previous Windows installation.
6. Use Different Installation Media
Corrupted Windows installation media or corrupted Windows installation files could be the reasons for the error code 0x80070570. In that case, if you are trying to perform a fresh install, you can try remaking the installation media. You just need to format the USB flash drive consisting of the installation media files. Then you need to download the Windows Media Creation Tool from here. You can create the installation media once again using the tool. If that still doesn’t work, you can try using another flash drive with at least 8 GB of free space.
7. Use Command Prompt To Check The Drive
There is another command that you can execute to scan through a specific problematic drive. Granted that it will only scan your boot drive. But it does a thorough scan and should fix the error code 0x80070570 after it’s done. Follow the steps below to perform the same:
- First of all, open Command Prompt the same way as explained before.
- After that, type in “chkdsk/f/r” command and press Enter on your keyboard.
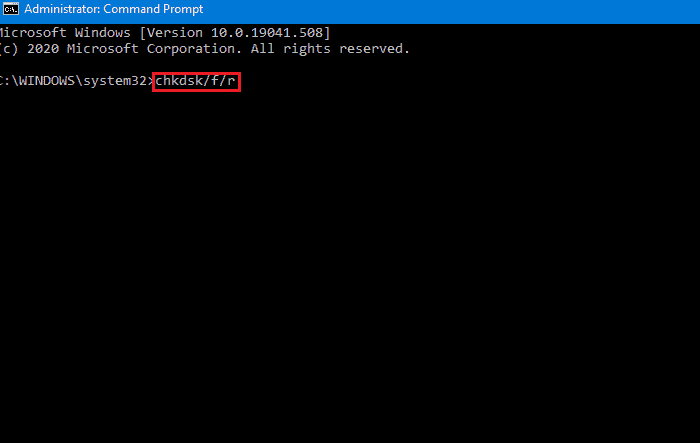
- If it prompts you to press Y, do the same.
- After it finishes, restart your PC.
8. Defrag All Of Your Drives
Defragging and optimizing your drives is a great way to fix the error. Even if you don’t face this error, it is usually a good practice to do this fairly regularly. It keeps your drives clean and fast running. Here’s how to do it:
- First, from the Start menu, search for the Control Panel<span style=”font-weight: 400;”>. Open It.
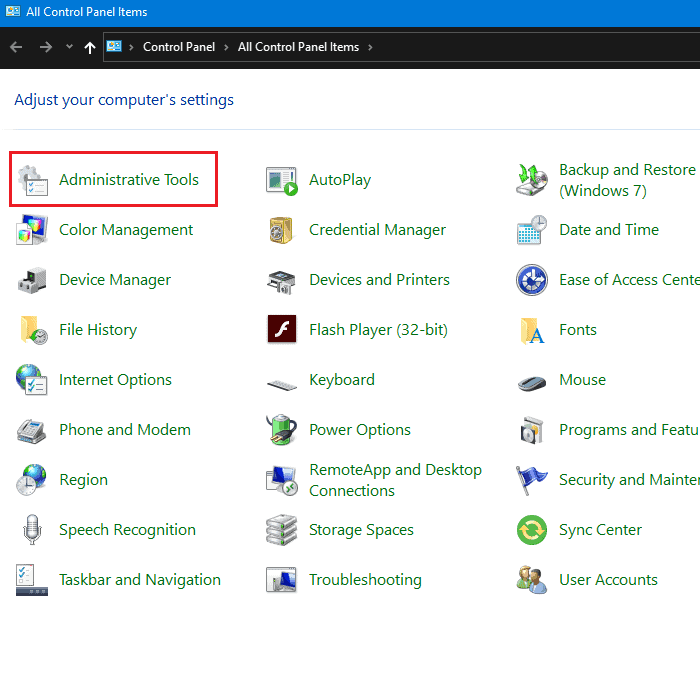
- Then from the Control Panel window, click on Administrative Tools.
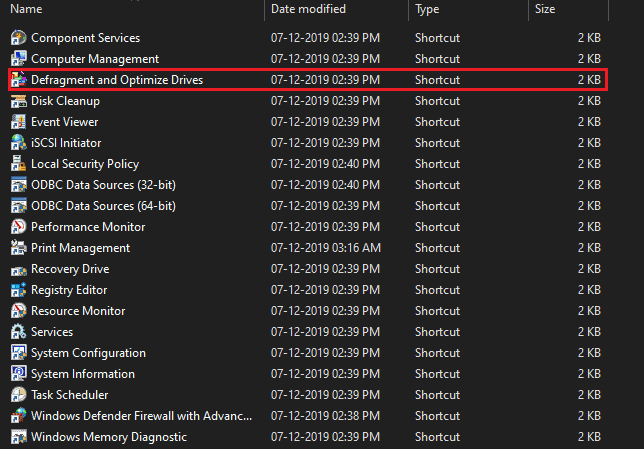
- After that, click on Defragment and Optimize Drives.
- Next, select all of your drives from here.
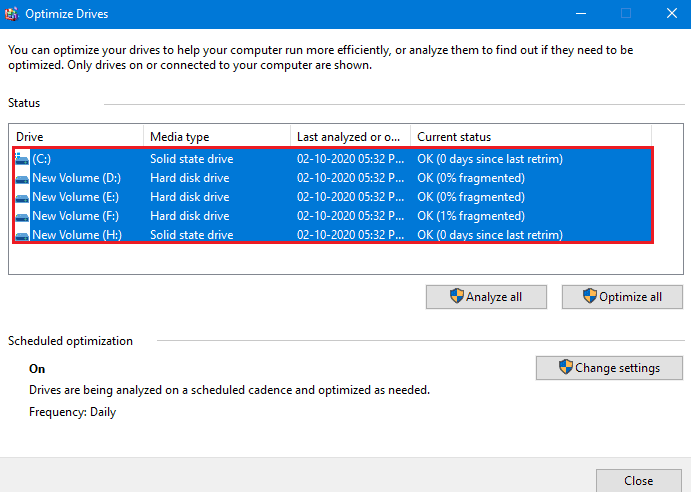
- Click on Analyze all.
- Once done, click on Optimize all.
- Wait for the process to finish. The time taken for the entire process depends on your drive’s read/write speeds. It also depends on how much content you have in the drives. And how much they were fragmented and needed to be trimmed.
9. Format The Particular Drive
If you are only facing this error trying to install something in a particular drive, formatting it may help. But before that, make sure to back up all your essential files on a separate drive. Once done, follow these steps to format your drive:
- At first, go back to the This PC section in File Explorer.
- Next, right-click on your problematic drive.
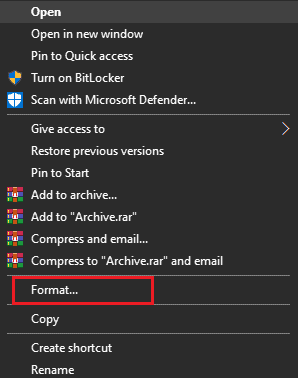
- Then click on Format.
- After that, a format pop window should show up. Make sure that everything is at their default settings here from their respective drop-down menus.
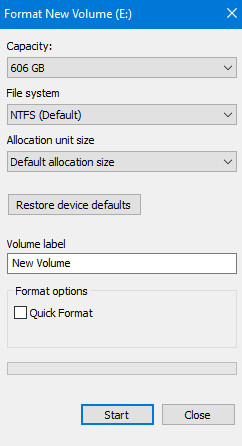
- Make sure that the Allocation unit size is set to “Default allocation size” from the drop-down menu.
- Make sure to uncheck the Quick Format option.
- Finally, click on Start and wait for the process to finish. The same error should not show up anymore, and you can move all your important files back to the drive.
10. Perform A Full Malware Scan
If you have malware in your PC, it can corrupt files, as said before. So now, we are going to show you how to perform a full scan to make sure malwares get removed. Do note that we are only going to use the included Windows Defender as our malware removing tool. We feel it is enough, and you don’t really need any other anti-malware or antivirus software, as it’s so good.
- First of all, click on the upwards arrow icon in the bottom right of your screen in your desktop taskbar.

- After that, click on the Windows Security icon.

- Next, click on Virus & threat protection.
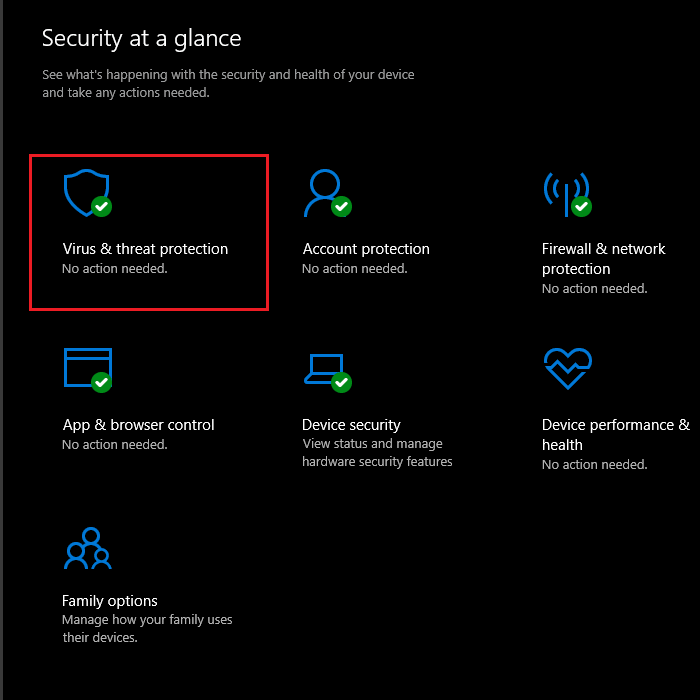
- Then click on Scan options.
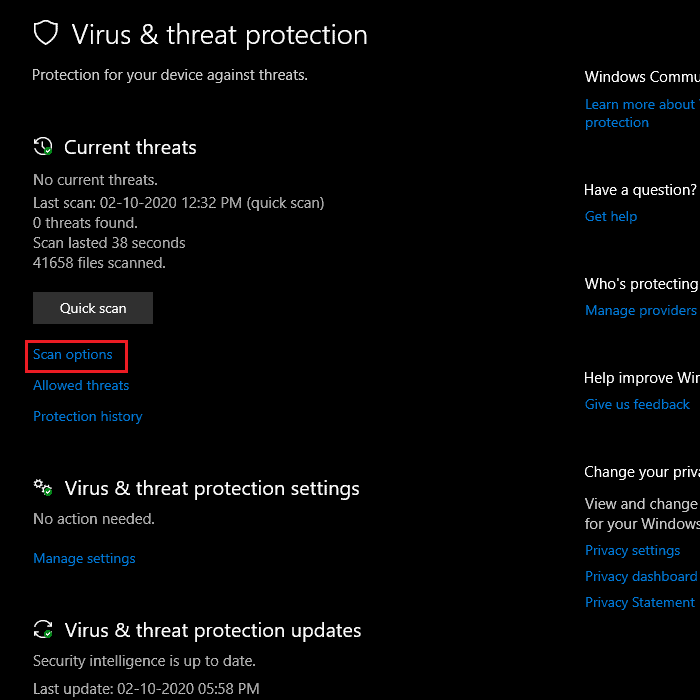
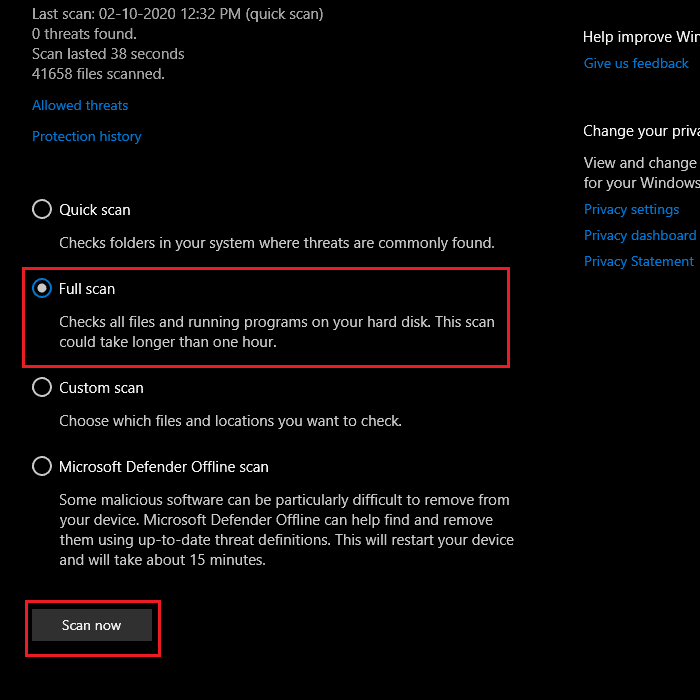
- In the end, select the Full scan option and click on the Scan now button.
11. Check For Memory Errors
The error could be caused by memory errors. Windows 10 does offer a tool to check the same and to make sure. Here’s how you can use the tool:
- Open up the Control Panel once again.
- Click Administrative Tools.

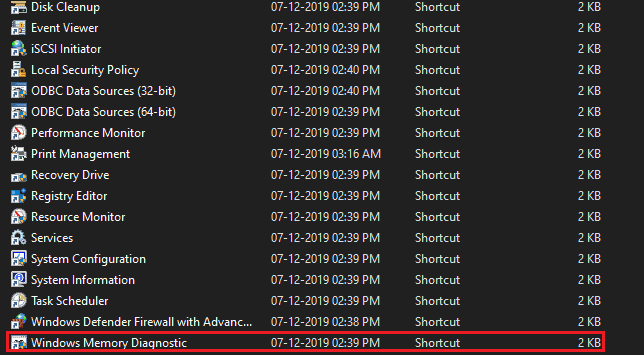
- Double click Windows Memory Diagnostic.
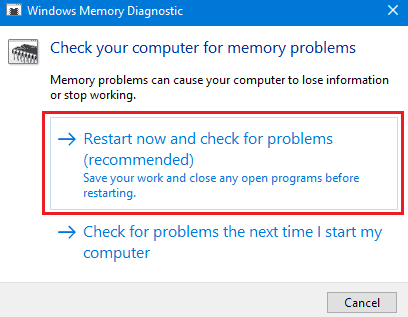
- Click Restart now and check for problems (recommended). Make sure to save your work and close any open programs before doing the same.
- Once your PC restarts, it won’t go into Windows as usual. It will go into the memory diagnostic utility, and that will stress test your system memory. It will show you a progress bar.
- Don’t turn off your PC even if the progress bar seems like it’s stuck. It will take a while for the tool to check your RAM sticks fully.
- You can, however, press F1 and select a more thorough testing option that takes even longer to finish. If you have a bit more time in your hands, you should perform this instead.
- Finally, once it’s done, your PC will reboot again and go into Windows. It will show you the result if it found any error within memory.
If it finds memory errors, it could be because of high memory overclock or putting your RAM in XMP mode. So you can try putting your RAM to the default speeds and timings and testing once again. If it still shows you errors, you can try reseating your RAM modules.
Conclusion
Following the above methods, you should definitely be able to resolve the error code 0x80070570. If it still shows the same error, it probably is due to some hardware problem. Unfortunately, in that case, your only option is the service center.

