Are you facing Windows Audio Device Graph Isolation High CPU problem on your Windows computer? If you visit the task manager regularly, the chances are high that you are aware of a process named “Windows Audio Device Graph Isolation”. The only reason to remember this annoying process is its high CPU consumption.
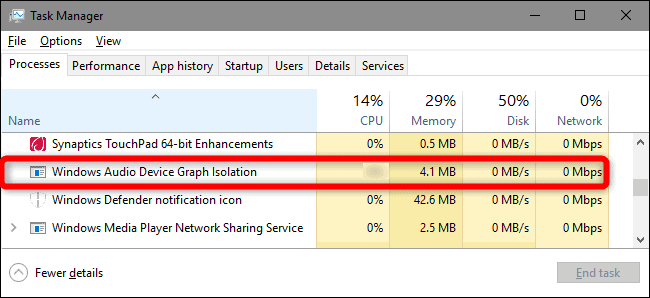
Now, experiences like this must raise your suspicion whether your PC is running in good condition or not. The name doesn’t suggest much about the process and it’s just obvious to feel cautious after seeing this unknown process consuming such a huge amount of CPU resources. However, you don’t need to worry anymore! Here in this article, we have offered a few easy workarounds to fix Windows Audio Device Graph Isolation high CPU usage error.
Table of Contents
What is Windows Audio Device Graph Isolation?
Windows device graph isolation is an essential process (audiodg.exe) which makes your PC audible. It works as the audio engine of your Windows 10 computer and helps third party applications run sound. You might think about disabling it to save a lot of CPU resources. But it would be a terrible idea as disabling that, will make your Windows operating system go mute.
Is it audiodg.exe a Virus?
The possibility is audiodg.exe not a virus. In some cases, certain viruses can hack this process anytime. If you want to get assured about its true nature, you need to check the location of the file and confirm that the process is running from its regular hard drive location .
To check, follow these simple steps.
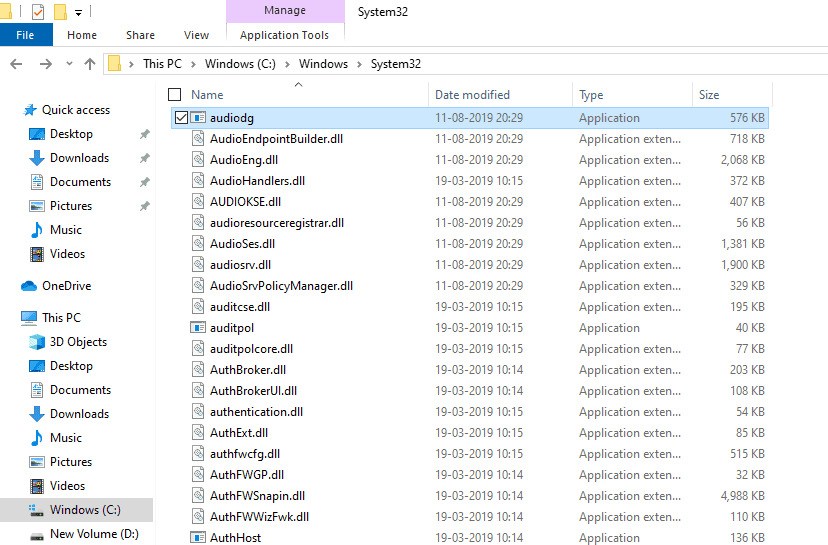
Step 1: Right-click on “Windows audio device graph isolation” in the task manager and click on ‘open file location’ tab.
Step 2: The location of the file is C:\Windows\System 32, and stored as AudioDG.
What is AudioDG? It’s Microsoft’s official application for audio graph isolator.
If you could find the application named AudioDG, then it is ensured that Windows audio device graph isolation process is not affected by the virus and it is drawing its quota of CPU power.
Then why is it demanding high CPU resources?
Windows audio device graph isolation high CPU usage can be caused by poorly phased out audio enhancers by any third-party application. The whole process will consume a high percentage of memory. Still, in some cases, the audio output will not be available, and the program will crash frequently. In this scenario, here is a number of ways to get rid of this situation
Fix Windows audio device graph isolation high CPU Usage
Now, you know all the basic details about Windows Audio Device Graph Isolation; it’s time to fix the high CPU usage caused because of the process. Try each of the below resolutions and troubleshoot the problem right away.
Method 1: Disable sound effects
Sound effects from 3rd party apps make Windows audio device graph isolation process active, and then it pulls juice from your CPU. Disabling those sound effects may resolve this matter. Here’s how to do it
Step 1: Right-click on the speaker icon in the bottom right-hand corner of your screen.
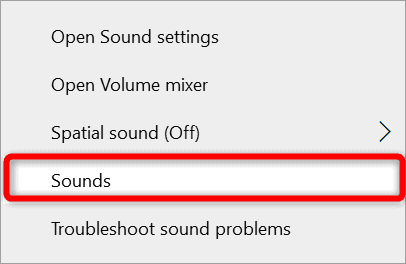
Step 2: Select the option “Sounds” and a new window will pop up.
Step 3: Then, in the Sound window click on the ‘Playback’ tab.
Step 4: Now, right-click on speakers and click on properties
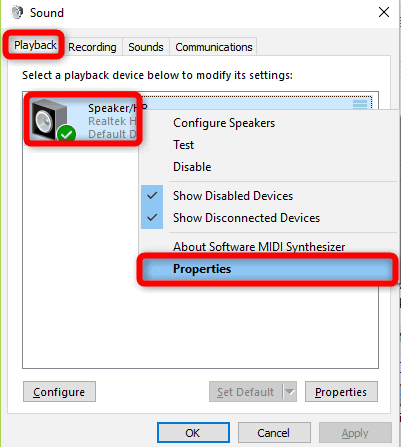
Step 4: In the Speakers Properties window click on the Enhancement tab and tick the box beside the option “Disable all sound effects” and select Ok.
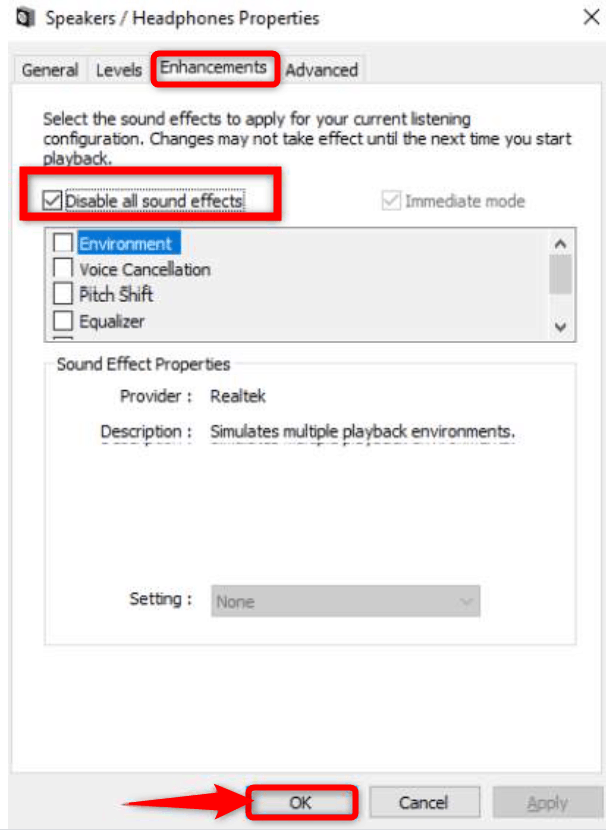
Now that all your sound effects have been disabled check the task manager to see whether your issue has been resolved or not.
Method 2: Fix your PC’s Audio Drivers
If disabling sound effects doesn’t help you, you could try another trick that is reinstalling your machine’s audio drivers. Corrupted or out of date audio drivers can sometimes pull out resources from your CPU in order to work properly. In this scenario, you have to reinstall all your audio drivers. Here’s how to update your audio drivers.
Step 1: Open Control Panel
Step 2: Go to device manager option in control panel and click on “Sound, Video and Games Controller”
Step 3: Right-click on sound driver’s device name, and it will open a menu
Step 4: Select Uninstall in the pop-up menu and click ok
Step 5: After Uninstalling restart your PC and check whether it resolves the high CPU usage problem or not.
Note: After uninstallation when you restart your PC Windows will automatically install the latest driver for your audio devices.
Method 3: Uninstall & Reinstall Skype
In the past, many users have expressed their issues of high CPU usage by audio drivers during a video call on the famous video calling platform Skype. So if you are an avid Skype user, I would suggest you uninstall Skype and reinstall the latest version of it. If the newer version still bothers you, you should stop using it and shift to some alternative platforms.
The bottom line
Now the troubleshooters mentioned above will resolve your issue, and you can utilize your CPU power for running other applications on your system. If you have further query, drop it in the comment box below.
Windows 10 is plagued by many such processes causing high CPU and Disk usage and we have covered several such processes and solutions to fix it. Check below list of articles if you are facing high CPU/Disk usage issue and wondering what’s the cause.

