Microsoft Windows is the major operating system for computers used by a large number of people around the globe. It has been a popular operating system for computers for several years now. Till now, Microsoft has released multiple versions of the Windows with many upgrades and new features in each update. As of right now, the Microsoft Windows 10 is the latest version of Windows with the best features till date. If you’re looking for the best Windows experience possible, then Windows 10 is the best version for upgrading to. But unfortunately, Windows 10 has some issues and bugs that can be a little frustrating.
Table of Contents
Slower SSD speeds on Microsoft Windows 10
After the Windows 10 Update, many Windows PC users have been facing slower speeds with their solid state drives. SSDs are meant to provide much faster data transfer speeds, shorter boot times, and quicker access times for softwares when compared to traditional hard disk drives. Unfortunately, after updating many users facing reduced SSD speeds after Windows 10 Update and are not getting the level of performance they should get from an SSD. Therefore, today we are here with the full guide on how to fix reduced SSD speed after Windows 10 update. We have provided all of the possible solutions to this issue in Windows 10 and if you want to successfully fix the performance of your SSD, make sure to go through each of the solutions provided in this article.
1. Updating AHCI Drivers for Optimum SSD Performance
AHCI drivers play a major role in the performance of your storage devices including SSDs. Therefore if the Windows 10 update has corrupted your PC‘s AHCI drivers, it will reduce the SSD speeds. So updating the AHCI drivers can possibly fix any issues related to SSD speeds if you follow the given steps:
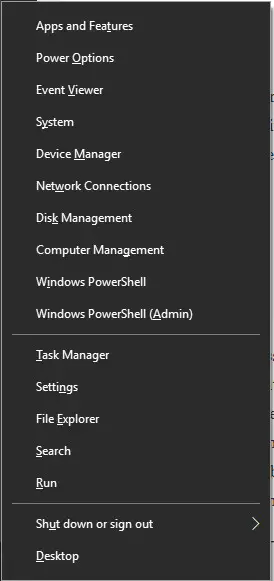
- First press Windows Key+X and open Device Manager on your computer.
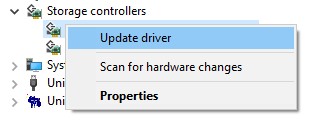
- In here, expand storage controllers and find the AHCI drivers. Now right click on it, and select Update driver.
- Finally, click on the Search automatically option after which Windows will find the latest AHCI drivers for your PC and update them.
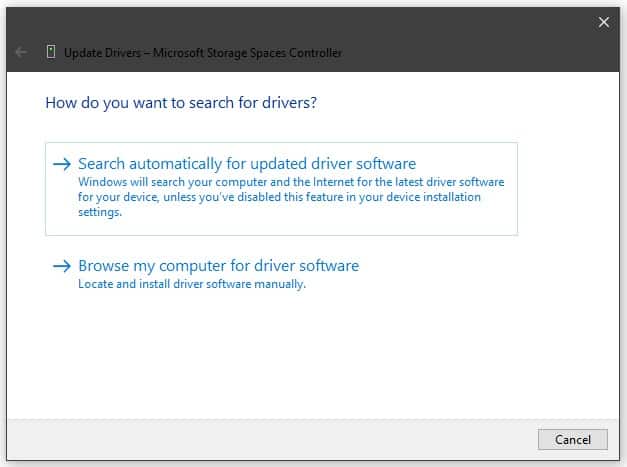
Doing so will most likely fix any SSD issues in your PC. In case if Windows is not able to automatically find drivers, then you can get them manually from the motherboard or device manufacturer website.
2. Tweaking Virtual Memory Settings
Virtual Memory Settings of Windows 10 can affect SSD speeds of your PC in some cases. If these settings are not set properly, users might face some issues. So to tweak your virtual memory settings for the best SSD performance, follow the given steps one by one:
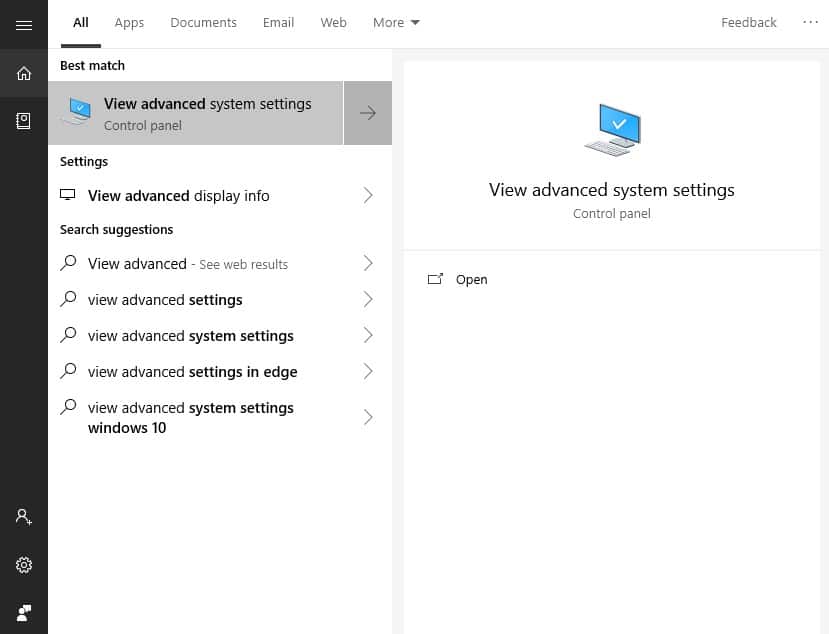
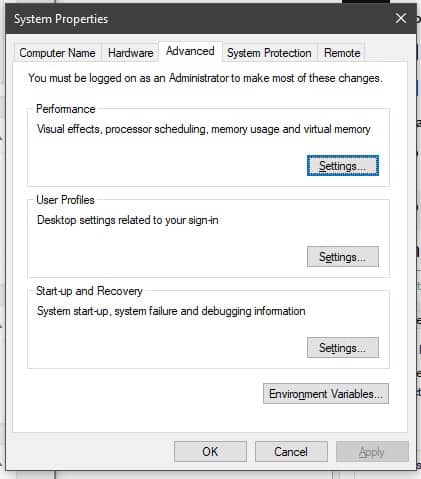
- Using the search in Windows, go to View advanced system settings on your PC.
- Now, go to the Settings of the Performance section in here.
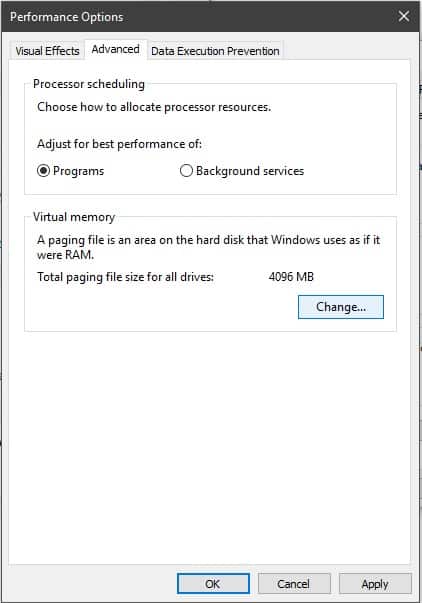
- Once you are inside the Performance Settings, go to the Advanced tab and click on Change under Virtual Memory.
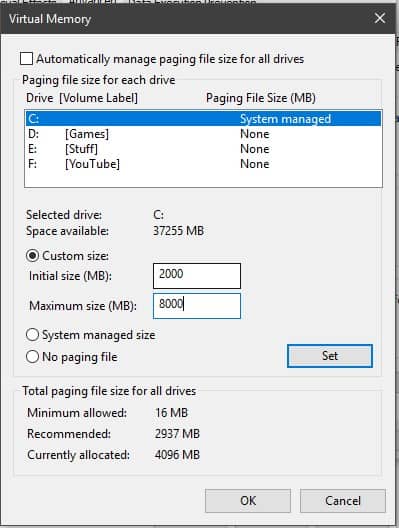
- After this, uncheck the Automatic manage paging file size for all drives and select your System drive.
- At last, click on Custom Size and enter any value for Initial size and approx double the amount of RAM your system has in Maximum size. Once this is done, click on Set and press OK to save your settings.
3. Enable Fast Startup in Windows 10
By default, the Fast Startup option in Windows 10 is enabled in the control panel. As the name tells, this feature reduces the boot time of your computer. But sometimes, a Windows update can disable this feature which means longer boot time. So, if you want to re-enable Fast Startup in your computer, use these instructions:
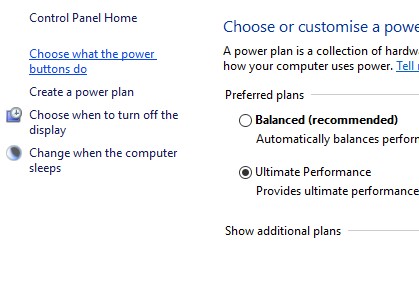
- To enable Fast Startup, first, open your Control Panel and go to Power Options.
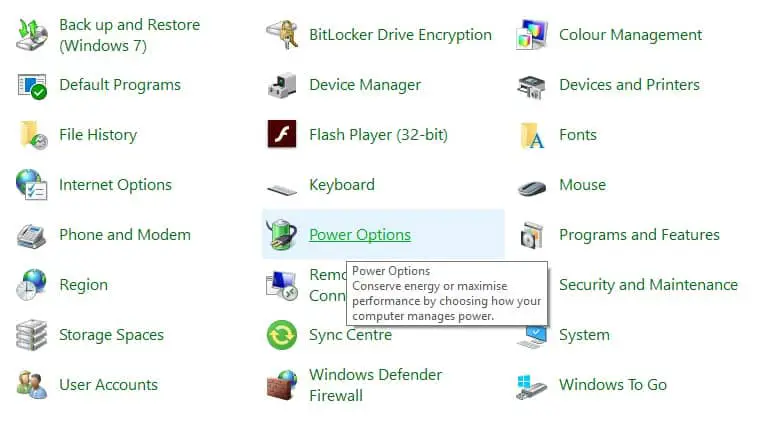
- In here, select Choose what the power button does from the left-hand side menu.
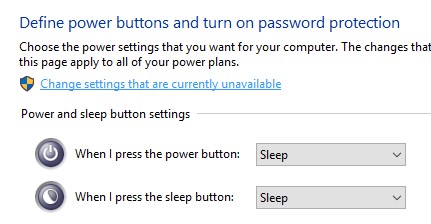
- After that, click on Change settings that are currently unavailable and make sure that you have administrative access in your PC.
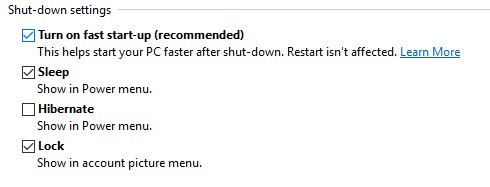
- Now, make sure that the Turn on fast startup option is enabled so that you can have the quickest boot times on your computer.
4. Uninstalling Graphics Card Drivers
Some users have reported slower boot times due to corrupted graphics drivers. Since a Windows update can affect graphics drivers of your PC, it can also affect the Windows booting time. This sort of behaviour has been mostly reported by AMD graphics card users. Thankfully, it is quite easy to uninstall drivers and once you’ve uninstalled them, simply go your graphics card’s manufacturer website and install the latest drivers from there. To uninstall your current graphics card drivers from your Windows 10 PC, follow the given steps one by one:
- Press Windows Key+X and Select Device Manager. This will bring up a list of all the devices installed on your PC.

- Now look for your graphics card driver and right click on it. After right clicking, select Uninstall device.
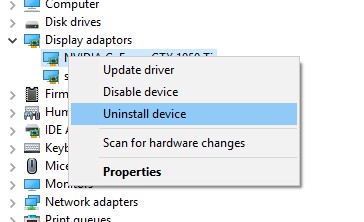
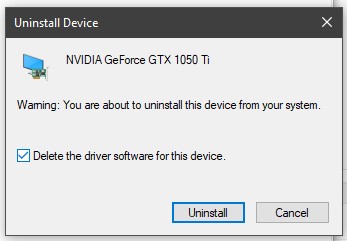
- This will bring up a confirmation dialogue on your screen. In here, check the Delete the driver software for this device option and click on Uninstall.
5. Windows 10 Clean Install
If none of the methods mentioned above have worked for you, then the only option left for you is to do to a clean install of Windows 10. Sometimes, a Windows update can corrupt Windows system files or toggle some unknown settings that can cause several issues. And these issues can also be related to SSD performance in your PC. So, if you have tried everything for fixing your SSD‘s reduced speed, try doing a clean install 0f Windows 10 on your computer. Just make sure to backup all of your files in your PC since your important data might get wiped during a clean install.
We hope that you’ve successfully fixed the reduced SSD speeds in your PC after the Windows 10 Update. We are pretty sure that atleast one of the fixed mentioned above have worked for you and your SSD is now back to normal. In case you liked this article, then make sure to share it on social media. If you have any doubts regarding the backup process, feel free to ask any queries in the comments section below.

