Issue: Display driver stopped responding and has recovered
Display Adapters or GPUs as most of us know them as being responsible for producing the video that is shown on the monitor. The display that you’re reading this on is being powered by a display adapter on your computer. There are different types of display adapters for a PC. One is a dedicated display adapter where you use a full-sized proper GPU or an onboard/integrated GPU that is integrated with the processor itself.
When it comes to dedicated GPU, you have big names like NVIDIA, AMD and soon Intel that will also launch dedicated graphics processors for desktops soon and some computers, especially laptops have an integrated GPU like the Intel UHD 620 or 630 which shares the system memory and doesn’t have a dedicated memory of its own. Now, the “Display Driver Stopped Responding and has Recovered” error can come up due to a bunch of reasons like corrupted drivers or a failing GPU that is going to die soon. We can certainly fix the former but the latter needs professional attention and in that case, you need to contact your GPU manufacturer to get it fixed.

In this post, we will read about solutions that can help you get rid of this error once and for all.
Table of Contents
Display Driver Stopped Responding and has Recovered, How to Fix?
Solution #1: Remove and Reinstall Drivers
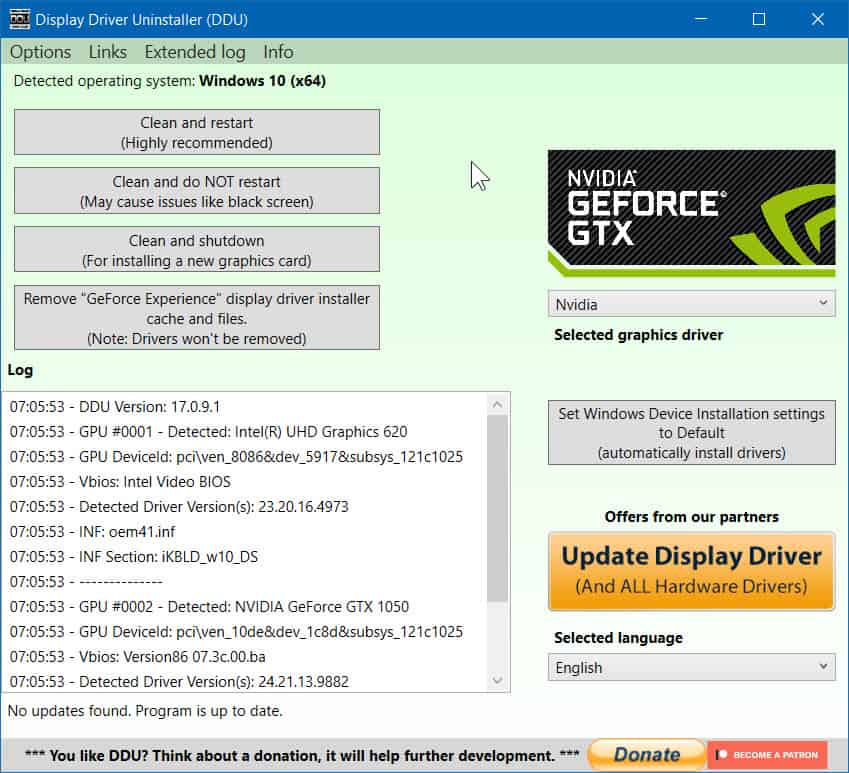
As mentioned above, the issue can arise due to corrupted drivers for your graphics processor. To fix that, we have to use a third-party tool called Display Driver Uninstaller or DDU.
- Download the Display Driver Uninstaller program from this page.
- Once downloaded, set it up and open it.
- It is recommended that you run this program in Safe Mode but you can try running it normally and it should work fine.
DDU will automatically detect the GPU you’re using and as you can see in the image above, the GPU or the display driver on the said computer is an NVIDIA GPU. Click on Clean and restart which will uninstall the current graphics drivers and reboot your PC. Once it is done rebooting, you can manually install the graphics drivers and see if the error goes away. This works for all kinds of GPUs including NVIDIA, AMD, ATI or Intel.
Solution #2: Edit Registry to Increase GPU processing time
If you are facing the issue due to a misconfiguration in the GPU processing time Registry entry, then it can be edited manually to fix the processing time.
- Open the Registry Editor on Windows 10 by pressing the Windows key + R and typing regedit.
- Press the ENTER key and the Registry Editor will open up.
- Browse to “HKEY_LOCAL_MACHINE\SYSTEM\CurrentControlSet\Control\GraphicsDrivers”.
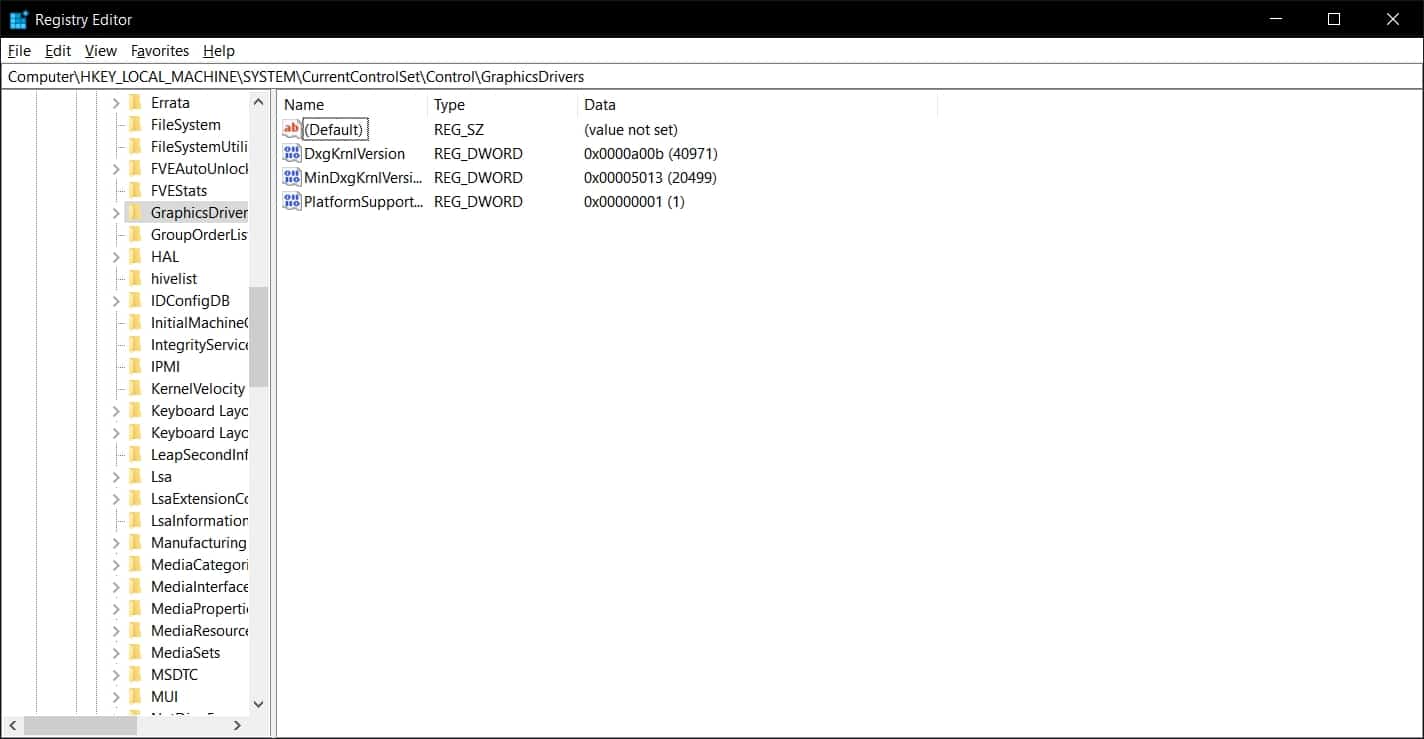
- Look for an entry with the name of “TdrDelay”. If you’re not able to find it, then right-click on an empty space and choose New > DWORD and set its name to TdrDelay.
All you need to do now is double-click the TdrDelay DWORD option and change its value from 2 (the default is 2) to 8. Once edited, restart your computer and now that we have increased the GPU processing time from Registry, you should not see this error anymore.
Solution #3: Clean your graphics adapter
If you have a dedicated graphics adapter, you need to take it out of your computer and clean it properly. Once you have cleaned it, you can insert it into the slot in your computer again to start using it. This issue can also come up due to a graphics adapter that stops working due to heating up. You can only check it once you have taken it out of the computer.
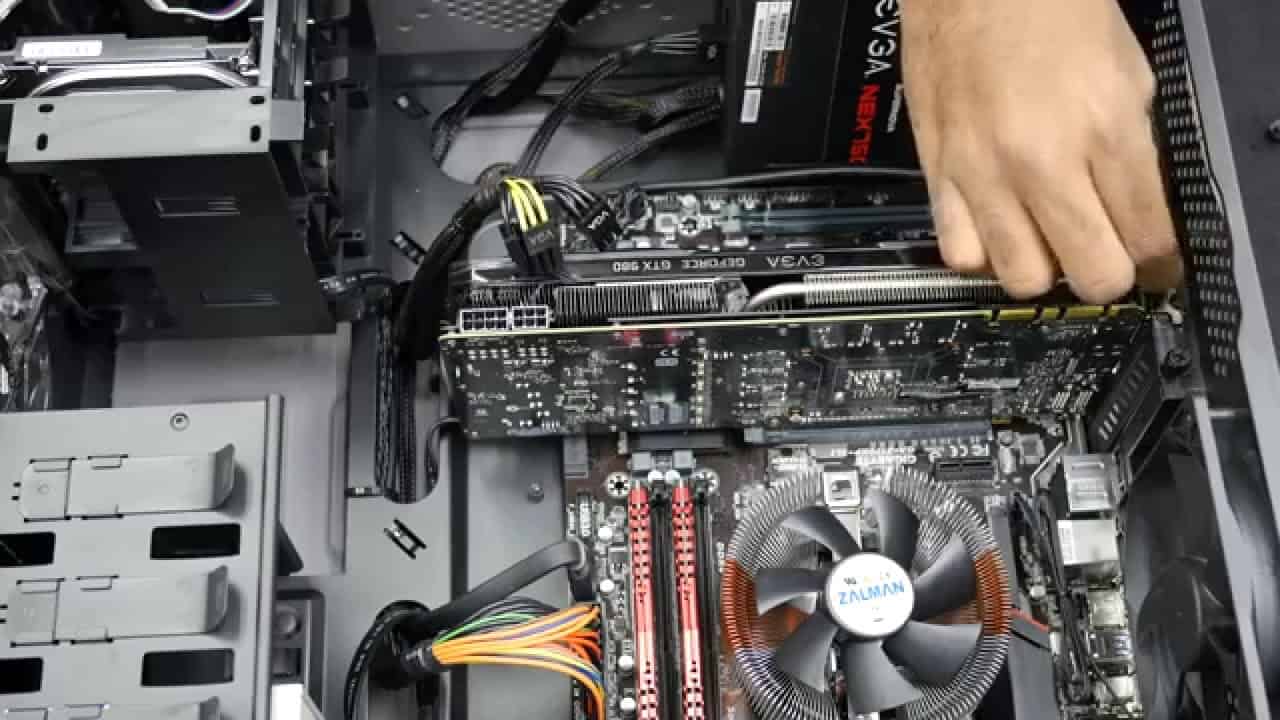
Take it out carefully and take help of tutorials and videos on YouTube to clean up your GPU. Don’t open it fully but just take it out of your computer, use a proper anti-static cloth to clean the connectors and the PCI-e connection point. Check for dust in the fan and fins and if you see any sort of dust, then go ahead and use Canned Air to blow the dust out of your GPU slowly. Make sure the fans don’t spin when you’re cleaning it or it will spoil your GPU.
Install the GPU again and boot your computer. If this was an issue coming up due to a dirty fan or connector or a GPU that’s heating up, clean the GPU will fix it.
Solution #4: Revert any overclocks
A lot of people in the PC community like to overclock their computers which includes overclocking the CPU, the RAM and of course, the GPU. But these overclocks can be very unstable and can prevent a computer from working properly. This is one of the most common errors that overclockers face and it can be fixed with just a revert in the overclock you applied to the GPU.
Most of these overclocks require better cooling solutions, a better voltage to the GPU and more and the effects of an overclock can vary system to system. If you are facing this due to an overclock then reverting it back to the default frequency and voltage of the GPU will help you get rid of the issue right away.
Wrapping it up!
When it comes to a hardware failure, there’s only so much you can do without taking the hardware for RMA. If you have tried everything mentioned above and you’re still facing the error then its clearly the hardware at fault here and in this case, you should send the GPU for RMA if you have a dedicated GPU.
For people who have a laptop or a computer without dedicated graphics adapters, you will have to get the motherboard and the processor RMA’d in order to completely get rid of the issue, once and for all. A lot of tutorials will ask you to disable Windows based features but those features don’t cause any trouble until the hardware itself isn’t working properly.

