The Black Screen with cursor issue has been a constant bug with Windows since forever it seems. The first instance of me facing this was on Windows 7 and this has been carried out to Windows 10 as well. But thankfully, this error actually affects only a rare few people and the root cause of the issue comes up because explorer.exe fails to run at startup.
People mostly see the black screen after the login screen but it can be fixed quite easily. Some fixes are as easy as setting explorer.exe to start with Windows Startup all over again while some require edits in Registry. In this post, we will look at solutions for the Windows 10 Black Screen With Cursor issue so let’s get started.
Table of Contents
Black Screen with Cursor on Windows 10, How to Fix?
Solution #1: Run explorer.exe at startup
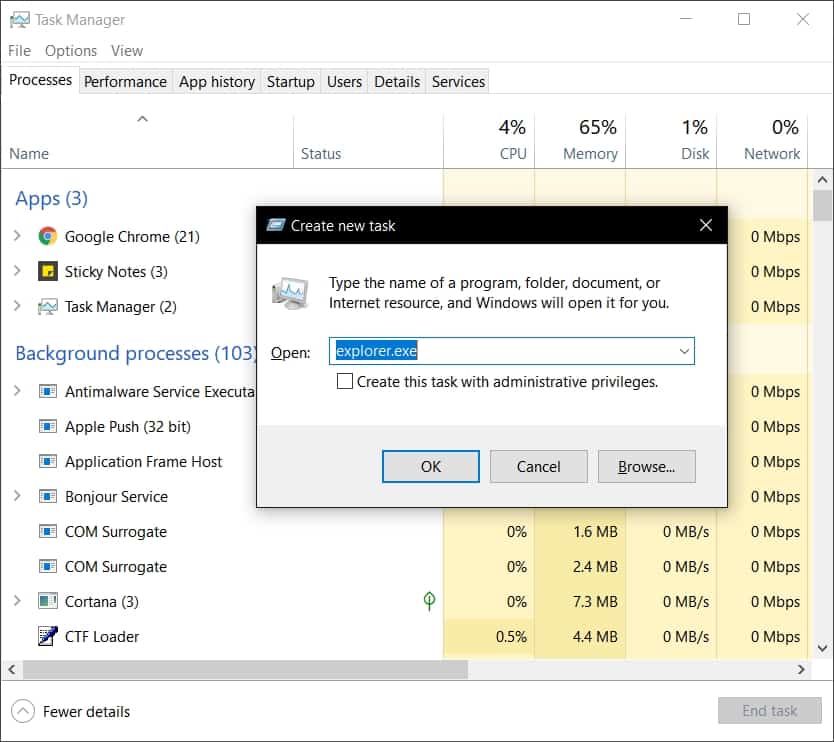
When you log in and see the black screen with the cursor, the simple thing to fix this is to start the Task Manager and run Explorer. To do that, follow the steps below.
- Use the keyboard combination of Ctrl + Shift + Esc to start the Task Manager.
- Now in the Task Manager window, go to New > Run new task.
- You will see a new dialogue where you have to type explorer.exe and press the ENTER button on your keyboard.
As soon as you hit the Enter key, Explorer will be started and you will be able to see the normal Windows 10 user interface. This will work everytime you run a new explorer.exe task but to fix this permanently, follow the solutions below.
Solution #2: Perform an SFC scan
SFC or System File Checker will check for errors in your Windows 10 files and if it finds files with errors, it will fix the files automatically to make sure the system runs better.
- Open the Windows 10 Start Menu and type cmd.
- You will see Command Prompt in the results and then you have to right click on Command Prompt and choose Run as administrator.
- In the command prompt window, type sfc /scannow command and hit the Enter button.
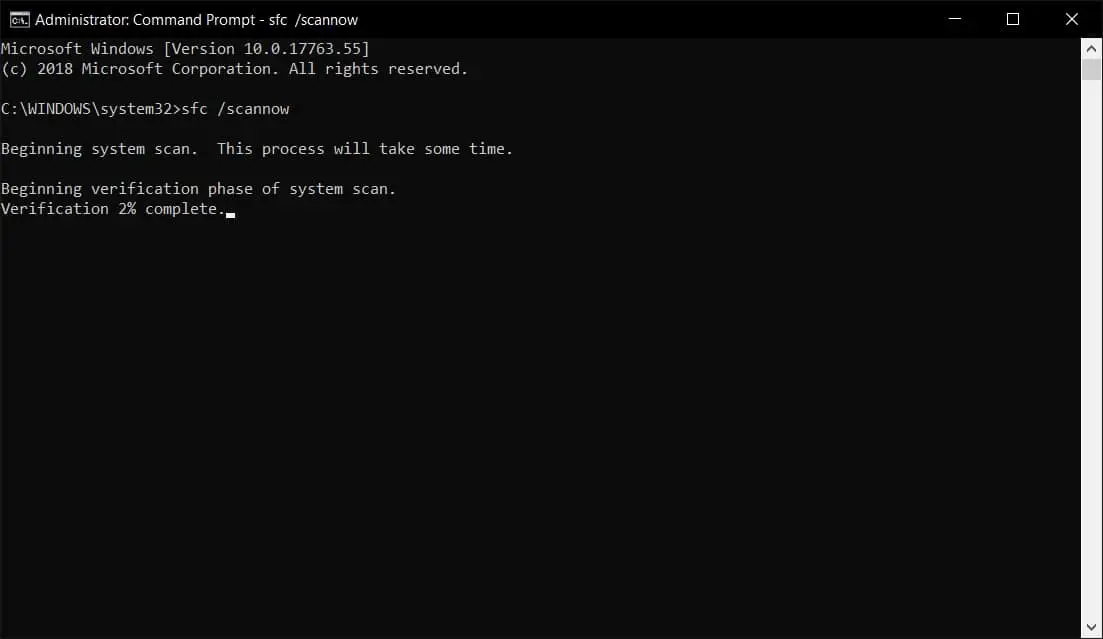
- Let System File Checker scan your system files. Once it finds the corrupted files, it will automatically scan and fix the affected files.
Once this is done, all you need to do is perform a restart on your Windows 10 computer and you will see that the issue will be resolved now. For people who still don’t have this issue fixed, read the solutions listed below and try them as well.
Solution #3: Using Registry Editor
Once you have logged into Windows 10 and you’re still seeing the black screen with the cursor, you need to start the Task Manager and enter the Registry Editor. To do that, follow the steps mentioned below.
- Use the keyboard shortcut for starting Task Manager i.e. Ctrl + Shift + Esc.
- Now in the Task Manager window, go to New > Run new task.
- You will see a new dialogue where you have to type regedit and also check the checkbox that reads Create this task with administrative privileges.
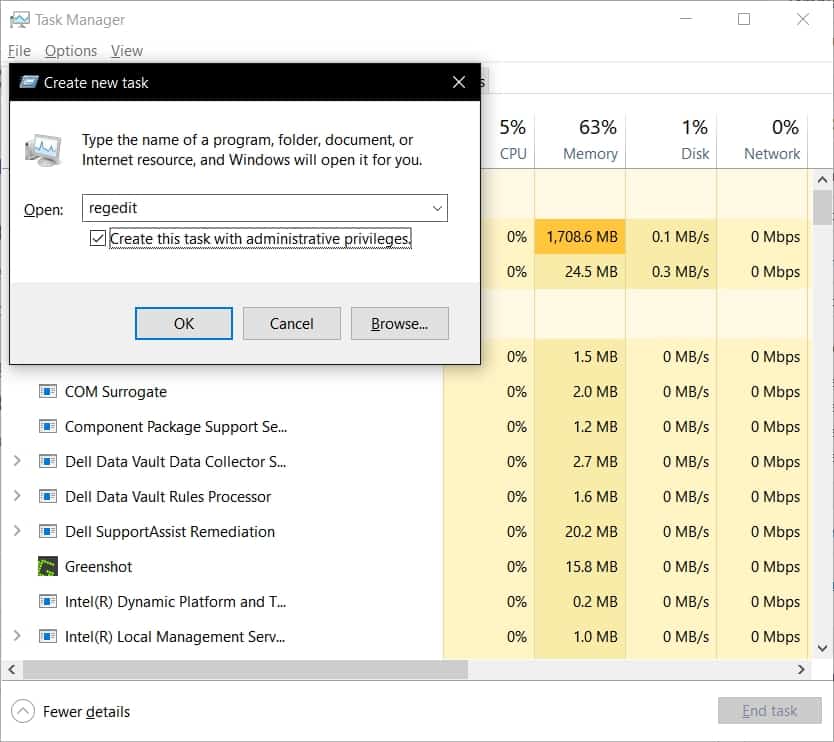
- Press the ENTER button on your keyboard and this will open the Registry Editor.
- In this window, navigate to HKEY_LOCAL_MACHINESOFTWAREMicrosoftWindows NTCurrentVersionWinlogon.
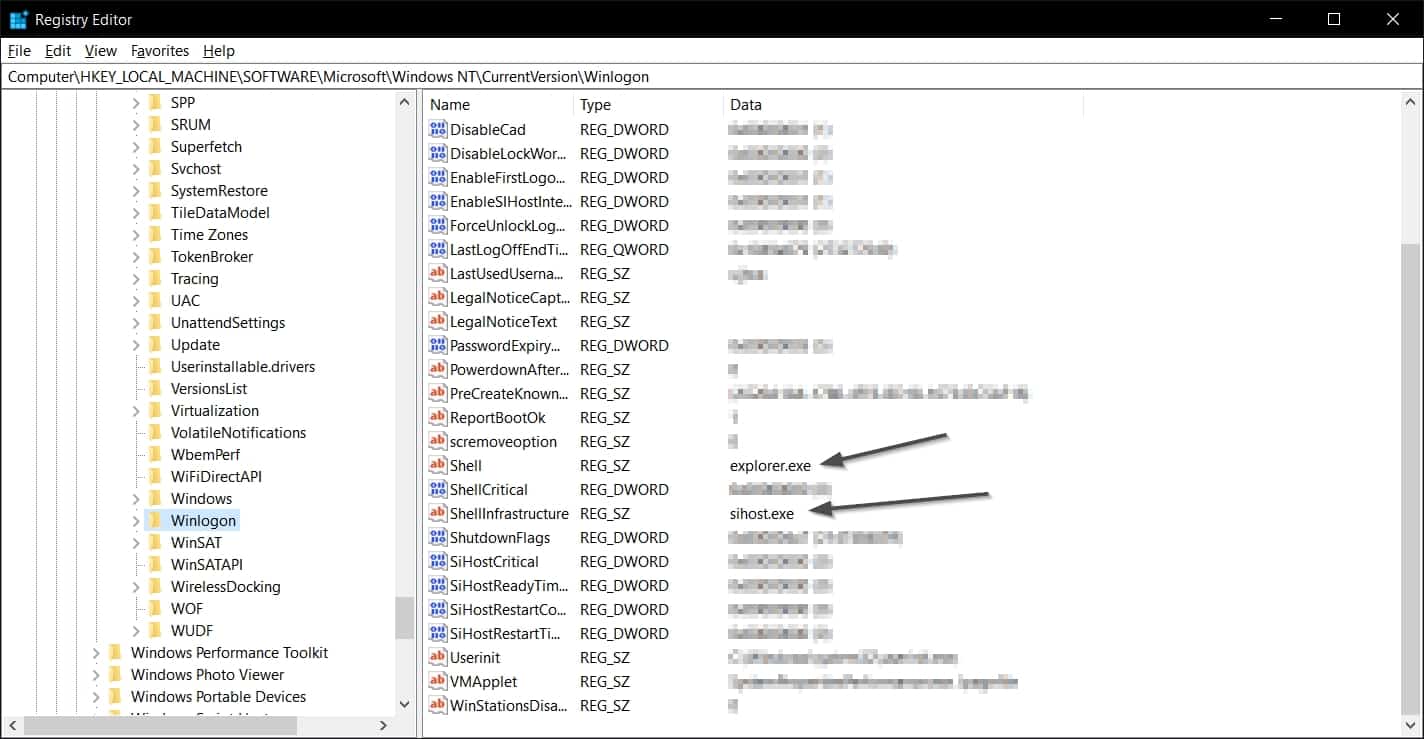
- In this window, look for an entry named Shell and make sure that the Data for this entry is explorer.exe as shown in the image above.
If the data is anything other than explorer.exe then make sure you change it back by double-clicking the option and entering explorer.exe. Once this is done, all you need to do is reboot your computer and Windows 10 will now boot with a proper user interface like it should.
Solution #4: Use System Restore to Restore your computer
System Restore has an image of how the system on the computer was on a saved restore point. You can easily revert to a previous restore point and this will fix the black screen with cursor issue.
- Open the Task Manager by using the keyboard shortcut Ctrl + Shift + Esc for starting Task Manager.
- Now in the Task Manager window, go to New > Run new task.
- You will see a new dialogue where you have to type rstrui.exe and also check the checkbox that reads Create this task with administrative privileges.
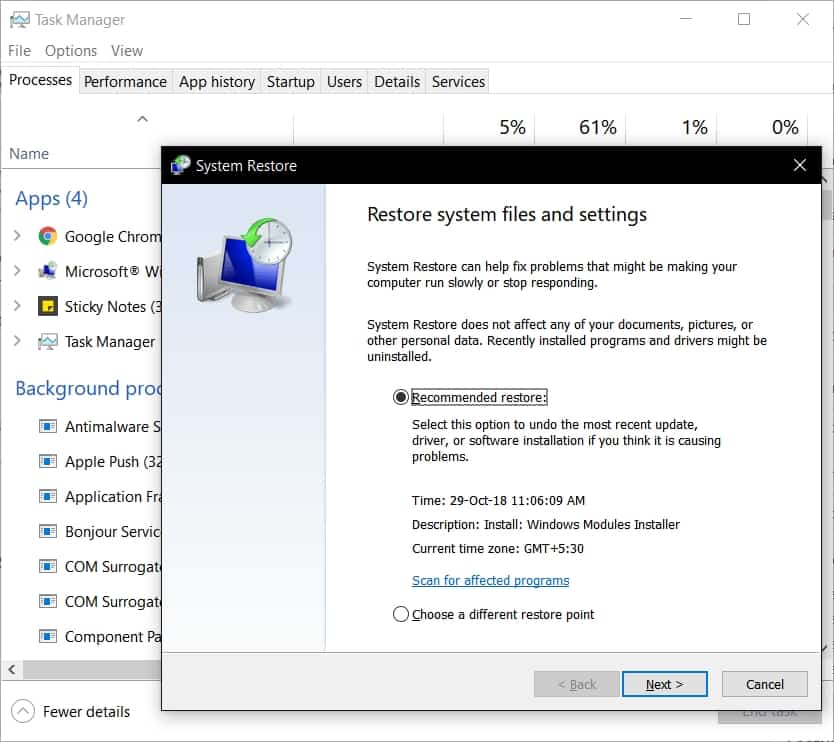
- In this window, check the Recommended Restore option to see what will be restored and how old the restore actually is.
- You can alternatively choose a different restore point as per your choice.
Once you go through System Restore, you will see that the system will be rolled back to the restore point you chose. Once it is done, just restart your computer and the issue will be gone.
When all else fails, Rollback to the previous version of Windows 10
This will only work for people who have just updated their Windows 10 computer to a new version or a newer build. All you need to do is press Ctrl+ALT+DEL which will bring up the options screen. On this screen, find the power button and then keep the SHIFT key on your keyboard pressed and click the power button. Click on the Restart option and while still keeping the SHIFT key pressed, confirm the restart.
You will see a new screen with a bunch of options. On this screen, click on Advanced Option and on the next screen you will see an option that reads Go back to the previous version. When you click on this option, you will be asked to login to your administrator account and go through the process of rolling back. Once this is done, your computer will be rolled back to the version of Windows 10 that was previously installed.
Keep in mind that this will work only for those people who have updated their Windows 10 computer and haven’t deleted the old files from the previous version.

