
Wondering how to take screenshot on your Lenovo laptop? continue reading to learn easiest ways to take screenshots on Lenovo laptop.
Lenovo offers a plethora of models equipped with different types of keyboards. Yes, the key arrangements in Lenovo laptops are slightly different from other Windows laptops. Hence, facing issues while taking screenshots is quite obvious for the users. Starting from the Thinkpad model to the Lenovo Yoga laptop, no matter which one you’re using, there are certain key combinations and third-party applications to help you in taking screenshots.
Here we’ve provided all the details regarding ‘how to take screenshots on Lenovo?’ You’ll get to learn the usage of combination keys as well as tools in order to take perfect screenshots on your Lenovo laptop. So, scroll down now.
Table of Contents
5 Super Easy Methods to Take Screenshot on Lenovo Laptop
Here we’ve discussed the best 5 methods to take screenshots on Lenovo laptops. Have a look and follow one as per your requirements.
Method 1: PrtSc Keyboard Shortcut to Capture the Screenshot
In this method, you’ll learn how to take a screenshot of the whole screen on a Lenovo laptop. It will involve your keyboard and the Paint. Follow the steps now.
Step 1: First, press the PrtSc button on your keyboard
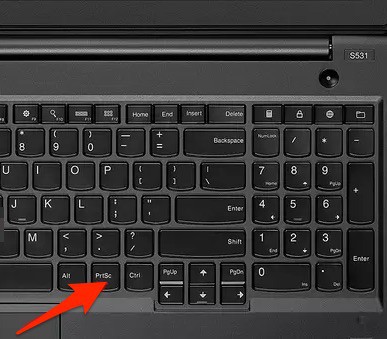
Step 2: Next, the whole screen will be captured and copied on your keyboard
Step 3: After that, hit the Windows button and type in Paint in the search box
Step 4: Then, choose Paint from the search results and open it
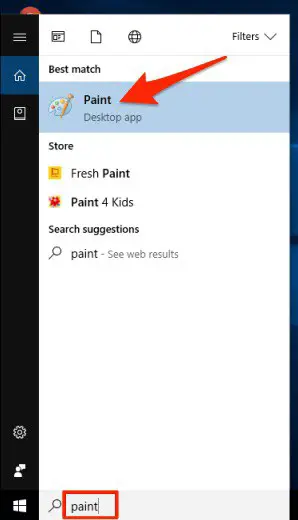
Step 5: Now press Ctrl + V to paste the copied image to Paint
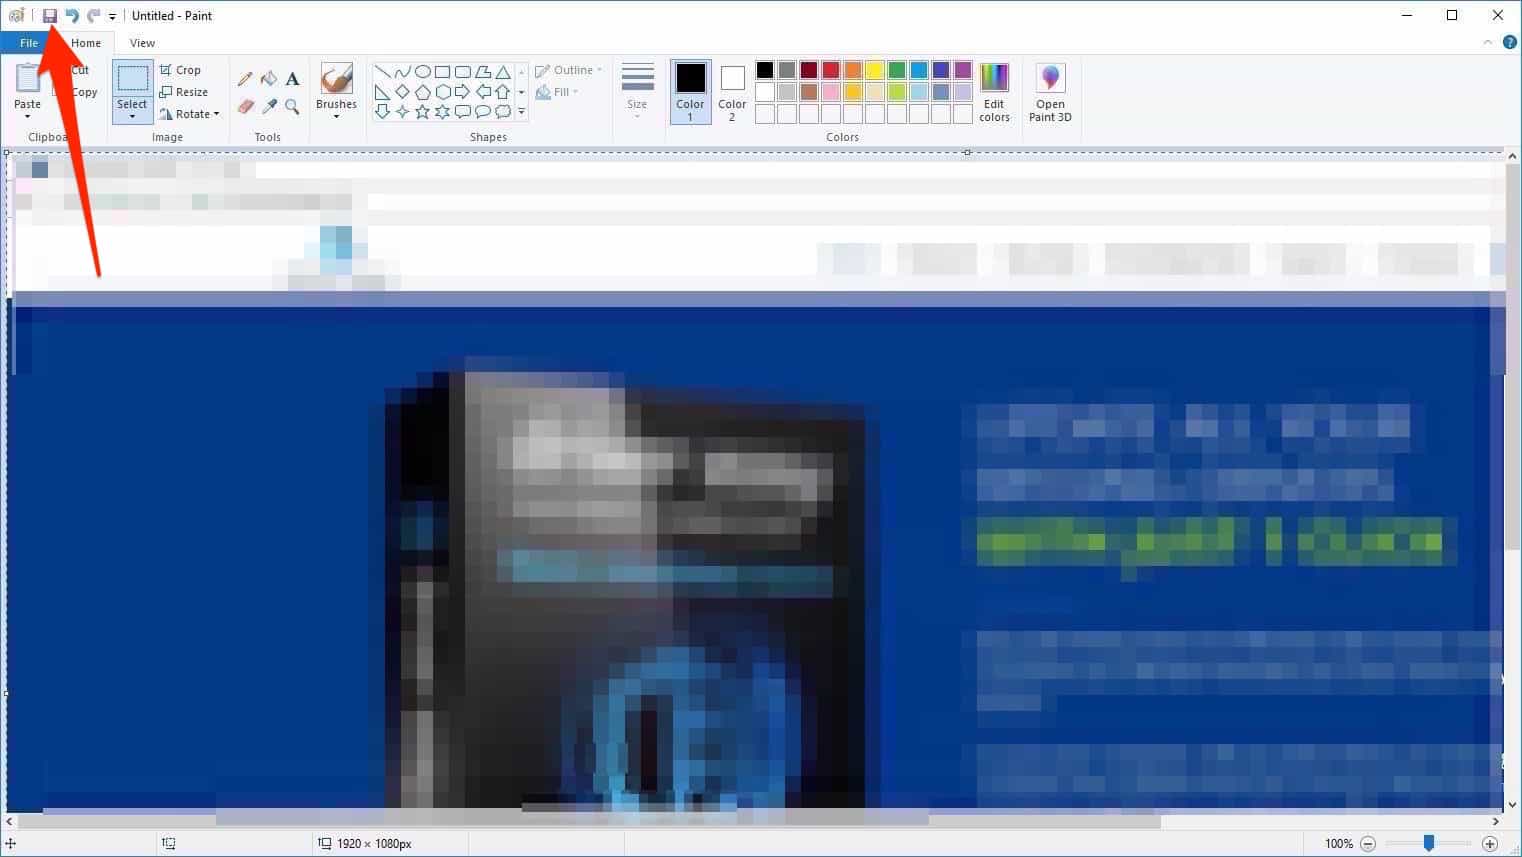
Step 6: Finally, hit Ctrl + S to save the screenshot and give it a proper name to locate easily.
If you think this method is a bit time-consuming, check out the next one to know how to take a screenshot on a Lenovo laptop.
Method 2: Windows Logo + PrtSc to Capture Selected Windows Screen screenshot
Consider this method as an alternative to the first one. Here you can directly access the screenshot without saving through paint. Here is how to do so.
Step 1: First, press the Windows logo key and the PrtSc button at the same time to capture the whole screen
Step 2: Next, go to this location- C:\Users\[Your Name]\Pictures\Screenshots
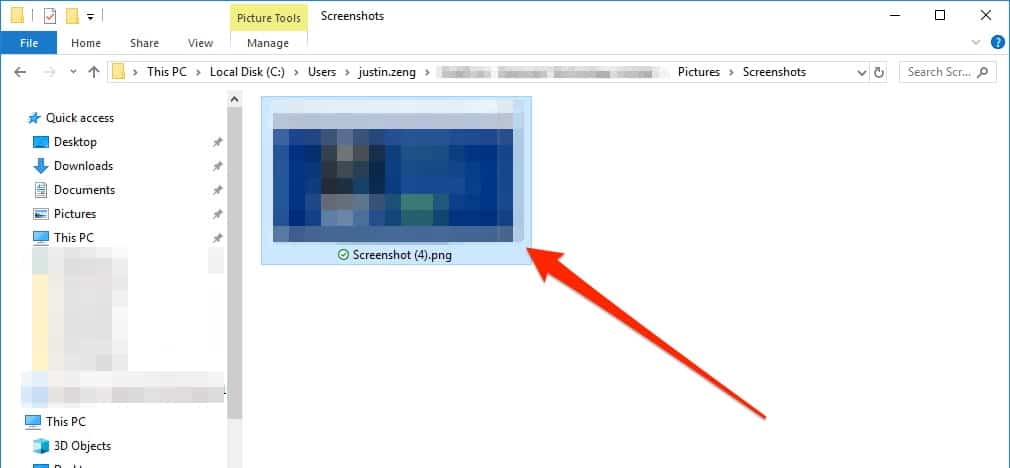
Step 3: Here, you need to view the latest one to get your last taken screenshot.
Note: Alternatively, you can paste the screenshots taken using these combinations on Paint as well if you find that method convenient.
Now that you know how to take a screenshot of the whole screen on a Lenovo laptop let’s learn how to capture an active window.
Method 3: Press Alt + PrtSc to Capture the Active Window
This method explains how to take screenshots of an active window on a Lenovo laptop. It also involves the Paint program, but the key combination is different. Take a look.
Step 1: Press the Alt + PrtSc buttons at the same time to capture your currently active window
Note: If you just want to try this method and haven’t opened any window yet, click on the empty space of your desktop to turn it into the active window, then press Alt + PrtSc.
Step 2: Now, the screenshot will be copied on your keyboard
Step 3: Press the Windows logo key and type Paint in the search box

Step 4: Now click on the top result
Step 5: When in Paint, press Ctrl + V on your keyboard to paste the screenshot
Step 6: Finally, press Ctrl + S to save it.
There is no alternative to this method for capturing an active window until you’re using any software. Let’s learn how to take a custom screenshot now.
Method 4: Press Windows Key + Shift + S to Take a Custom Screenshot
If your Lenovo laptop is running Windows 10 OS version 1809 or newer than that, you can easily take a custom screenshot using the in-built Snip & Skitch application of Windows 10. Here is how to do that.
Step 1: Press the Windows logo key + Shift + S button at the same time in order to open the snipping toolbar
![]()
Step 2: Now, there will be 3 options- Rectangular, Freeform, and Fullscreen
Step 3: Choose the one you need and click and drag the area you want to capture
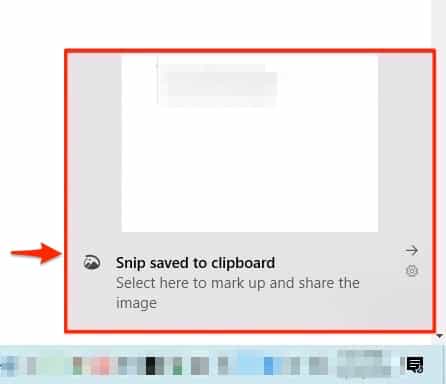
Step 4: Once done, the snipped area will be saved on your clipboard; paste it wherever you want to.
Method 5: Use Snipping Tool to Take Custom Screenshots
Here is another in-built software of Windows- Snipping Tool, which you can use to capture custom-shaped screens. This software also allows you to highlight, mark, or write at your preferred positions on the screenshot. Here are the steps to take a custom screenshot using the Snipping Tool on your Lenovo laptop.
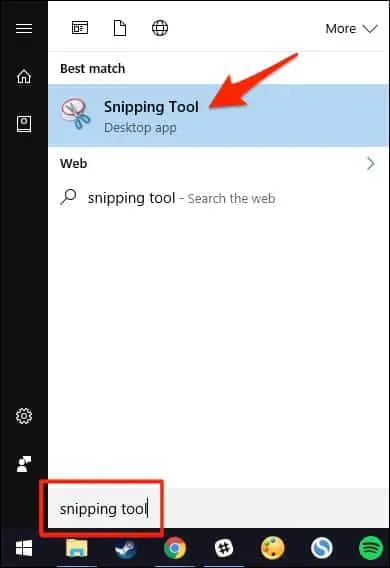
Step 1: First, press the Windows logo key and type in Snip
Step 2: Next, click on the top result and open Snipping Tool
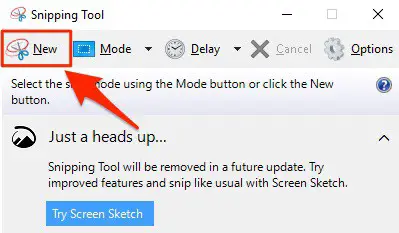
Step 3: In the Snipping Tool window, click on New
Step 4: Now choose a corner of the whole screenshot area, click and drag your mouse to snip the whole place
Step 5: Once done, your screenshot will be displayed on a pop-up window
Step 6: Finally, click on the Save icon and give a proper name to save it.
All of these methods can help you in taking screenshots on Lenovo laptops. If you want to mark the screenshots for professional use, you can download software like Snagit or Screenpresso on your Lenovo laptop. That’s all!

