Discord is the voice and text chat solution that online gamers prefer these days. The reason behind this is that it is so incredibly customizable and has so many different options and settings that users can do almost anything they want in the app itself. From regular voice communication all the way upto live streaming services, Discord has it all. All the necessary features are available for free for all the users.
Today, we will guide you on how to Create, Maintain or Delete a particular server in Discord. Although discord might seem a little complicated, it is not. All the steps are explained thoroughly for your ease in this article. Make sure you follow all the steps carefully, and you will have your own server in no time.
You can either download the official version of discord app from https://discordapp.com/download, or you can use the web overlay of discord. This tutorial will be feasible for both platforms, nonetheless.
Table of Contents
How to Create A Server in Discord?
If you have previously noticed in the app, you require a server if you want to communicate with a group of friends regularly. These servers can be created for free and manageable by the admin as well as moderators. Each server can contain various voice channels as well as text channels so that the discussions topics can be differentiated easily.
To create your own server, follow the steps provided below:
- The very first step would be signing up for a discord account. You can use your facebook or google account, or you can just enter the required data to create a free account on discord.
- After that, you will have access to the discord interface. In here, you need to locate the (+) sign in the lower-left corner and click on it.
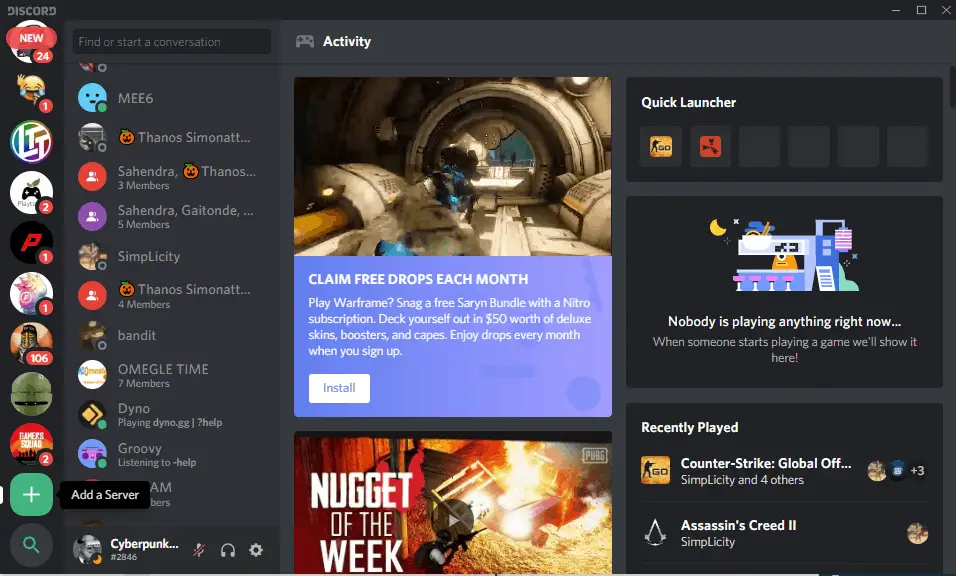
- After that, a window will pop up, asking you whether you would like to create a new server or join an existing one. Click on “Create a server” option to proceed further.
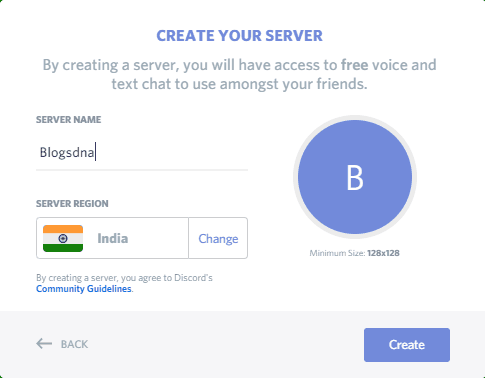
- Now, a “create your server” window will appear. Here, you have to put down the server name as well as mention the server region.
- If your region is not detected automatically, select the region manually before moving ahead. This is crucial for further communication process in the server.
- Once you have selected an appropriate name for your server, click on the “Create” button. You can also add a profile image for the server, but that is not mandatory.
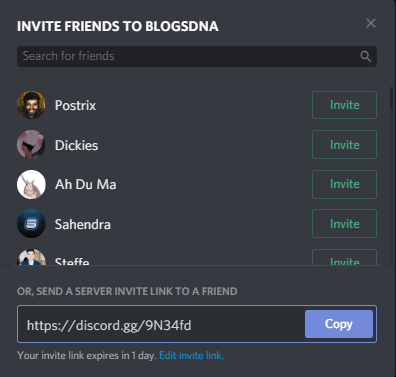
- As soon as you click on the create button, your server will be built. After this, you will be provided with an option to add people in your server. There are two ways to do so. You can copy the invite link and forward it to your contacts, or you can manually invite your existing discord friends. You can later access this window by clicking the “Invite People” button in your server.
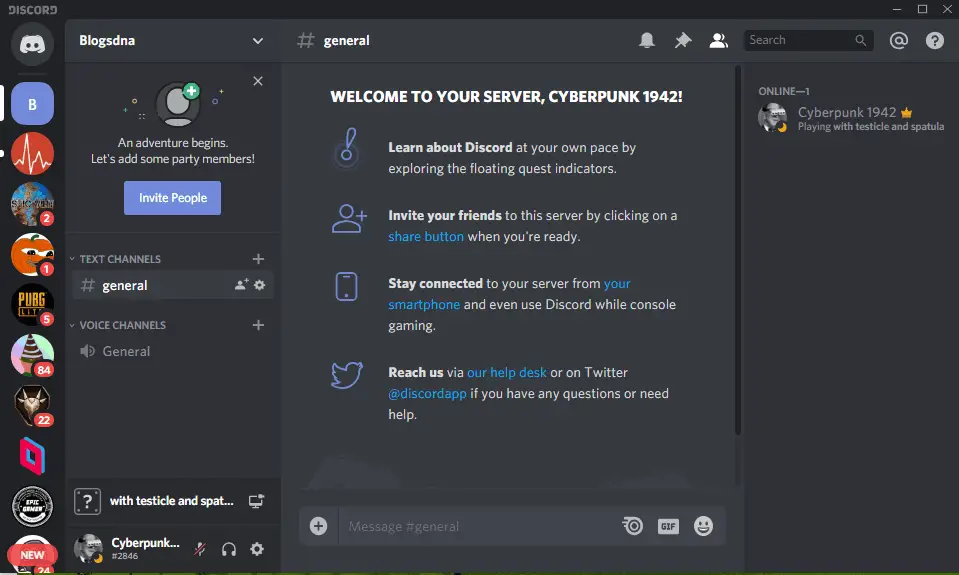
- By default, there will be 1 text channel and 1 voice channel in your discord server. You can right-click on the right-side area and select “Create Channel” to create more voice or text channels.
- Only small case alphabets are allowed in the channel name so keep that in mind while naming the channels.
- You can also create various categories via the same menu to correctly classify your chats.
- That’s it. You have successfully created your own server in discord.
Guide to fix Discord no route error and Discord not connecting.
How to Manage a Discord server?
Creating a server is an easy part compared to what comes next – Management of the server. The hard part of this is that (especially for servers with a large number of users) assigning appropriate permissions to people. Discord has thirteen agreements at the server level. For example, the ability to deny someone or have administrator privileges. After that, there are Nine text permissions (for example, the ability to send messages or add text links) and seven voice permissions (for example, the ability to speak on the server or have a voice should be louder than others on command). Each of these permissions is a binary choice, so there are 536,870,912 possible combinations of permissions. Obviously, assigning each of these permissions individually would be tedious, but what if there are hundreds or even thousands of users on the server? That would be an impossible task. Hence, we are here to guide you on how you can manage the server efficiently.
Here is the list of best music bots for Discord.
What is a “role” in discord?
a “role” is a specific set of permissions assigned to a particular account. For example, there is a default role, “@everyone,” which provides a wide range of necessary permissions, such as chatting on the server and reading messages but without any administrative authority. The server administrator can create a role called “Moderator”, which will add the ability to disable or ban other users. Users can be assigned multiple roles, and they always have the most significant combination of role permissions; that is, those with @everyone and Moderator roles will have all @everyone privileges plus Moderator privileges. Discord has a total of 29 permissions, divided into general, text, and voice permissions.
General Permissions
Following permissions falls under general permissions category:
- Administrator – the administrator provides all the authorities that exist on the server. This is clearly risky permission to give this permission to unknown people.
- View audit log – this permission allows the user to read server audit logs.
- Server management – this permission allows the user to change the server name or move it to another region.
- Role management – this permission allows the user to create new roles and edit roles for which role management permission is not enabled.
- Channel management – this permission allows the user to create, edit and delete channels on the server.
- Kick Members – This permission allows the user to expel members from the server.
- Ban Members – This permission allows the user to ban members from the server.
- Create an instant invitation – this permission allows the user to invite other users to the server.
- Change nickname – this permission allows the user to change his nickname.
- Alias management – this permission allows the user to change the aliases of other users.
- Emoticon management – this permission allows the user to manage emoticons on the server.
- Webhooks management – this permission allows the user to create, edit and delete webhooks.
- Read Text Channels See Voice Channels – This permission allows the user to read message channels.
Text Permissions
Following permissions falls under text permissions category:
- Send messages – this permission allows the user to send messages in a text chat.
- Send TTS Messages – This permission allows the user to send text messages.
- Message Management – This permission allows the user to delete or attach messages from other users.
- Insert links – this permission allows the user to insert hyperlinks into the chat.
- Attach files – this permission allows the user to attach files in the chat.
- Read message history – this permission allows the user to scroll back and access previous messages.
- Mention everyone – this permission allows the user to activate push notifications for channel members.
- Use external emojis – this permission allows users to use emoticons from other servers.
- Add reactions – this permission allows the user to add new responses to the message.
Voice Permissions
Following permissions falls under voice permissions category:
- Connect – this permission allows the user to connect (i.e. listen) to the voice channel.
- Speak – This permission allows the user to speak on the voice channel.
- Mute Members – This permission allows the user to disable another user’s ability to speak.
- Deafen Members – This permission allows the user to disable the ability of another user to hear on the channel.
- Move participants – this permission allows the user to move other participants from one channel to another.
- Use voice activity – this permission allows the user to speak without using Push-to-Talk.
- Priority speaker – this permission allows the user to lower the volume of other users when he says that their words are louder on the channel.
Working solutions to fix Discord not picking up mic.
How to Set up Roles in Discord?
Setting up your roles correctly is the key to managing your users on the Discord server. It is recommended that you create essential roles before you even start inviting people to the server. You can always come back and add new parts or reconfigure existing roles when you are in business.
To set up the roles, follow the steps given below:
- Log in to Discord and access your server.
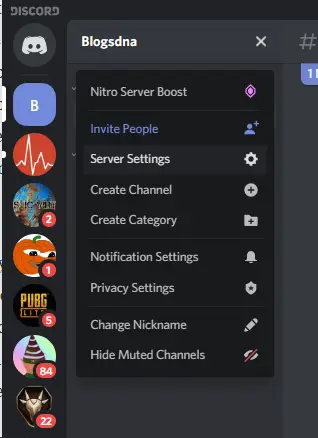
- Select the small arrow in the drop-down list to the right of the server name and click “Server Settings.”
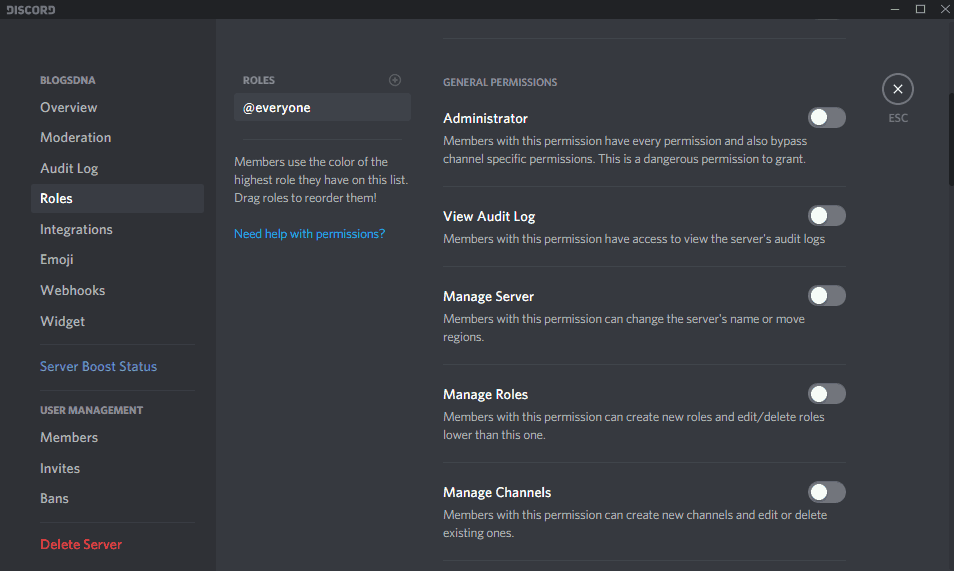
- Click Roles in the left pane. You should see one role called @everyone.
- Click the tiny (+) icon at the top of the centre panel to add a role.
- Name the role descriptive and assign a color to it (colours are important because they inform users about each other’s roles).
- Check out all 28 permissions. Select only those that you want to associate with this role.
- Select Save Changes to finalise the roles.
- Repeat the process for each new role that you want to create.
Assigning different permission levels to different roles allows you to create a hierarchy according to trust. You can assign lower tasks to beginners and higher roles with broader powers for those you know well.
How to Manage Roles?
Managing roles in Discord is the same as creating them. You can add more roles if you need and change permissions for each of them. Depending on how you want to start your server, you can create only two roles: admin and @everyone. As your community grows, you can add others. Since roles must be added individually for each user, of course, the most efficient use of your time is that the @everyone role has as many political decisions of your server as possible. So that users have the necessary permissions by default.
You may have noticed the left column on the Roles page, which displays the names of all the roles that you created. The user names on the server will display the color of the highest role assigned to the user. This makes management even easier: users can quickly determine who is the moderator, administrator, etc. On the server.
How to Delete a Server?
If you wish to delete your server, you can follow the guide provided below. But beware that this is an irreversible action. Once the server is removed, you can never get it back or any data regarding the server.
Follow the steps given below to delete the server:
- Click on the down arrow on the right side of the server title and select server settings option from the drop-down menu.
- After that, select the “Delete Server” option from the left-hand side menu.
- Now, a window will appear where you have to confirm the action. Simply type the name of the server as it is and click on “Delete server” button.
- Now, the server will be deleted permanently from discord.

