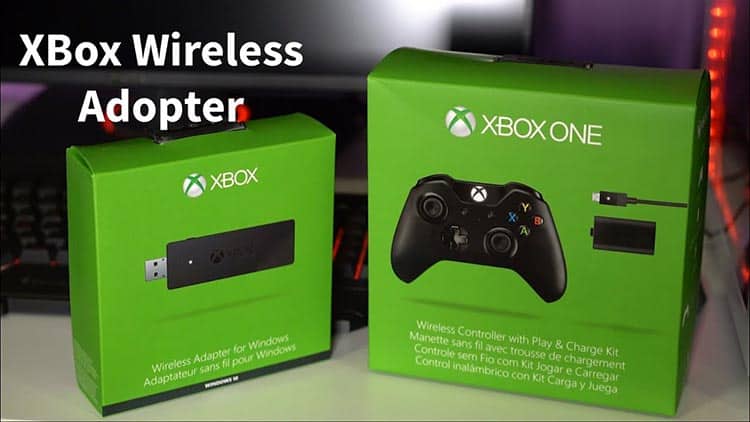
is your Xbox wireless adapter not working? If yes, you are not the only one, there are many users who’re dealing with the same. We researched through different community platforms and found that the connectivity issues with Xbox adapters are a common one. To help you with fixing, here are some troubleshooting steps to fix Xbox wireless adapter.
Table of Contents
How to Fix Xbox Wireless Adapter Not Working
Your Windows 10 operating system has the drivers for the Xbox wireless adapter embedded within it. When you insert the wireless adapter in the USB port, it should get installed automatically. But if the driver fails to detect or run the device Xbox wireless Adapter not working issue may arise.
Besides that, you may face a problem if your device is not connected with the internet or if the USB port on your computer is faulty. Not only that, but an outdated operating system can also be the culprit behind the problem. So, now you all know the reasons behind the Xbox wireless adapter not working error. Wondering, how to fix them?
Before proceeding with different solutions provided herein, make sure you have verified the following things,
Check the Internet
Check the internet connection and make sure your Windows 10 PC is connected with the internet.
Restart Your Computer
The Xbox wireless adapter not working problem can be a temporary issue you are facing. It can happen because of the inability of the driver’s software to run the device. Often or not, for many users, the problem gets fixed after restarting the computer. So, you must try in your case as well.
Check the USB Ports
Try inserting the Wireless in some other USB port that is working. If you have another USB device connected to your computer, which is in working condition, consider removing that for once and inserting the wireless adapter to that specific USB port. If the Xbox wireless adapter does not show any connectivity issue now, then you can be sure that the USB port has some issues. But if the problem does not get resolved, proceed through other solutions.
Note: Many users have reported that they specifically face the problem while connecting the adapter to a USB 3.0 port. Therefore, if you are using a slightly older version of the adapter, you can consider connecting it to a USB 2.0 port available on your PC.
1. Update Windows 10 Computer
Is your Windows 10 operating system outdated? If it’s been some time that you have not installed the Windows 10 update, then you may face the Xbox wireless adapter connectivity error. Go through the following steps and update your Windows 10 OS.
Step 1: At first, press the Windows logo key from your computer keyboard
Step 2: Then, open Windows Settings by clicking on the gear icon at the left corner
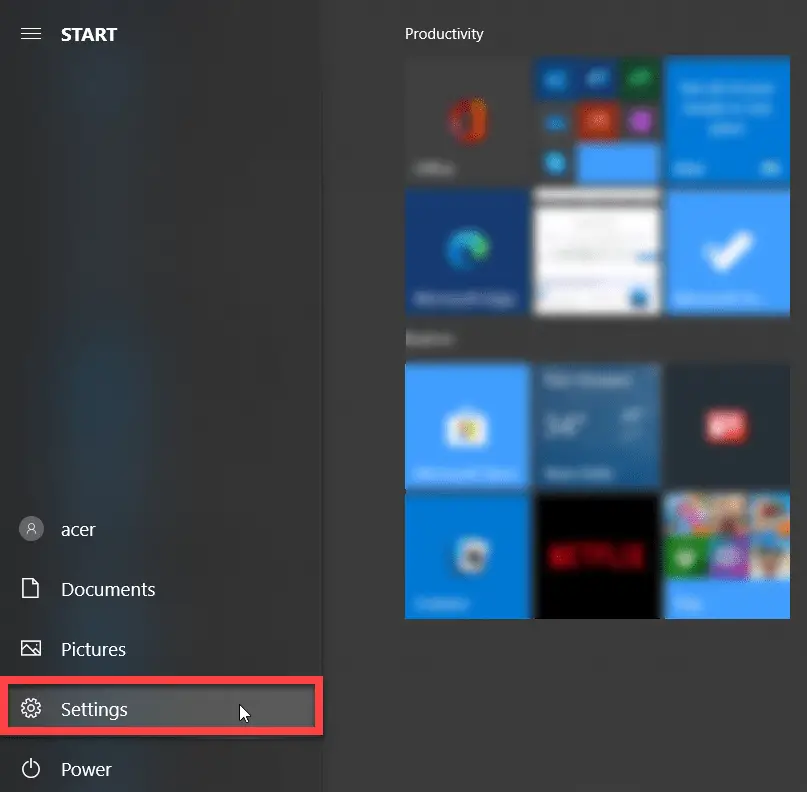
Step 3: Now, from the Windows Settings window, select Update & Security
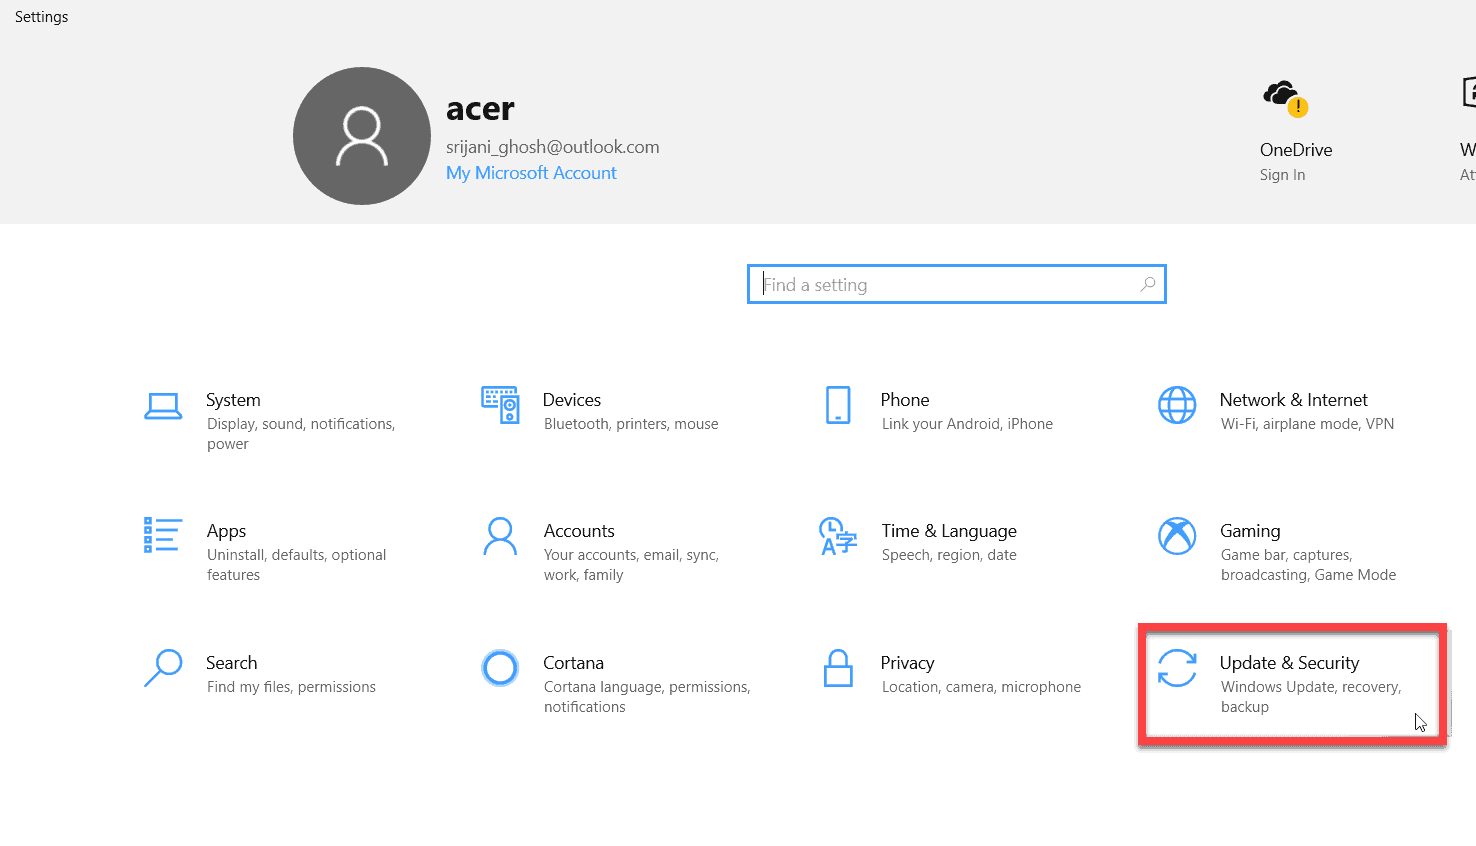
Step 4: From the left bar, click on the Windows Update tab
Step 5: Now, click on the ‘Check for updates‘ button. Your operating system will automatically check and download the update file
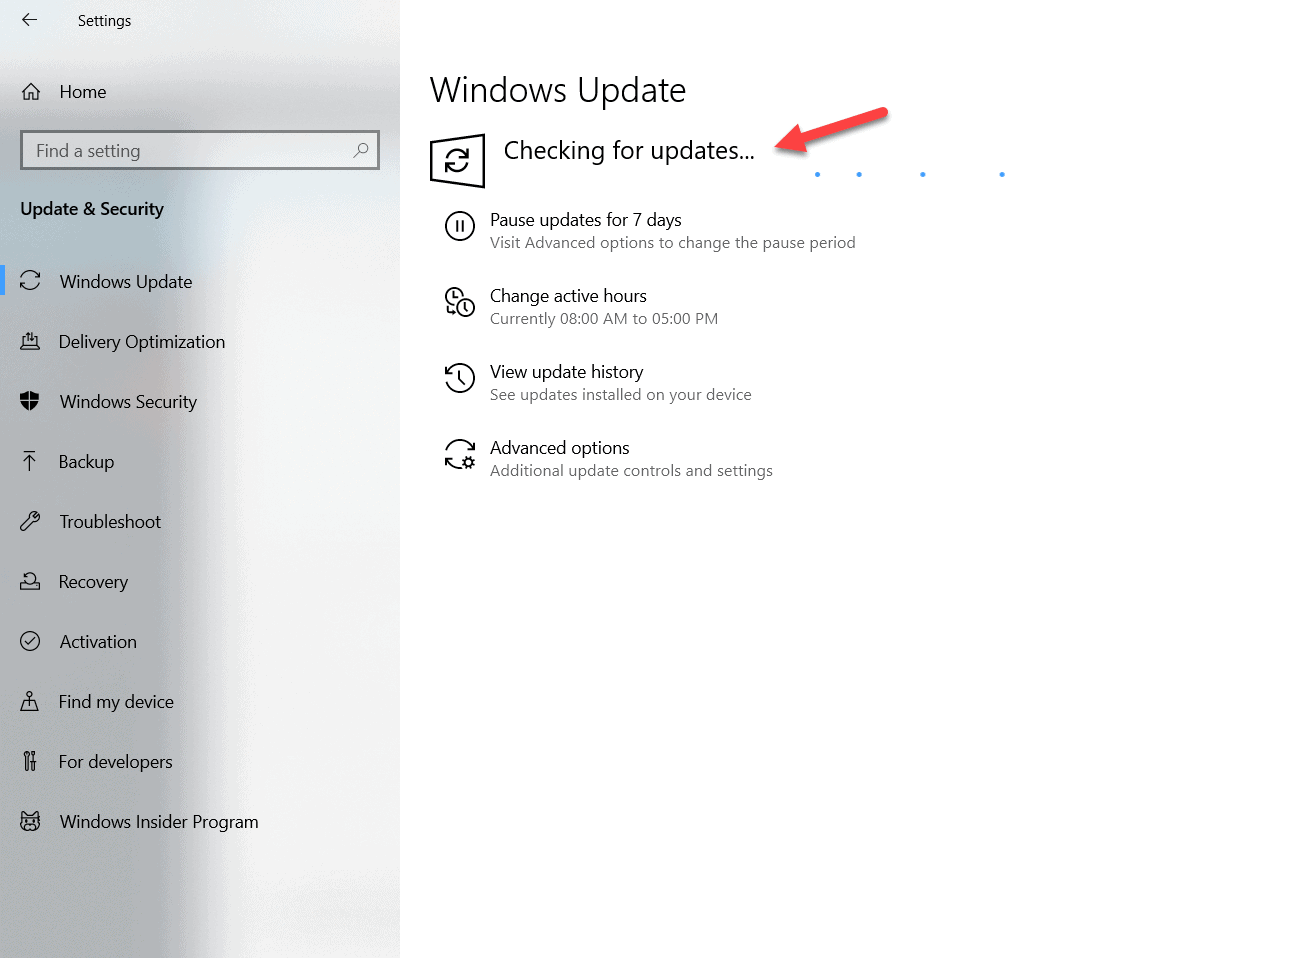
Step 6: Wait until your operating system downloads the update files
Step 7: Finally, as the downloading process completes, install the update on your PC
If updating the Windows Operating system does not fix the Xbox wireless adapter not working error on your computer, then you must have to proceed with some advanced troubleshooting methods. Scroll through the rest of the part of the article!
2. Install the Latest Xbox Wireless Drivers Manually
If the Xbox wireless adapter driver embedded with your operating system is corrupted or outdated, you will face problems connecting it.
Here in this part of the article, we are going to discuss how you can update the driver of your Xbox wireless adapter through the Device manager manually. Follow the steps below.
Step 1: You need to download the right driver according to your Operating system specifications. So, firstly find out what Windows 10 version you are using 32-bit or 64-bit
Step 2: Now, visit Microsoft’s catalog website. In the website search bar type “Xbox wireless” to search for the drivers. Now from the list of software, download the one you need for your PC
Note: The driver’s file you download from Microsoft’s catalog website can get saved as a Zip file. You need to unzip the file using WinZip or some other software
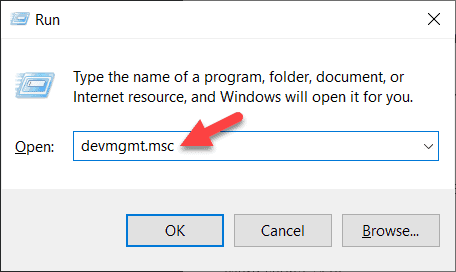
Step 3: Once the driver is gets saved in your computer harddisk press the Windows Logo Key + R open run dialog box
Step 4: As the Run dialog box opens type ‘devmgmt.msc’ and hit the Enter button
Step 5: Now, from the list click expand the Network adapters tab
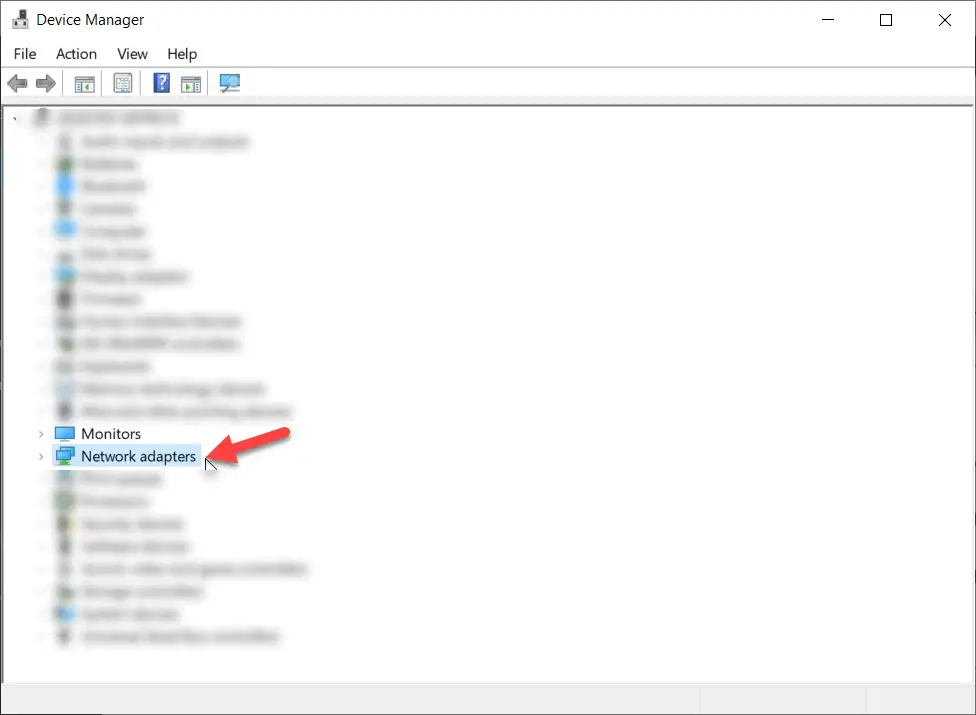
Step 6: Locate your Xbox wireless adapter from the list. The receiver will show an unknown device named as “XBOX ACC”
Step 7: Right-click on the “XBOX ACC” and from the drop-down select the Update driver option
Step 8: As the new pop-up window asks you ‘How do you want to search for drivers?’ select the second option ‘Browse my computer for driver software’
Step 9: Now click on the Browse button and navigate to the location where you have saved the Driver file
Step 10: Wait until the installation completes. Finally, once you get the notification, “Windows has successfully updated your driver software,” click on the Close button below the notification window. Don’t forget to restart your computer to proceed with the changes.
Once you successfully install the latest driver software, your Xbox adapter not working error should get fixed.
So, now you got the resolution, right? Or, there are still some problems left to bother you? Actually, there are many users who face issues with syncing the controller with the adapter.
If your controller doesn’t sync after restarting, fret not! I’m going to give you the right solution for the ‘Xbox controller not syncing after restart’ error.
Firstly let’s learn how to sync your controller with the adapter.
3. Sync Xbox Controller with the Adapter
Once you connect the adapter properly and resolve the Xbox adapter not working error follow the steps below to sync your controller.
- At first, press and hold the Sync button till the receiver start flashing
- Now, as soon as the adapter starts flashing you need to press and hold the Xbox bind controller button till the light starts flashing rapidly.
- Finally, wait for a few seconds. Once the lights on both the adapter and controller stop blinking, it means your controller is properly connected.
Now, coming to the problem in hand, that is- ‘Controller not syncing after restarts.’
Fix: Xbox Controller not Syncing
In most of the cases, users face this problem due to certain issues with the power management settings. However, following the steps below will surely resolve your problem.
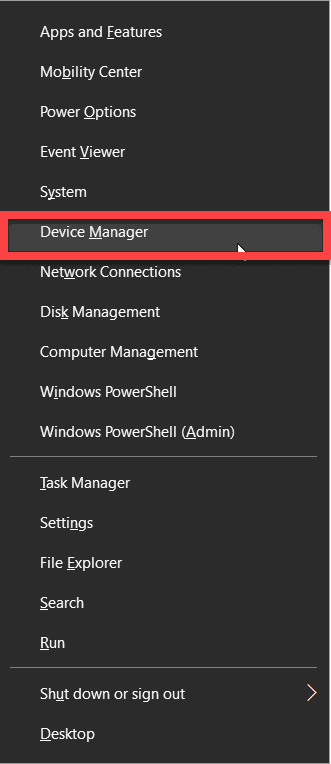
Step 1: At first, press the Windows Logo Key + X
Step 2: Now, from the list click on Windows Device Manager to open Device Manager on your computer
Step 3: Navigate to Network adapters. Click on the tab to expand it
Step 4: Click on Wireless Adapter for Windows button
Step 5: Now, double-click Xbox Wireless Adapter for Windows to open the Properties window
Step 6: Click on the Power Management tab under the Properties window
Step 7: Then, uncheck the box beside ‘Allow the computer turn off this device to save power’ option
Step 8: Finally, click OK below and exit to save the changes
That’s it, guys! We hope, now you can fix all the connectivity issues with your Xbox wireless adapter. As you have successfully fixed the Xbox wireless adapter not working issue, you can peacefully plan the next match day. Let me know specifically which fix did work for you in the comment below. For any other issue on your Windows 10 computer or Xbox controller post your problem in the comment section, we will surely get back to you

