Anyview Cast is the feature of Hisense smart tv which allows user to project the displays of any Smartphones and PC on a TV wirelessly. Although, Anyview cast works flawlessly but there are number of users facing a typical problem, Windows 10 out right fails to connect or cast content using Anyview to the Smart TV. The way different tech involved in this, its very difficult to pin point the exact cause of anyview cast failing for you.
Note: Anyview Cast, Miracast and Screen Mirroring are same exact technology where you can project screen of any device to your SmartTV.
Table of Contents
What is Anyview Cast and How It Works?
Anyview Cast is a feature of Hisense Smart TV which help us to watch the content of our pc or mobile devices on our TV without using any wire. Anyview utilizes wireless connection to cast the content from your Primary devices to your Secondary Display i.e. Smart TV. This is a superior feature overcoming the mess of HDMI cables. It is a great way to cast distal device screen with just an identical internet connection.
How to Fix Cannot Cast From Windows 10 to Smart TV via Anyview cast
-
Turn on Smart TV Anyview Feature:
The first step is to know whether your Smart TV’s inbuilt feature of Anyview Cast is turned on or not. You have to turn it on so that your pc can detect your Smart TV. It is an inbuilt feature of the latest Smart TV which can be turned on very easily by doing the steps below.
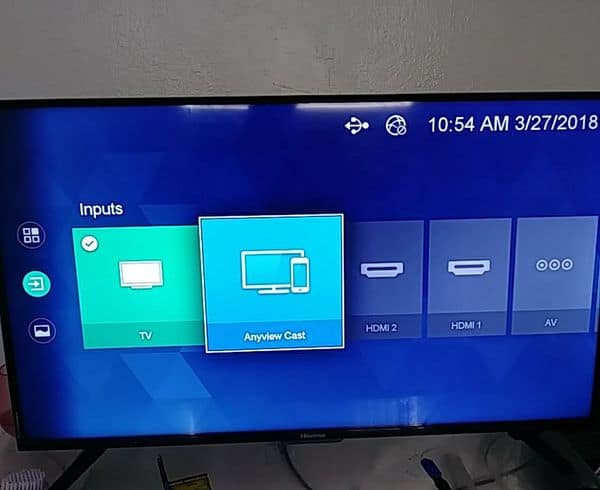
- Pick up your Smart TV’s Remote and click on the button of Input/Source.
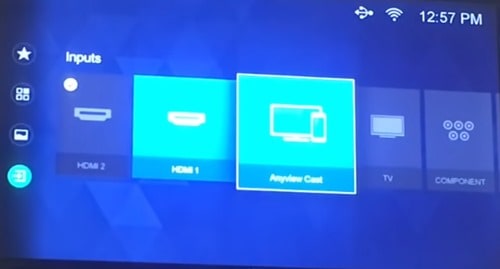
- You will see all the input options of your TV like HDMI1, 2, TV and Anyview etc on your TV screen. Go to Anyview Cast and Press OK on your remote so that it can be turned on.
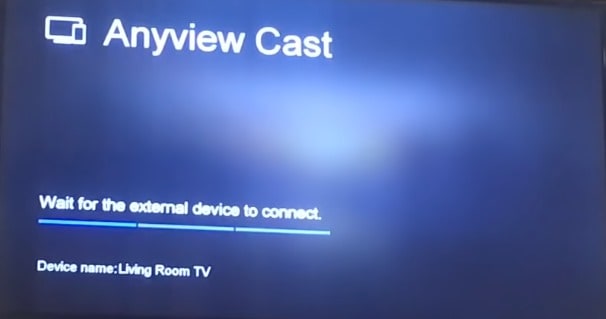
Check your Smart TV user manual to turn on Anyway Cast ‘ON’ if not done by the above guide. Restart your Television once after turning this on. After this feature turned on, proceed to the next step.
-
Check for Display driver updates:
An outdated Driver can be the reason of this problem. Many times we didn’t care about the driver updates because we do not feel the need to do so.
An outdated or corrupted display drivers can cause the certain issues, you will check for latest Display Driver Update in your pc. It is always advised that you must update drivers officially with automatic update option. So, Let’s start with the first step:
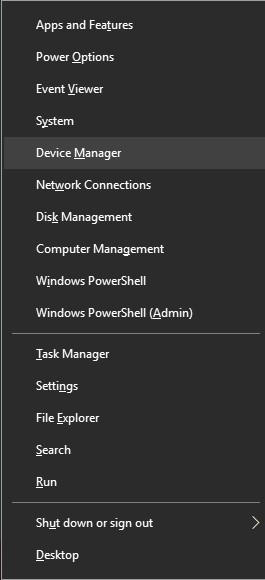
- In the first step, you have to press Windows+X and click on Device Manager. You can also find the device manager by going to the Control Panel.
- Then Click on Display Drivers and Double Click on the dropdown which is your PC Graphics driver (e.g. Intel HD 520 or any Driver)
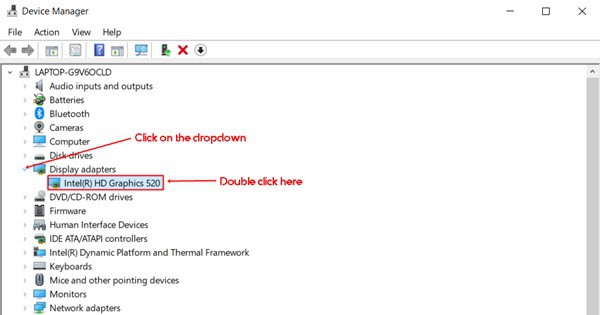
- Now, click on the driver tab where you will get an option of update driver. (as shown in screenshot)
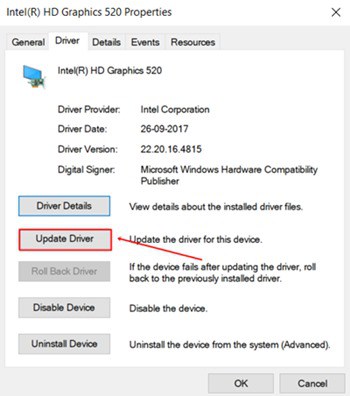
- Now, select Search Automatically for updated driver Software and your system will start searching for drivers online. (Make sure that your pc is connected to the internet)
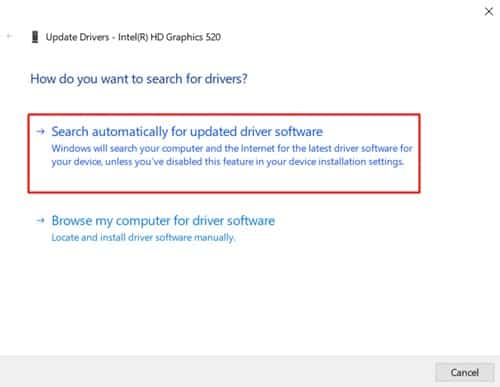
- The updated driver will start downloading and get installed automatically. Don’t forget to restart your pc after installation.
Now you are finished with the system troubleshooting. Maximum problems we face in Windows get solved after updating the ambulatory driver. So, after doing the above troubleshooting you are ready to use screencast service in your pc. Make sure that you did these settings correctly with the help of screenshots.
-
Check your Windows Firewall Settings:
Your System’s Firewall should allow file sharing and casting to another devices. If it is turned off, you must turn it on first. To do this, follow the steps below:
- The First step is to connect your pc with your Wireless Modem.
- Now Press Window + S keyboard shortcut and type Windows Defender Firewall.
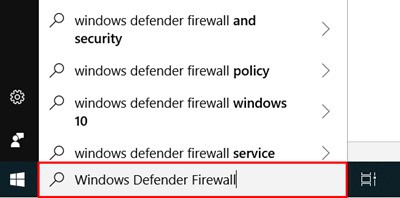
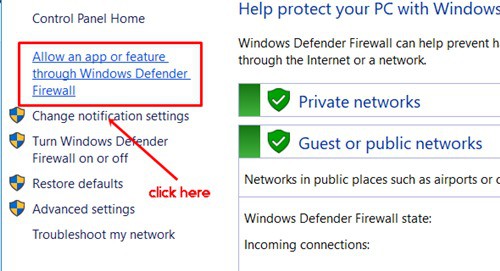
- Windows Firewall will open, Confirm the Connection and click on ‘Allow an app or feature through Windows Defender Firewall’
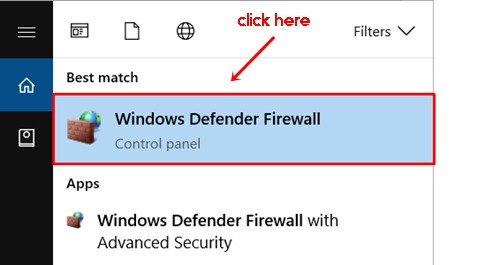
- You will see a list of apps and features which can be turned on or off to be shared through the Firewall.
- Click on Change Settings and Mark File and Printer Sharing as shown in the screenshot.
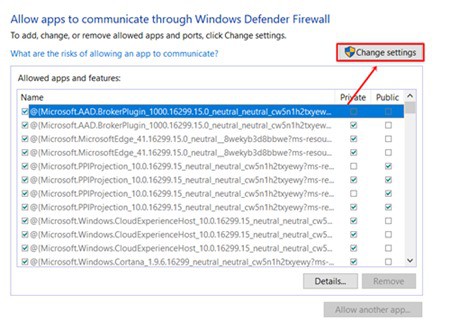
- Click on OK.
-
Connect both devices with the same Internet and Continue:
If your smart tv and Windows 10 device is not in same network then anycast will not work. For this you must make sure all your device are connect to same network. You aren’t sure on how to do it then follow below give steps,
- Your First step is to connect your pc and Smart TV with the same wireless connection i.e. WiFi Modem or a hotspot.
- Now Press Windows+X and click on Settings.
- You will see Windows 10 setting on the next page. Click on Devices (as in the screenshot)
- Now click on Add Bluetooth or other devices.
- Select Wireless Display or dock.
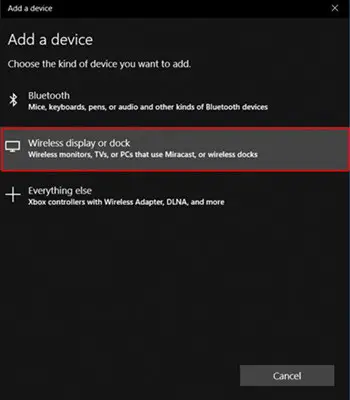
- A scan will be started to search for nearby available wireless displays.
- When you see your TV appearing there. Click on that and it will be connected in a couple of seconds.
-
Change Router and use different one:
If things does not get corrected even after doing the above troubleshooting steps then upgrade your router or change the router. This could be a problem with the router too because the nucleus of the connection is your router. For troubleshooting you can ask your friend or family member to spare their router.
-
Reset Your Smart TV to factory default.
If the problem still persists, try resetting your Smart TV to its factory default. An alternation to the settings can result in Anyview cast failing to connect between Windows and your smart tv. By resetting setting there are higher chances of getting ride of unwanted changes that might be preventing anyview cast to work properly. Contact your TV customer support to do it if you are not familiar with all this.
-
Use Chromecast
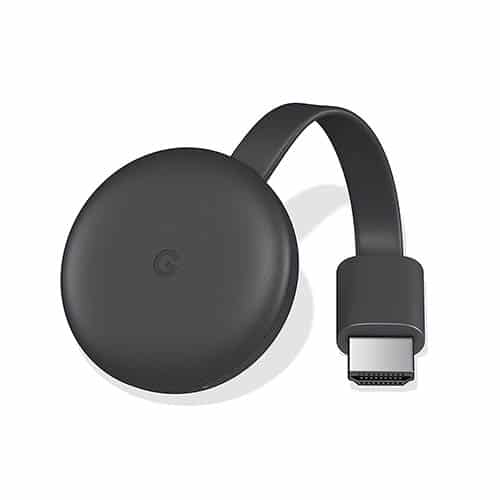
Chromecast is the small hardware device developed by Google to let you stream from any compatible device like Android or iOS smartphone or your Laptop and PC to your TV over HDMI/Micro-USB via WIFI. Using chromecast you can also get plenty of useful apps and the voice feature via Google home.
Final Words:
We hope that above troubleshooting steps will help you in fixing anycast issue. If you are still not able to see your TV while searching for devices then this can be a problem with your Smart TV, in such case it would be better to reach out to your TV manufacturer support.
If the problem doesn’t not get solved after doing all this, then try updating your Windows 10 or do the Windows 10 reset and refresh.


3 thoughts on “How to Fix Windows 10 Cannot Cast to Smart TV [Anyview Cast]”
I just solved this issue on my HF8. You can unfortunately connect your laptop and TV in many ways that doesn’t do screen sharing. Look at the apps on your tv, there will be one called Screen Sharing and you need to open it. On your laptop you need to go to your display options and scroll down to the wireless display heading, below that is the option to search for devices. Your tv should pop up on the new search window that opens when you search for a wireless display. Just select it to connect. I believe it took 2 attempts for my connection to work, I get some screen pulses and it’s a second or two behind the laptop display, haven’t played with options yet.
I had Anyview Stream enabled in the network settings on the TV. The connection is WiFi based not bluetooth based so that causes loads of false leads that do produce a connection but not the one you’re looking for. You might want to remove the TV as a recognized device in the bluetooth options area on your laptop, though it should be fine for it to be recognized as a media server over bluetooth we’re just considering it being recognized as a display being problematic. Best of luck.
great job. this is the really useful link to solve the problem!! thank you
Thanks