Even if you follow all the methods correctly, problems may occur with WoL properly working, especially with PCs running Windows. As the process of enabling WoL is a bit complicated on Windows operating system, most users report issues with it. If you are also facing any issue with WoL on your PC running Windows, try the following methods.
Table of Contents
Fix WOL [Wake on Lan] Not Working on Windows 10
1. Try Updating Your Motherboard’s BIOS
Always keep your Motherboard’s BIOS version updated as new updates fix a lot of glitches, performance, and overclocking issues on unlocked chipset motherboards, bugs, and, most importantly, security vulnerabilities. Follow your motherboard’s manual to update your BIOS if you have a different motherboard.
- Download the latest version of the BIOS from the official webpage of the motherboard.
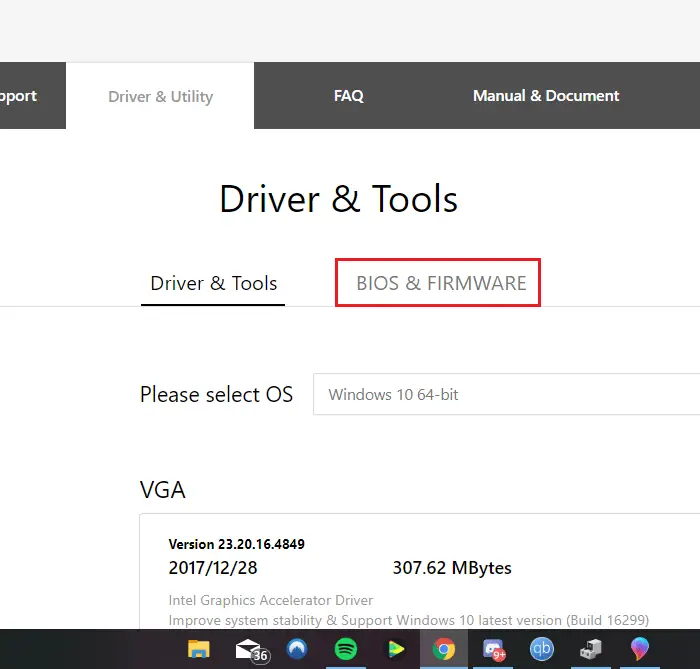
- Extract the BIOS file in the root folder of a USB drive.
- After that, click on the Start button. Then, click on the Power button and select Restart. Your PC should now restart. Keep spamming either the Delete key or the F2 key on your keyboard to get into your PC’s BIOS.
- Once you get in the BIOS, if you see an “EZ Mode” user interface or equivalent in front of you, then press F7 on your keyboard or click on the same to go to the “Advanced Mode.” Also note, some really old BIOS don’t have mouse support. So you might have to use your keyboard exclusively to get around your BIOS.
- In Advanced Mode, click on the Tool tab.
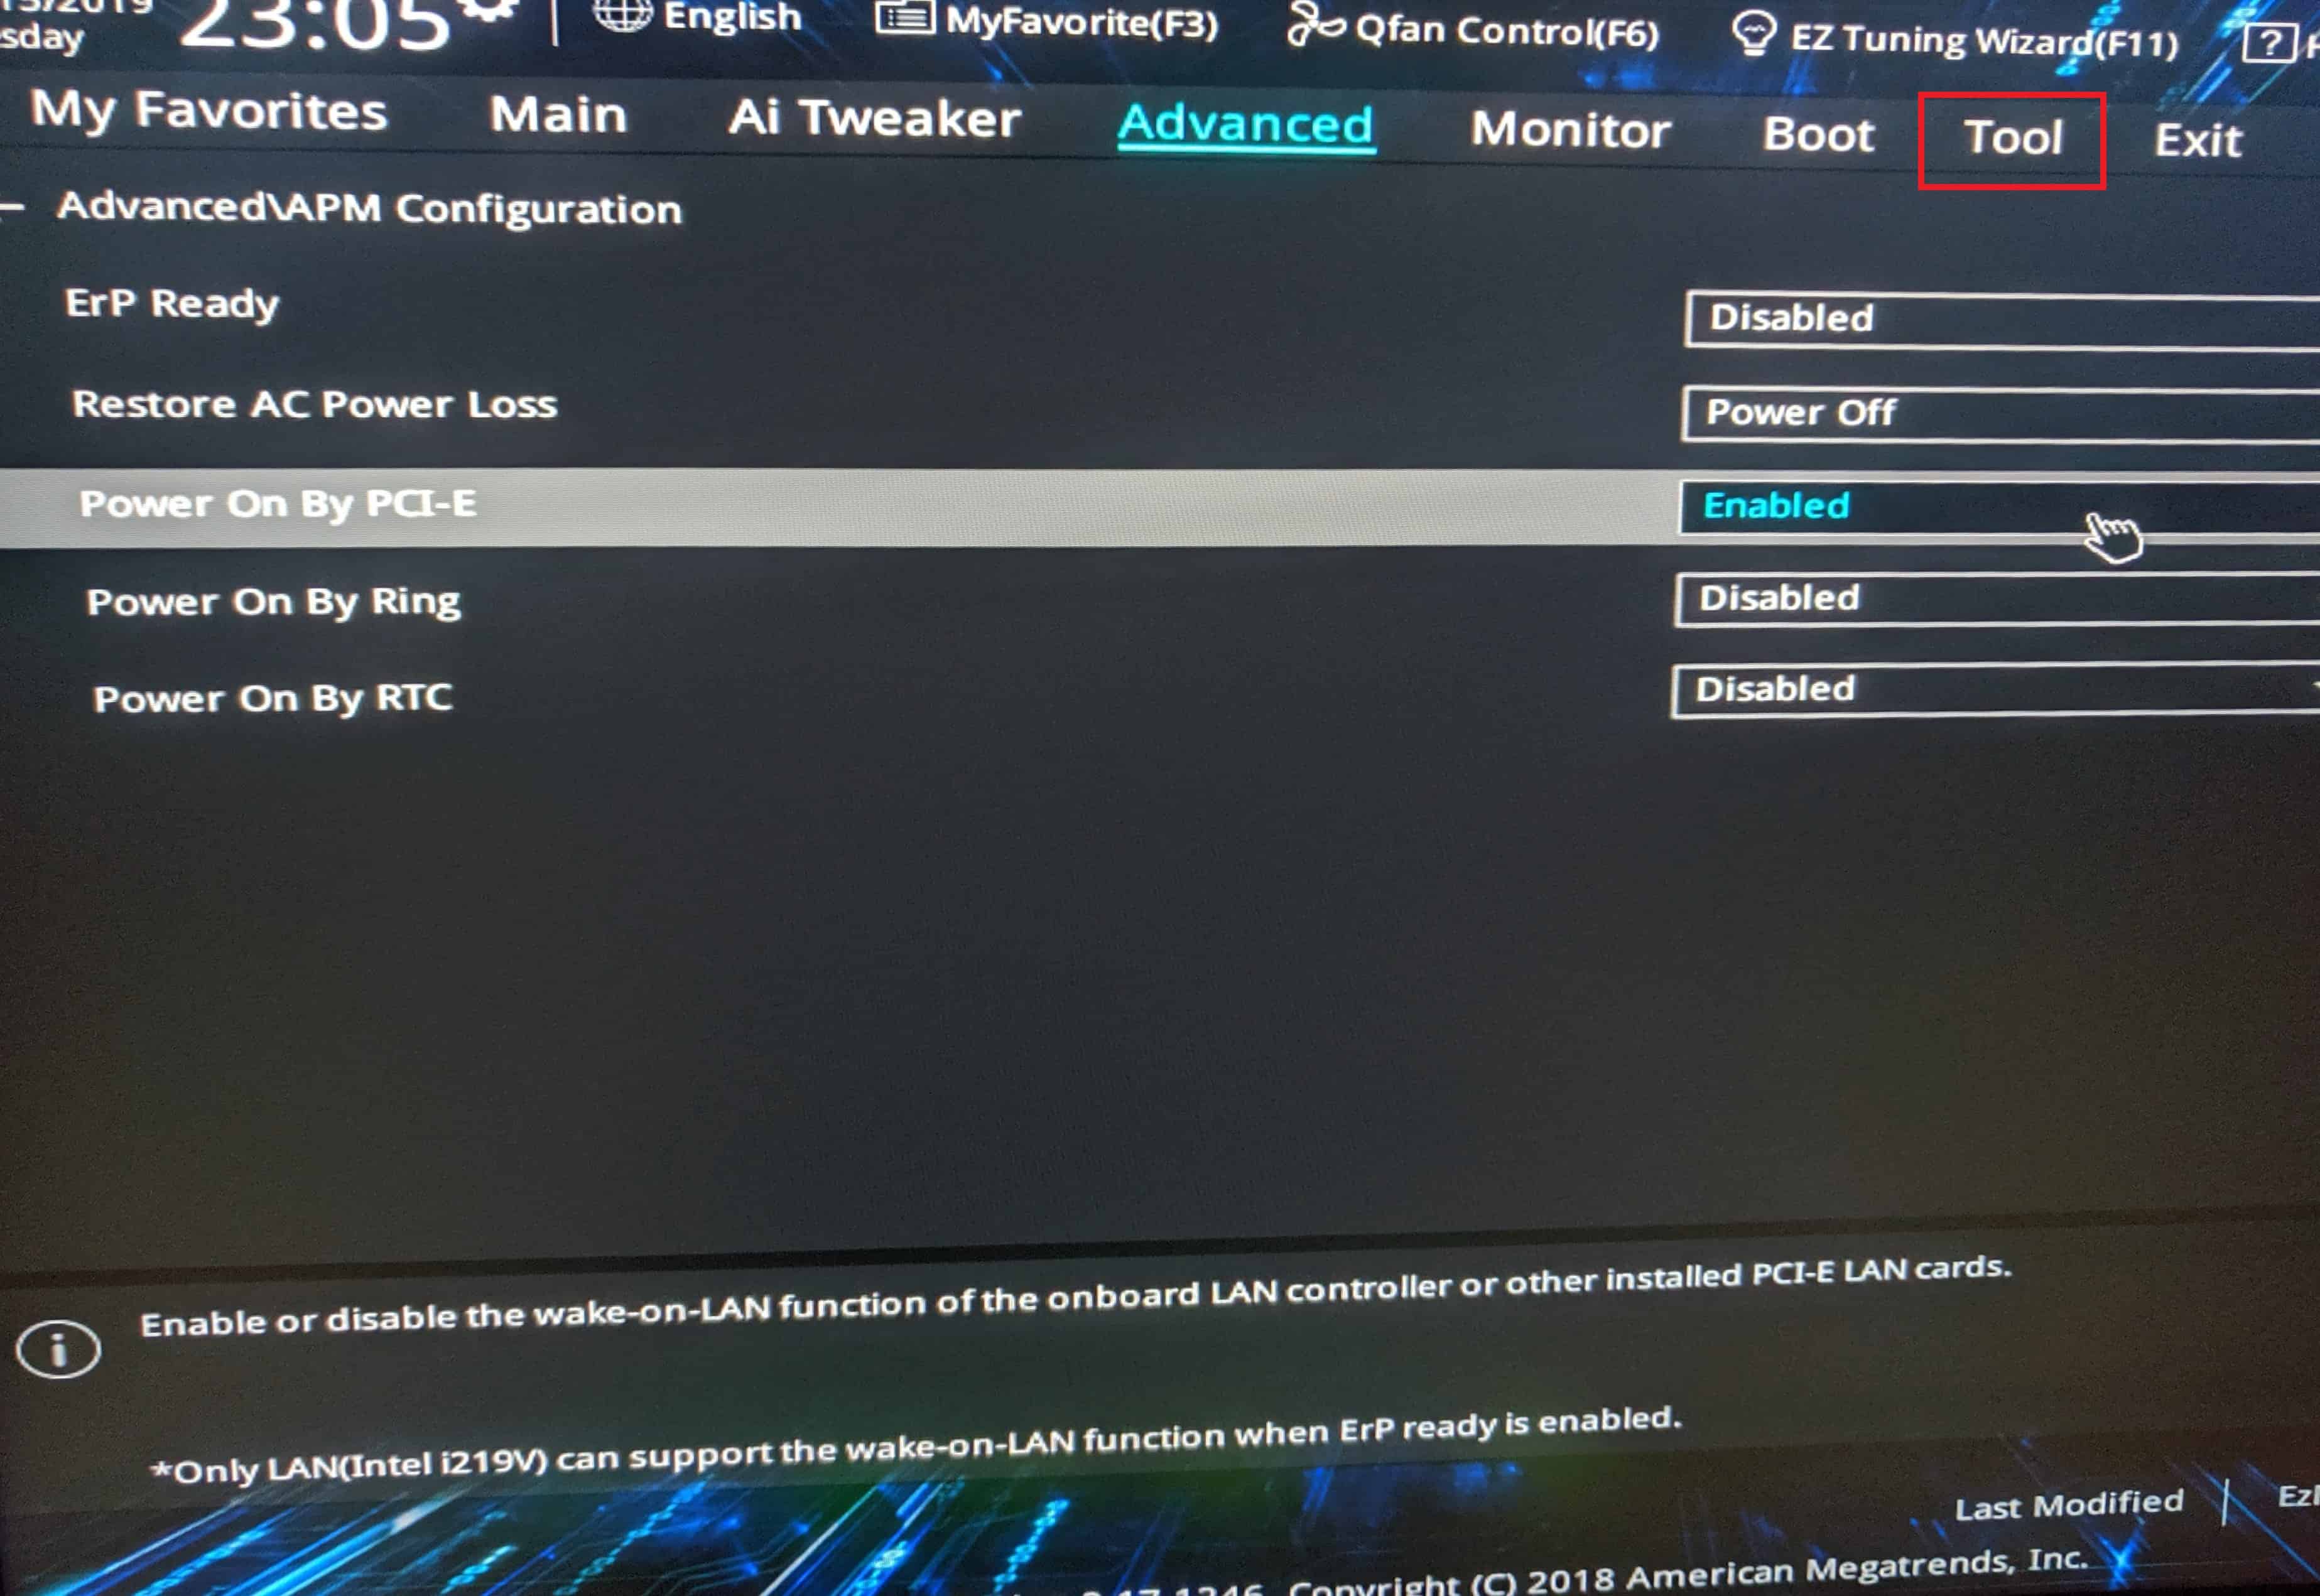
- From here, select by USB and click Next.
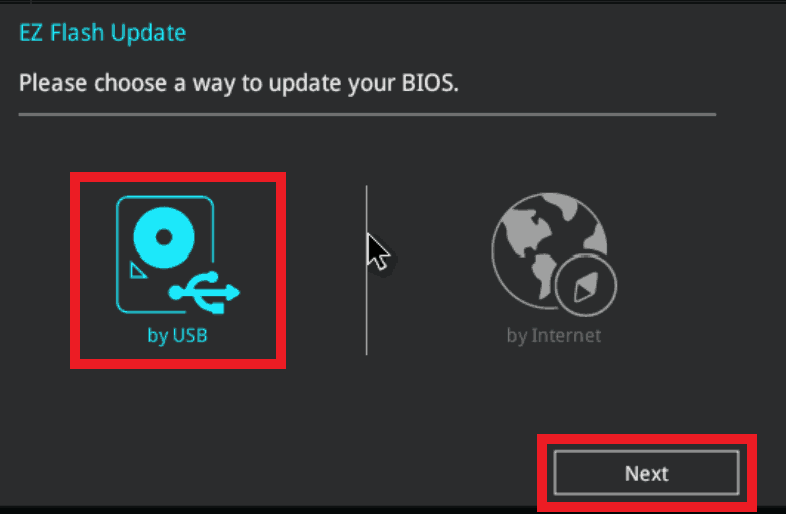
- Now, press Tab to switch to the drive field.
- Click the up or down arrow keys to find the USB drive that contains the latest BIOS and hit Enter.
- Then, press Tab again to switch to the folder info field.
- After that, click the up or down arrow keys to find the BIOS file and hit Enter to perform the BIOS update process. Note, do not shut down or restart your PC while performing the BIOS update process as the BIOS file can get corrupted, and that can brick your motherboard. So, always perform a BIOS update when you are not expecting an electrical blackout in your area. As always, we won’t be responsible for any damage dealt with your hardware while trying to update your BIOS.
Check how to enable WoL on different devices.
2. Update All Of Your Motherboard Drivers
Wake-on-LAN may not work correctly on your PC due to outdated drivers (especially the network driver). Go to your motherboard’s official page, download all the latest drivers, and install them. If you have a PCIe-express network LAN card, update its driver as well by visiting its official website.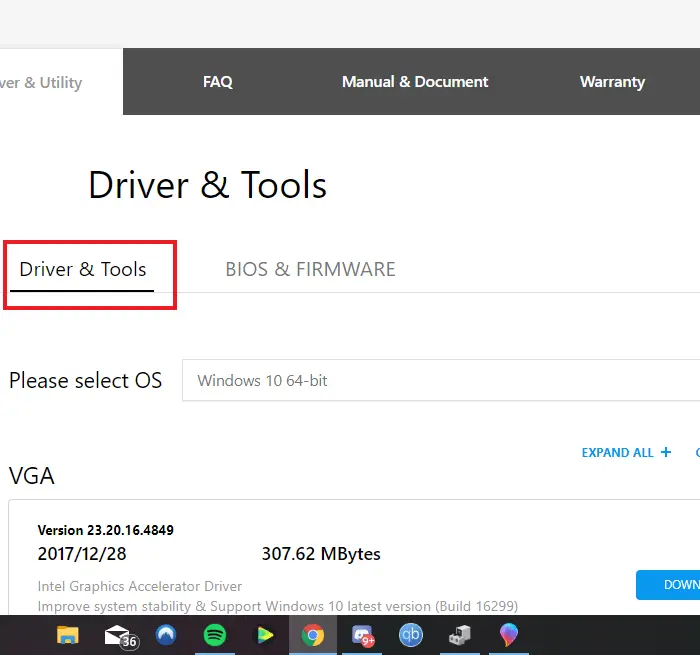
Check out best Device Driver Updater tools for Windows 10.
3. Try Disabling Fast Startup
If you are using Windows 7 or older, or if you don’t want to disable Fast Startup, you can skip this method. From Windows 8, when you shut down your PC, it puts it in a hybrid shutdown stage. So, when you turn your computer on, it boots a lot quicker. Most of the time, disabling it fixes Wake-on-LAN problems on Windows.
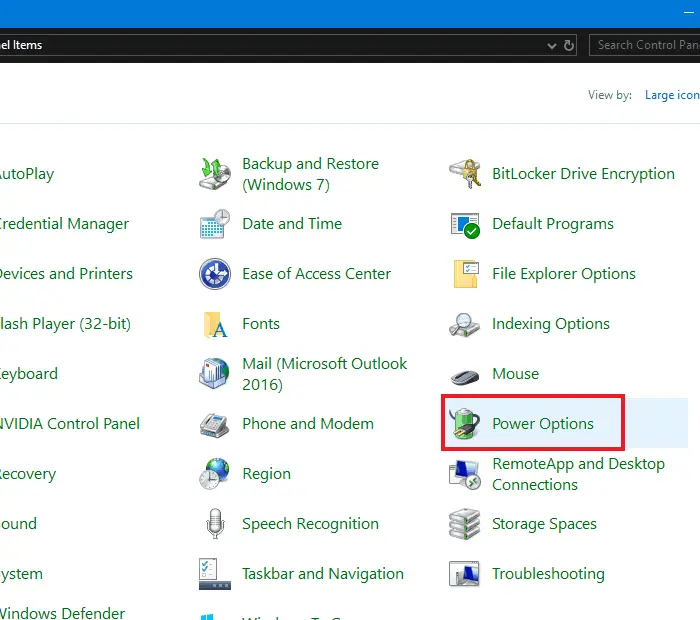
- First, open Control Panel and click on “Power Options.”
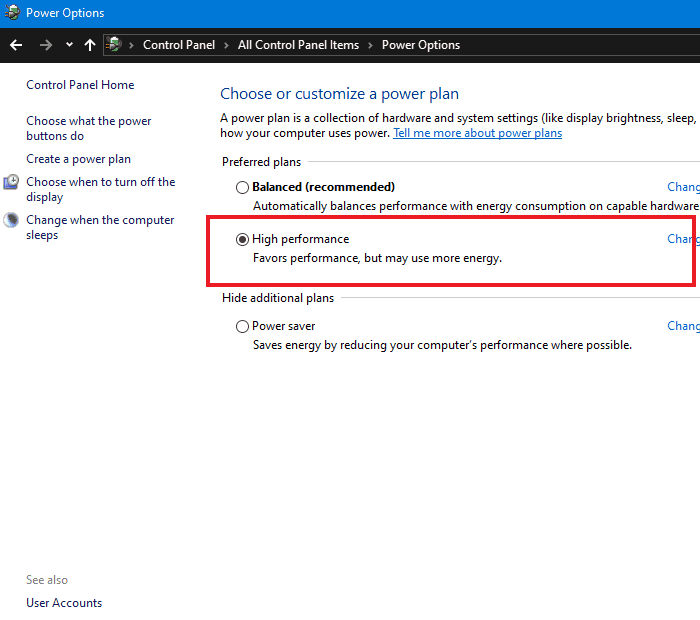
- Make sure that High performance is set as your Preferred plan.
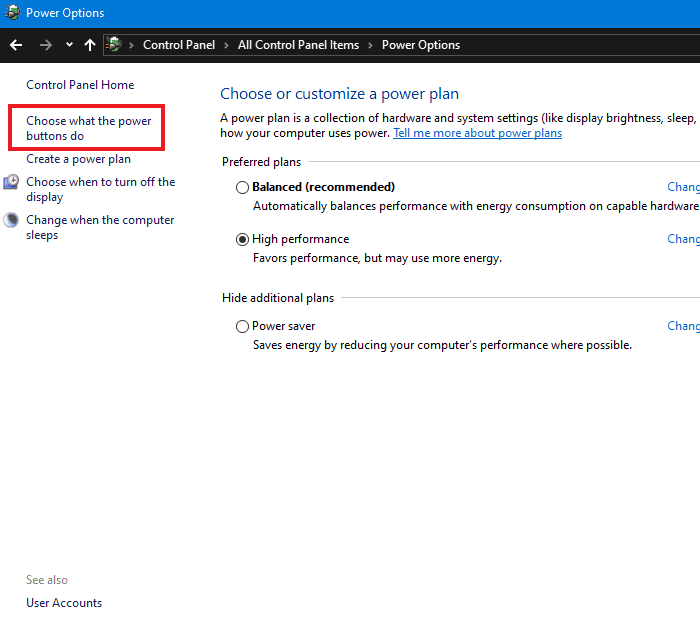
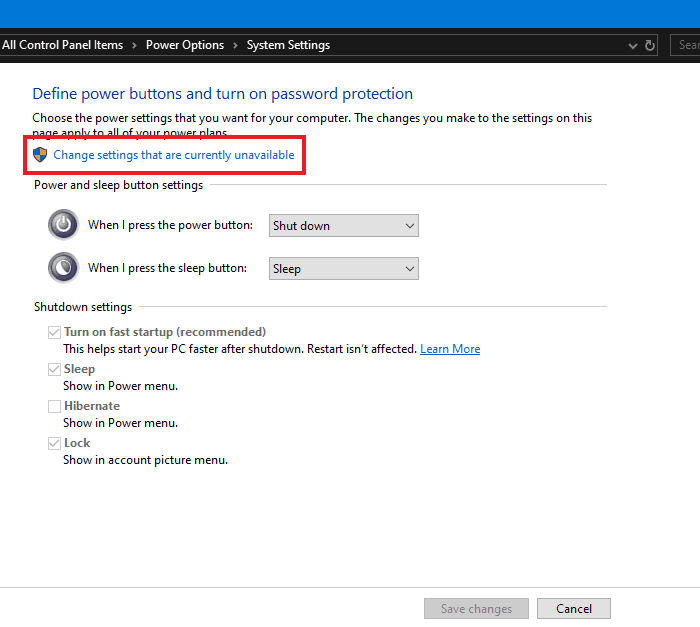
- Now, click on “Choose what the power buttons do.”
- The options in Shutdown settings should be greyed out for now. Then, click on “Change settings that are currently unavailable.“
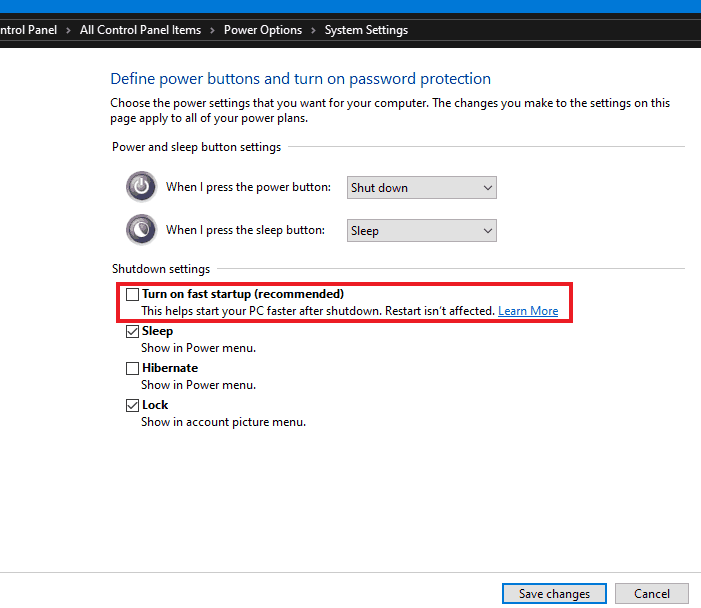
- After that, uncheck “Turn on fast startup (recommended).”
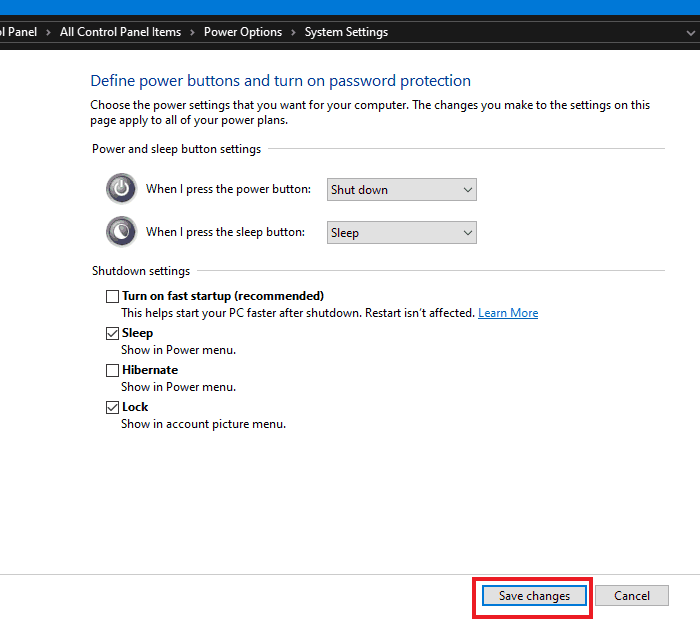
- Click on “Save changes.”
4. Change Up Some Of Your BIOS Settings
Some times, your other BIOS settings can clash with your WoL settings. For example, Wake-on-LAN might not work if you have enabled Fast Boot, MRC Fast Boot, Deep Sleep Control, and a lot more. Try disabling them to see if WoL works.
5. Disable & Enable Network Adapter
Some times, disabling and re-enabling the network adapter helps as it refreshes the adapter.
- Right-click on the Network icon on the taskbar.

- Select “Open Network & Internet settings.”

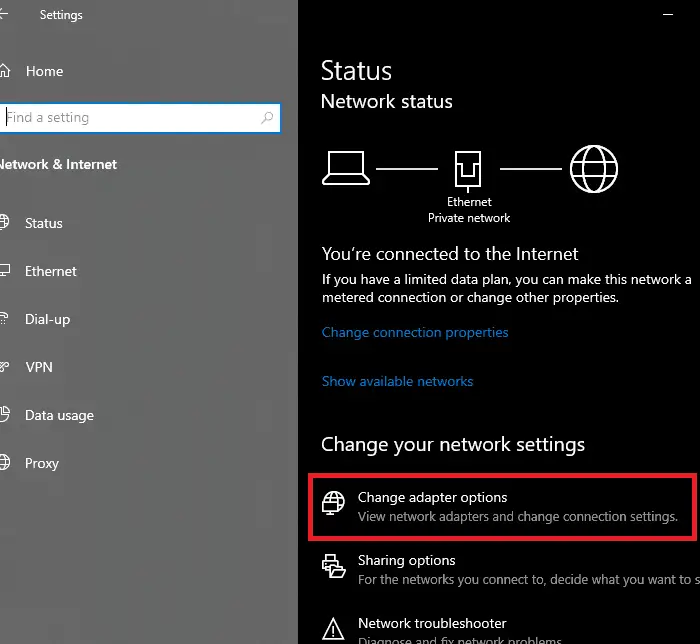
- That should open up a Settings window. Select “Change adapter options.” Doing that should open up the Network Connection tab of Control Panel.
- Right-click on the Ethernet adapter that you’re using to connect to the internet and click on Disable. Now note that you should lose the internet connection to your PC up until you re-enable it.
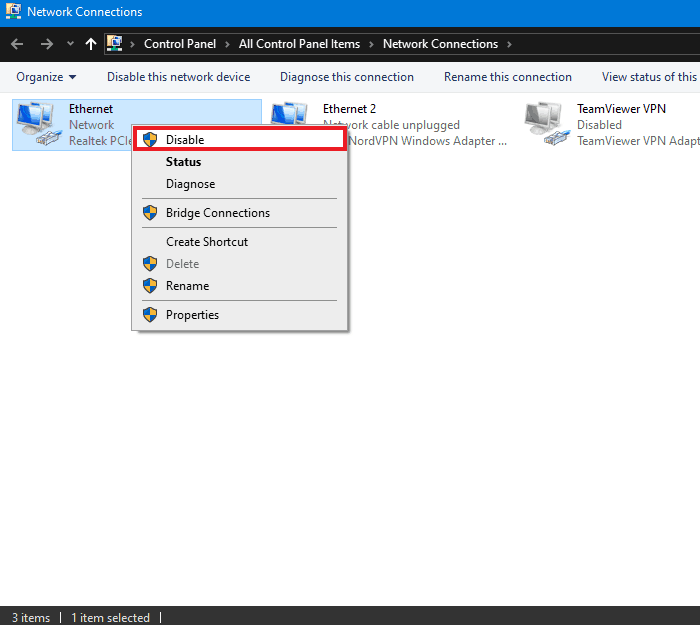
- At last, right-click on your network adapter again and click on Enable.
6. Reinstall Your Network Driver
Occasionally, a corrupted install of the network adapter’s driver can cause issues with WoL. In that case, you have to reinstall your network driver properly following these steps.
- Go to your motherboard’s official webpage and visit the Help/Support section and download the latest network driver. If you have a PCIe-express network LAN card, download its latest driver by visiting its official website.
- Once you uninstall your network driver, Windows may try to install a suitable driver automatically. So, disconnect your PC physically from the internet now.
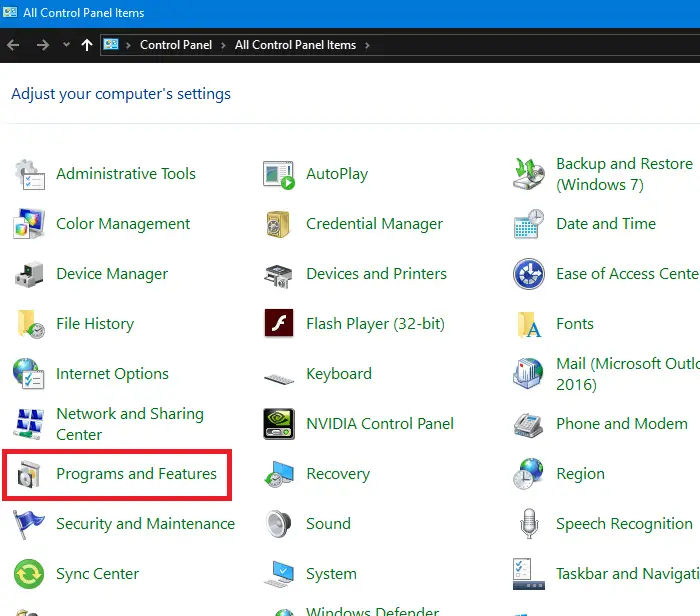
- Open Control Panel. Find “Programs and Features” and click on it.
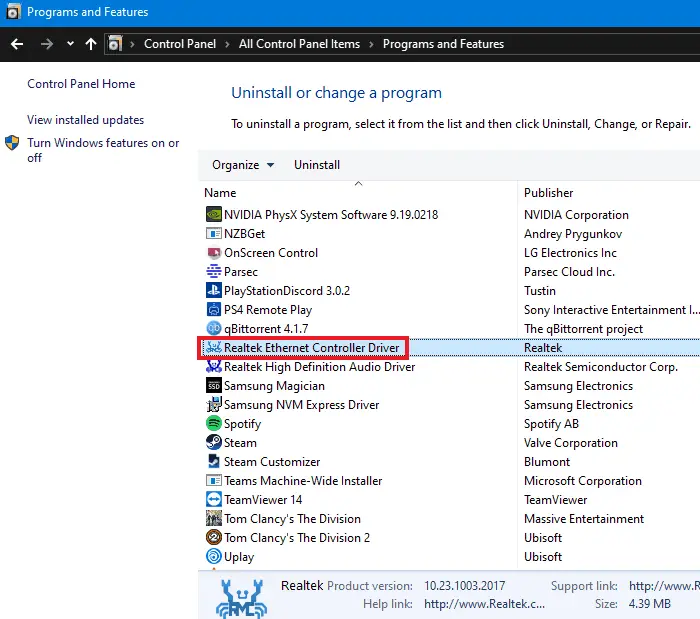
- Then select your network driver.
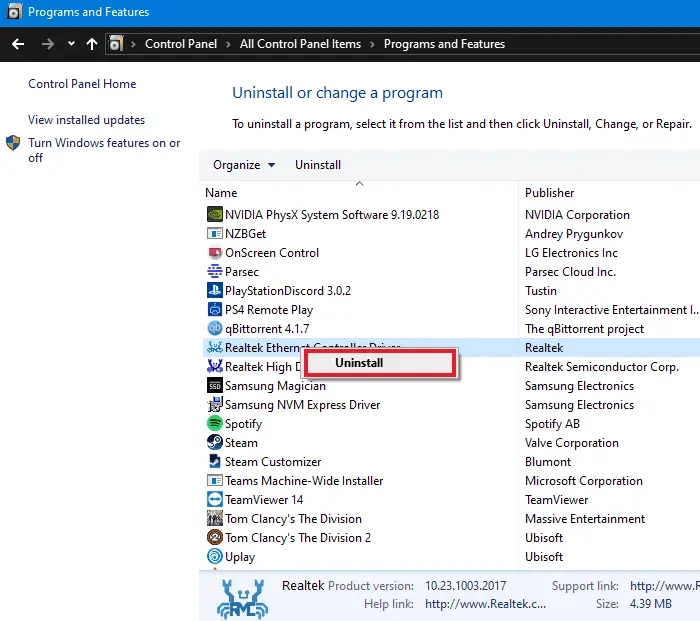
- Right-click on it and click on “Uninstall.” After that, go forward with the uninstalling process.
- Right-click on the Start button.

- After that, click on “Device Manager.”

- Now, find and expand the Network adapters section.
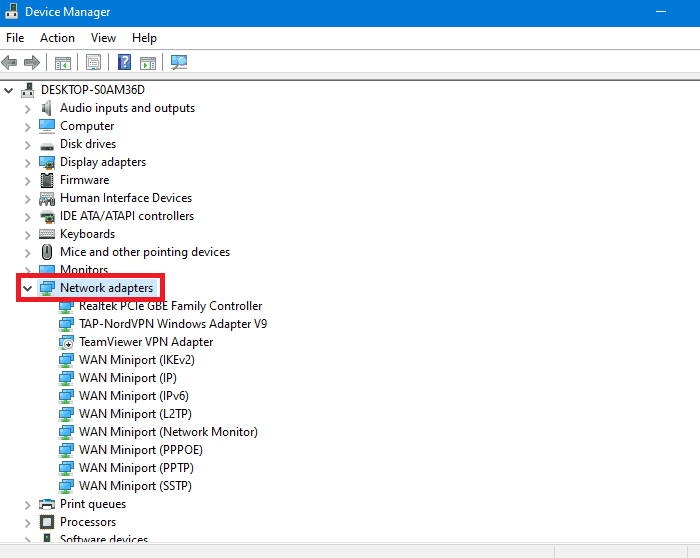
- See if you can find your network adapter anymore. If you can’t, skip to step12. If you still can find your network adapter, the driver most probably didn’t get uninstalled correctly.
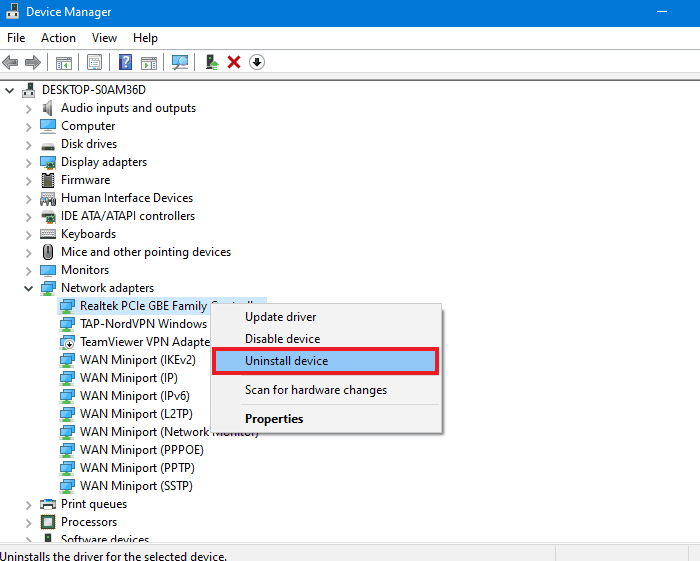
- To uninstall it properly, right-click on it and click on “Uninstall device.”
- Then, click on ‘Uninstall.’
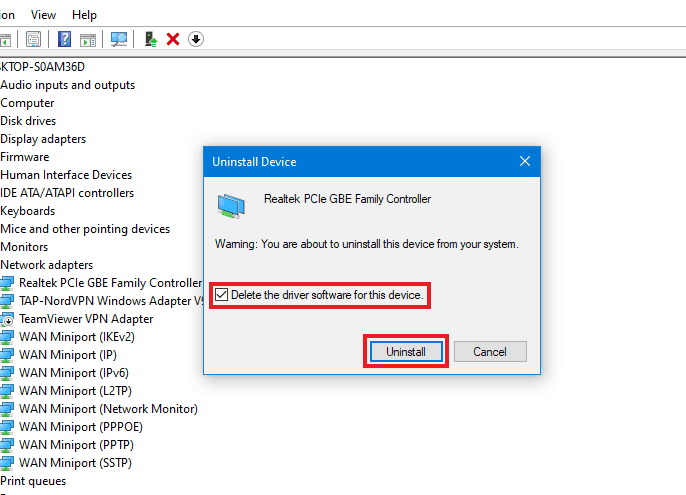
- After it’s done, run the latest driver’s executable file that you downloaded earlier and go forward with the installation.
- At last, connect your PC back to the internet.
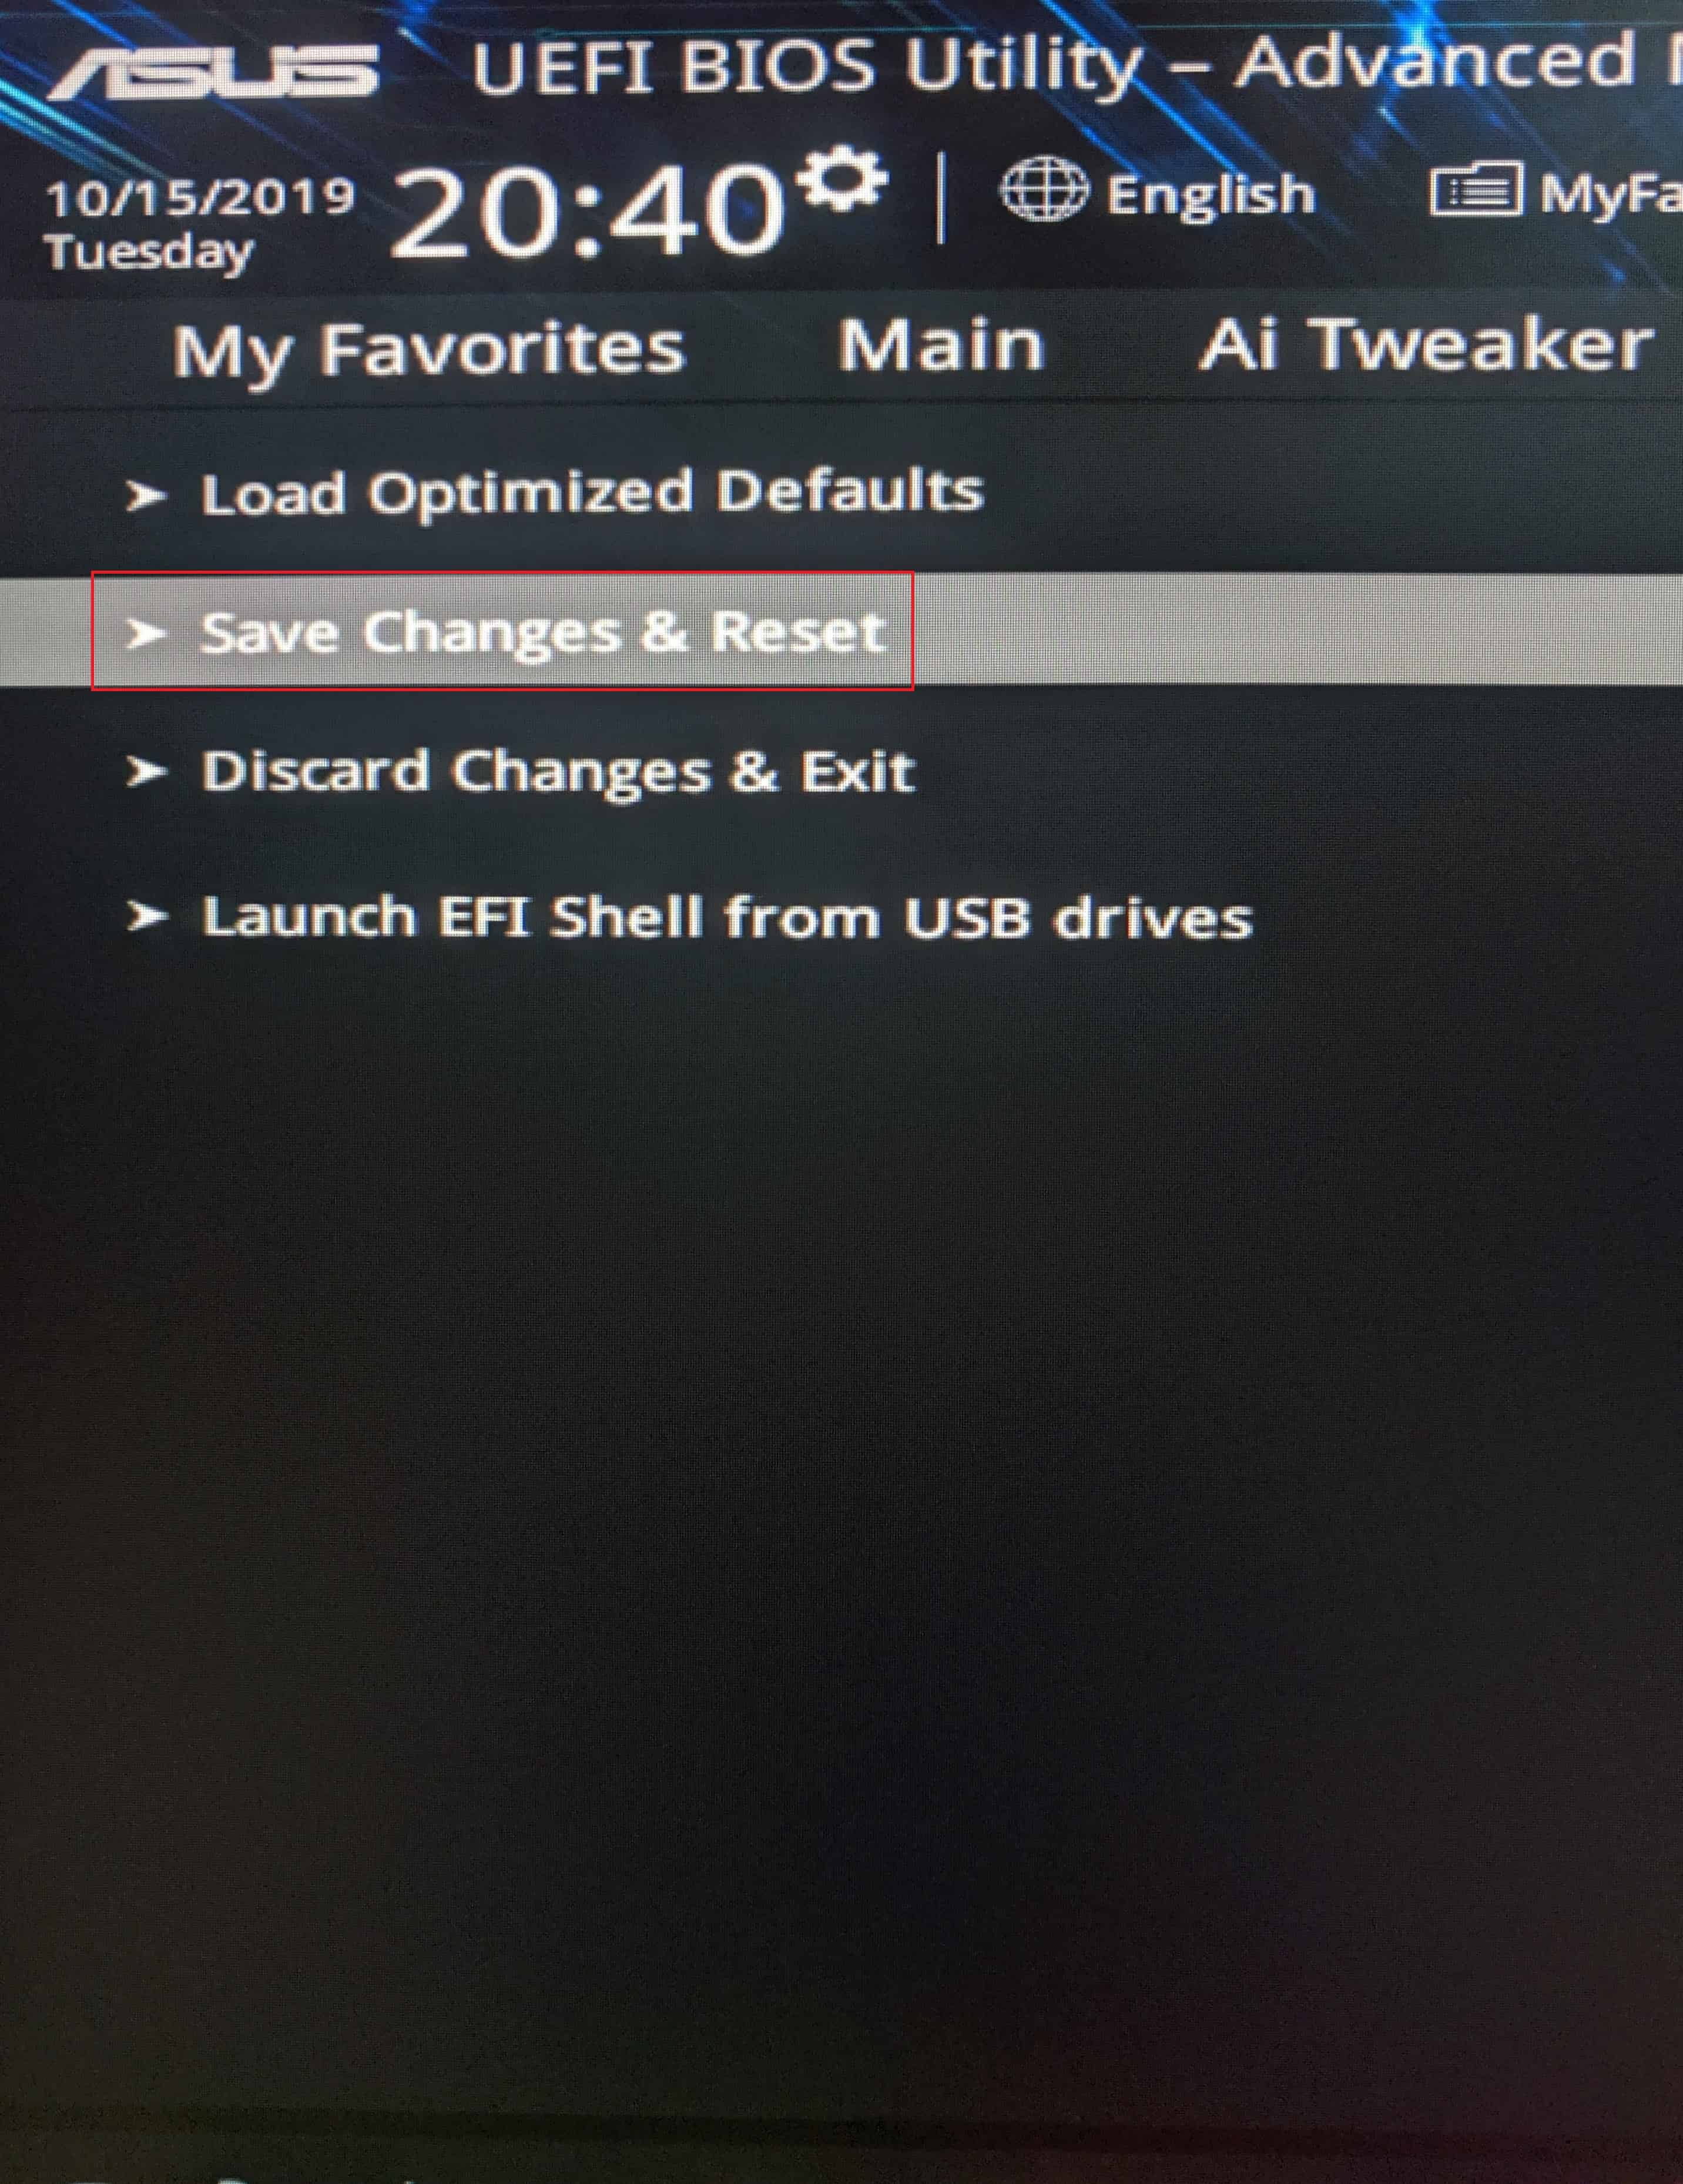
7. Load The Optimized Default Settings In The BIOS
- Go to the BIOS as described before.
- Press F5 or go into the Exit tab and click on the same to load the optimized default settings of your BIOS.
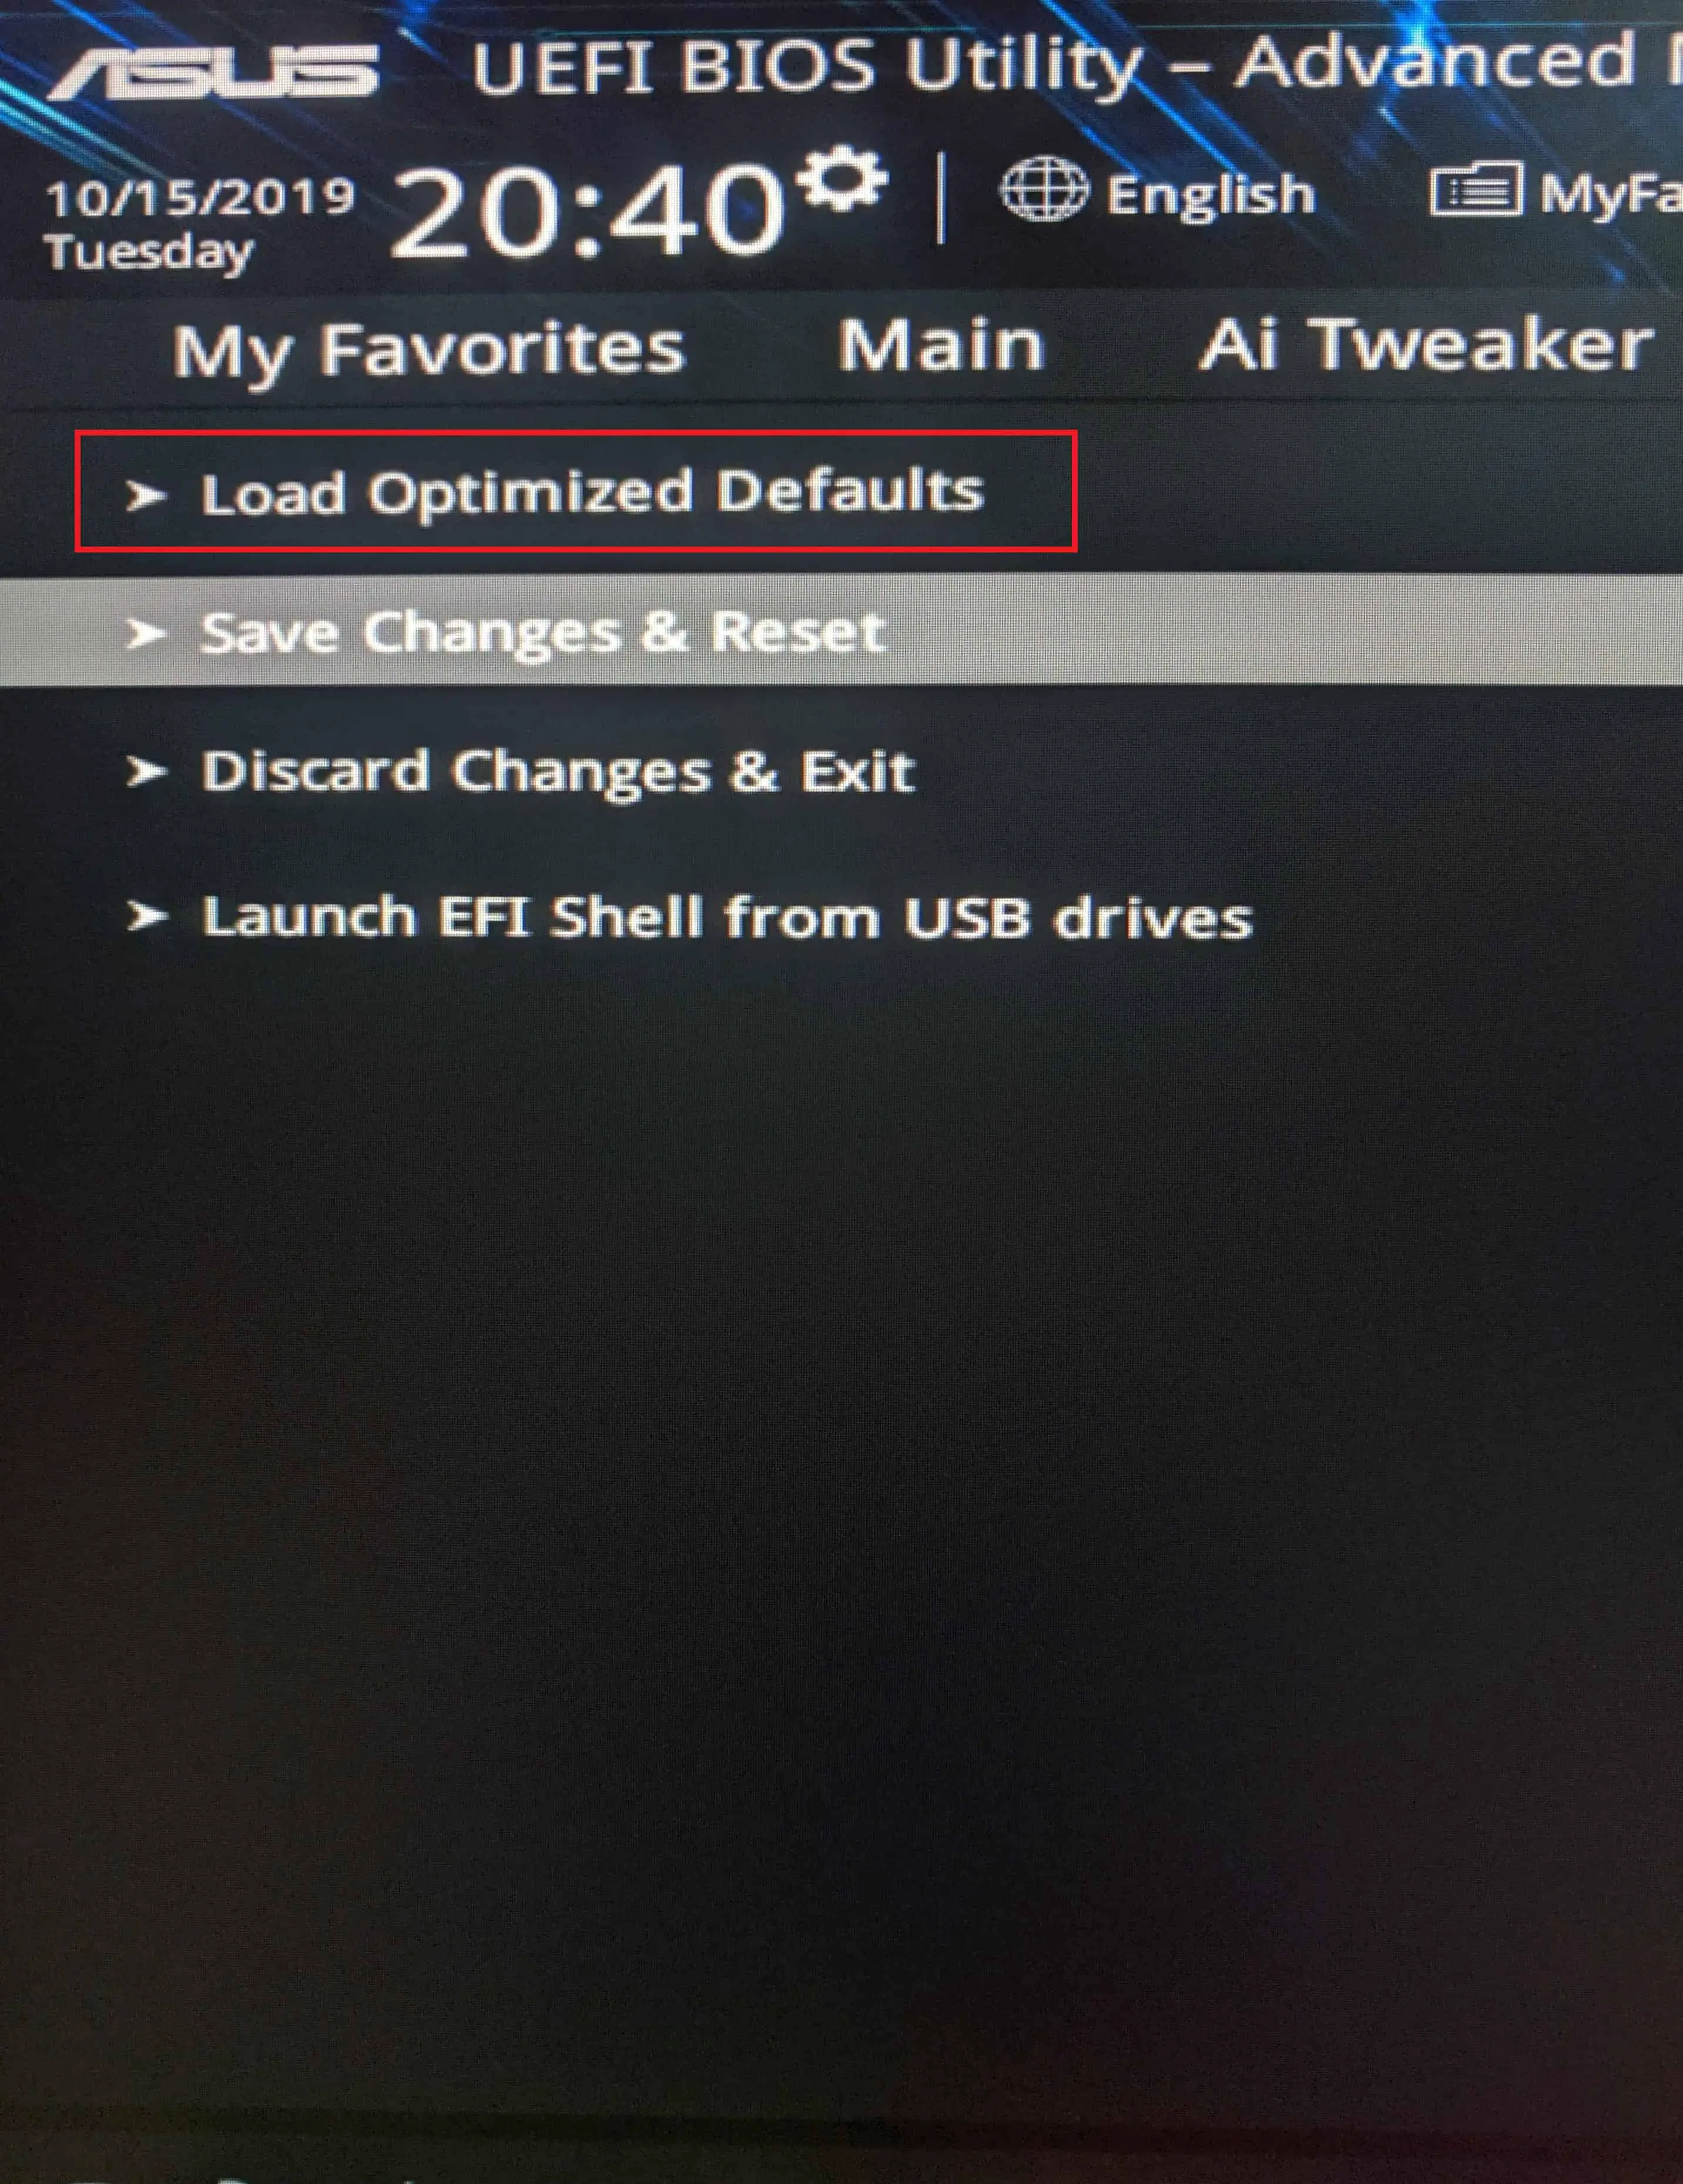
- If you have any overclocking settings on your CPU or RAM, and in case you have saved case and CPU fan curve settings applied currently, make sure to create a profile for them to back them up in Advanced Mode Tools tab because they would get reset.
- After that, go to the Exit tab and click on “Save Changes & Reset.” Then click, Yes. That saves your changed settings and restarts your PC into Windows.
8. Reflash Your BIOS
If you already have the latest BIOS installed and even loading the optimized default settings didn’t help, you should try out reflashing your BIOS. The process is pretty much the same as updating your BIOS.
- Download the latest version of the BIOS from the official webpage of the motherboard.

- Extract the BIOS file in the root folder of a USB drive.
- After that, click on the Start button. Then, click on the Power button and select Restart. Your PC should now restart. Keep spamming either the Delete key or the F2 key on your keyboard to get into your PC’s BIOS.
- Once you get in the BIOS, if you see an “EZ Mode” user interface or equivalent in front of you, then press F7 on your keyboard or click on the same to go to the “Advanced Mode.” Also note, some really old BIOS don’t have mouse support. So you might have to use your keyboard exclusively to get around your BIOS.
- In Advanced Mode, click on the Tool tab.

- From here, select by USB.

- Now, press Tab to switch to the drive field.
- Click the up or down arrow keys to find the USB drive that contains the latest BIOS and hit Enter.
- Then, press Tab again to switch to the folder info field.
- After that, click the up or down arrow keys to find the BIOS file and hit Enter to perform the BIOS reflash process. Note, do not shut down or restart your PC while performing the BIOS reflash process as the BIOS file can get corrupted, and that can brick your motherboard. So, always perform a BIOS reflash when you are not expecting an electrical blackout in your area. Again, as always, we won’t be responsible for any damage dealt with your hardware while trying to reflash your BIOS.
9. Clear CMOS
Some premium motherboards have a clear CMOS button to completely reset the BIOS on the fly. But, if your motherboard doesn’t have one, try shorting the two pins, which are for clearing CMOS using a screwdriver after consulting your motherboard manual. Note that once you clear CMOS, even your saved profiles would be gone. So, if you do not want to lose them, you should back them up on an external USB flash drive beforehand on the Tools tab in Advanced Mode.
Check how to fix PC reboot loop.
10. Turn The PC On Manually Once
If your PC has been shut down for a long period, occasionally, the PC can completely shut off the power to the network adapter to save power if you have “Allow the computer to turn off this device to save power” checked in your network adapter’s properties. So, turn the PC on once manually and then check if WoL works.
11. Try Turning The PC On From Sleep Or Hibernation Using WoL
Rather than trying to turn it on from complete shutdown, try turning it on from sleep or hibernation using WoL. That should fix the problem. But if your PC only turns on from sleep or hibernation using wake-on-LAN, you may have to always keep your PC on sleep or hibernate if you want to turn it on using WoL whenever you want.
12. Perform Clean Install Of Windows 10
If none of the previous methods helped and you really need WoL working, backup all your important files and do a clean install of Windows. A bloated or corrupted install of windows might be the reason why WoL is not working as intended.
Here are the best free wake on lan apps for Android.

