Internet is one of the most important utilities in the corporate world as well as regular day to day life. The internet service is a quite complicated service which is based on many small supportive services. Even a little fault in any of the smaller service could create a large disturbance in the internet service, causing the service to fail. A fast, reliable and secure internet connection is the basic requirement of any netizen out there. This includes a large number of Windows users. As you may already know, the latest installment of Windows (Windows 10) might be the most stable version of Windows yet, but still, it is required to tweak the Windows system by performing some manual actions. Considering the internet service, you must pay attention to the “IPHLPSVC” services. Tuning “IPHLPSVC” services will definitely reward you with a better and more reliable internet connection.
Table of Contents
What is IPHLPSVR ?
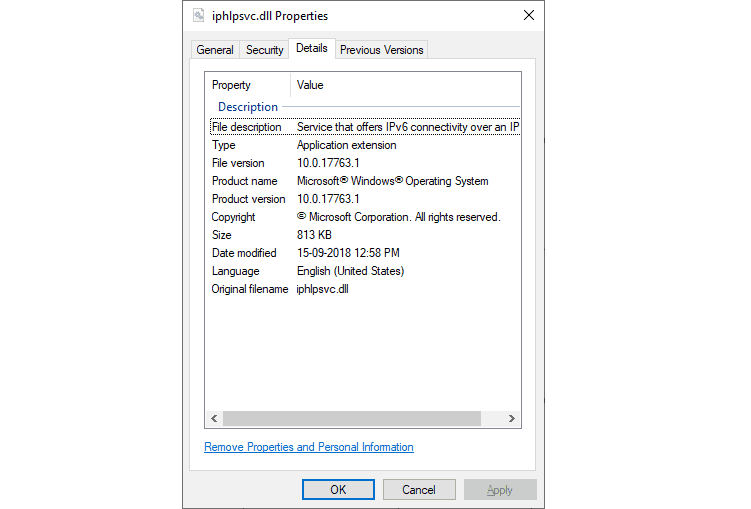
IPHLPSVR stands for Internet Protocol Helper. IPHLPSVC is internet connectivity related service which was primarily introduced in Windows 7 and further modified for the Windows 10. This service relates to the “IPv6” protocol. This service can be considered as the main terminal which connects your system with the internet. IPHLPSVC is basically your best option to improve your current internet scenario. IPHLPSVC allows the user to tweak the default settings to modify the network configuration settings in order to improve the internet experience on the user side. The IPHLPSVC file is available as a .dll format file. This service is automatically started at the time of boot. This file contains information about the machine in terms of code. The IPHLPSVC is stored on the RAM of the machine and it executes various tasks according to requirement. IPHLPSVC services contain services like ISATAP, Teredo and Port Proxy. This service is not a root service of Windows 10. Hence. it can be disabled if it is not required.
Why IPHLPSVR is needed?
The home computers (Single computer) does not require the IPHLLSVC services to connect the computer with the internet as IPv4 is used for a single system. But, in the large network of computers like offices and hospitals, IPHLPSVC services are required. The IP helper service provides quite advanced options regarding the internet connection. The homegroup networks are generally dependant on the IPHLPSVC services.
Do I need IPHLPSVR running to connect to the internet?
As mentioned above, it is dependant on your network type. IPHLPSVC is required only if a certain number of computers are connected to a singular network. If there is a single computer which is connected to the Internet service, there is no need to keep the IPHLPSVC service running. Like any other service in Windows 10, IPHLPSVC also requires a part of processing resource to operate in the background. In the case of a single computer, this service basically acquires unnecessary processing power and RAM space. This can turn out to be a really bad situation for a low-end system having weaker processors and less RAM storage. We will suggest you disable the IPHLPSVC service at your earliest convenience if you are part of a single desktop network system to prevent slowing down of the system.
What is IPHLPSVR tuning?
Tuning a service generally relates to changing the current state of the service. That is, Enabling the service if it is disabled or vice versa. Toggling the status of a service or “tuning” a particular service is required for many purposes. In many cases, unnecessary services are running in the background and user might not notice them. This causes frequent lags and problems in the system. In the case of IPHLPSVC, tuning is required as the majority of the user may never require the service but still running the service in the background anyway. There are quite a few methods to tune the status of IPHLPSVS service mentioned below.
How to Start and Stop iphlpsvc service
We have provided some basic methods to tune the IPHLPSVE service mentioned below. Please follow the steps carefully and cautiously.
1. Start or Stop IPHLPSVC service using Services.msc
The services console is a miscellaneous command which can be executed through the Run window to get the information about all the services at a single place. You can check the status of the service and you can also enable or disable the service directly through here. You can also change the startup type of the service.
To use the services console, follow these steps:
- Press “Windows key+R” to open the “Run” window.
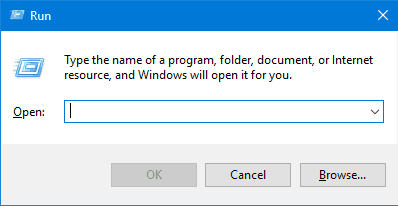
- Type “Services.msc” in the empty space and press enter.

- Now the services window will open.
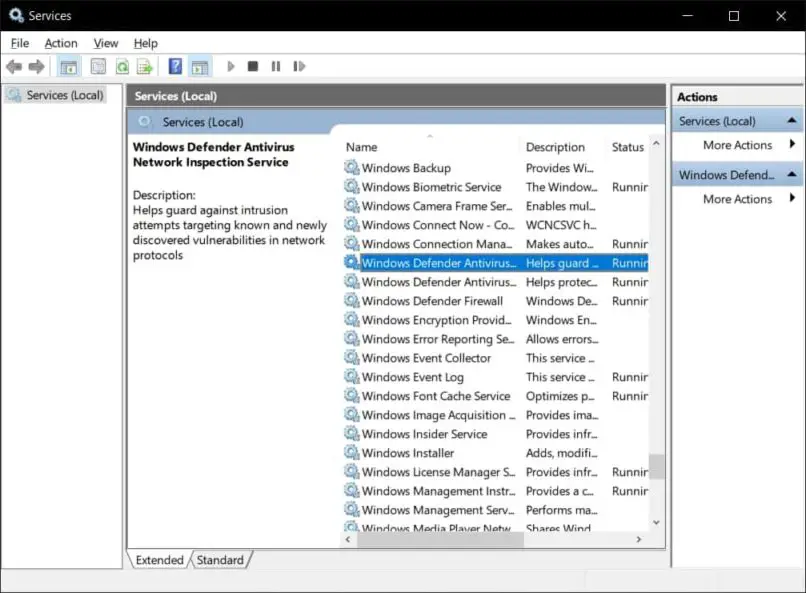
- Now, look for the “IP Helper” service in the list of all available services.
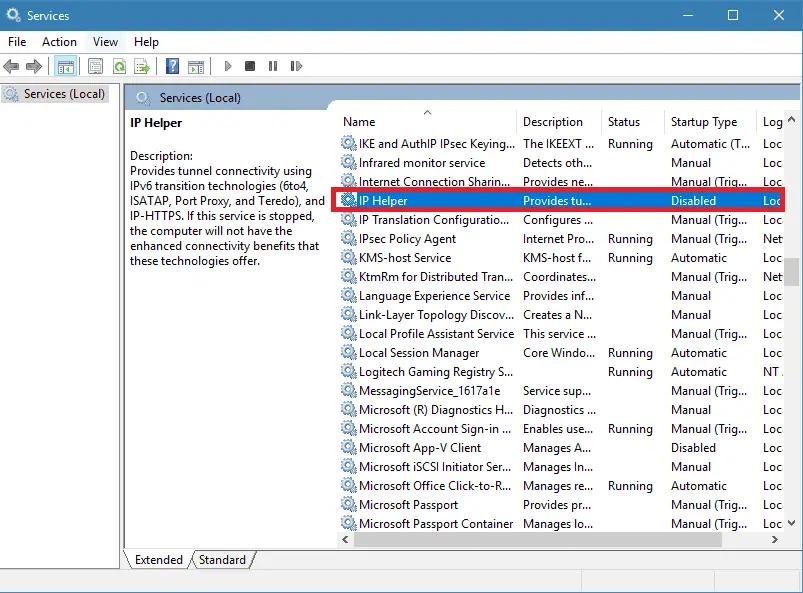
- Now, right click on the service and select “Properties”.
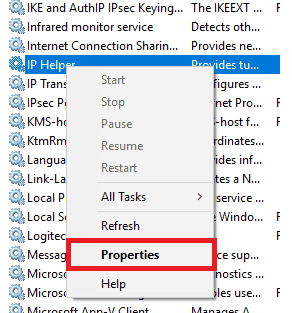
- In the properties window, you can see the service properties.
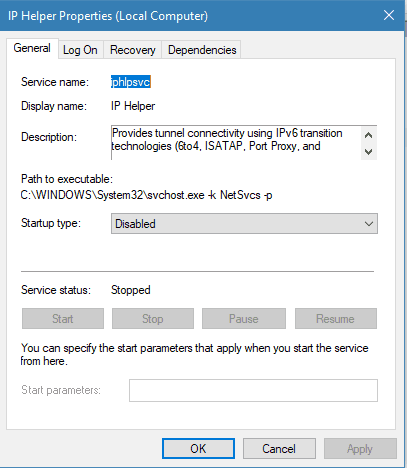
To enable the service:
- Select the startup type to “Automatic” and click on the “apply” button.
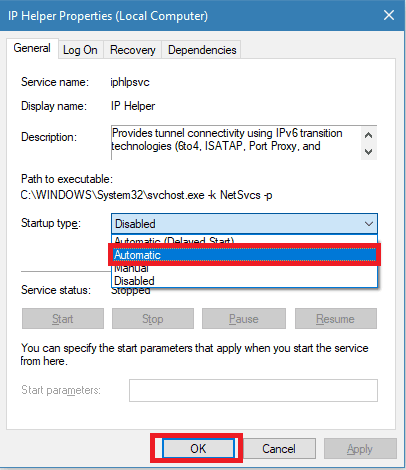
- The service will be started automatically at the time of the next reboot.
To disable the service:
- Select the startup type to “Disabled” and click on “Stop”.
- Click on “Apply” to close the window.
- Now, the service will not run again in your system.
2. Enable or Disable IPHLPSVC service using the Registry editor
Registry editor contains basically the complete data of Windows various settings in the Hexadecimal format. We will recommend you to be careful while changing the registry values because the wrong tweak can end up creating an unresolvable error in the operating system.
To use the registry editor to enable or disable the IPHLPSVC, follow these steps:
- Open the Run window and type “Regedit” and press enter.

- Select “Yes” in the pop-up window to open the registry editor with administrative privileges.
- Now, the registry editor window will open.
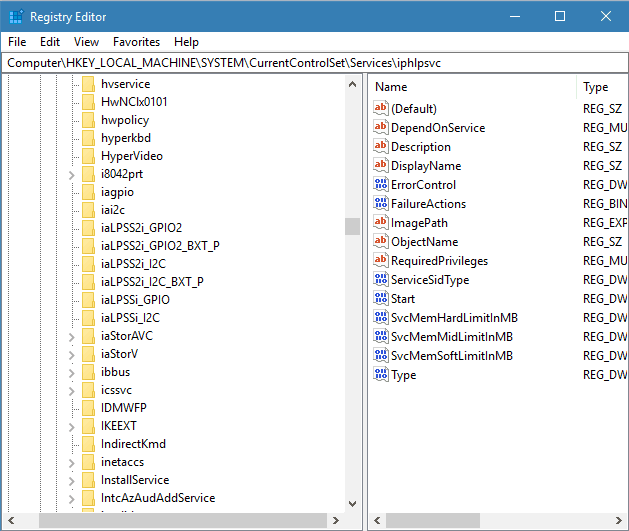
- Copy the following address path and paste it in the address bar provided in the window.
HKEY_LOCAL_MACHINE\SYSTEM\CurrentControlSet\services\iphlpsv
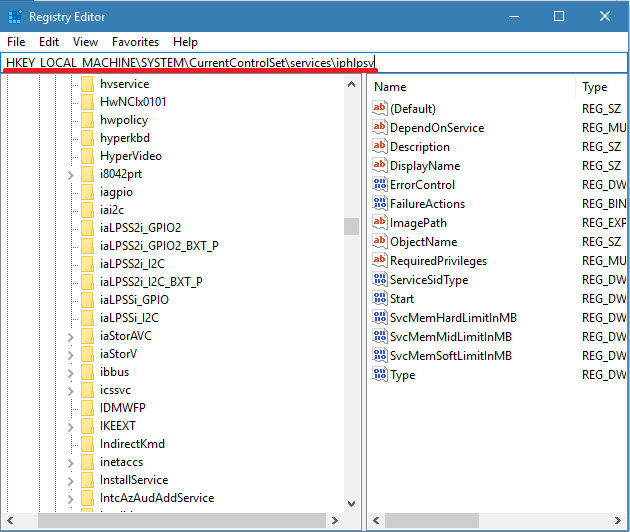
- Now click “Enter”.
- This will redirect you to the IPHLPSVC service page directly.
- Now, double click on the “Start” registry enter on right side of the window.
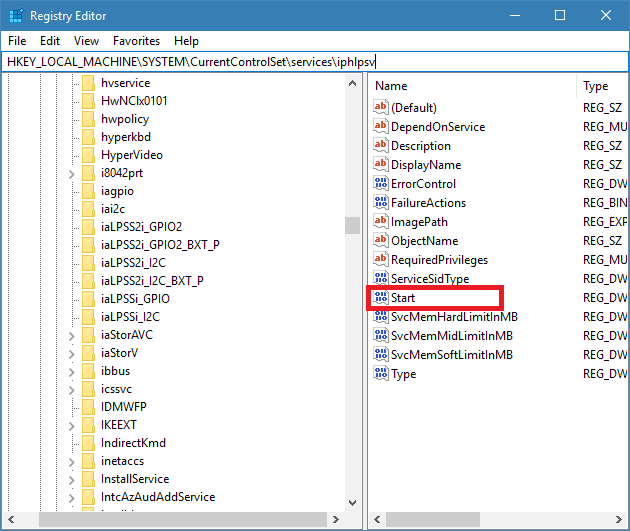
- Here, you can put the value between 2-4 to change the status of the service.
To enable the service:
- If the service is disabled, the default value should be “4”. Change it to “2” to enable the service.
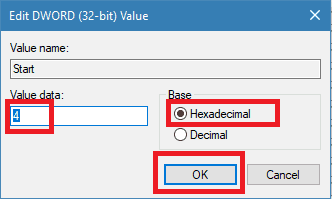
- Make sure the Base is selected as “Hexadecimal” and press “Ok” to save the changes.
- Close the registry editor and restart the system for changes to take effect.
To disable the service:
- If the service is enabled, the value entered will be “2”. Simply, change it to “4” to disable the service.
- Make sure the base is selected as “Hexadecimal” and press “ok” to save the changes.
- Close the registry editor and restart the system for changes to take effect.
3. Start or Stop IPHLPSVC Service using Command Prompt
You can use the command prompt to simply execute a particular command to start or stop the IPHLPSVC service.
To do so, follow these steps:
- Search “Cmd” in the start menu. Right click on the “Command prompt” and select “Run as administrator”.
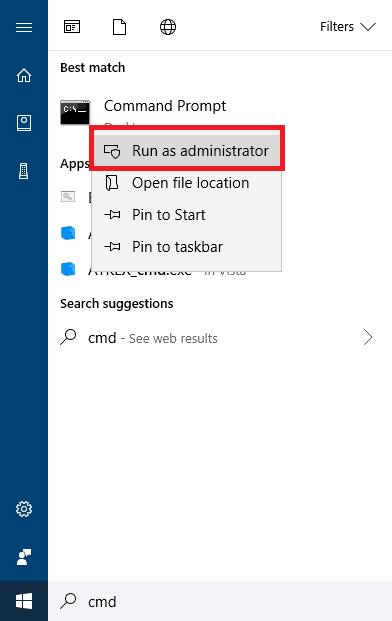
- Select “Yes” in the UAC pop-up window.
- Now, the command prompt window will open.
To enable the service,
- Type *net start iphlpsvc* without asterisks in the command prompt and press enter.
- Once the command is executed, close the command prompt.
- The service will successfully start.
To disable the service,
- Type *net stop iphlpsvc* without asterisks in the command prompt and press enter.

- Once the command is executed, close the command prompt.
- The service will successfully stop.

