A stretched screen with resolution issues on Windows 10 can happen due to two main reasons. One is bad settings of your display settings and the other is related to the drivers you have installed. Bad settings mean that your resolution and display settings are not what they should be according to the display you are using.
The driver issue, however, is due to the fact that you have bad drivers installed on your computer. We have mentioned three total fixes for this issue below out of which one fixes the bad settings while the other two fix the issue of having a bad driver database for your display adapter. Take a look at the solutions mentioned below and perform them one by one on your Windows 10 computer.
Solution #1: Check if you’re on the recommended Screen Resolution
More often than not, the problem of the screen being stretched and showing blurry stuff on the display is due to the computer running on a lower screen resolution that the display supports. Let’s say you have a 1080p display so, in order to display the screen properly, you need to make sure that the display is set to that resolution i.e. 1920 x 1080 pixels. This also stands true for screens with lower or higher resolution.
We can easily change the resolution to something that our monitor supports on Windows 10. All you need to do is follow the steps below.
- On your Windows 10 computer, go ahead and open the Start menu.
- Click on the Settings icon and this will open up the Windows 10 Settings app.
- Now look for the option that reads System and click on it.

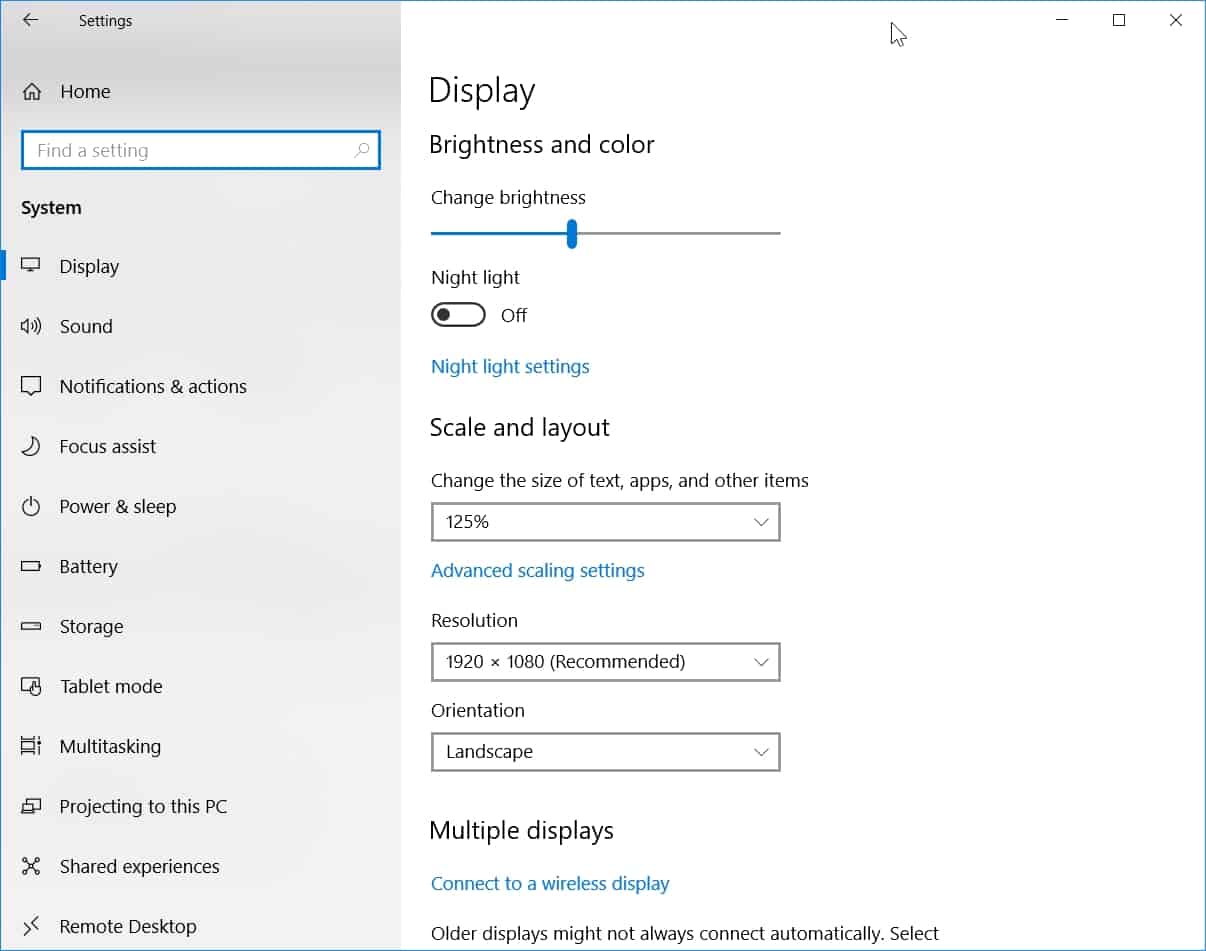
- In this window, change the resolution to the option that has (Recommended) written next to it.
- Also, make sure that the orientation has been set to Landscape.
These are a few simple steps that you need to take in order to correct your display’s resolution on your Windows 10 computer.
Solution #2: Check if you have your graphics drivers installed
Every computer needs a graphics adapter in order to produce the display and video on the screen. In order for this display adapter to work correctly, you need to have the drivers installed. Not having the drivers means the adapter won’t be able to function properly and one of the reasons why your screen seems stretched can be due to the fact that you don’t have the drivers installed.
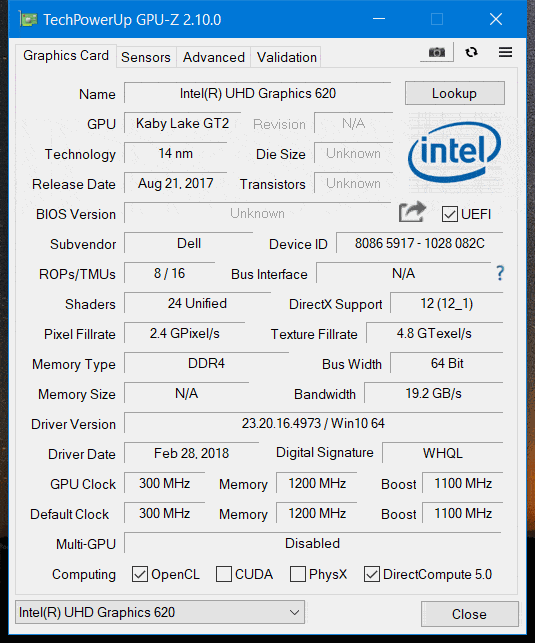
Windows 10 has the ability to install the drivers for your computer’s components automatically but if for some reason your drivers aren’t installed, you can install them manually. Follow the steps listed below in order to install the graphics drivers manually. Before that, you need to know that most computers will have graphics adapters from three major companies – NVIDIA, AMD, and Intel. To know which adapter you have, you can use a program like GPU-Z which will show you all the details about your graphics adapter.

As you can see, the GPU-Z is showing the graphics adapter to be Intel UHD 620 which is an integrated graphics adapter that comes with Intel CPUs. You may have another graphics processor from either NVIDIA, AMD or Intel and you can use GPU-Z to find that out. Go ahead and download the drivers for the adapter and then install the downloaded drivers. Installing the drivers will fix the screen stretched issue on your Windows 10 computer.
Solution #3: Uninstall old drivers and install updated ones
If you have your drivers installed and you’re still facing the issue, you can remove the old drivers that aren’t working and then install the updated drivers. In order to remove the old drivers for your graphics adapter, you need to use a third-party program that can clean uninstall the drivers from your Windows 10 PC.
Clean uninstall means your PC will not have any remaining chunks of the old display drivers and the new ones will work properly and won’t have any conflict due to old files. To clean uninstall these drivers, we need to use Display Driver Uninstaller and the program works pretty well.

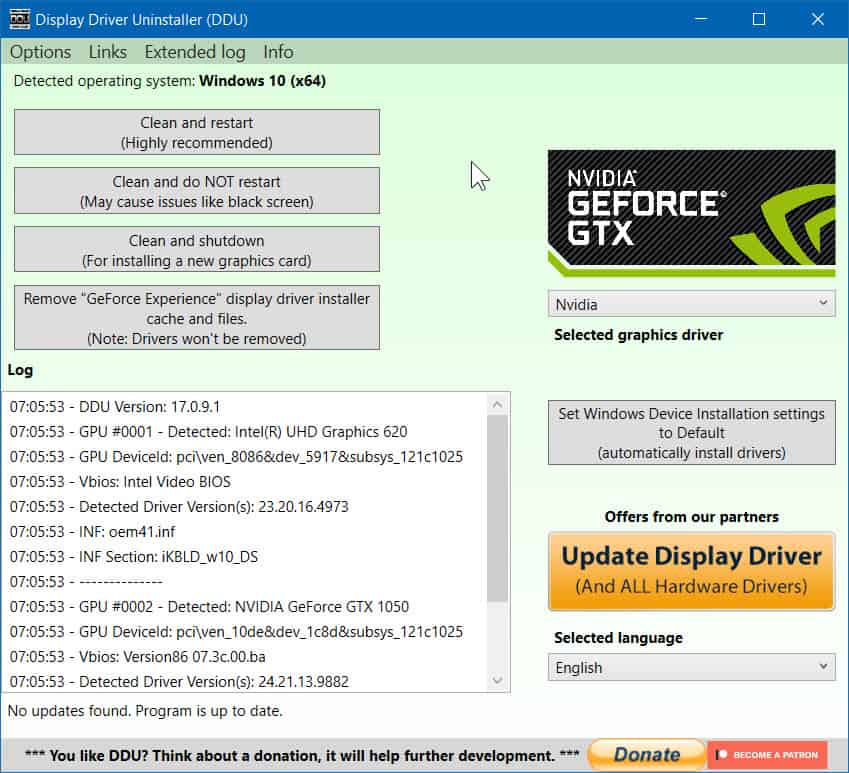
Go ahead and download the Display Driver Uninstaller program from this link and install it on your computer. Once you have it set up properly, start the Display Driver Uninstaller program and it will look something like the above-displayed window. It is recommended that you do this in safe mode instead of normal Windows 10 login. The safe mode will make sure your PC doesn’t get affected by this operation so boot into safe mode and then run Display Driver Uninstaller.
Click on the Clean and Restart button which will start the display driver uninstall. Once the uninstall is complete, go ahead and download the latest drivers for your graphics adapter and install it. Once the latest drivers are installed, you can go ahead and change the resolution to the recommended resolution and you will have a normal display with no stretched layout anymore.
When all else fails, check your display adapter
The solutions mentioned above always work for this issue since it is related to bad drivers or bad settings. We have fixed both of them above with the three mentioned solution. After all this testing, if you’re still facing an issue, you should check your graphics adapter hardware wise since this can be one of the baby symptoms of your GPU dying. If that is the case here, you should get your GPU or your computer RMA’d.

