Cortana, as we all know, is a personal assistant for the Windows platform. Microsoft launched the digital assistant first on Windows Phone 8.1 and the service then made its way on the desktop with Windows 10. The name Cortana is taken from a character from the Halo games that came from Microsoft Studios where the character was a synthetic intelligence assisting the protagonist Master Chief.
Anyway, the history aside, the digital assistant from Microsoft is available for both Android as well as iOS and it comes with some amazing features which include the ability to sync your phone’s notification on your Windows 10 computer(s). The process to sync your notifications is quite straightforward and all you need to do is install the apps, go to Cortana settings and set up the cross-device syncing. But sometimes the sync stops working at all and there might be a few reasons for that.
One reason which is specific to Android is the battery optimization on the platform which disables autostart for Cortana which means it cannot access your notifications. But in this post, we will look at a bunch of solutions that will help you solve the issue and without any further ado, let’s get started.
Cortana Not Syncing Phone Notifications, How to Fix?
- Allowed Notification Access to Cortana
- Cortana Not Limited to Only Battery Optimization
- Clear Cortana Data
Solution #1: Make sure you have allowed notifications access to Cortana
Sometimes after getting a software update on your phone, the settings are reset and you need to choose and set preferences again to make sure Cortana is working properly. For this, you have to make sure that Cortana can access your notifications so it can sync it across devices. The process to allow notification access to Cortana is different on Android and iOS and both of them are mentioned below.
Android
On Android, you need to allow access to notifications separately in order for the notification sync to work. In order to do that, follow the steps below.
- Open the Settings app on your Android phone and use the search function and type “notification access”.
- Open the Notification Access option and you will see something like the image added below.
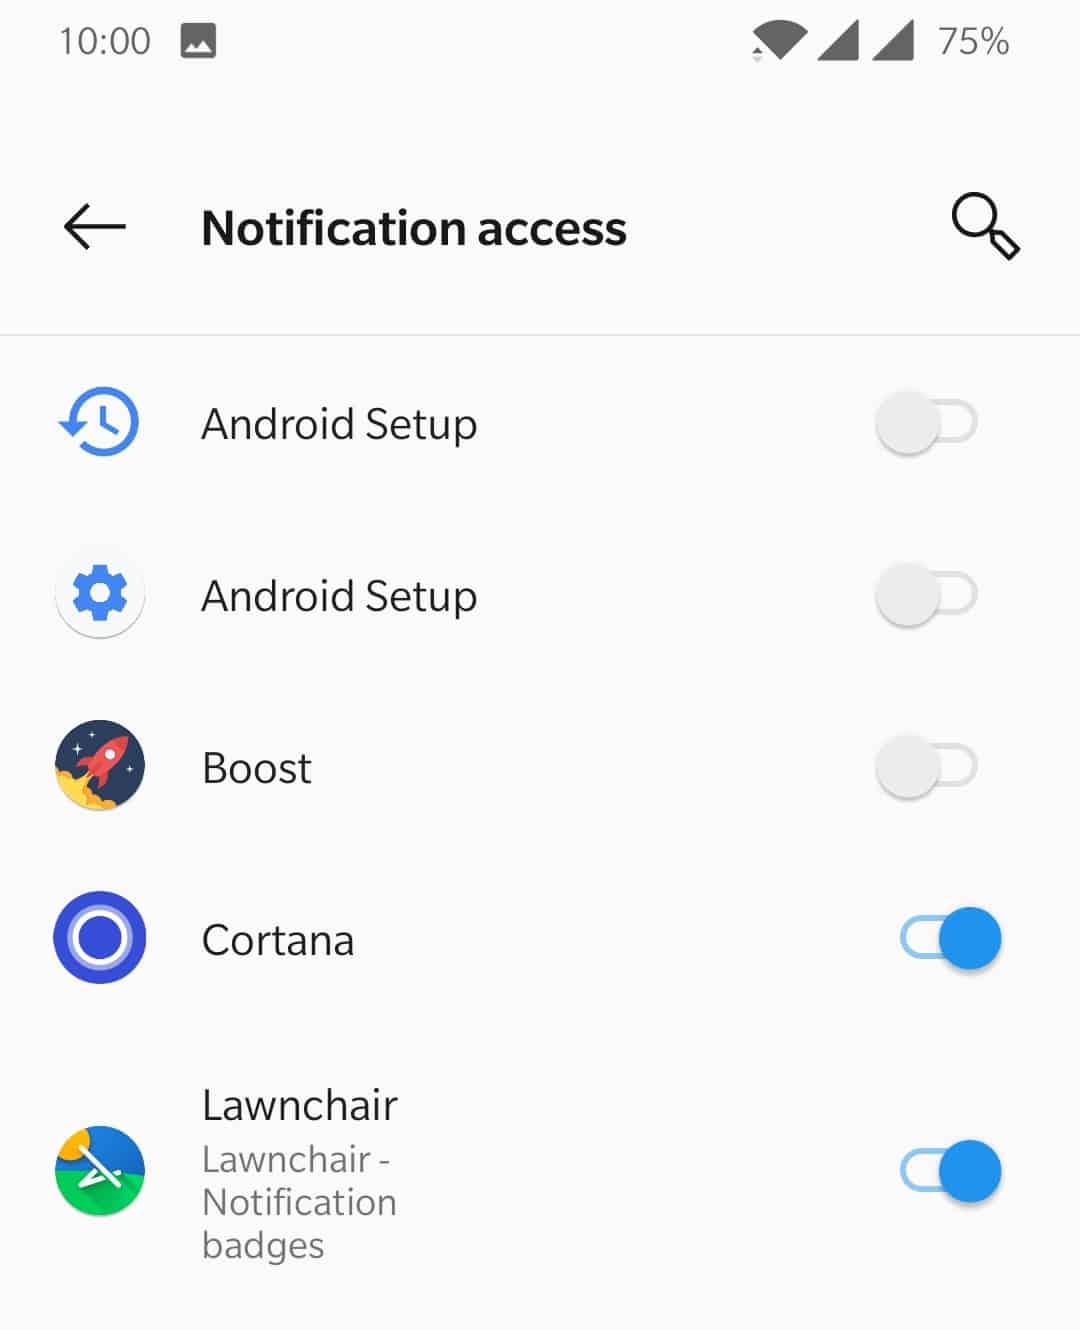
- As you can see in the image above, the setting has been turned on for Cortana and you need to make sure the same is true for your Android phone.
If the notification access on your phone is disabled for Cortana, then make turn it on using the switch given there. Once the switch is on, Cortana will have access to your phone’s notifications.
iOS
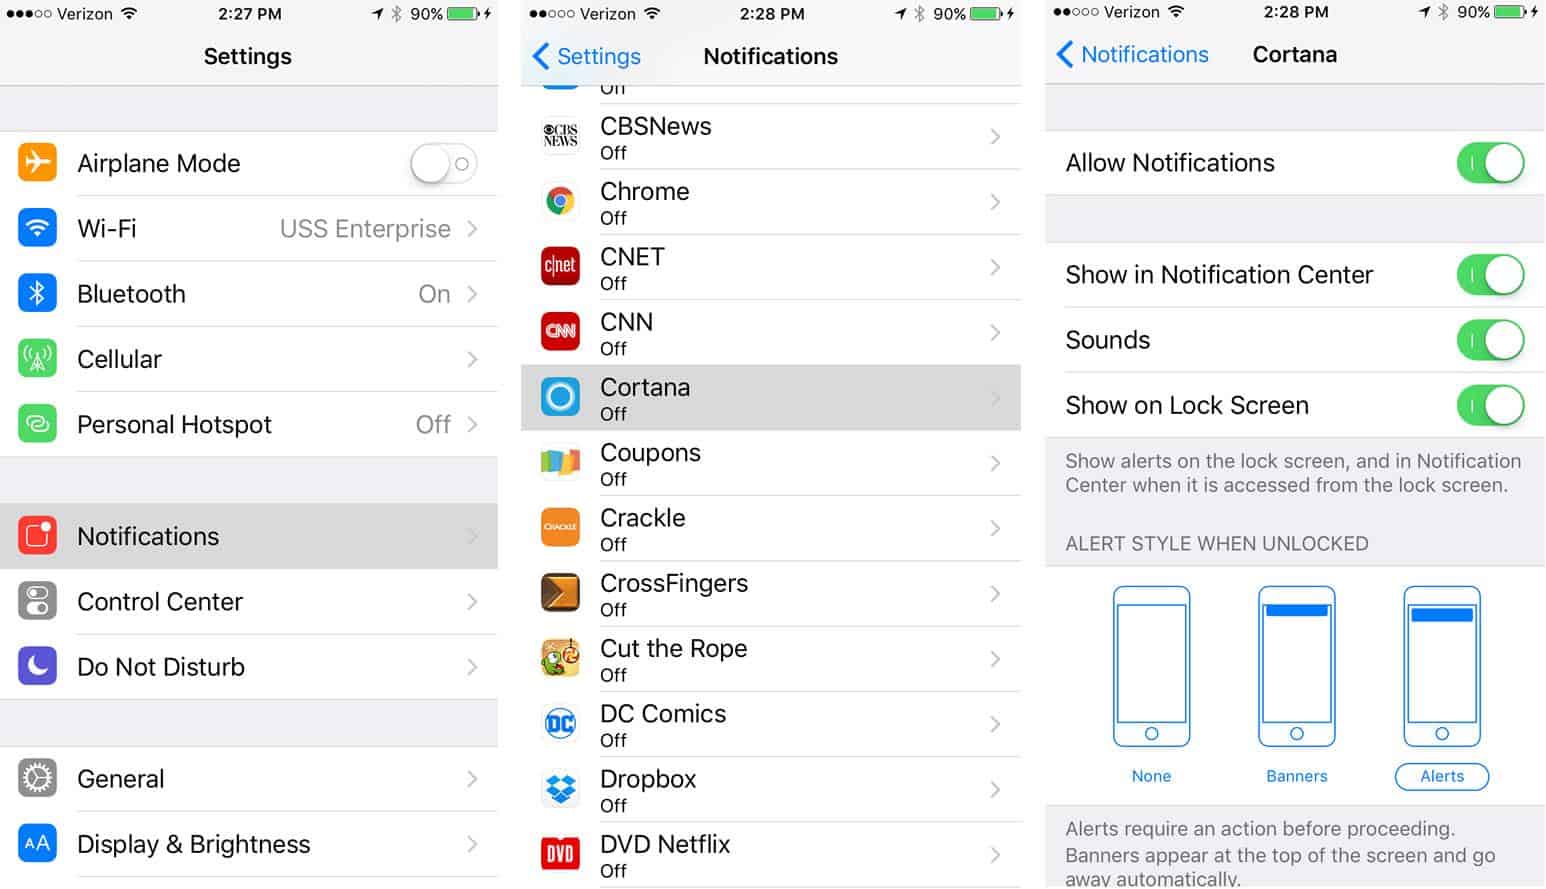
For iOS, you need to open the Settings and then go to Notifications. In this new screen, you will see the names for the applications installed on your iOS device. Just scroll down and look for Cortana. Tap on the Cortana option and turn the button on and make sure Allow Notifications is turned on. This is all you need to do on iOS in order to allow Cortana to read your notifications.
Solution #2: Make sure Cortana isn’t being limited by Battery Optimization
On Android, the system suppresses background apps from running in the new Battery Optimization option in Battery Settings. This prevents Cortana from working properly and in order to fix this, you need to go through the steps listed below.
- Open the Settings app on your Android phone and use the search function to search “battery optimization”.
- Open the Battery Optimization option screen and from the drop down, choose All Apps.
- Now, scroll down until you find Cortana and check if the option for Cortana says “Optimize”.
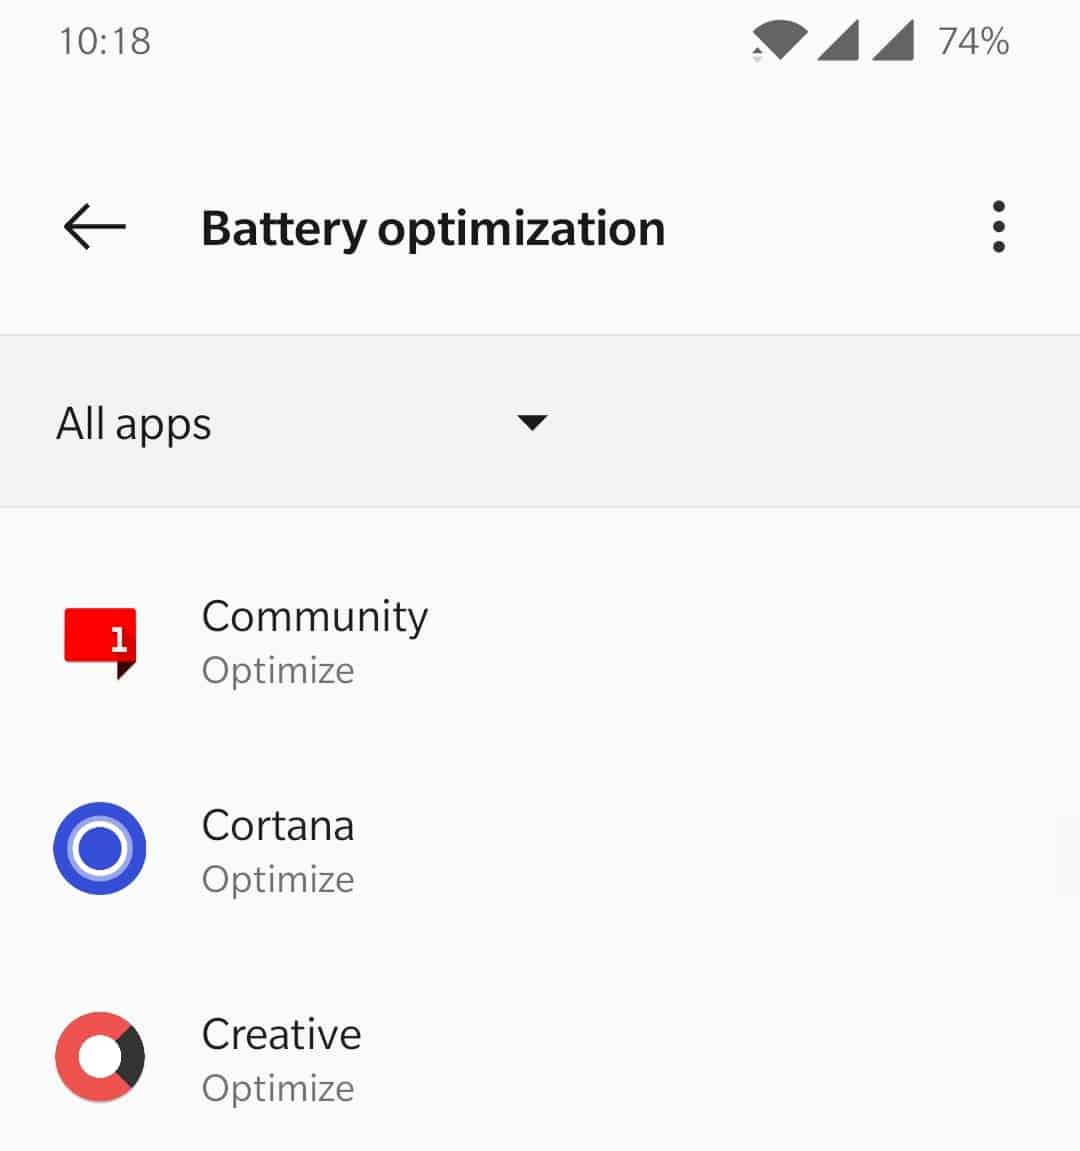
- As you can see in the screenshot above, Cortana is being optimized by Battery Optimization which is restricting Cortana from syncing notifications properly.
- Tap on the Cortana option and then choose Don’t Optimize.
After you have set Cortana to Don’t Optimize, the app will now be able to run in the background and read notifications automatically for syncing. If both of the solutions mentioned above have not fixed the issue for you, then move over to the next solution.
Solution #3: Clear Cortana Data
Let’s try clearing the Cortana Data stored on your Microsoft Account which will essentially reset Cortana completely. Please keep in mind that this is going to completely reset Cortana and everything saved on the digital assistant will be wiped including your reminders, notes, alarms etc.
So carry on with this process only if you are OK with the sacrifices that you are going to make. Once you have made peace with the options you’re going to lose, go ahead and follow the steps mentioned below.
- Head over to https://account.microsoft.com/ and login to your Microsoft account which you are using for Cortana.
- Once you have logged in, just click on the top right side of the screen where you see your name with your avatar.
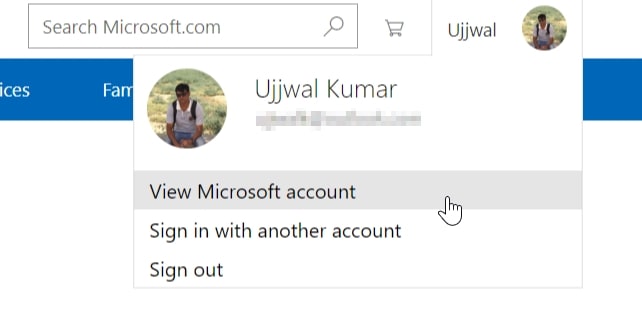
- From the options you see here, click on View Microsoft account and this will open the new page.
- Now, click on Privacy which will open the Microsoft account Privacy page.
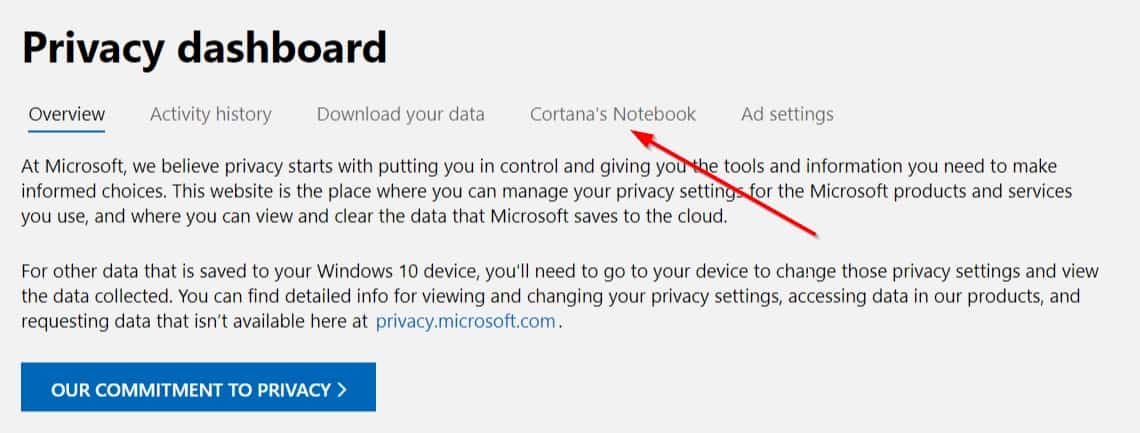
- Click on Cortana’s Notebook and this will open the Cortana settings page for your account.
- On this page, you will see everything stored about Cortana for your account. All the settings and preferences will be mentioned on this page.
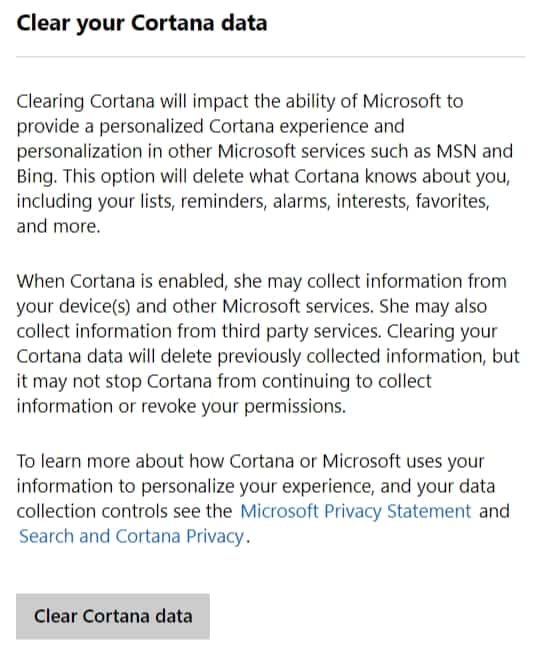
- On the right side of the page, you will notice a button that reads Clear Cortana data.
Click on the Clear Cortana data button and wait until the data is cleared. Once it is done, all the settings, preferences and all the data stored with Cortana will be deleted from your Microsoft account and Cortana will be reset. Now go ahead and set up Cortana again and this time, Cortana should work properly and sync notifications across devices as usual.


3 thoughts on “How to Fix Cortana not Syncing Phone notifications on Windows 10?”
There is no “battery optimisation” setting on Android, search returns no result on the full string and just typing battery gives a lot of results but nothing for “battery optimisation” or “battery opt”.
Awesome, thanks this worked!! Been driving me nuts for past month. Thanks for the post!!!
@Mr. Magoo… in Android settings, search battery. Click on the first one (general). About half way down screen, click on “Power saving exclusions”, then ensure Cortana is selected.