If you’ve ever encountered complications in sleep, you may be affected by the blue light emitted by your computer, especially if you have a desk job that requires you to operate a computer for prolonged hours. This deteriorating light not only strains your eyes but also affects your cognitive abilities and hinders your thought process.
Keeping that in mind, Windows being a productivity giant has incorporated a feature known as “Night Light” in their most recent operating system iteration, Windows 11. It allows you to set warmer hues on your display to prevent the emission of blue light and get rid of the ailments caused because of it.
Table of Contents
Moreover, you can even adjust the color strength on Windows 11 as per your preferences and enjoy greater ease of usage. That’s why Windows 11 is considered one of the most prominent operating systems for students and working professionals. The best thing is that you don’t even require any third-party apps to enable night filters in this operating system.
If you’re wondering how to enable night light in Windows 11, need not worry because this article will highlight the exact steps that you need to reproduce to get this feature up and running on your operating system. Additionally, you’ll also learn a couple of amazing things related to the feature. Therefore, make sure you stick to the guide till the end.
How To Enable Night Light in Windows 11?
There are several ways to enable night light in Windows 11. However, before you proceed with the tutorial, keep in mind that there are some monitors that have built-in features similar to night-vision. If you enable both the features at once, the resulting display will be somewhat distorted. Therefore, either uses the former or the latter, but not both at once.
Using Windows Settings App
To enable night light in your Windows 11 through the “Settings” app, follow the steps given below:
-
- Press the Win + I key together on your keyboard to access the “Windows Settings” applications in Windows 11
- Press the Win + I key together on your keyboard to access the “Windows Settings” applications in Windows 11
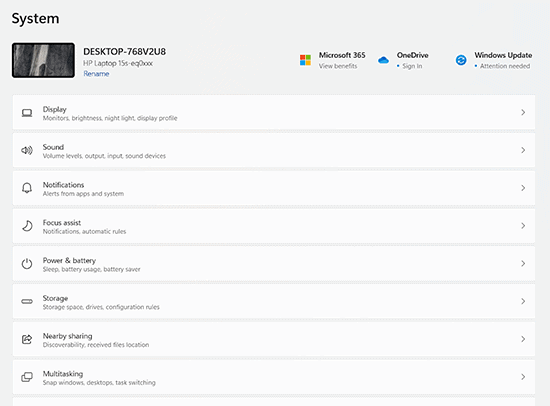
- to the “Systems” tab on the new window and click on the “Display” option located under your PC’s name
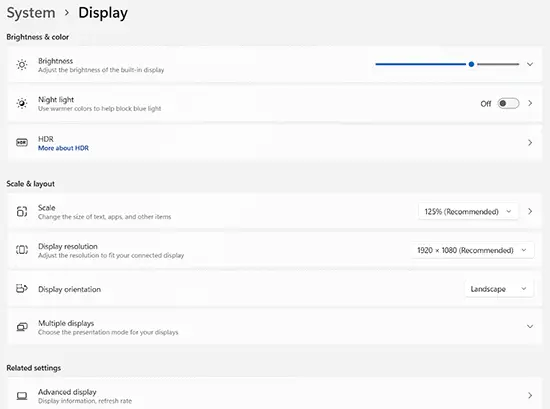
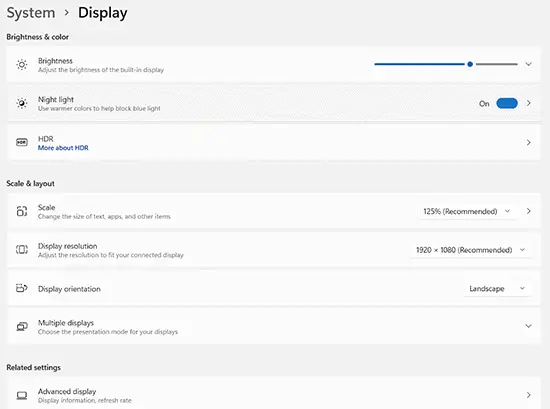
- Under the “Brightness and Color” option, turn on the “Night Light” feature by clicking on the toggle button located next to it
- On the new window, click on the “Turn on now” button to immediately enable the Night Light feature of Windows 11
You can also use the Quick Settings panel available in Windows 11 to access the “Night Light” feature without having to navigate through the settings at all. It’s not only convenient but also saves you a lot of time in the process.
Using Quick Settings
As stated above, using the Quick Settings panel to toggle the night light on and off can save you a lot of time. It is already available in the interface by default and you simply need to follow the steps given below to enable it:
- Press the Win + A button together to access the Quick Settings Panel in Windows 11. Alternatively, you can also click on the space where Wi-Fi, battery, and sound-symbol are located
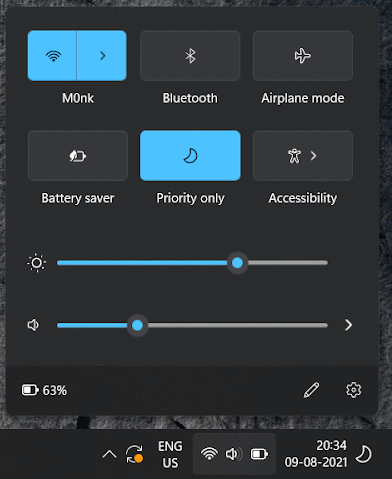
- Then, click on the “Night Light” tile on the Quick Settings panel to enable it
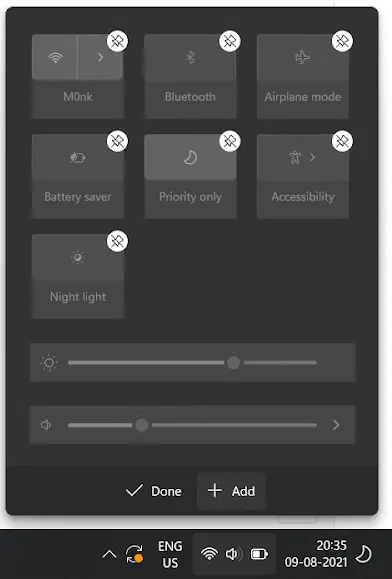
- In case the option isn’t available on your operating system, click on the pencil icon located at the bottom-right corner instead
- Afterward, click on the “Add” option, followed by choosing the “Night Light” option to add it in the quick settings pane
Once you’ve added the Night Light option, you can easily access and toggle it through the Quick Settings panel. You can even schedule this feature based on your geographical time to trigger Night Light on as soon as it gets dark.
How To Schedule Night Light for Sunset and Sunrise?
With the help of Windows 11, you can also schedule Night Light to turn on and off automatically at specified time intervals. You have the liberty to set a particular time to trigger this feature and prevent having to navigate to Windows Settings again and again.
There is even a unique feature known as “Sunset to Sunrise” that allows you to schedule the Night Light feature as per the time of your present location. Here are the required steps that you need to follow:
- First of all, access the “Windows Settings” app by pressing the Win + I key together on your keyboard. Alternatively, you can also access the app through the Start menu or Search function on Windows 11
- Once you’re on the Settings interface, navigate to the “System” section and choose the “Display” option on the right-hand side of the screen
- Then, click on the “Night Light” option and select the “Schedule Night Light” option to turn it on
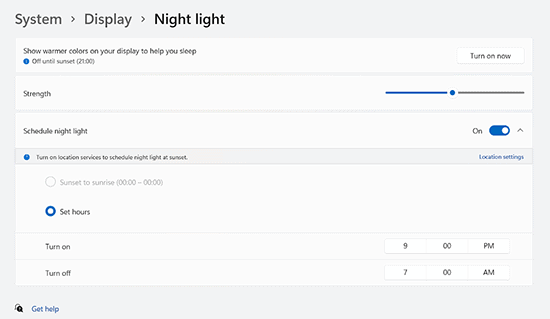
- Under the “Schedule Night Light” option, check to mark the “Sunset to Sunrise” option to automatically trigger the feature as per your geographical location
- You can also set your own schedule with the “Set Hours” option located right under the “Sunset to Sunrise” option
As you may have observed, there is also a slider located at the “Night Light” settings page. With this slider, you can change the strength of the Night Light based on your requirements. All you need to do is drag the slider left to right and choose the desired strength that feels soothing to your eyes based on how lit your surroundings are. That’s all you need to do to enable and disable the night light feature on Windows 11.
Final Words
Among the various amazing features of Windows 11, the Night Light feature is one of the most useful out of all. It prevents your eyes from getting strained due to continuous exposure to blue light and enhances your productivity. Therefore, make sure you use the methods given above and use the “Night Light” feature to enjoy a better and more convenient user experience.

