The blue screen of death/black screen of death (BSDO) error has always been a nightmare for Windows users across the globe. Previously, all versions of Windows have had this issue, and the new Windows 11 is just no exception. Microsoft has released the beta version of Windows 11 as a Windows Insider program, and the official release is due as of now. For all obvious reasons, the preview build of Windows 11 comes with many bugs, causing your PC to lag and freeze every now and then.
The Windows 11 blue screen error is one of the most common problem that early adopters are facing quite often. If you are also one of them and looking for easy troubleshooting methods, then you are not going to be disappointed. Here we have come up with a complete guide on how to fix Windows 11 BSOD errors.
Table of Contents
What Causes the BSOD error on Windows 11?
The blue screen of death (BSOD) error appears as a black screen on Windows 11. It’s a system error which is also popularly known as a stop error. The problem pops up when there is a fatal system error on your PC.
The problem can happen both because of software or a hardware compatibility issue. From missing or corrupted system files to outdated device driver software, anything can lead you to a BSOD error on Windows 11.
The reason behind the critical process died error on Windows 11 can be an improper BIOS update. Apart from that, malware can be one of the major reasons you are facing Windows 11 BSOD errors.
How to Fix Windows 11 BSOD Error?
As you can see, there might be multiple reasons behind the Windows 11 stop codes popping out with a black screen on your PC. Therefore, depending on the nature of the problem or, more precisely, what exactly causing the black screen error, you might have to try different fixes. Stay glued and try each of the resolutions mentioned below, and it will remove the error.
Method 1: Access your PC in Safe Mode
Accessing your PC in Safe Mode is not going to resolve the problem, but if your PC does not boot after a BSOD error, the only way to access it is through the Safe mode. You can try the further fixes that we have mentioned hereafter accessing the safe mode in that case. Follow the steps below to access your PC in safe mode,
- Restart your PC, and upon showing the Windows logo on the screen, reboot it again.
- Next, repeat the same process twice to open the automatic repair environment.
- After that, select the Troubleshoot tab there and click on Advanced options.
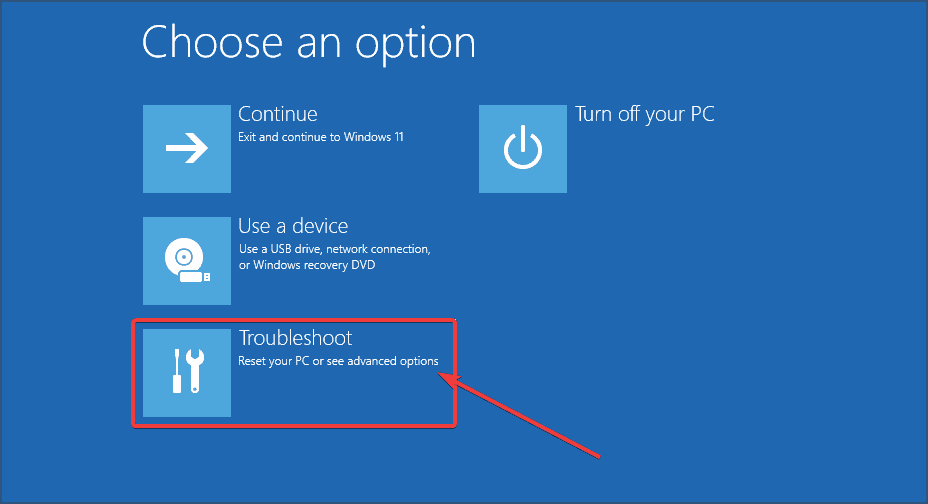
- Then select Startup Settings and click on the Restart button.
- Upon restarting, pressF5 to start Safe Mode with Networking.
Method 2: Reinstall or Update the Input Device Drivers
If an outdated input device driver causes the problem, updating them from Widows Device Manager will fix it. Follow the steps below to update the USB Input Device driver on your PC.
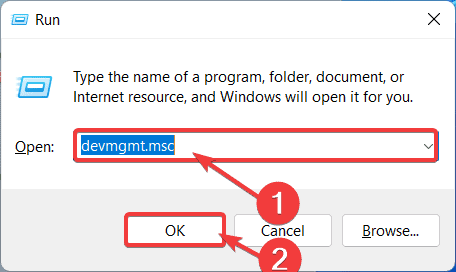
- Press the Windows Logo Key + R to open the Run dialog box on your PC.
- Now, in the search field, type devmgmt.msc and hit the Enter button.
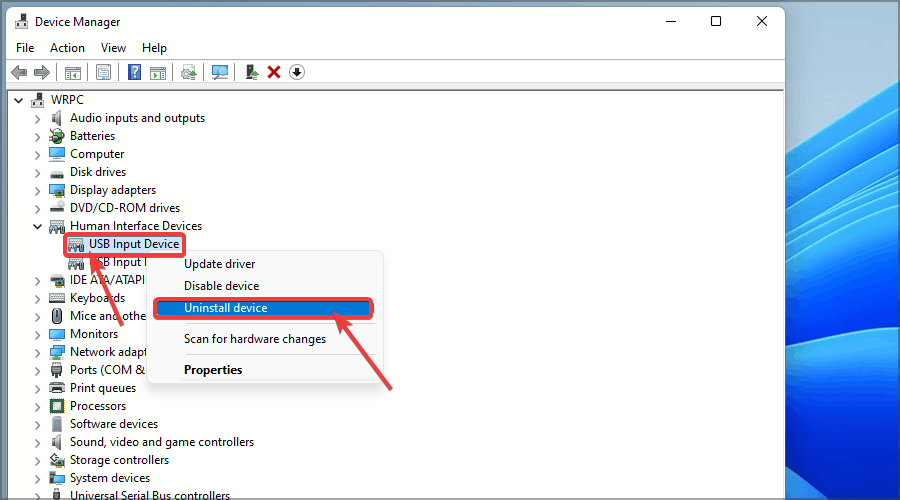
- As the Device manager window opens, locate and click on the Human Interface Devices tab to expand its menu.
- Now, right-click on each of the components one by one and select the Uninstall device option.
- Once you complete the uninstallation, simply close the Device Manager window and Restart your computer.
- Windows will automatically reinstall the latest drivers for all the device drivers you uninstalled previously upon restarting your PC.
If the outdated input device driver was the reason behind the BSOD error, then it must be resolved by now. However, if the problem returns, you need to try further fixes.
Not only the Human Interface devices driver but all the drivers available on your Windows 11 need to get a timely update. Check out how to update Windows 11 driver.
Method 3: Run the Windows Troubleshooter
Windows 11 comes with a built-in troubleshooting console that can resolve issues related to missing or corrupted system files. Here are the steps that you need to follow to Run Windows troubleshooter,
- Firstly, press the Windows Logo key and click on Settings.
- Now, from the left pane, select System and click on Troubleshoot.
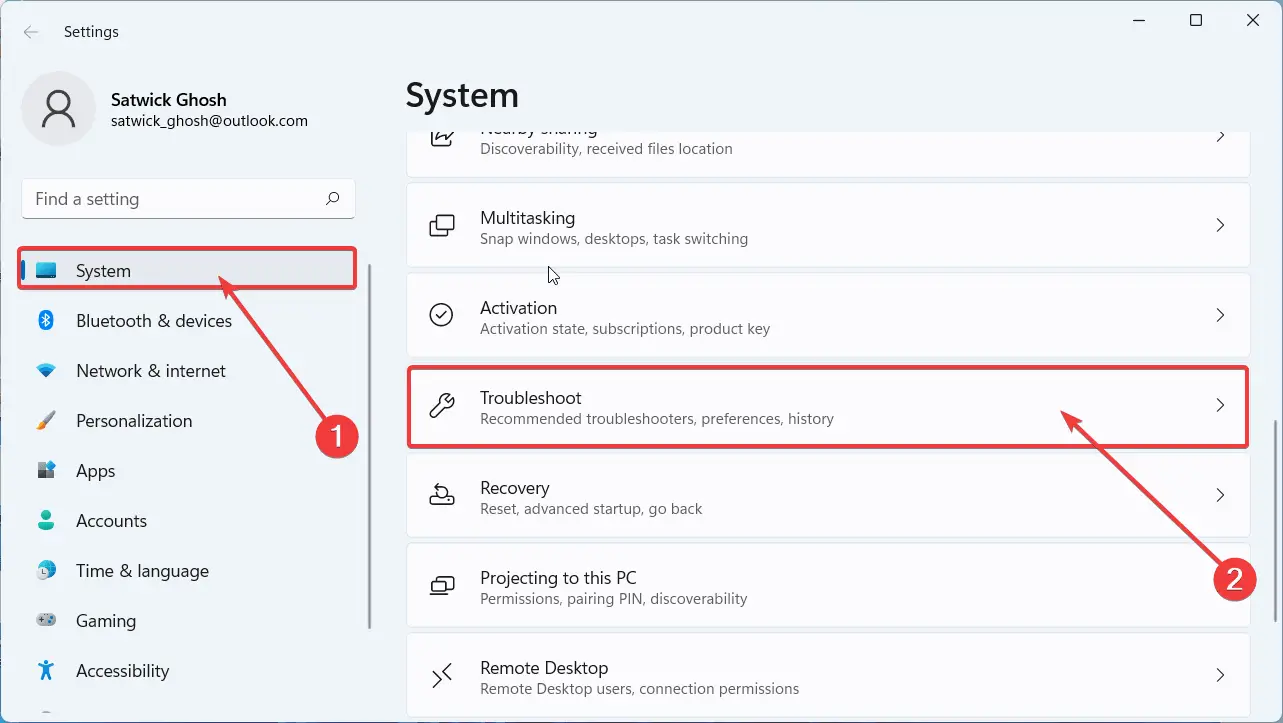
- Then, as the troubleshoot options window opens, click on Other troubleshooters.
- Finally, click on the Run button beside each troubleshooter and check if that resolves the issue.
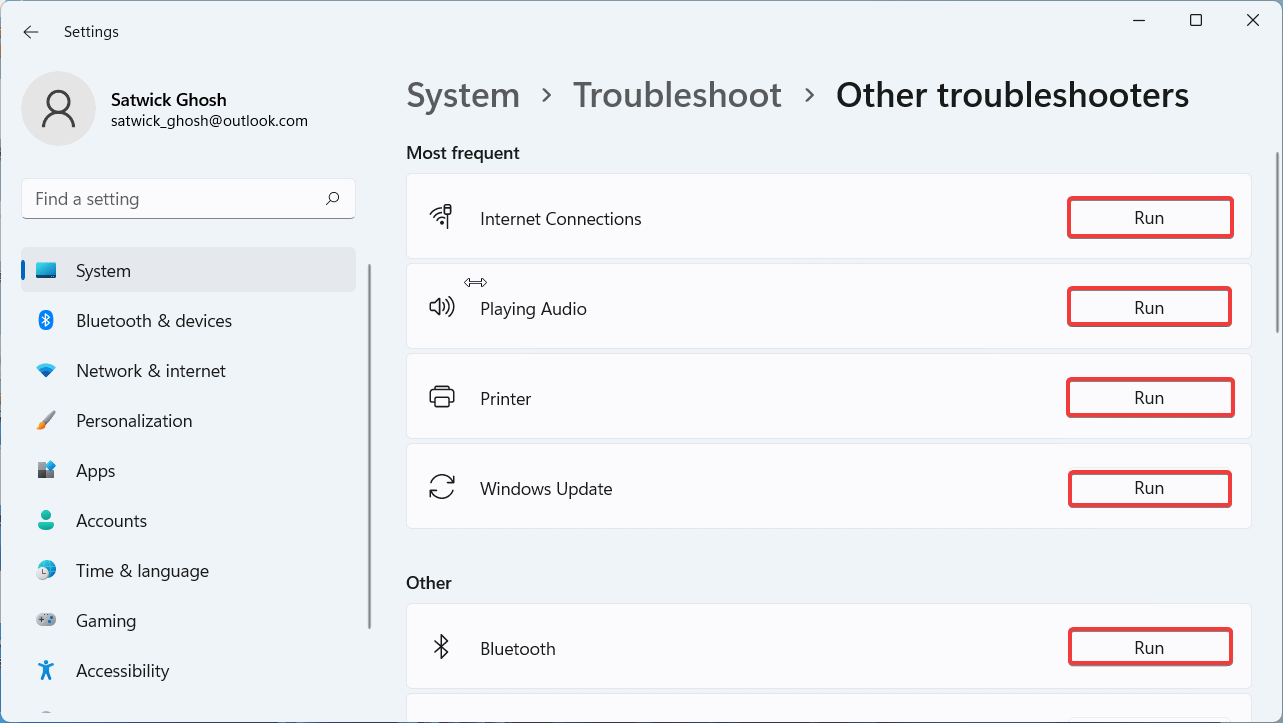
If running the troubleshooter does not fix the issue, you need to try further resolutions.
Method 4: Run SFC Scan
If there are corrupted or missing system files, you can easily find that by running the system file checker console on your Windows 11 computer. SFC scan can help you to identify the most relevant issue that might cause the BSOD error on your system. Here are the steps that you need to follow to open and run SFC scan,
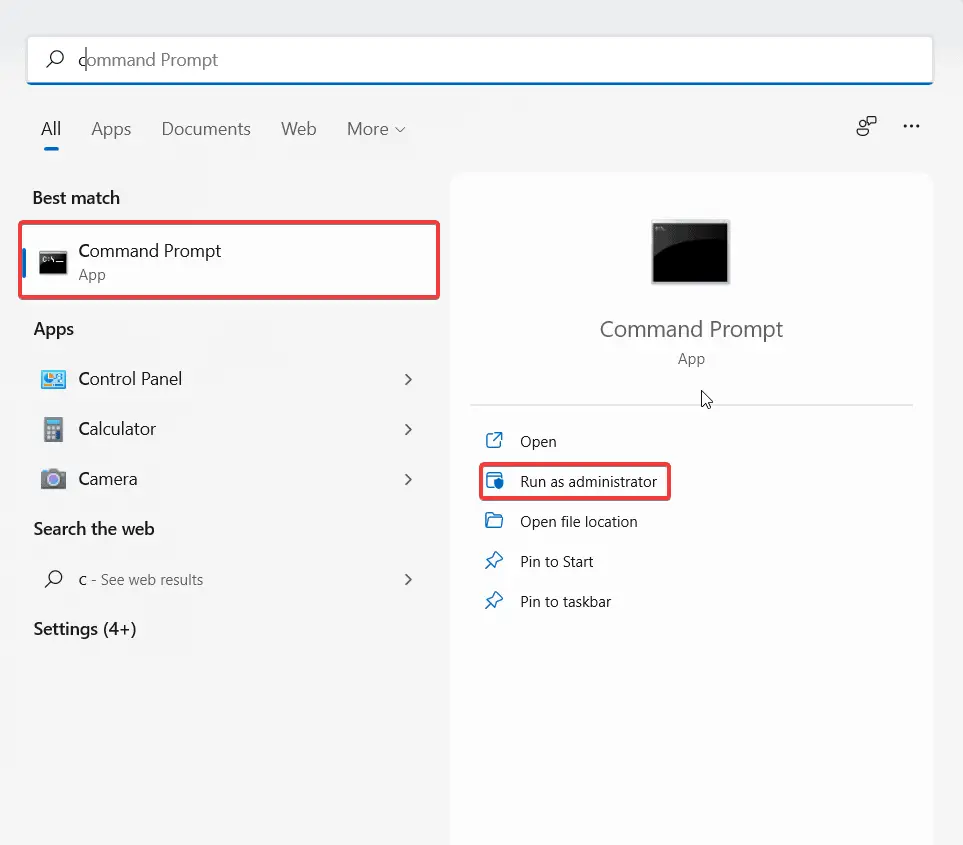
- Click on the Windows search icon and type cmd there.
- Select Command Prompt and click on Run as administrator.
- As the pop-up window asks for further confirmation, select Yes.
- Now, type the following command and press the Enter key on your keyboard.
sfc /scannow
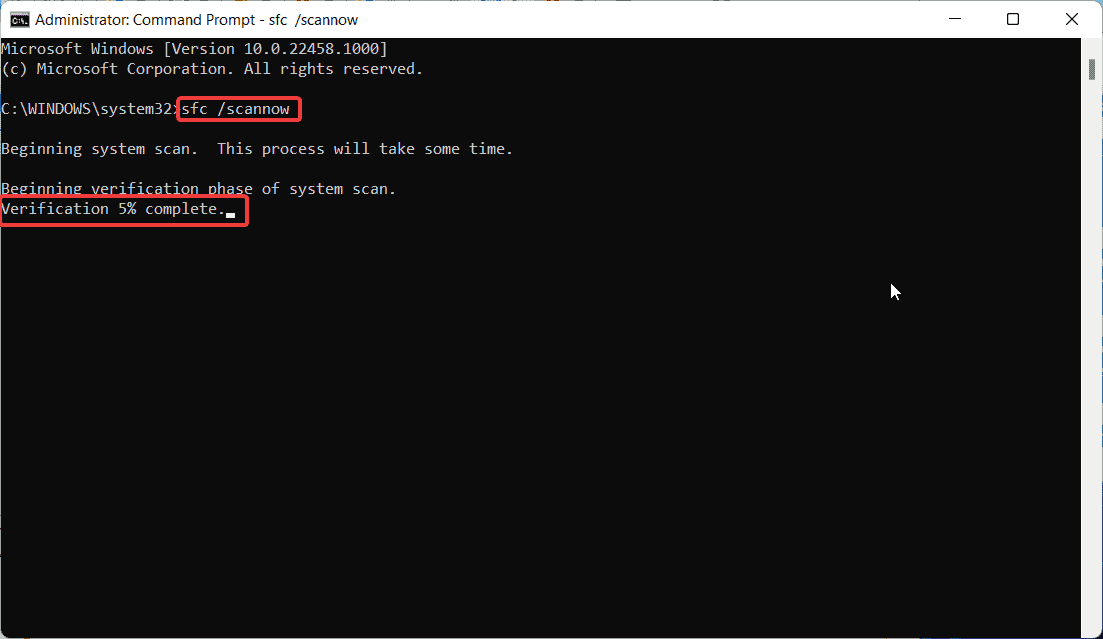
- Wait until the process completes and Restart your PC once done.
Method 5: Run Check disk
A corrupted disk drive can be the reason behind the Windows 11 black screen error you are facing. Therefore, running the disk checking console on your system will help you resolve any error related to possible disk corruption. Follow the steps below to run a disk check,
- At first launch command prompt with administrative rights.
- Select Yes as the further confirmation window pops up.
- Now, on the elevated command prompt window, type the following command and hit the Enter button.
chkdsk C: /f /r
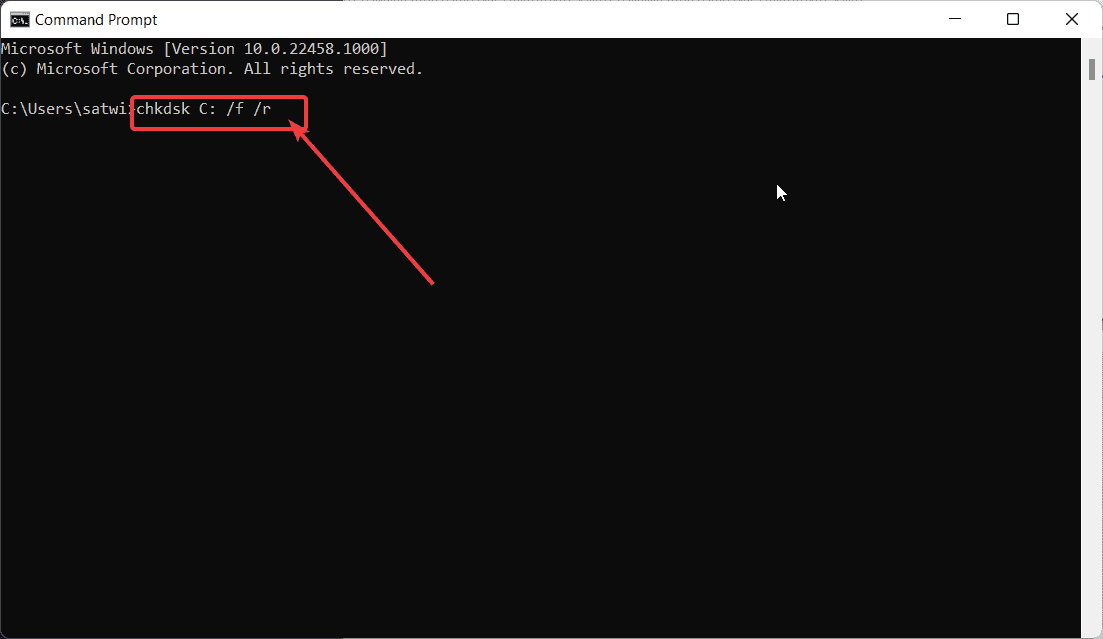
- The letters ‘C:‘, ‘f’, ‘r’, and ‘x’ represents the following:
- C: implies the local disk drive where the Windows 11 is installed
- The letter ‘f’ implies Fix
- On the other hand, ‘r’ means recognizing the issue
Note: As you run the command, it won’t process right at that time since the disk drive you are checking for probable errors is already in use.
- Type’ Y’ to run check disk next time you restart your PC.
- Finally, reboot your computer to run the process and fix problems related to disk corruption.
If the BSOD error has become frequent on your system after installing a Windows update, the update file might be problematic. In that case, you will have to uninstall the problematic Windows update to get out of the problem.
Check Windows 11 latest preview build update details.
Method 6: Remove Problematic Windows Update
An update file with bugs can be the reason you are facing the black screen error on Windows 11. Follow the steps below to remove an update on your PC,
- Open the Run dialog box by pressing Windows key + R on your keyboard.
- Now, on the search field, type the following command and hit Enter.
Appwiz.cpl - As the Programs and Features window opens, click on the View installed updates button on the left pane.
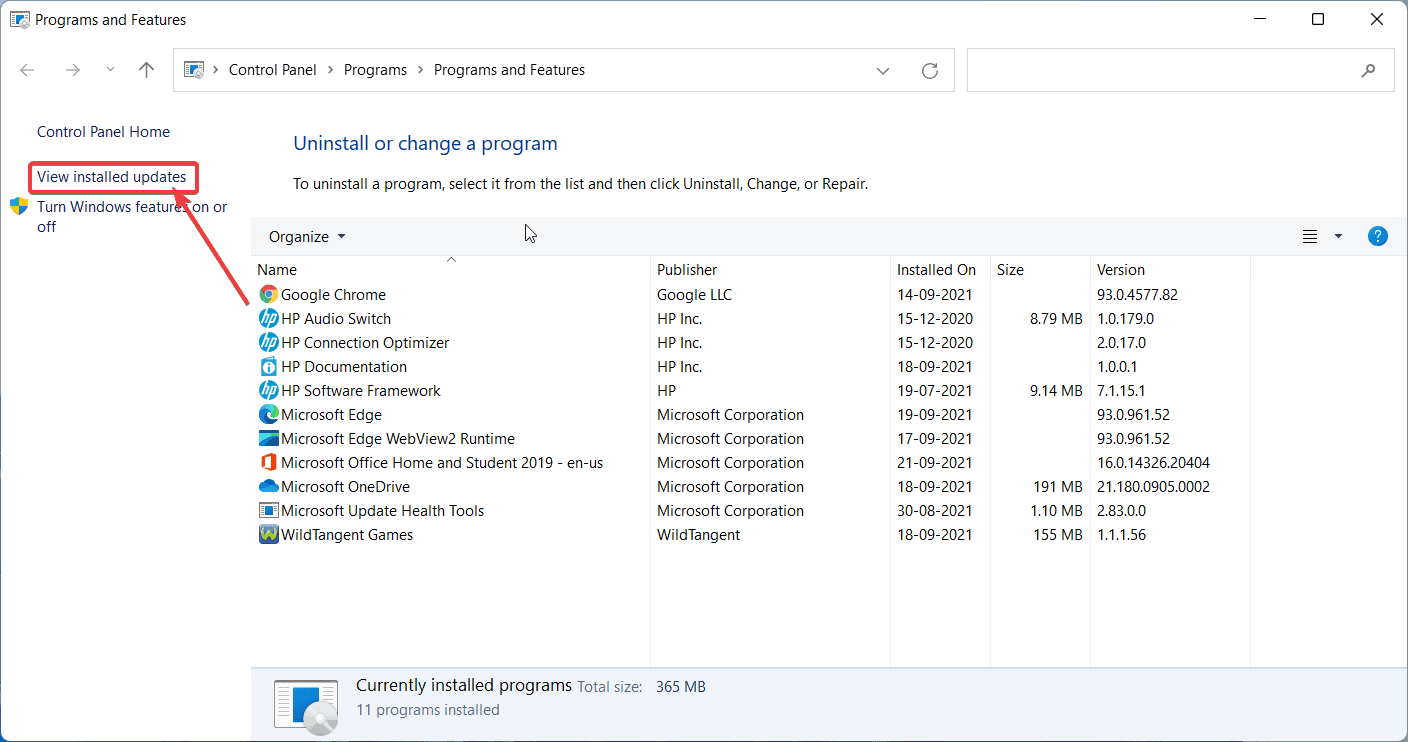
- Finally, from the list of updates, double-click on the one that you need to remove.
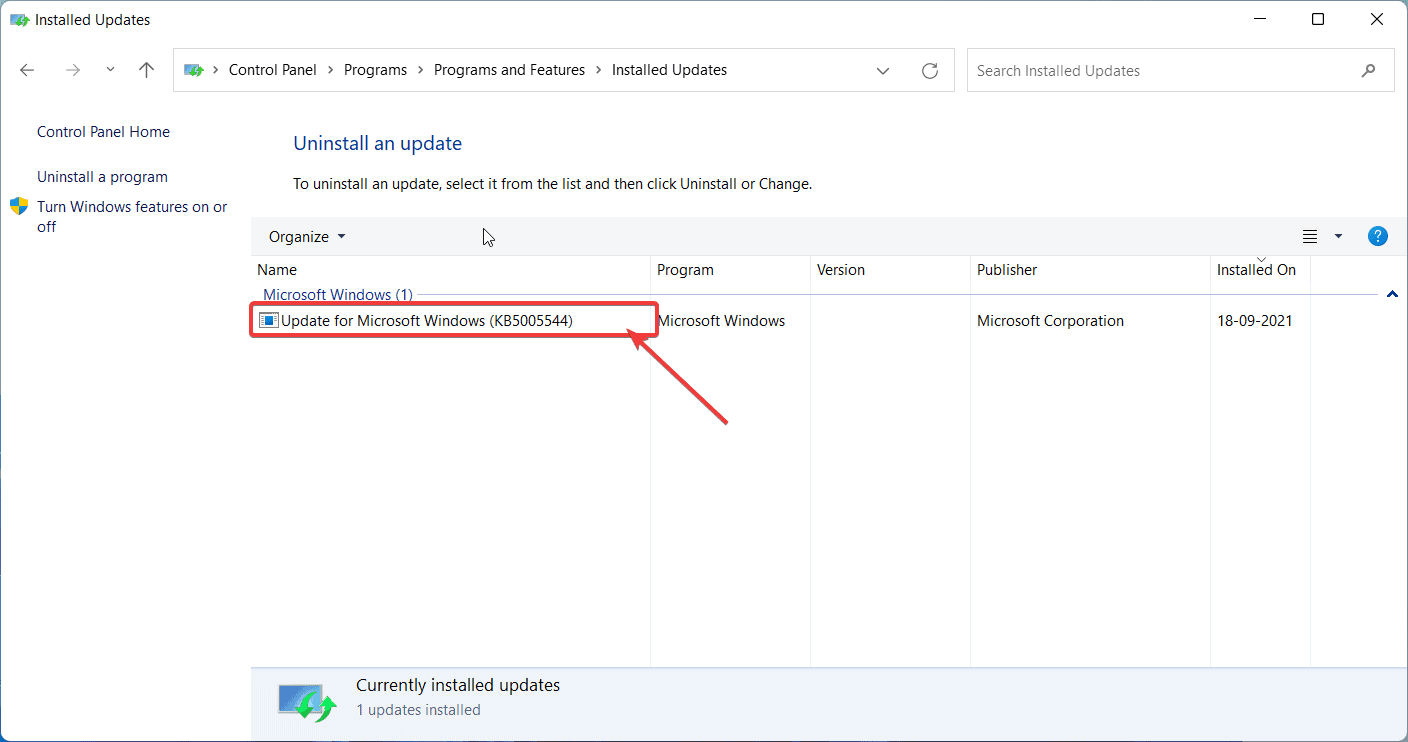
Once you are done with the uninstallation, restart your computer and check if everything gets back to normal.
However, if the above solution does not work as well, the best way to resolve the BSOD error will be to factory reset your PC. Check the method mentioned below.
Method 7: Reset Windows 11
Resetting your PC will remove all the problem-causing files and restore the OS to its initial version. Try this method only if all the above methods do not work. As you reset, your computer will remove all the changes you have made so far, including your documents, media files, and others. Thus, make sure you take a backup of your important data before performing the steps.
- Firstly, press the Windows Logo Key + I to open Windows Settings.
- Now, click on System from the left pane and scroll down to locate the Recovery tab.
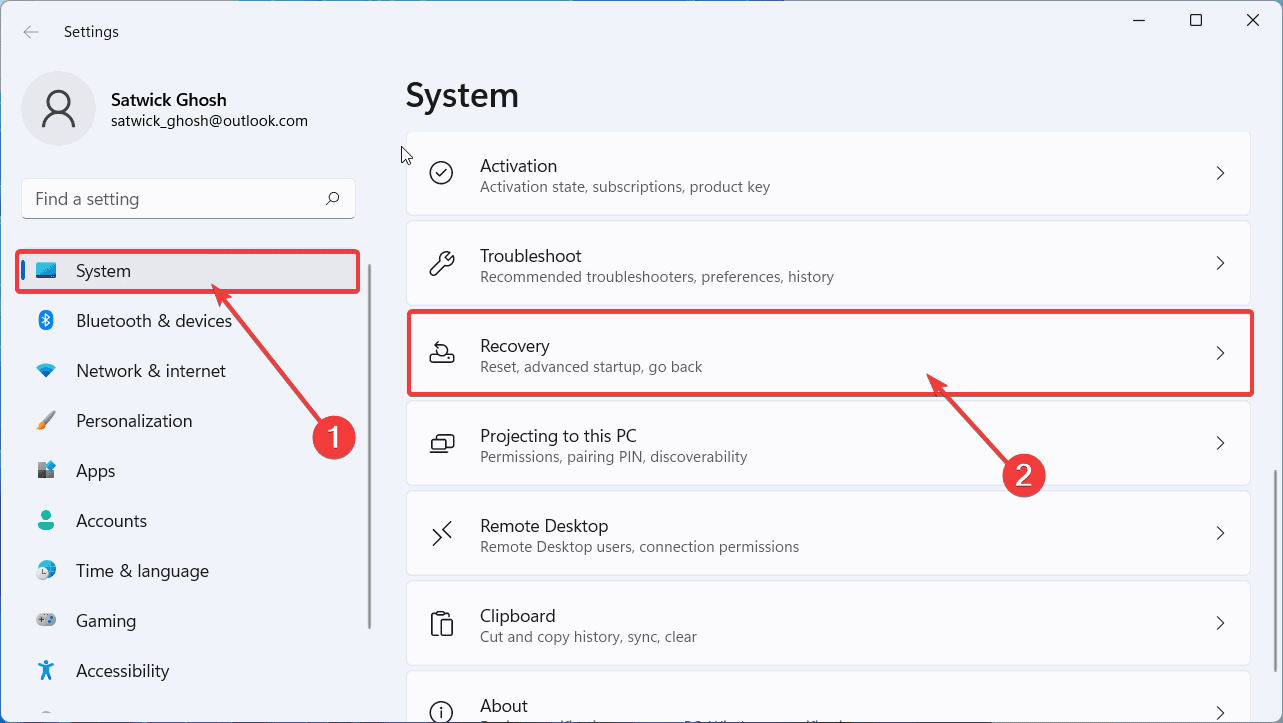
- Then, select Recovery, and from there, click on the Rest PC button in the new window.
- Under the Reset this PC pop up, select the desired option.
Note: However, we recommend selecting the Remove everything option since the BSOD error has been persisting issue on your system.
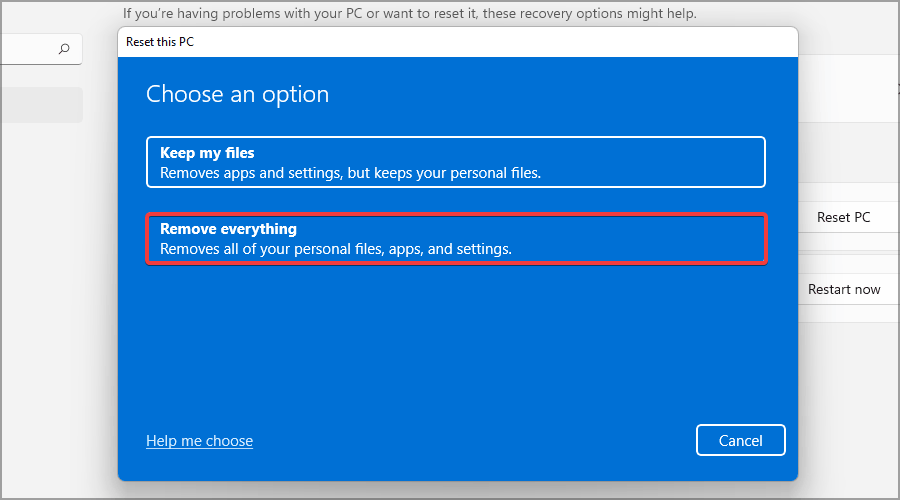
- Now, select the option Local reinstall so that your PC installs the original built-in OS version it had.
- Then, confirm your re-installation settings and hit the Next button.
- Finally, click on Reset and follow the simple on-screen instructions to finish the process.
That’s all. We hope that you find the article useful. We have discussed all the methods on how to fix Windows 11 BSOD error. Let us know which method worked for you in the comment section below.

