If you’re looking to create a user account for someone on your computer but don’t have an active internet connection, you can choose to create a local account instead. This account doesn’t require any internet connection to work.
Windows 11 supports majorly two types of accounts – Microsoft account and local account. The Microsoft account is the recommended login option of Windows and allows the user to stay connected with Microsoft’s services.
Table of Contents
With a Microsoft account, you can do a lot of things on your computer like syncing windows settings, managing subscriptions, storing files online, and a lot more. To use a Microsoft account, you’d have to provide details like your location, phone number, and a lot more.
On the other hand, a local account works completely offline and doesn’t require any additional details. Additionally, you can also choose to keep it without any authentication mechanism like a password or pin.
This article will describe numerous methods to create a local account in Windows 11. `
How to Create a Local Account in Windows 11?
To create a local account in Windows 11, you can use a plethora of ways. It can be either done using the settings app, computer management tool, control panel, or even command-line utility. Let us take a detailed look at each of the available methods:
1. Using Settings App To Create Local Account
- Access the Settings app through the start menu or press the Win + I key together on your keyboard
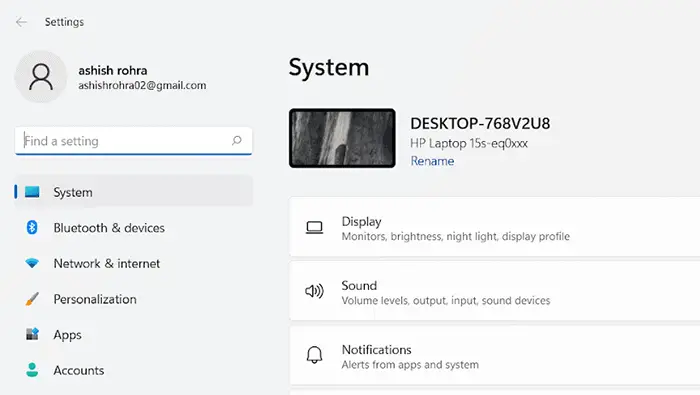
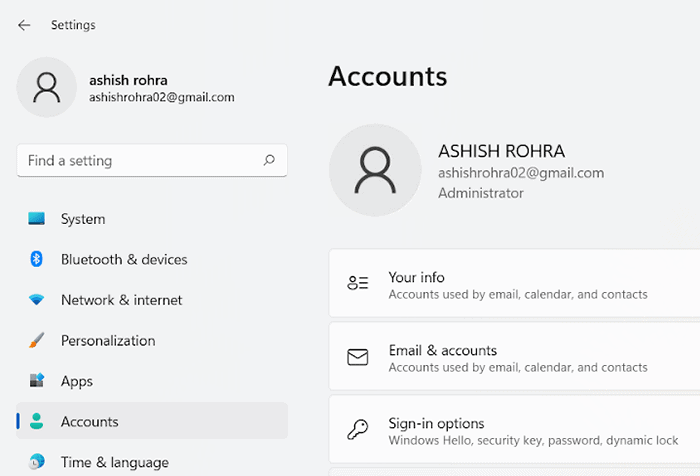
- Click on the “Accounts” option located on the left
- On the new interface, choose the “Family and other users” option located on right
 Then, click on the “Add account” option located at the “Add other users” section
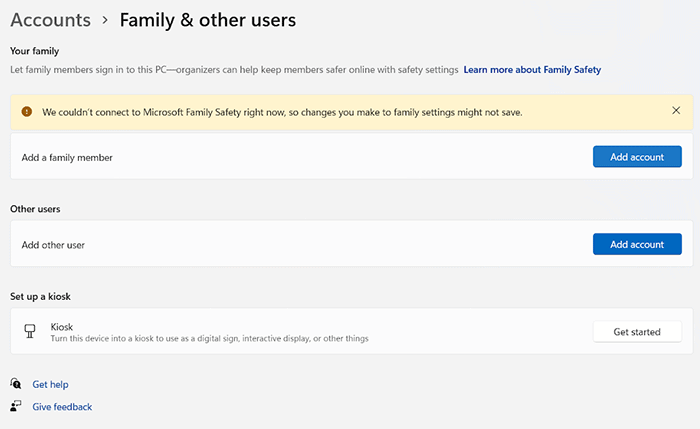
- When the OS prompts you to sign in with a Microsoft account, click on the “I don’t have this person’s sign-in information” option
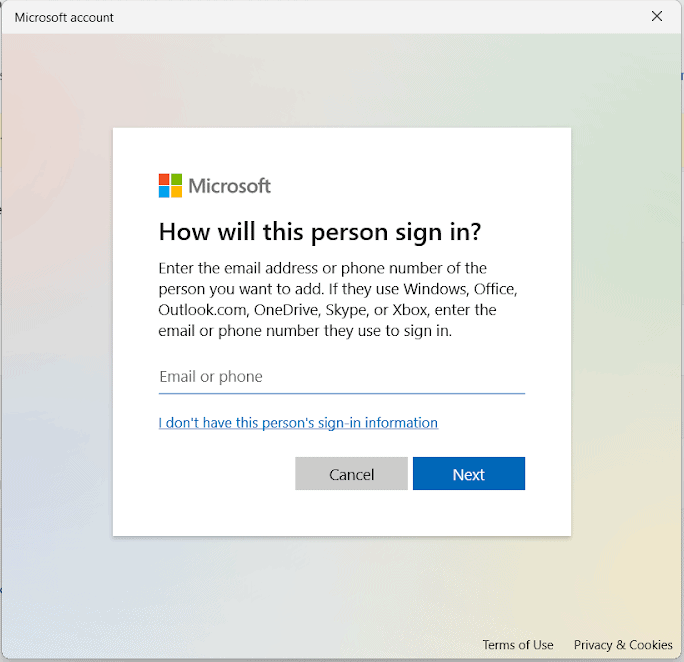
- Afterward, click on the “Add a user without Microsoft account” option
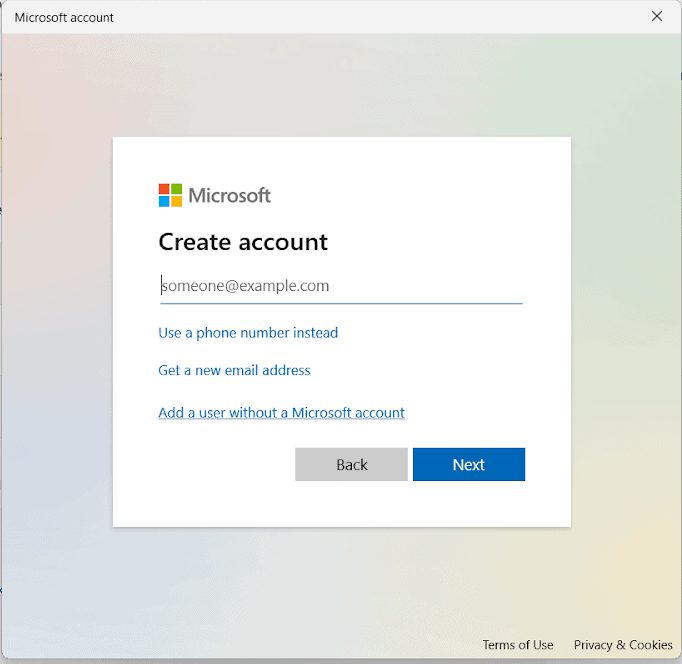
- Now, choose a preferred username for your newly created local user account
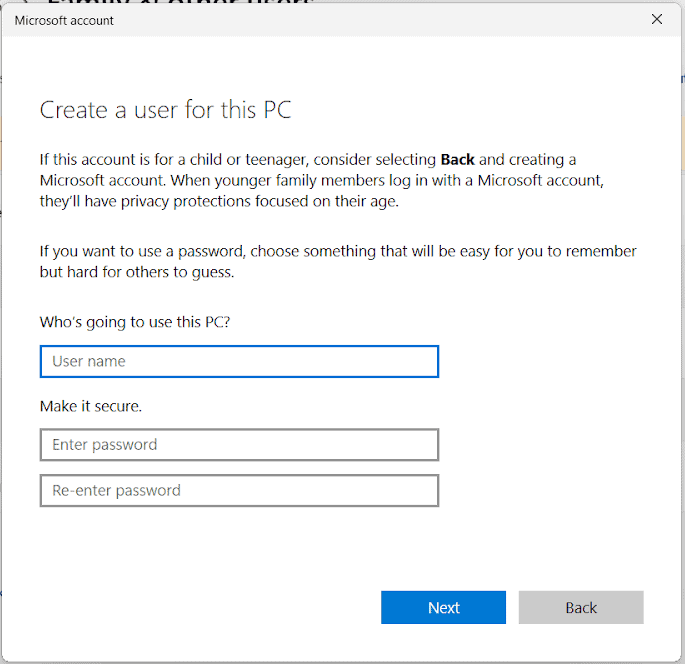
- Optionally, you can also set a password for additional security
- In case you choose to add a password, the operating system will ask you to add a few security questions along with their answers for recovery purpose
- Once you’ve submitted all the required details, simply hit the “Next” button to complete the setup
2. Use Netplwiz Tool to Create Windows 11 Local Account
Netplwiz is a control panel applet available in almost all versions of Windows, which can be used to add a local account. Here’s how to do so:
- Press the Win + R key on your keyboard to access the “Run” function and type “netplwiz” in the input field that appears
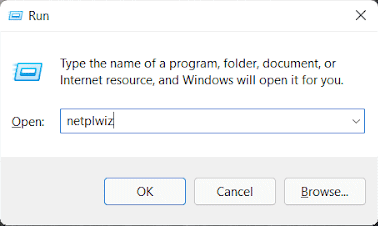
- A floating window will open where you need to navigate to the “Users” tab and tick mark the “Users must enter a username and password” checkbox

- Then, click on the “Add” button, followed by choosing the “Sign in without a Microsoft account” option on the next screen
- Choose the “Local account” option on the next page and specify details like your username, password, and a password hint in the form fields and then click on the “Next” button
- Lastly, click on the finish button to complete the account setup
3. Using Computer Management Tool
- Access the “Run” utility by pressing the Win + R key altogether and then type “compmgmt.msc” in the input field, and then hit the enter key on your keyboard
- Among the various options listed on the left, expand the “Local Users and Groups” section and choose the “Users” option
- In the middle column, right-click anywhere to access the floating menu and choose the “New User” option
- Now, simply add the desired username, password, and other details as per your preferences and click on the “Create” button to complete the process
And that’s it. You’ve successfully created a local user account in Windows 11.
4. Using Net Tool
If you’ve been using a Windows OS for a while, you may already know about the “net” command. It was introduced in Windows iterations almost a decade ago and is still used for various administrative tasks. It can also be used to create accounts with administrative privileges on your Windows 11 operating system. Here are the required steps that you need to follow:
- Access the Windows terminal as an administrator by pressing the Win + X key together and choosing the “Windows Terminal (Admin) option
- If you want to add a local account without any password authentication, you have to type “net user “username” /add” and hit the enter key on your keyboard
- Alternatively, if you’re looking to create a local account with password authentication, you have to type “net user “username” “password” /add” instead
Once you’ve executed the required commands, close the terminal and check whether the account has been added or not.
Can You Setup a Local Account on Windows 11 First Boot?
Although the option to add a local account during the first boot of Windows 11 wasn’t available in the initial release of the preview build, Microsoft added the ability to sign up with a local account later. Moreover, there was even a workaround that allowed users to create a local account without any option to do so on the main user interface. To add a local account on the first boot, follow the steps given below:
- On the login screen, choose the “Sign-in Options” option, followed by choosing the “Offline account” option
- Select the “Limited experience” option on the next screen and enter your name for the local account and then choose the “Next” button
- Now, you can also set a password if required and add three security questions to proceed
After following the aforementioned steps, all you need to do is wait for the OS to complete the configuration process and you’ll be done.
Bottom Line
With the various methods listed above, you can easily add a local account to your Windows 11 operating system. The methods listed above are completely tested and presented in stepwise instructions to help you reproduce them with ease.

