Backing up your images and files from your Windows 11 to another place or external drive is always a good idea. There are a few significant ways you can save a backup of your images and avoid the risk of losing them. This guide is for those who are looking for ways to backup the images and system files from Windows 11 to a place more secure.
Table of Contents
How to Backup Windows 11?
There are two separate kinds of backups available in Windows 11. One is image backup and the other one is files backup. In image backup, you can backup your total harddrive and in files backup, you can backup separate files or folders. We will tell you how to perform these backups shortly but before that, let’s know about their importance.
1. Image Backup
Before we tell you more, please note that you cannot transfer images from one computer to another because the Windows key is tied to one PC only. But when you are backing up images from your Windows 11 system, your PC will create an. ISO file for everything you copy from your system. And it includes Windows settings too. And your PC transmits those files to another device. In simple words, image backup in Windows 11 will take a shot of everything you have in your hard drive and will combine it all into one file and deliver that to a different location.
2. File Backup
You select the files and folders you want to backup to another device. Here you won’t have Windows settings. But you might have to reinstall your Windows system if your system experience crashes.
Now that we know the different ways to store photos and files, let’s learn the steps.
How to Backup Images from Windows 11?
Since you know which images or files you want to backup, you can choose the best way to store the backups. Does not matter which way you choose to store the backups, it won’t take much time. Simply follow the instructions below.
Method 1: Create Backup Images
You can create backup files of your images from the Control Panel. But note that if you want to back up the images to an external device, then format the device first but make sure to keep those data in a safe place before formatting. Follow the steps below to backup images from Control Panel.
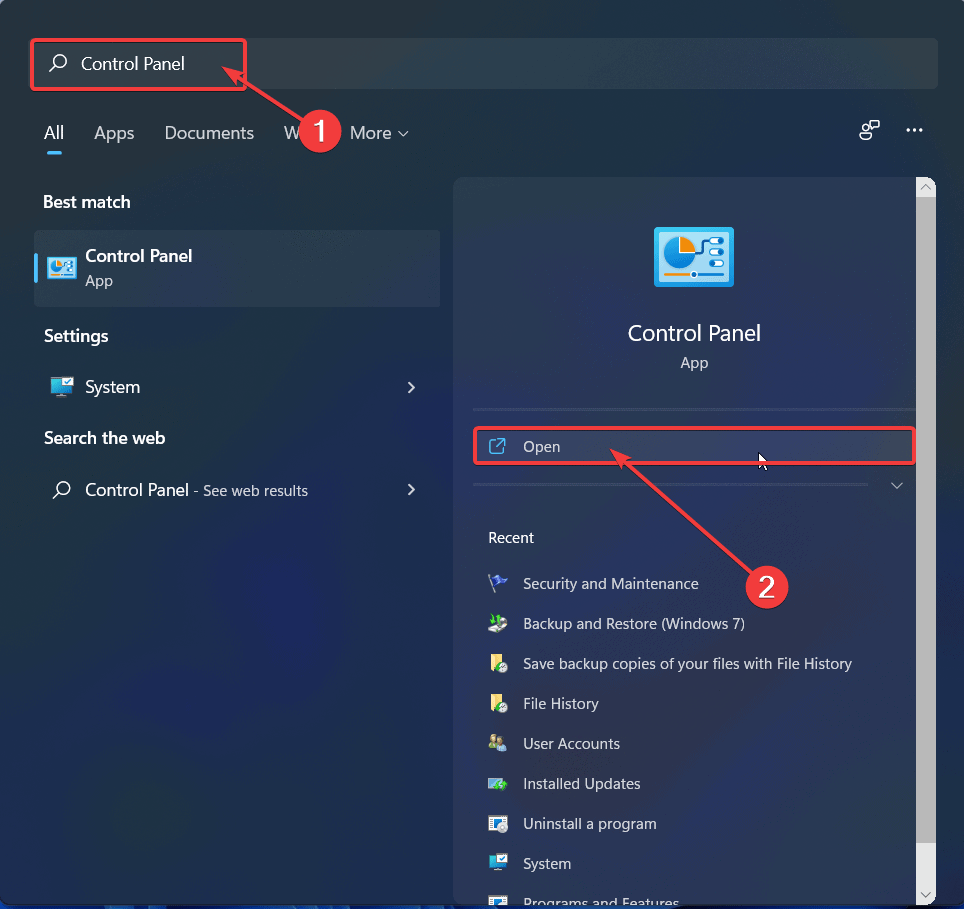
Step 1: Press the Start or Windows key.
Step 2: Search for Control Panel.
Step 3: Click on Open from the right-pane window to open Control Panel.
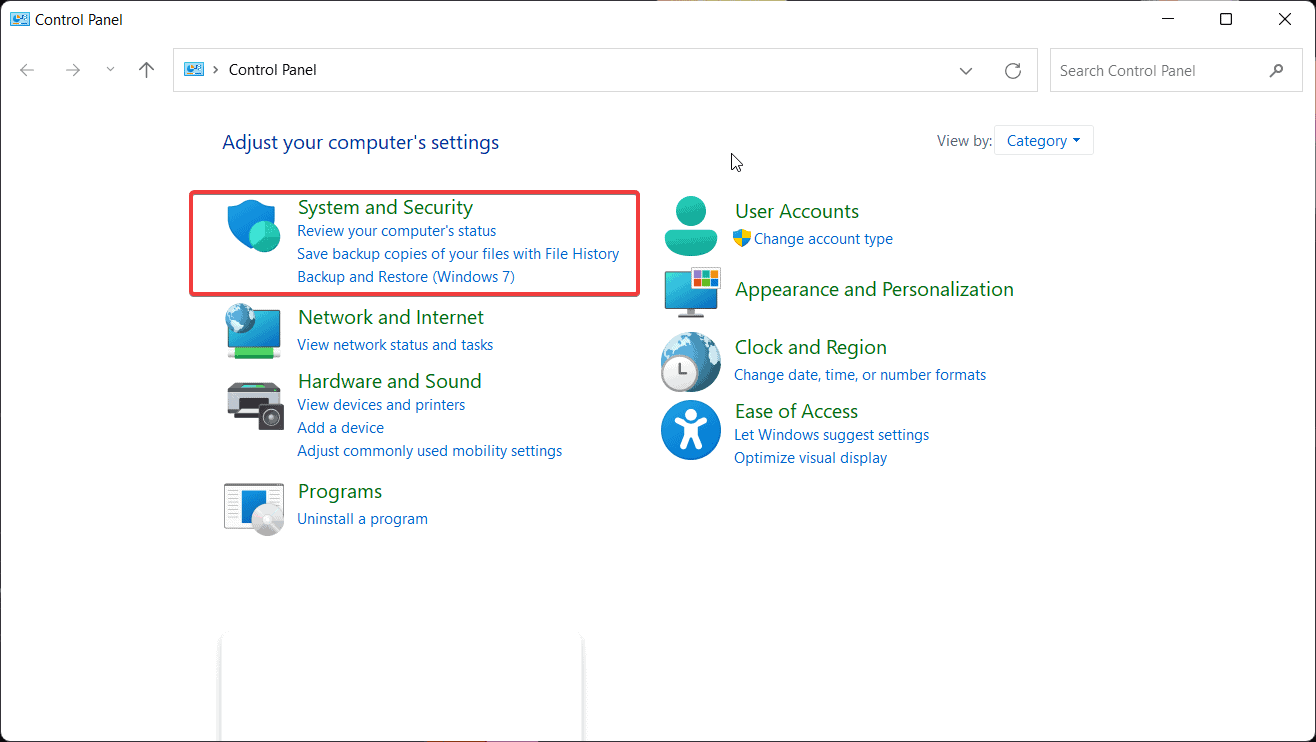
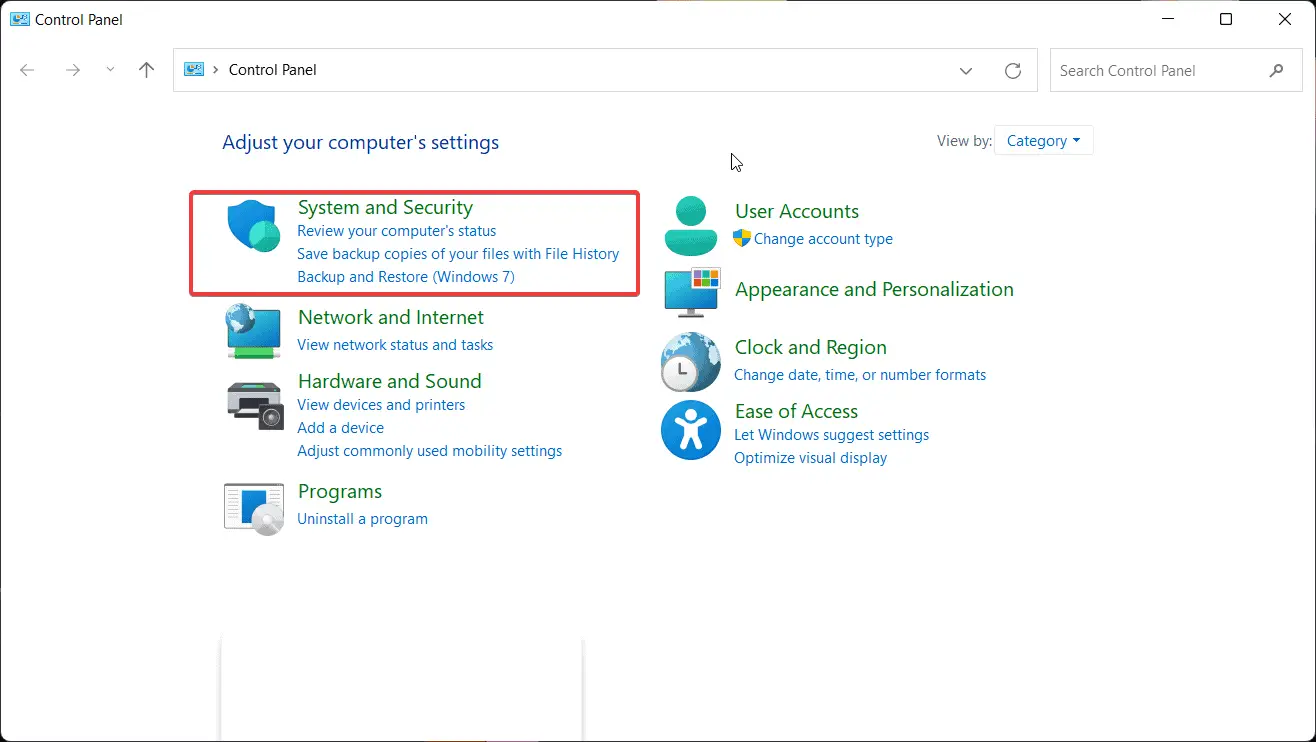
Step 4: Click on System and Security
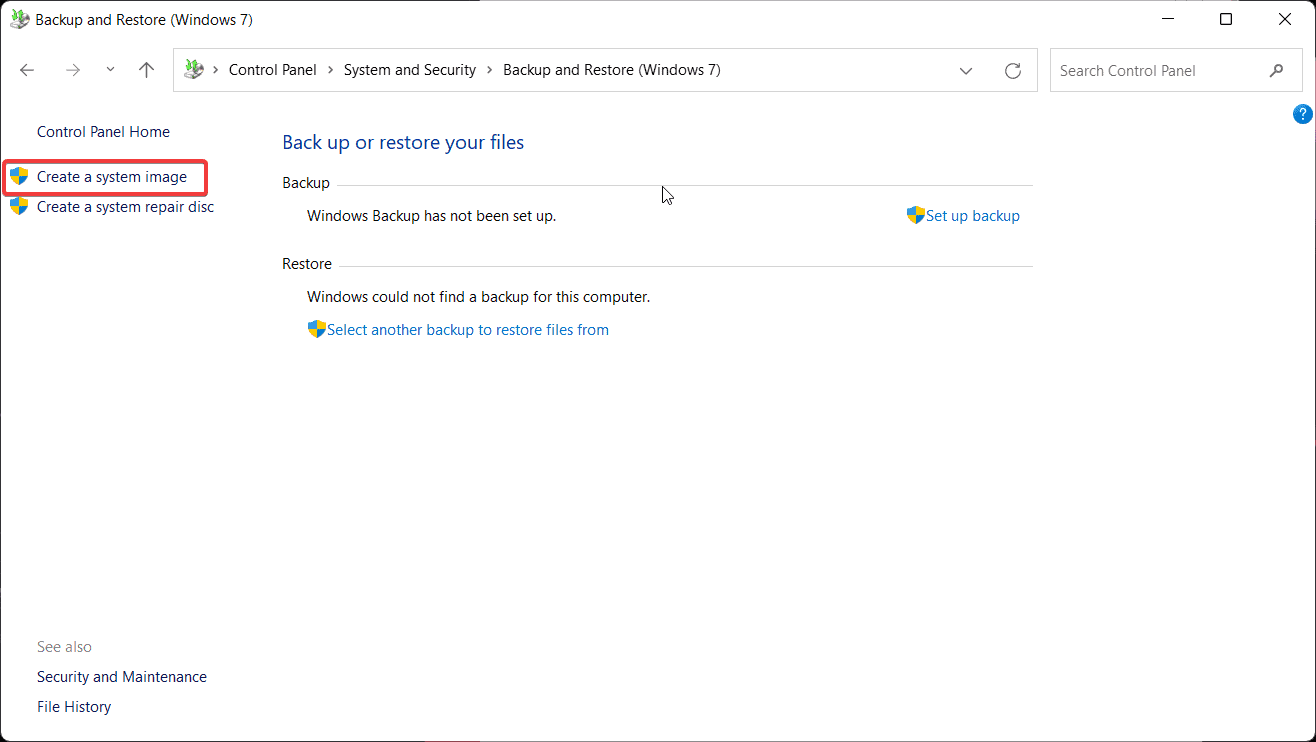
Step 5: Click on Backup and Restore.
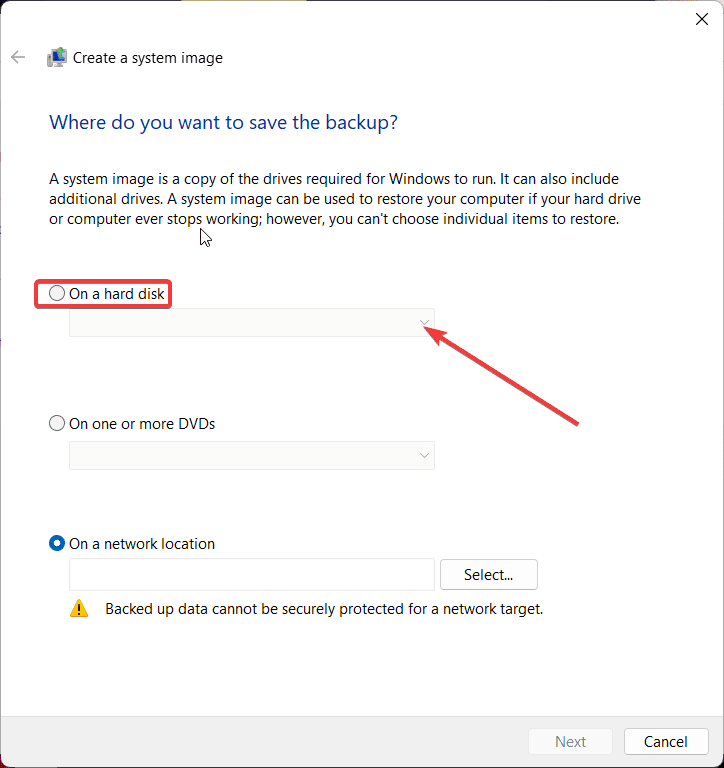
Step 6: Now, from the left pane window lick on Create a system image.
Step 7: Select the “On a hard disk” drop-down menu and select the location you want to keep the backup
Step 10: Click on the Next button
Step 11: You can also select an extra drive that you want to put in the backup
Step 12: Select the Next button
Step 13: Select the Start backup option
Step 14: Choose the No button
Note: Here you might get a prompt asking you to create a system repair disc, but if you want, you can skip the option.
Step 15: Select the Close option
After these steps, a backup of your entire computer including the system files will be backed on your primary hard drive and other additional drives. But if you want to perform a file backup, follow the next section.
Method 2: File Backup
You can transfer files and folders manually in Windows 11 especially when you are transferring large data files to a new location. Here are the steps:
Step 1: Attach an external hard drive to your system
Step 2: Press Windows + E keys on your keyboard to open the File Manager
Step 3: Click on This PC
Step 4: Double-click on the “Devices and drives” section and it shall open
Step 5: Leave the previous window open and press Ctrl+N to open a new File Explorer window
Step 6: In the new File Explorer window, go to the File or Folder location
Step 7: Select all the files and folders you want to backup and click on Ctrl+ C
Step 8: Go back to the previous File Manager window
Step 9: Press Ctrl+V to paste the files and folders
Now your new files and folders will be backed up in the external drive and you can carry them with you.
Method 3: Create a System Restore Point
Windows allow you to create System Restore Point which you can use to restore your system if you experience issues. Here is how you can create a system restore point on Windows 11.
Step 1: Press Windows Key and type Control Panel to search for it on the Start Menu.
Step 2: Then, double-click on the Control Panel icon from the search result.
Step 3: As the Contorl Panel window opens, click on System and Security.
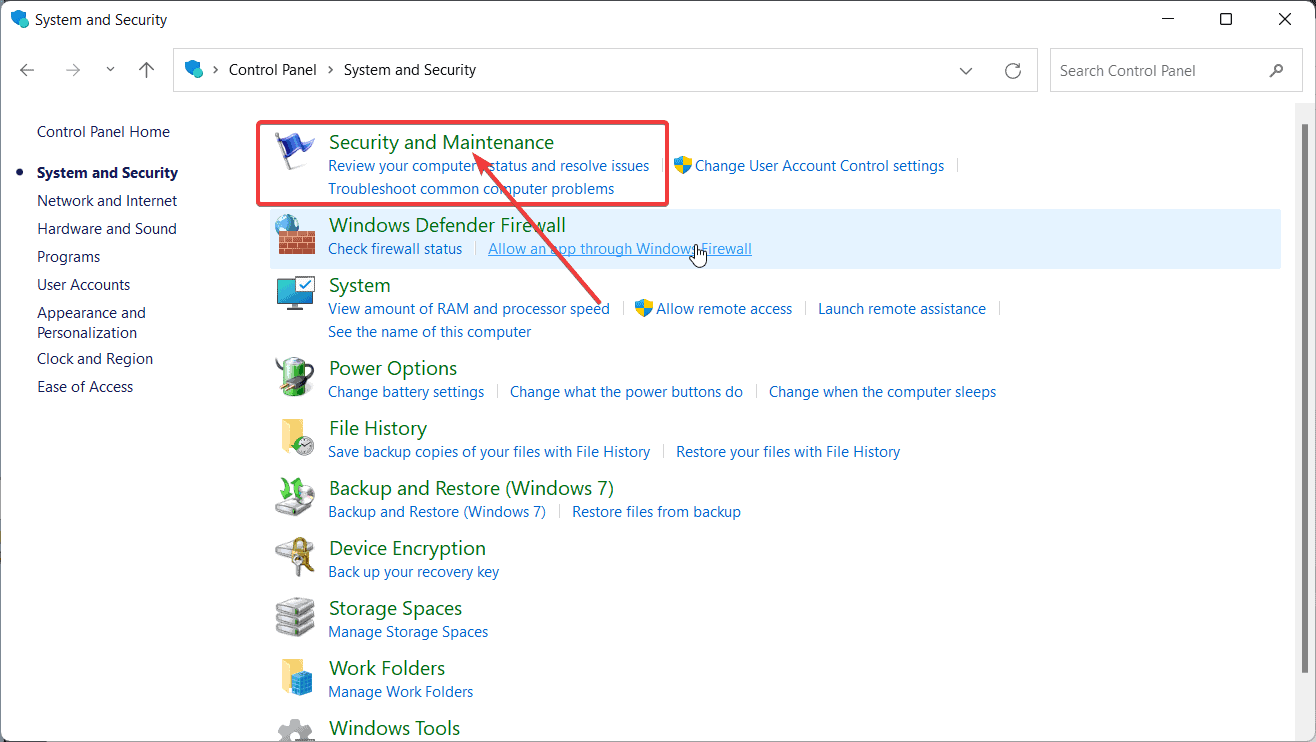
Step 4: Now, in the System and Security window click on Security and Maintainance.
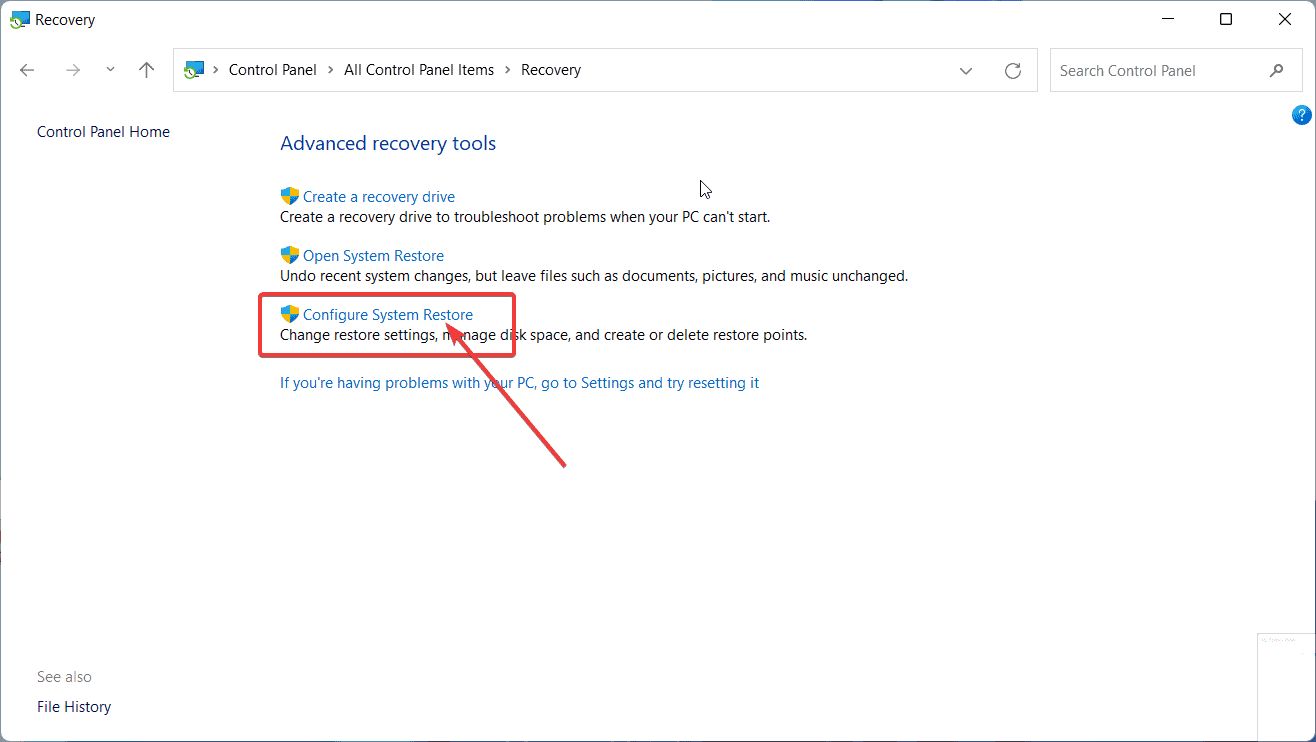
Step 5: Then, click on the Recovery button below and in the new window select Configure System Restore.
Step 6: Under the System Properties window click on the Create button below to create a restore point.
Step 7: Then, write a description of the restore point so that you can trace it back(if required) and click on Create button.
Step 8: Finally, wait until the process completes and then Close the window to proceed with it.
Conclusion
These are the common and easiest ways to backup your files and images from Windows 11 to another device. But we recommend you the cloud storage option to save your backups. You can store the backups the same way we showed you in the steps above. But this time, connect to your Microsoft’s OneDrive cloud account from the File Manager window.

