Often referred to as volume name, a volume label is a unique identifier assigned to a storage media like hard drive, disc, or any other media. While it doesn’t matter whether you add a volume label to your storage drive or not, it still helps in differentiating between multiple media connected to your system. It is usually set when you format a hard drive but can be easily changed as per your preferences at any instant of time.
If you want to change the volume label of a drive-in Windows 11 to differentiate better among the various storage options available, you’re surely at the right place. Whenever you format a drive and don’t specify a name beforehand, Windows 11 assigns a default name to it. There are numerous methods to change the volume name of a drive on Windows 11, without even having to install any kind of third-party application.
Table of Contents
How to Change/Rename Drive Label on Windows 11
1. Rename a Drive in Windows 11 Using Settings
The settings option in Windows 11 offers various options to customize your operating system as per your requirements. Among the various options, there’s also an option that allows you to rename a drive in the Settings app. Follow the steps given below:
- Access the “Settings” application by pressing the Win + I key together on your keyboard
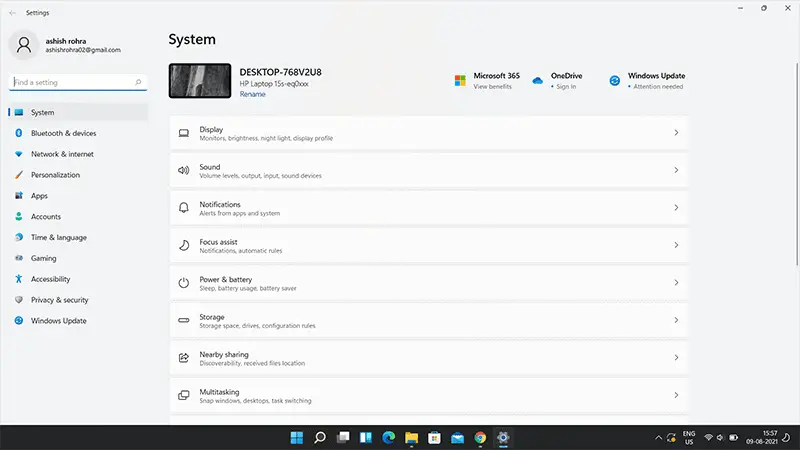
- Navigate to the “System” section and choose the “Storage” option to proceed
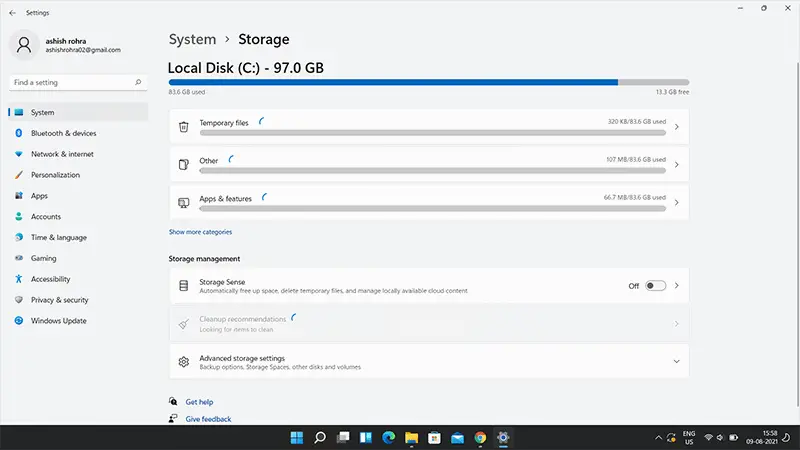
- Click on the “Advanced Storage Settings” option and choose “Disk and Volumes” among the various options listed
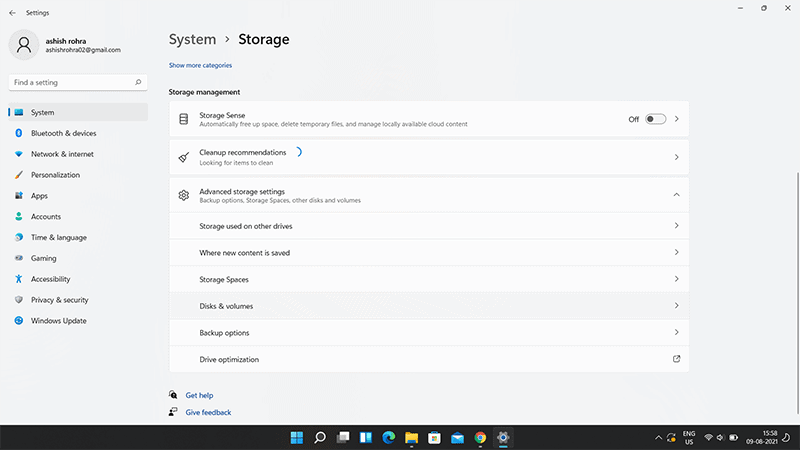
- You’ll see a list of all the storage volumes and their partitions attached to your device, where you have to click on the downward-facing arrow next to the partition that you’d like to rename
- Click on the “Properties” button next to your desired drive and choose the “Change Label” option
- Enter your preferred name in the input field and click on the “Apply” button to keep the changes
That’s all you need to do to change a storage volume’s name in Windows 11 with the help of the Settings app. There are various other methods that can be used to change a drive’s name, which will be discussed further.
2. Change Volume Label Using Disk Management
Right-click on the start menu or press the Win + X key together and click on the “Disk Management” option. Alternatively, you can also access the disk management utility by pressing the Win + R key together and typing “diskmgmt.msc” in the input field. Then, follow the steps given below: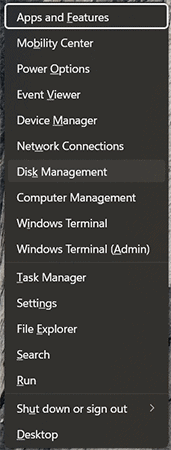
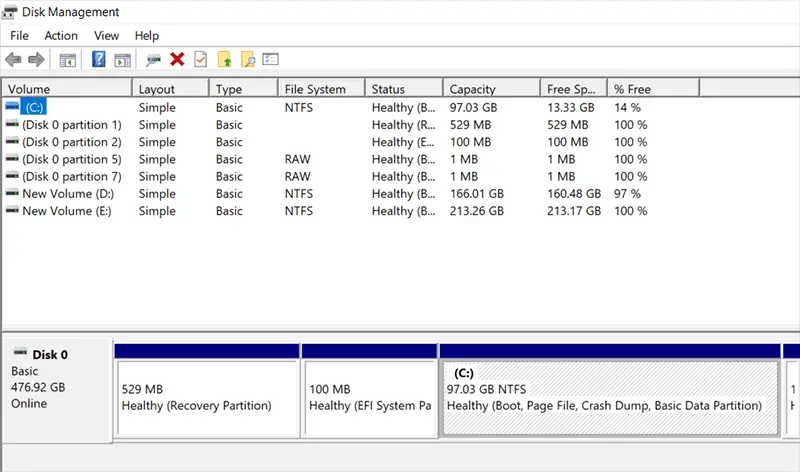
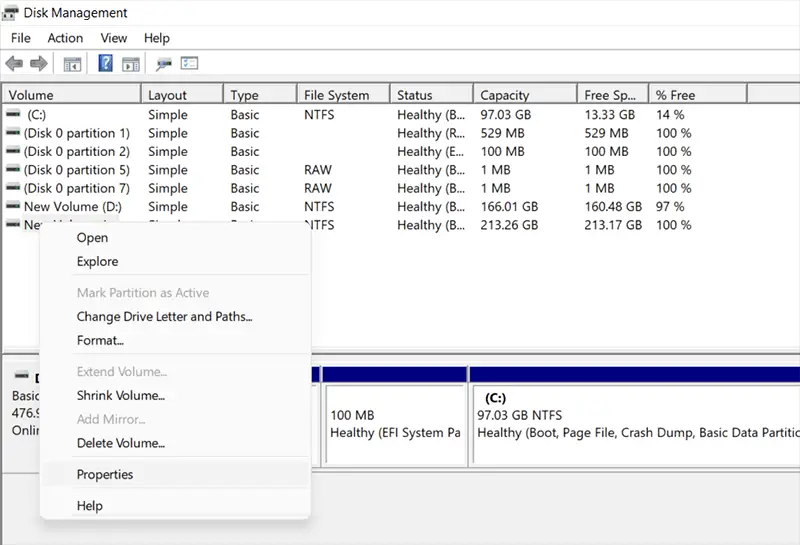
- A new window will appear with various volumes available on your device. Right-click on the one that you want to rename and choose the “Properties” option
- Among the various tabs, navigate to the “General” tab and click on the input field located at the top of the floating window
- Enter the desired name and click on the “Apply” button to proceed
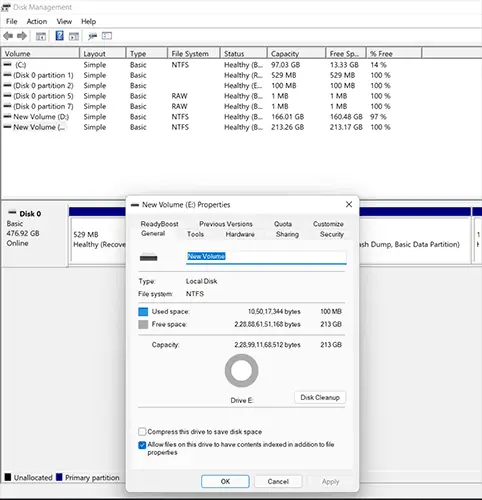
Keep in mind that while renaming your drive, you can only use up to 32 alphanumeric characters. Additionally, symbols like underscore, dash, and spaces are also allowed.
3. Rename a Drive Using File Explorer
One of the simplest methods to rename a drive in Windows 11 is by using File Explorer. The process is extremely simple and won’t even take more than a couple of seconds. Follow the steps given below to proceed:
- Access the file explorer by clicking on its icon on the taskbar
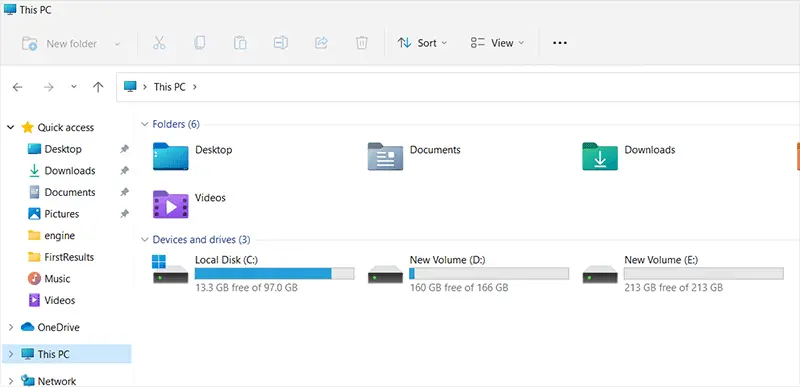
- Right-click on your preferred partition and click on the “Rename” option. You can also press the F2 button on your keyboard while selecting your desired partition to change its name
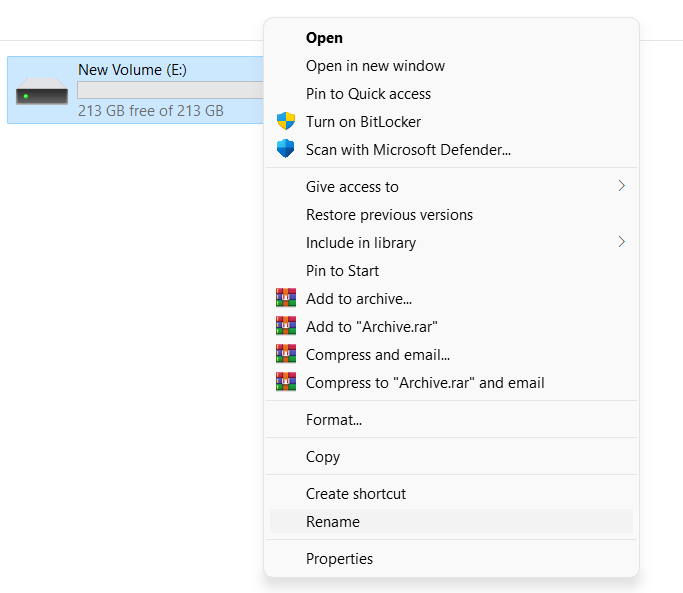
- Enter a preferred name for the drive and hit the enter key on your keyboard to apply the changes
You can also access the properties of a particular drive through file explorer and proceed to rename it under the General tab.
4. Change Volume Label Using Command Prompt
Command Prompt is the command-line utility of Windows that allows you to perform several actions that you can’t simply replicate on the user interface. To be able to change a volume label with a command prompt, you need to make sure that you have the required privileges of an administrator. Here’s the stepwise process that you need to follow:
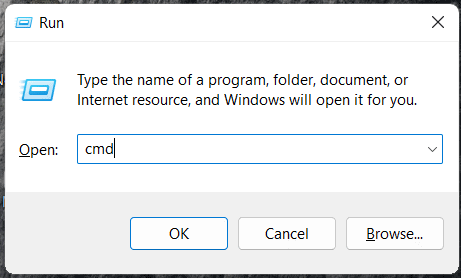
- Access command prompt on Windows 11 as an administrator by pressing the Win + R key together on your keyboard and type “CMD” in the input field, followed by pressing the CTRL + Shift + Enter key altogether
- In the command line, enter the command “label N: Drive name” where N denotes your volume label and Drive Name denotes the identity of the drive. For instance, if you want to rename your C:// drive, you have to type “label C: Windows Drive” in the command prompt
Then, hit the enter key on your keyboard to execute the command. To check whether the changes have taken place or not, you can open the “File Manager” application on your operating system and check the drive label.
5. Using PowerShell to Change Drive Label
PowerShell is also a command-line utility that allows you to change the name of a drive with ease. Follow the steps given below to proceed:
- Access PowerShell as an administrator in your Windows 11 OS
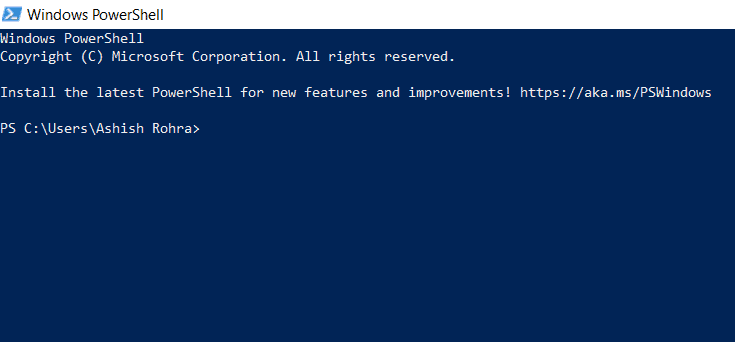
- Type “Set-Volume -DriveLetter # -NewFileSystemLabel” “NAME” by replacing the appropriate symbols with your required preferences
At last, press the enter key on your keyboard to complete the procedure and rename your storage volume’s name in Windows 11.
Bottom Line
Renaming your drives and changing volume labels allow you to differentiate between multiple storage media with ease. Moreover, if a particular partition contains important system files, you can rename it to prevent accidentally deleting anything.
With the various methods given above, you can easily change the name of your storage media in Windows 11 without any failure. We hope you find this newly gained information helpful in assessing more about this brand new operating system by Windows.

