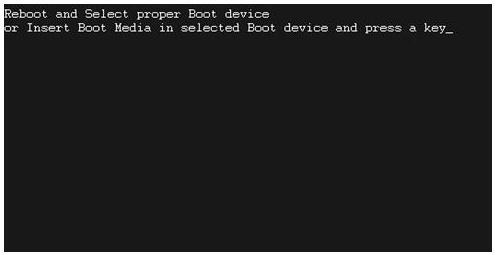
By clicking on the power button on the computer, we all expect the usual splash screen of the Windows operating system to appear in a few seconds. Sometimes, this meditative process is interrupted at the very beginning by an error which states: “Reboot and select proper boot device or insert boot media in select boot device”. And that’s where it all stops.
There are two ways to deal with what happened and how to resolve the situation. You can either contact this service center that provides computer assistance near you or read through to the end of this article and deal with the problem yourself. There are some proven solutions for this error that might just work in your case, getting your system booted up in no time.
This error can also occur under various other names, similar not only in names but also in behavior, search and correction algorithms. Depending on the problem, the configuration of your computer, and the actions taken, the essence of this error can be stated in different ways:
- A disk read error occurred
- An operating system wasn’t found
- Boot Device Not Found
- Boot failure
- BOOTMGR is missing
- Default Boot Device Missing or Boot Failed
- Inaccessible boot device
- No boot device available
- No bootable devices found
- NTLDR is missing
- Please select boot device
- Reboot and Select proper Boot device and press a key
- Remove disks or other media
Table of Contents
What is “Reboot and Select Proper Boot Device” and why does it occur?
First, we should understand what this error means. In a free translation, this means that the boot device was not found and it is proposed to install the desired device (USB flash drive, boot optical disk) and boot from it. Depending on the manufacturer of BIOS in each specific motherboard, the message that appears may be slightly different, but the meaning remains the same.
You will have to fulfill the request of the computer, otherwise, it will still fail to load the OS. So, we need to determine the reasons that caused this behavior of the computer. It could be:
- BIOS Failure: BIOS is the software which is hardcoded in the motherboard. Sometimes, this software can fail to perform correctly due to some malfunction.
- Incorrect BIOS setup: If you made any changes to the parameters in the BIOS, you need to check the settings showing which devices the computer is loading from.
- Computer power problems: If there are malfunctions in the power supply of the computer, then this error may occur in the system.
- Drive malfunction: If the main hard drive on which the OS is installed fails, this error may occur. There are multiple reasons behind the failure of drive such as faulty power cable, unstable connection, incorrect mounting, etc.. The reason may also lie in the removal of system files, for example, due to the action of a virus.
Guide on How to boot into Safe Mode in Windows 10. and fix UNMOUNTABLE_BOOT_VOLUME Error on Windows 10.
10 Ways Fix Reboot and Select Proper Boot Device on Windows 10
There may be several reasons for the appearance of such a message instead of loading the OS. But, there are solutions accordingly as well. We will deal with all the possible solutions which can help you get through this problem.
1. Check Boot Device Priority
The BIOS indicates several devices from which the system can boot. Generally, it is one of the hard disks installed in your cabinet. But, the BIOS provides the option to boot from certain other devices such as USB Drive, CD, DVD or an external hard drive. All of them are listed in a certain order that determines their priority. Sometimes, the BIOS selects a CD / DVD-device or USB-drive as the first boot device, and the main drive on which the system is installed is second in this list.
This is convenient if you have to boot from removable media from time to time, but there is also a potential source of problems. A forgotten flash drive stuck in the connector, or an optical disk left in the drive, may block the booting of the system. You must remove all of these devices and check if the system is now booting. If not, then move forward to the next solution.
2. Check the Motherboard Battery
The inability to boot may be due to a reset that defines the boot device. Often the reason behind that is a failed battery. Checking the battery is very simple. All you have to do is enter the BIOS and check the date indicated there. If it does not correspond to the current one, but shows, for example, January 1, 2000, then the battery must be replaced and the BIOS set up again.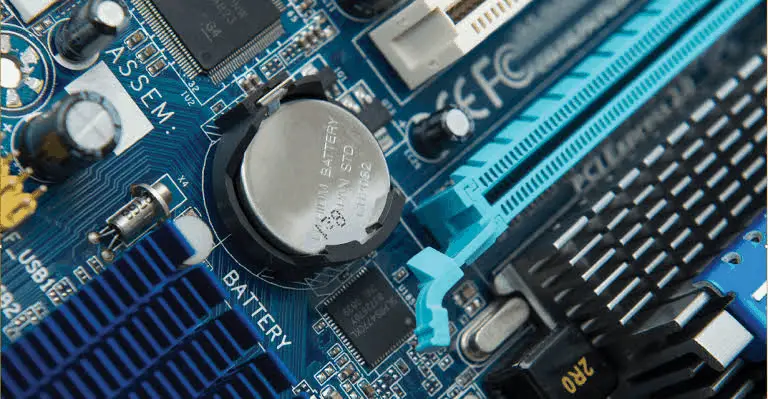
Usually, changing the battery located on the motherboard is simple, and there should be no problems. After a new battery is installed, you need to specify the correct boot device and restart the computer. If the problem persists, then check further.
Guide to fix PC stuck in reboot loop with no bios screen or beep.
3. Check the Power Supply (SMPS)
You should carefully listen to what sounds the hard drive makes at the time of loading. Are there any clicks, knocks, etc. It is necessary to pay attention to the drive activity indicator. Does it light up when trying to boot? The reason may be a loose power cable from the drive or failure of the power supply. In this case, the disk will not work at all or might make unusual sounds if it does not have enough power for normal operation.
To make sure that nothing interferes with the boot process, you can temporarily disconnect all devices connected to the computer. Printers, network cables, USB devices, etc. Up to the monitor. The fact that the boot has begun can be understood by the flashing disk indicator. Perhaps one of the disconnected devices is malfunctioning and creating power disturbance.
It is also possible that too many disks, video cards, etc. are installed on the computer. As a result, the power output of the power supply is not enough to ensure the proper working of each device. In such a case, you will have to purchase a new, more powerful power supply.
4. Set up the BIOS
The BIOS boot option depends on how the settings defined in BIOS. If your computer has several drives (hard drives, optical drives, etc.), then the correct indication of the boot device is especially important. So, the order of work is as follows:
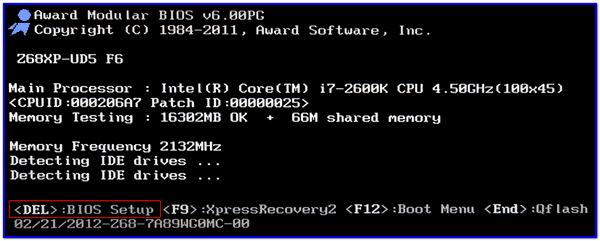
- You need to go into BIOS. To do this, after turning on the power, press the DEL button. In some cases, the F2 button or other combination is used. It depends on the motherboard manufacturer and the BIOS used. What to press is written on the screen at the time of loading, or this information can be found in the documentation for the motherboard.
- After opening the BIOS window, go to the ” Advanced BIOS Features ” section.
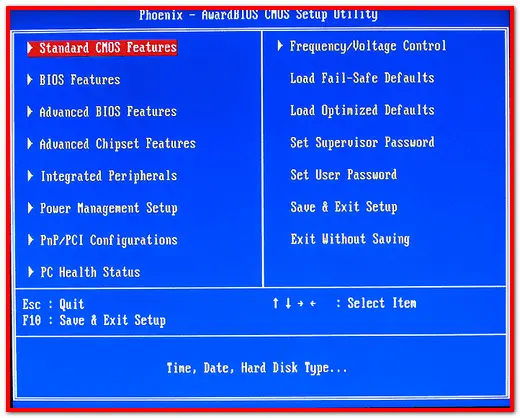
- After that, Go to the section where boot devices priority is set. Different manufacturers may have different menu structures. In that, go to the point that contains the name of the drive from which iterates boot devices.
- You must first indicate the drive on which the operating system is installed. If the computer has only one drive, then there will be no other options. If there are several disks, then you need to specify the correct one.
- Save the changes made and restart the computer.
5. Choose an instant boot device
Often there is the opportunity to choose the disk from which to boot the system without going into the BIOS. To call the desired window prompting you to select a boot device, press F10 or F12. Other options are possible. It depends on the motherboard manufacturer.
The procedure is as follows:
- Immediately after switching on or rebooting, press the desired function key.
- A window with a list of devices will appear.
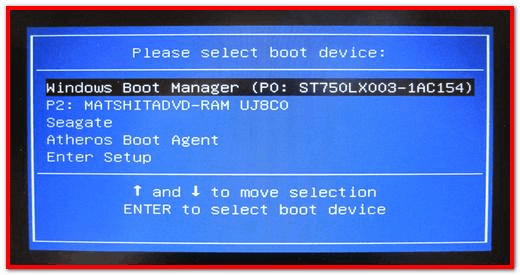
- Select the desired drive and press Enter.
Note: The boot device that you will select through this method will be a temporary boot device. The system will revert back to the previous boot device at the time of next boot.
6. Booting from a flash drive or emergency disk
Booting from an alternative source will allow you to check whether the OS system files on the main disk are damaged or not. You can create such a boot disk yourself or download it, for example, from the sites of developers of anti-virus programs.
It is necessary to connect a USB flash drive or insert a disk into the drive, configure boot from the desired device in BIOS, and start the system. If the boot is successful, then this indicates a problem with the main disk (Hard drive). To do this, remove the housing cover and check whether the power cord and/or the interface cable of the drive are loose. The drive may have failed because of that.
If the drive works and all the cables are connected correctly, you can check the drive for viruses using the utility included with any emergency boot disk.
7. Try Windows Bootloader Recovery
If booting from external media fails and the main drive continues to refuse to boot the system, then another reason may be damage to the boot information on this drive. After all BIOS manipulations, the message displayed instead of the usual OS boot may change to “No boot device available/No bootable device”. This indicates that the drive is found, but it does not have a boot record.
There are 2 solutions for such a situation:
The first option is to re-install the system. This is a lengthy process and there is always a risk of data loss. The second option is to try to restore boot information. To consider the second option, you will need a bootable windows disk or drive.
To restore boot information, follow the steps given below:
- We boot from the installation disk.
- When the ” Install Windows ” option appears, click on the ” System Restore ” link in the lower-left corner.
- Click on “System Recovery Options.” There are 2 options here – roll back to any of the backup recovery points or try to restore the Windows boot loader. Select the second option.
- Select the desired OS and click “Next”.
- In the “System Restore Options” window, select the “Command Prompt” item.
- In the window that opens, enter the following commands:
*bootrec.exe / fixmbr* and then *bootrec.exe / fixboot* - Now you can close the window with the *exit* command and reboot the system.
If the problem is still not solved, then it remains either to restore the previous state using the backup point or reinstall the system.
Tips for Avoiding Reboot and Select Proper Boot Device
In order to avoid such situations, we can provide some important tips:
- Change the BIOS battery in time if you notice that the settings are getting reset from time to time.
- Do not subject the computer to shock, primarily the hard drive. If it began to make strange sounds, then, without delay, you should check its performance.
- Do not trust BIOS setup to people who are poorly versed in the computer. Better use the services of specialists.
- An anti-virus program must be present in the system. Check your disk regularly for viruses.
- Back up your system drive and all important data regularly.
- Create and store the emergency start disk (flash drive) that will help you quickly deal with the problem in the future.
A frequently appearing message does not mean some serious breakdown of the system and it can be eliminated in relatively simple ways. We hope that you have resolved “Reboot and Select Proper Boot Device” error on your system. If you have any query regarding this article, you can reach us via the comment section below.

