Microsoft has paid a great deal of attention to customization and themes while designing Windows 10. Theme system was available since Windows 7 but, it was remastered with the successors and it is now quite good after the release of Windows 10. User can choose from thousands of different themes and customization option to personalize their system according to their requirement.
Table of Contents
How To Change The Theme In Windows 10?
Downloading and applying a theme is very easy in case of windows 10. You do not require any third party applications or downloads to do so. Many themes can be found in the Windows store itself. To change your system’s theme, follow these steps:
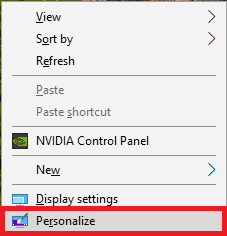
- Right click on the desktop.
- Select the “Personalize” option.
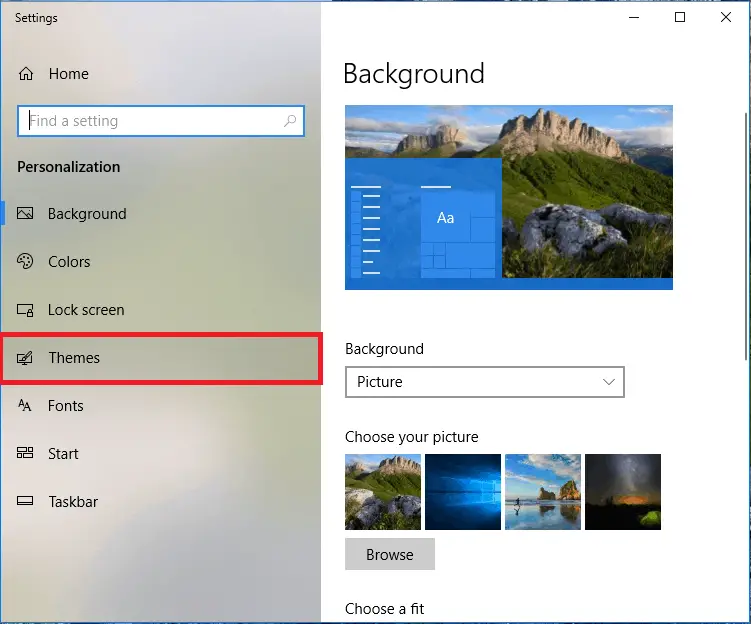
- Now click on the “Themes” option in the next window.
- Now, you can see your currently applied theme.|
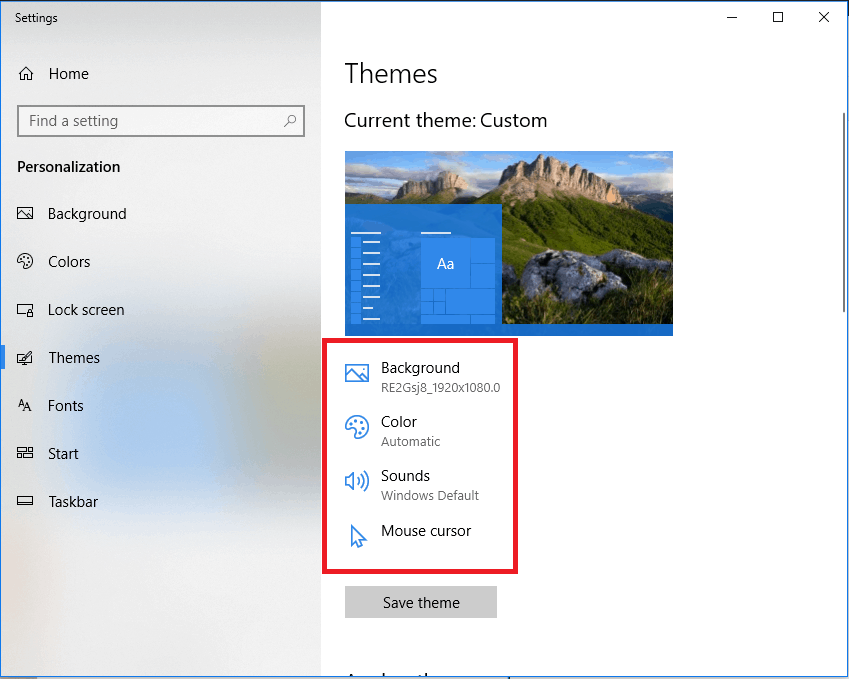
You can tweak your current theme by using various options provided below such as:
1. Background: You can change your desktop background by clicking on the background option.
2. Color: You can alter the scheme color through this option. The selected color will appear on all the windows borders.
3. Sounds: This option can be used to change the sounds of your system.
4. Mouse cursor: You can change your mouse cursor by using this option. - If you want to download a new theme, simply click on the “Get more themes” option. This will redirect you to the Windows store theme page where you can download many free as well as paid themes.Note: Themes and customization options are available only for the activated version of Windows 10.
“Windows Cannot Find One of The Files In This Theme” Error
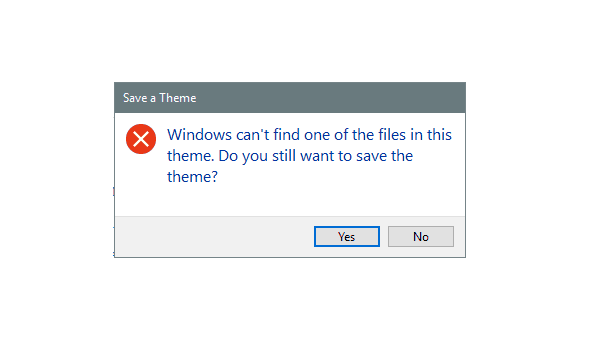
Many users have faced the error “windows cannot find one of the files in this theme”. This error pops up mainly at the time of applying a new theme onto your system. The error message will give you the option to save the theme anyway. You can click “Yes” and the theme will be installed. But, that will not solve the problem. Chances are the problem will re-appear every time you try to change the theme. This can get a little bit frustrating and annoying.
Reasons Behind “Windows Cannot Find One of The Files In This Theme” Error
There are a few possible things that might’ve caused the issue. They are listed as follow:
- Problem with SettingSyncHost.exe: SettingSyncHost.exe is responsible to synchronize your theme across the system UI. If there is a problem with SettingSyncHost.exe, the theme cannot be applied, resulting in the error.
- Problem with Custom Screensaver: This is the most probable culprit behind the situation. Many themes have screensavers of their own and if you have a custom screensaver enabled, it will interfere with the theme which will create the error.
- Problem with the theme itself: Lastly, the problem could appear because of some missing files in the theme itself. You have to delete the theme and it’s backup files and re-install the theme again from source.
How to Fix Windows Cannot Find One of The Files In This Theme
We have gathered some proven solution for this error. This solutions are quite simple and can be easily applied to resolve the problem. All you need is a little bit of time and patience. The solutions are as follows:
1. Set Screensaver To “none”
This method is as easy as the title. As mentioned above, the custom screensaver can be the reason behind this error. It can either be a screensaver which is not supported by a theme or vice-versa. If you notice that the error pops-up after a particular period of time, it is most likely a screensaver problem.
To resolve the problem, follow these steps:
- Right click on the desktop.
- Select the “Personalize” option.

- Now click on the “Lock screen” option in the next window.

- Now click on “Screen saver settings”.
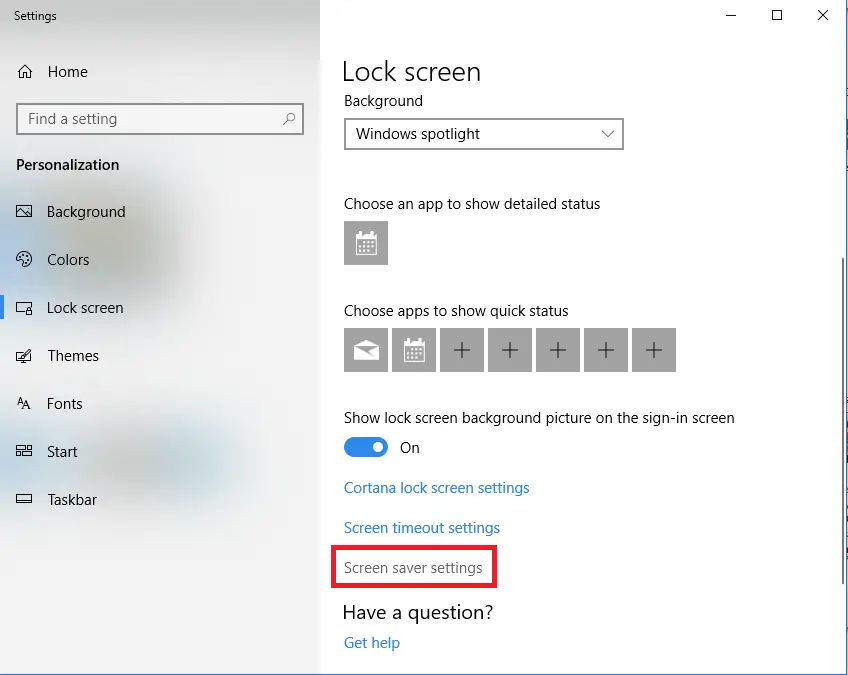
- Now, the screen saver settings window will be opened. Click on the drop-down menu and make sure “None” is selected.
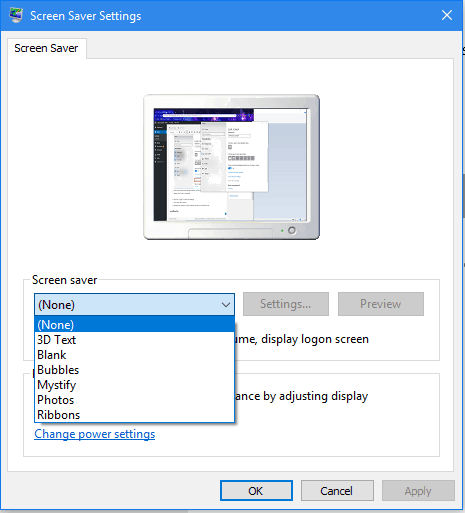
- Click on “Apply” to save the settings.
- Now close the window.
- Restart the system to check whether the issue is resolved or not.
2. Change Current Theme and Delete Cache Files
The problem can be resolved by either replacing your current theme with another or setting up the same theme again. As mentioned in the error “windows cannot find one of the files in this theme”, there might be a particular file which is either lost or corrupted in the theme. Hence, the theme cannot be synchronized properly, resulting in the error.
To apply this method, follow these steps:
- Right click on the desktop.
- Select the “Personalize” option.

- Now click on the “Theme” option in the next window.

- Now, choose any random theme or default theme from the list.
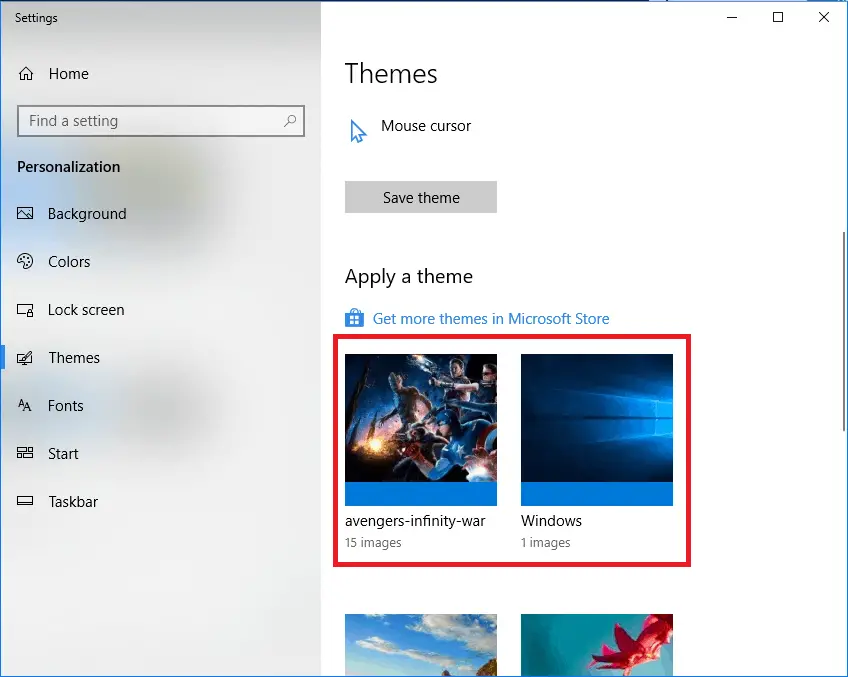
- Now, once you have changed the theme, open the Run window by pressing “Windows key+R”
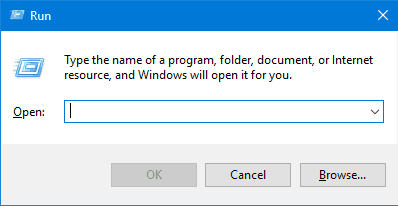
- Now, put “%windir%\Resources\Themes” in the search box and press “OK”.
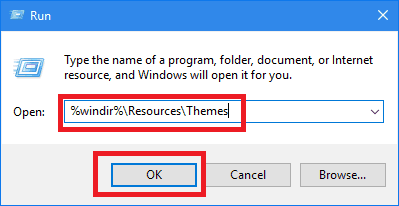
- The theme folder will open now. You can also trace the path “C:\WINDOWS\Resources\Themes” to get to the folder.
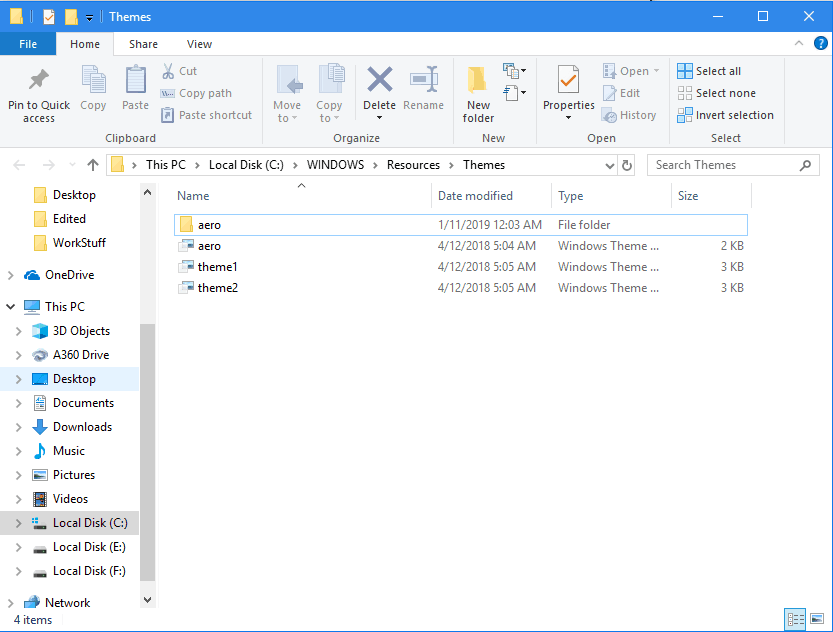
- Now, delete the files and folder which has the name of your previously installed theme.
- Now Restart the system. If there was a problem with the theme, it will be resolved now.
- If you wish to install your previous theme again, kindly download it again from the source and install normally.
3. Disable SettingSyncHost.exe
As mentioned in the reasons, SettingSyncHost.exe can also cause trouble. You can simply disable it to avoid the error. The error might be resolved by this method but you will not be able to synchronize your theme again. So, if you want to avoid the error for a particular theme, you should go for this method.
Follow these steps to disable SettingSyncHost.exe:
- Open Run window by pressing “Windows key+R”
- Put “ms-settings:sync” in the search bar and press “OK”
- It will open the sync setting window.
- Make sure that the “Theme” option is turned off in Individual Sync.
- Now close the window and restart the system for changes to take effect.
4. Use Windows PowerShell
You can use Windows PowerShell to reset the system apps suite. This will reset the theme settings completely, providing you an easy way out of the problem.
To use PowerShell for this problem, follow these steps:
- Right click on “Start icon” and select “Windows PowerShell (Admin)” option.
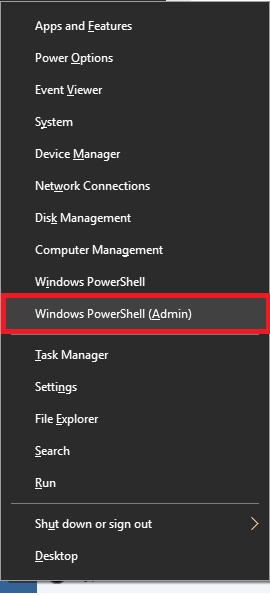
- Now, the PowerShell window will open. Put the following command in PowerShell as it is and press “Enter”
Command: Get-AppXPackage -AllUsers |Where-Object {$_.InstallLocation -like “*SystemApps*”} | Foreach {Add-AppxPackage -DisableDevelopmentMode -Register “$($_.InstallLocation)\AppXManifest.xml”}
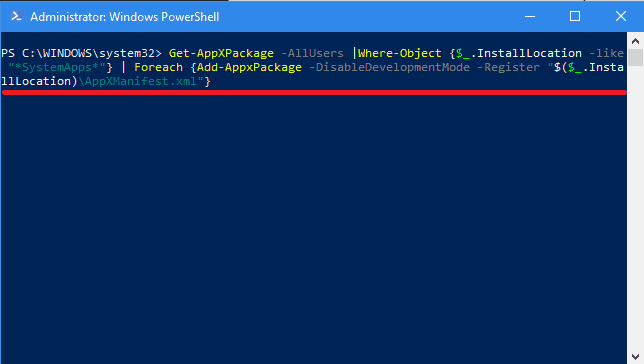
- Once the command is executed successfully, close the PowerShell window.
- Restart the system for changes to take effect.

