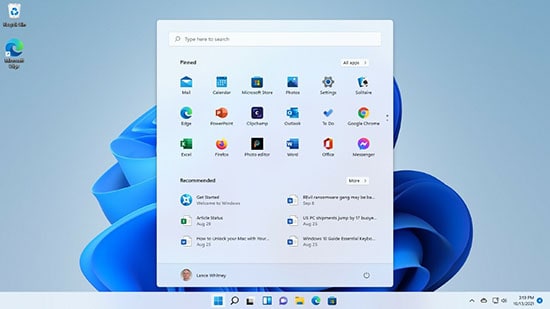
The new Windows 11 operating system from Microsoft comes with a sleek design and some additional features. One of the very first changes that you may notice while upgrading to Windows 11 is the position of the Start Menu. Though some users find the new look pretty much cool, users like us find the traditional look much worthy. If you are trying to switch the start menu to the left, this article will help you. Here we have prepared a guide on how to move the start menu to left in Windows 11.
Table of Contents
How to Move Windows 11 Start Menu to Left
Though the initial phase of Windows 11 beta releases did not allow the users to move the Start Menu to the left with strategic updates, the feature is added. Follow the easy methods below to move the Start menu left on Windows 11.
Method 1: Change Taskbar Position From Settings
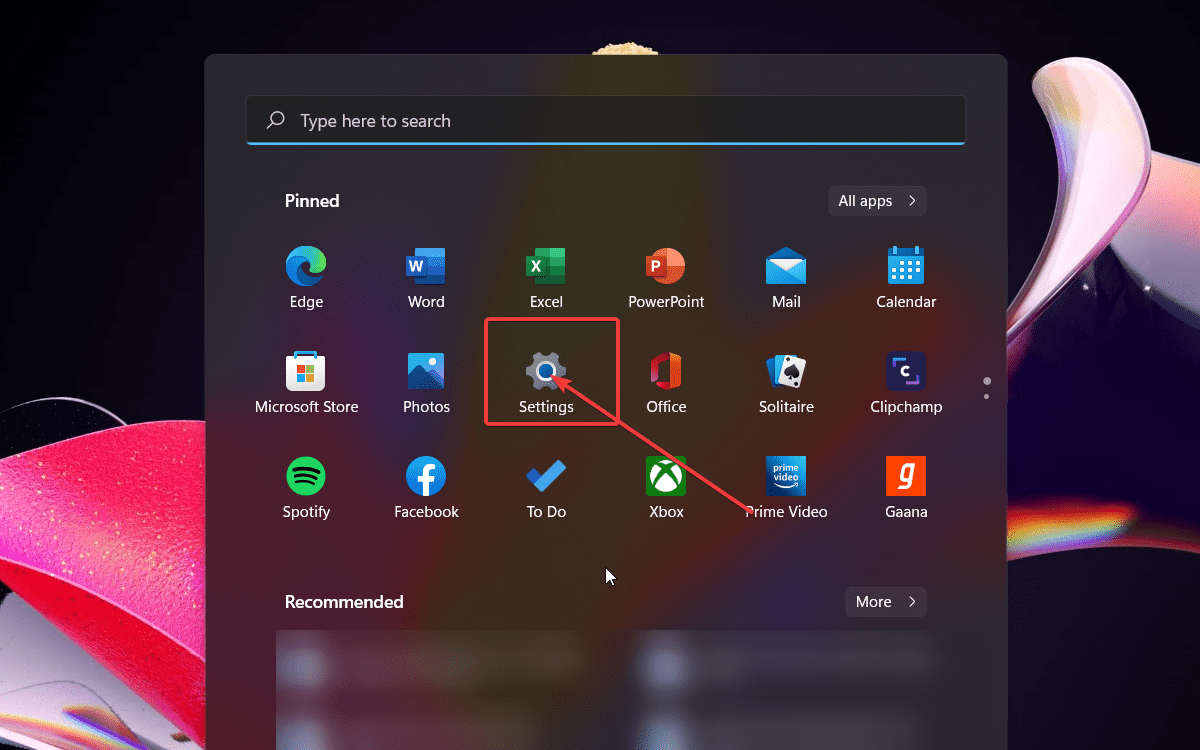
- Firstly, click on the Windows logo on the taskbar to open the Start Menu.
- Then, click on Settings to open Windows Settings on your PC.
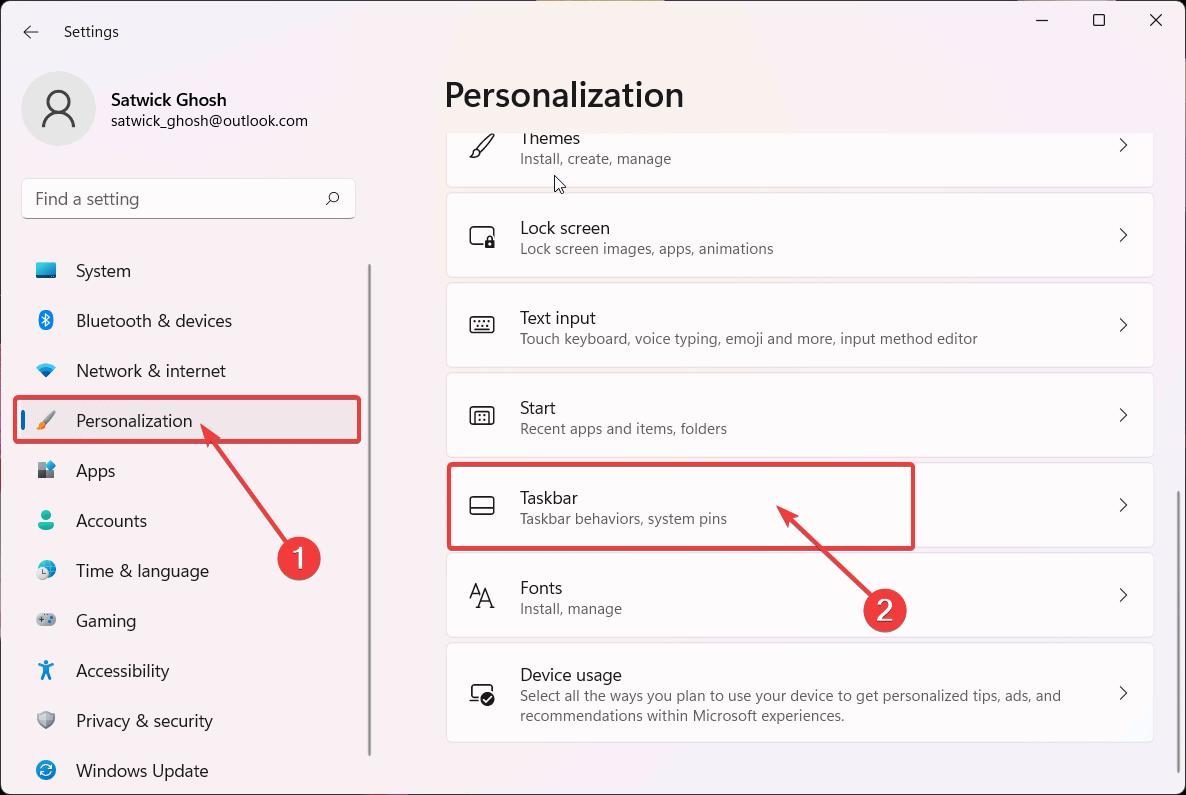
- Now, click on the Personalization tab at the window’s left pane.
- Then, scroll down to locate the Taskbar option. Click on the tab to expand the menu.
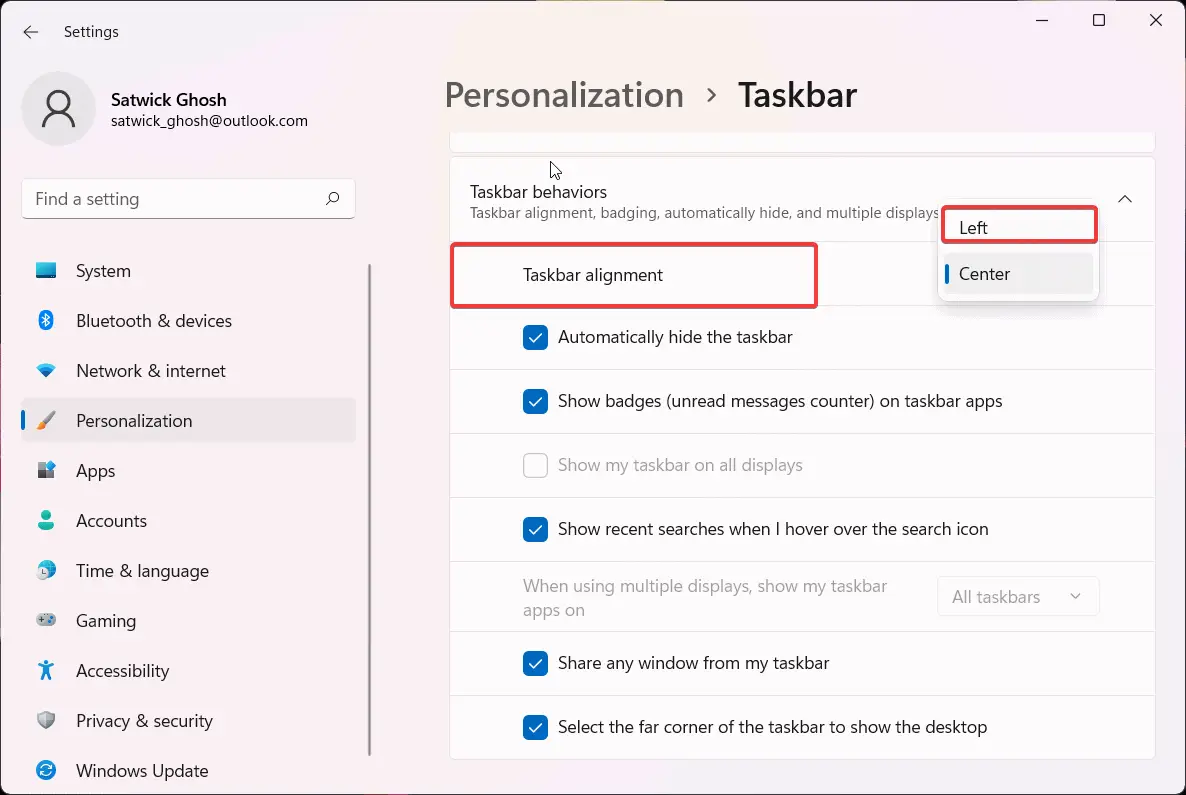
- Next, select the Taskbar behaviors option under that window.
- Finally, click on the button beside Taskbar alignment and select Left.
There is another easy way to move your Windows 11 Start menu to the left of the screen. You don’t need to open Windows Settings separately and get the job done much easier in this method.
Method 2: Change Start Menu position Through Taskbar Settings
- At first, right-click on your Taskbar and select Taskbar Settings from there.
- Now, click on the Taskbar behaviors to change the alignment of the taskbar.
- Then, locate the Taskbar alignment option below.
- Finally, click on the button at the right and select Left to align the taskbar on the left of your screen.
The new Windows 11 does not offer all the personalization features to the unactivated systems. Therefore, if you have just installed Windows 11 using an ISO and haven’t activated it yet, the above two methods won’t work for you.
In that case, you need to use the Registry Editor to tweak Windows 11 registry files and move the taskbar to the left.
Method 3: Change Taskbar Position Through Registry Edit
- Press the Windows key and type Registry Editor to search for the program.
- Now, open Regedit from the search result and browse the following location.
HKEY_CURRENT_USER\Software\Microsoft\Windows\CurrentVersion\Explorer\Advanced\ - Then, right-click on the Advanced key and select New.
- Again from the pop-up menu, select DWORD (32-bit) Value.
- Next, name the value TaskbarAl and press the Enter button.
- Now, the taskbar will be aligned to the left of your screen since the value is set to 0. You can change the value to back 1 to align the taskbar to the center.
Note: Don’t try to modify the Windows system files through Registry Editor if you don’t have a previous experience. Any wrong doing can corrupt the system files and you may find the operating system inaccessible.
How to Move Windows 11 Taskbar Position [Registry Editor]?
With some major registry hacks, it’s pretty easy to move your Windows 11 taskbar to any position on the screen. However, it may seem broken, and the icons don’t show up properly for many users.
Alongside that, try the method only if you are well experienced with the use of Registry Editor. Using it wrong can make your system unstable and inoperable in the worst possible scenario.
Follow the steps below to use the Regedit to move the taskbar on Windows 11.
- Press the Windows logo key + R to open the Run command box on your PC.
- Now, at the search field, type Regedit and hit the Enter button
- Copy and paste the following address line on the address bar as the registry editor opens.
Computer\HKEY_CURRENT_USER\Software\Microsoft\Windows\CurrentVersion\Explorer\StuckRects3 - Now on the right pane of the Registry Editor, double-click on the Settings button.
- Then, on the Edit Binary Value window, change the fifth value on the second row from 03 to 00.
- You may use different values to move the taskbar at different positions.
- 00 will represent the taskbar on left.
- 01 will show the taskbar on top.
- 02 Keeps the taskbar on the right-hand side.
- 03 Will keep the taskbar on the bottom as usual.
- Next, click OK and close the Regedit. It will change your taskbar position to the top of your screen.
- Finally, Restart your computer to proceed with the changes.
The changes made through the registry editor will not be applicable on the other user (if any) on your PC. If you have multiple users on your Windows 11 PC and want to remove them you might like to check out our guide on how to remove users on Windows 11.
Other than moving your Start Menu and taskbar, several other customization features are available that you may like to apply on Windows 11 taskbar. For example, Windows 11 allows you to autohide your taskbar while working with an application on full-screen. The latter part of the article talks about how to auto-hide your taskbar. Check out to know more about that.
How to Auto-hide Taskbar on Windows 11?
If you mostly like a clean, interruption-free window while working with a particular application, then you may find the auto-hide feature interesting. Go through the following steps to auto-hide the taskbar on Windows 11.
- At first, press the Windows key + I on your keyboard to open Windows Settings.
- Then, from the left-pane window, click on the Personalization button.
- Now, scroll down to locate the Taskbar tab, click on it to open the Taskbar settings option.
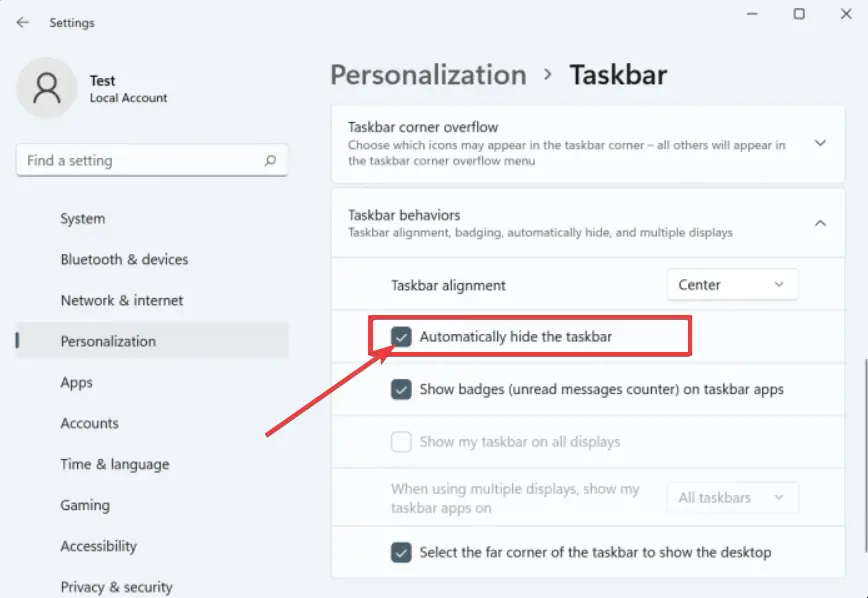
- Next, scroll down again and click on the Taskbar behaviors button.
- Finally, check the box beside the option Automatically hide the taskbar. Your taskbar will hide automatically while working on fullscreen.
That’s all. Hope you find the article helpful. We have already shared all the possible methods that may work for you as far as moving the start menu to the left is concerned. Tell us in the comment section below which method did exactly work for you. Also, tell us whether you are finding the auto-hide feature on your Windows 11 computer useful or not.

