Microsoft Windows 10 offers various useful networking and internet features to its users. You can use these to either improve your network connection or resolve any issues related to it. While Windows 10 has a great networking solution built in, users can sometimes face issues while connected to a network. And one such error found in Windows 10 is the Default Gateway is Not Available error in Windows. Because of this error, you will not be able to access the internet even if you are connected to a working network. Therefore, today we are here to show you How to Fix Default Gateway is not Available error on Windows 10. Not only that but you will also learn more about this error including the possible reasons due to which you might face this issue on your Windows 10 computer.
Table of Contents
What is Default Gateway is not Available error on Windows 10?
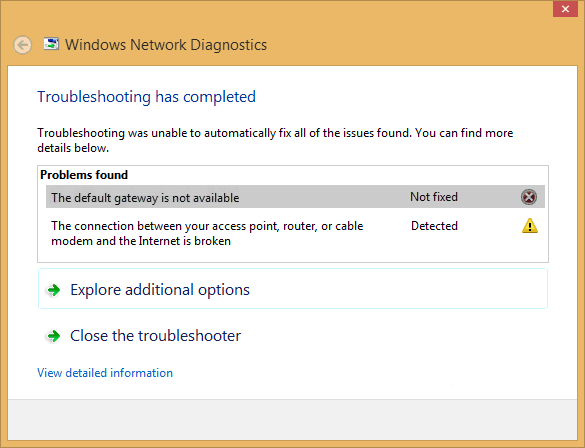
If you are connected to a network and experiencing issues with it, Windows 10 will show you the corresponding error which is causing the issue. And one such error is called “Default Gateway is not Available.” As the name suggests, this error is caused when your Windows 10 PC is not able to find the default gateway of your network. But if you know anything about computer networks, then you must know that the default gateway of your PC is quite important.
The default gateway of your network is responsible for handling all the packets going through your network. This means that whether you are sending or receiving packets on your network, the default gateway handles all of them. Due to this, if your Windows 10 PC is not able to access the gateway, you will lose internet access which can be quite frustrating. For most users, this error is caused due to things like outdated network drivers, improper network settings in Windows, and other similar things present in your Windows 10 PC.
How to Fix Default Gateway is not Available error on Windows 10?
If you are facing this error on your Windows 10 PC, then chances are that you are not able to access the internet on any browser installed on your computer. Due to this, such an error can affect your computing experience since almost all applications require an internet connection for proper functioning. Therefore, fixing the issue which is causing this error on your PC is quite important. So, if you are also facing the Default Gateway is not available error on your Windows 10 computer, follow one of the given solutions in order to successfully get rid of it:
1. Update Network Adapter Drivers on your Windows 10 PC
All of the hardware devices connected to your computer have their own drivers which are required for its proper functioning. This means that the network adapter installed in your PC which handles all the network requests in Windows also uses drivers to function properly. But if these drivers are outdated or corrupted due to some reason, you might start facing issues on your computer. Such an issue can also cause the Default Gateway is not Available error on your Windows 10 PC. In such a case you can simply follow the given instructions one by one to update the network drivers of your computer:
- First, press Windows Key + R on your keyboard to open Windows Run.
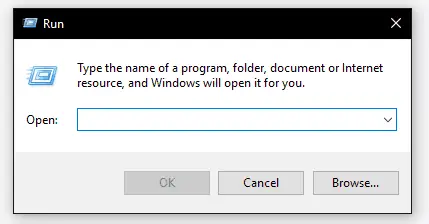
- In here, type devmgmt.msc and press enter to open the Device Manager utility in Windows 10.

- In here, locate and expand Network adapters devices and identify the default network adapter connected to your computer.

- Now, right-click on this network adapter device, and select Update Driver.

- Doing so will open a new window on your screen in which you have to select Search automatically for updated driver software.
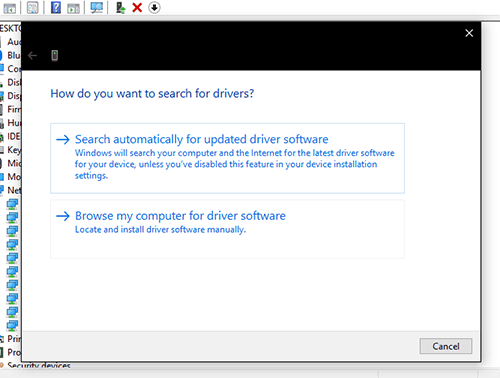
- Finally, Windows 10 will automatically download and install the latest network adapter drivers in your computer which will fix the Default Gateway is not available error on Windows 10.
2. Change Power Management Settings of Network Adapter in Windows 10
For Windows 10 devices like laptops, users can find a lot of power management options which can improve the battery life of a device. These power management options simply disable the hardware devices when they are not in use. Similarly, the network adapter of your computer can also be disabled by power management when it is not used. But sometimes, it is not able to function properly afterward. In such a case you might start facing errors in Windows 10 including the default gateway is not available error. Therefore, you should make sure that power management features are turned off for the network adapter of your computer by following the given steps one by one:
- Press Windows Key + X on your keyboard and select Device Manager.
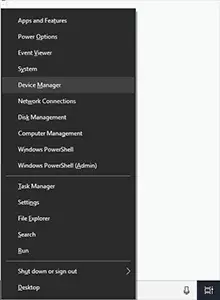
- Inside the Device Manager window, expand the list of Network adapters installed on your device.

- After that, select your default network adapter, right-click on it and open its Properties.
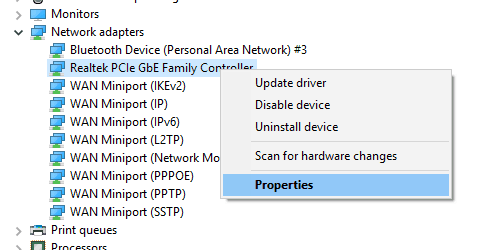
- In here, go to the Power Management tab where you will find all of its power related settings.
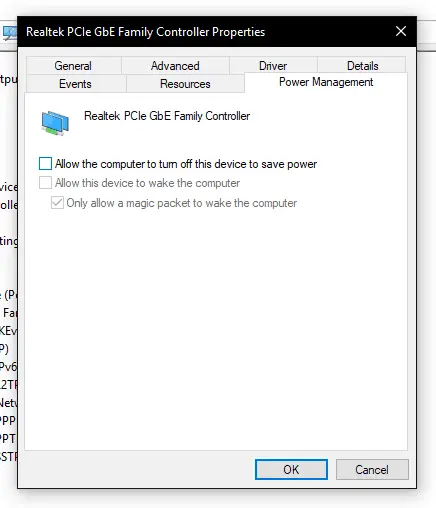
- Now, unselect the Allow the computer to turn off this device to save power option and click on OK to save your settings.
- Finally, reboot your computer after which your network adapter will not be turned off which will fix any issues related to it.
3. Use Manual Default Gateway Address in Windows 10
Windows 10 is able to locate the default gateway address automatically which is quite useful for users since you do not have to enter the gateway yourself. While this feature is quite handy for beginner users, it does not work sometimes. In such a case, you might face the default gateway is not available error in Windows 10. Thankfully, you can manually assign the default gateway address in Windows 10 via the network settings quite easily. And once you follow the given steps one by one to assign gateway address, it will also fix the issue:
- Use the Windows Search feature to open Command Prompt on your computer.
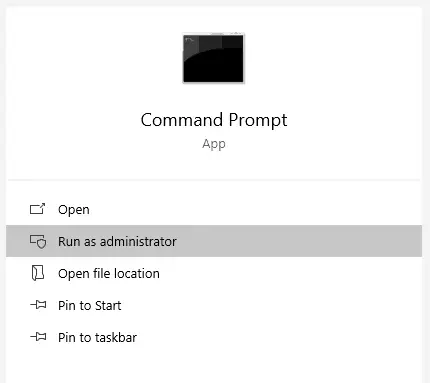
- In here, type ipconfig and press enter on your keyboard.

- This will show you the IP address, Subnet mask, and Default Gateway of your computer. Make sure to note these down as you might need them sometime later.
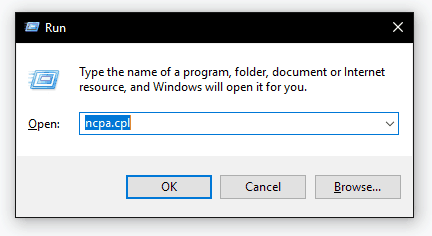
- After that, press Windows Key + R on your keyboard to open Windows Run.
- In here, type ncpa.cpl and click on OK to open Network Connections settings in Windows 10.
- Now, right-click on the active network adapter and open its Properties.
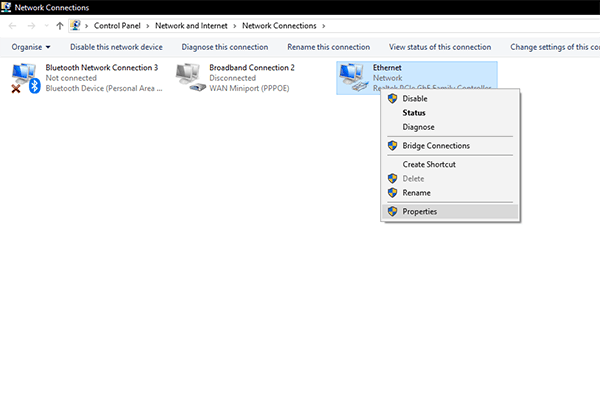
- Inside the Networking tab, double-click on Internet Protocol Version 4 (TCP/IPv4) which will open a new window.
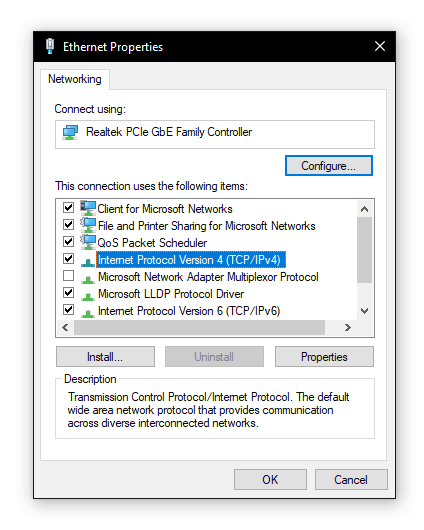
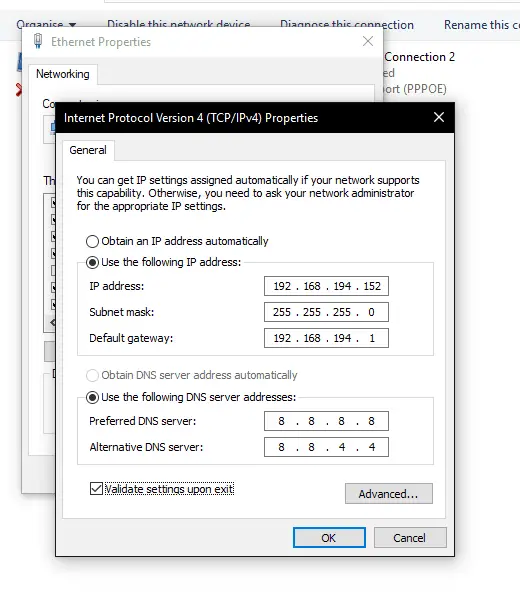
- Here, first select the Use the following IP addresses option and enter IP address, Subnet mask, and Default Gateway values noted down from the Command Prompt earlier. Now, select the Use the following DNS server addresses option and type the following addresses:
- Preferred DNS Server: 8.8.8.8
- Alternate DNS Server: 8.8.4.4
- Finally, select the Validate settings upon exit option and click on OK to save your settings. Doing will so will assign a new address to the default gateway of Windows 10 which will successfully fix the error mentioned in this article.
Reset TCP/IP Settings in Windows 10
If none of the solutions mentioned above have worked for you, then you can try resetting the TCP/IP Settings in Windows 10. Doing so on a Windows 10 computer usually fixes any network related issues present in your computer. TCP/IP stands for Transmission Control Protocol/Internet Protocol, and as the name suggests it handles all of the network requests of Windows 10. Thankfully, it is quite easy to reset TCP/IP settings in Windows 10 which will fix the default gateway is not available error on your PC. You can reset TCP/IP with the help of Command Prompt in Windows 10 as shown in the given step by step guide:
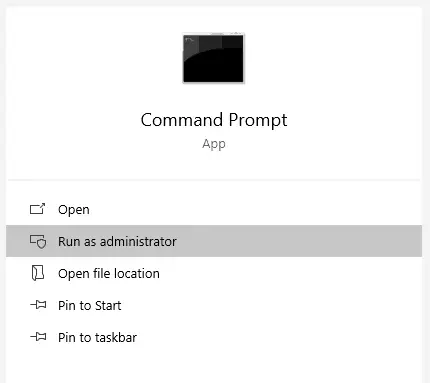
- First, use the Windows Search feature to open Command Prompt as an administrator.
- In here, type netsh int ip reset resettcpip.txt and press enter.
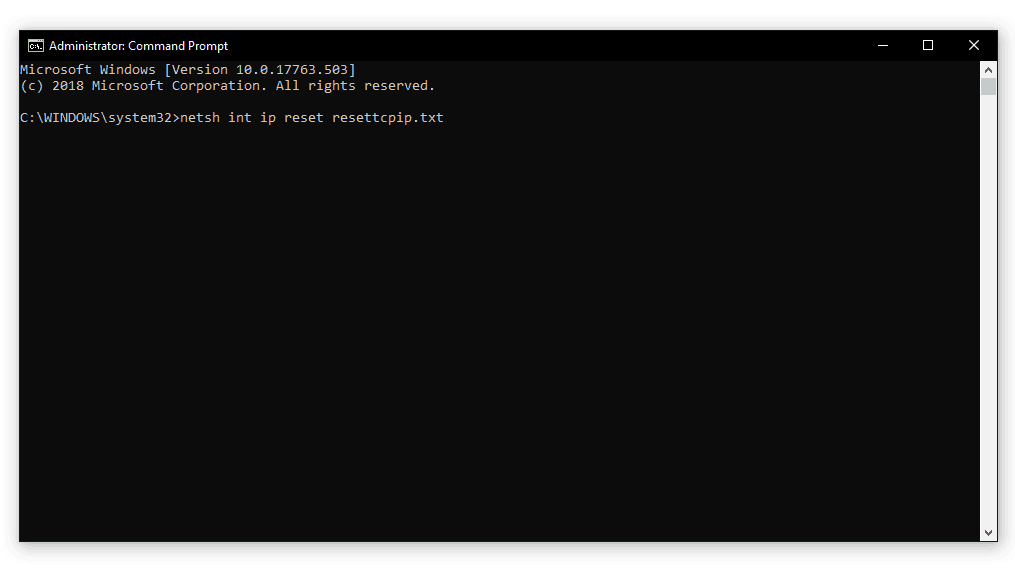
- Doing so will reset the SYSTEM\CurrentControlSet\Services\Tcpip\Parameters and SYSTEM\CurrentControlSet\Services\DHCP\Parameters registry entries in Windows 10.
- Finally, reboot your Windows 10 computer which will successfully reset TCP/IP fixing the default gateway is not available error in Windows 10.

