
Microsoft’s OneDrive comes pre-installed in Windows 10 which can be useful for many users. For those of you who are not familiar with OneDrive, it is essentially a cloud backup service by Microsoft. It allows you to save your personal files and data as well as Windows settings online. While the OneDrive client works flawlessly for most of the time (forgetting Windows 10 build 1809 OneDrive data deletion bug), it might cause some issues in some cases or simply you did not like One Drive and had uninstalled it from your Windows 10
But if you are now looking forward to reinstalling the OneDrive in Windows 10 then here is simple to follow guide for you with additional information about how to disable or uninstall One Drive from Windows 10.
How to Reinstall OneDrive on Windows 10?
For those of you who have removed OneDrive from their PCs and now want it back, we are here to help. There are multiple possible methods for reinstalling OneDrive on Windows 10. And we have included two of the easiest methods for reinstalling OneDrive on your computer. If you want to start using OneDrive on your computer once again, then make sure to go through these methods one by one:
1. Command Prompt for Reinstalling OneDrive
The Command Prompt in Windows 10 can be used to perform many useful functions in a computer. It can also be used for both installing as well as uninstalling applications from your PC. This means that if you have uninstalled OneDrive and now want to reinstall it, then you can use the Command Prompt to do the same. You have to simply the following command in Command Prompt which will reinstall OneDrive on your computer as shown here:
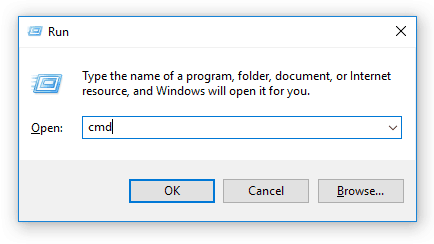
- Press Windows Key + R on your keyboard which will open Run on your screen.
- In here, type cmd and press enter which will open Command Prompt on your screen.
- Once you are inside the Command Prompt window, type one of the following commands depending on the architecture of windows installed on your computer:
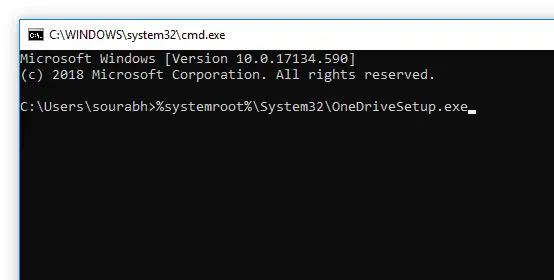
- For 32 bit Windows Users: %systemroot%\System32\OneDriveSetup.exe
- For 64 bit Windows Users: %systemroot%\SysWOW64\OneDriveSetup.exe
- After typing in either of these commands in Command Prompt depending on your system, press the enter key on your keyboard which will run this command.
- Finally, this will start the installation process for OneDrive on your computer and once it has been completed, reboot your computer to successfully reinstall OneDrive in Windows 10.
2. Reinstalling OneDrive in Windows 10 PC using Explorer
All applications installed in Windows 10 have their own data folder where all temporary files stored. Similarly, OneDrive also has its own app data folder where all files related to it are stored. Apart from saving user settings, OneDrive also stores the installer file for OneDrive in this folder. Therefore, you can simply use the Windows Explorer to access this file and reinstall OneDrive in Windows 10 as shown below:
- First, press Windows Key and E on your keyboard at the same time to open Explorer.
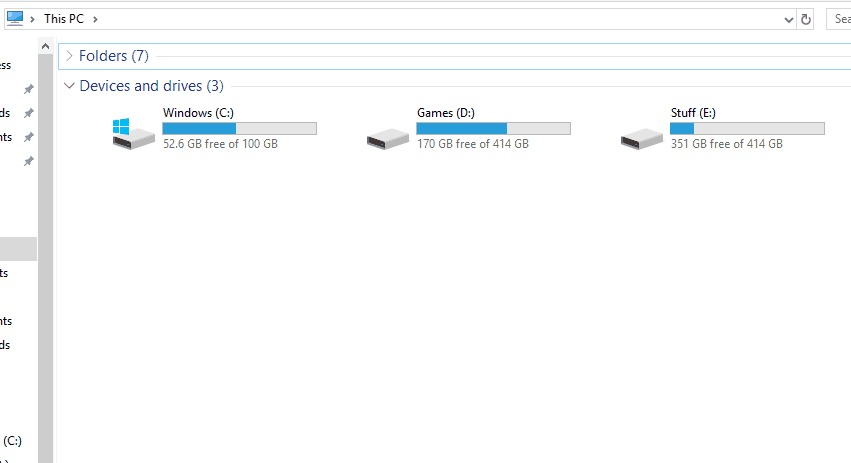
- In here, navigate to C:\USERS\USERNAME\APPDATA\LOCAL\MICROSOFT\ONEDRIVE\UPDATE where you have to replace <USERNAME> with your account’s username in Windows 10. (C: is the drive where Windows 10 is installed)
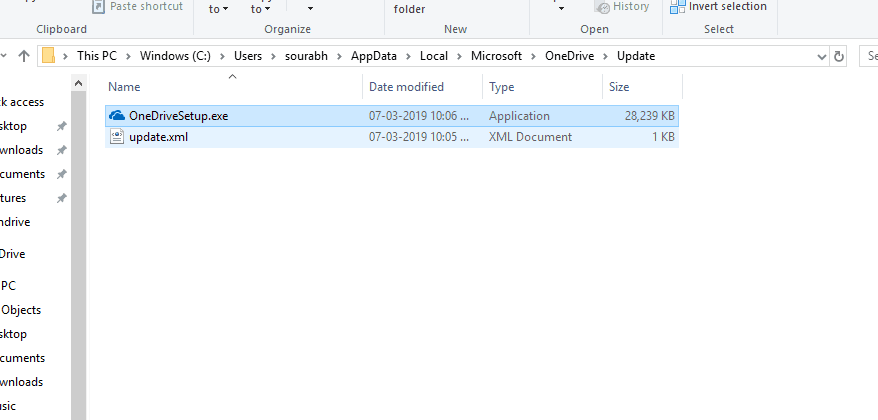
- After that, you will find a file named exe in here. Double-click on it to open it and start the installation process for OneDrive.
- At last, follow the on-screen instruction to complete the OneDrive installation in Windows 10 successfully.
How to Disable OneDrive in Windows 10
For those of you who want OneDrive to be installed on their computers, but don’t use it quite often, you can simply disable it. Disabling OneDrive in Windows 10 will stop OneDrive from launching by itself. But you can still use it on your computer whenever you want it. Due to this, multiple Windows 10 users will prefer disabling OneDrive instead of permanently uninstalling it. So, if you want to disable OneDrive in Windows 10, simply go through these instructions one by one:
- Locate the OneDrive icon on the taskbar in Windows 10 in the bottom right corner of your screen.
- Now, right-click on the OneDrive icon and open its Settings.
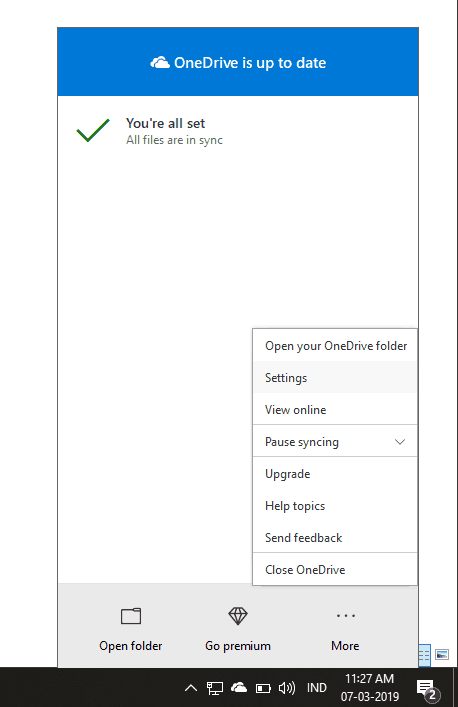
- In here, go to the Settings tab and deselect the Start OneDrive automatically when I sign in to Windows.
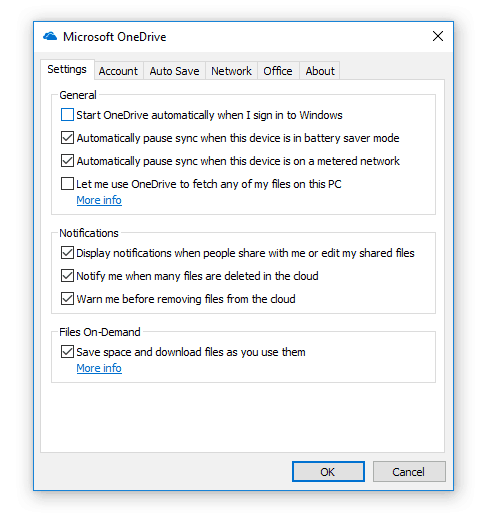
- After that, click on OK to save these settings and reboot your computer which will successfully disable OneDrive in Windows 10.
How to Uninstall OneDrive Permanently from Windows 10
In case if you don’t want to disable OneDrive instead want to get rid of it from your computer permanently, then you can uninstall it. Uninstalling OneDrive will completely delete all files related to OneDrive from Windows 10. The OneDrive client can be uninstalled from your Windows 10 computer by following either of the two methods mentioned here:
1. Uninstall OneDrive Application from Windows 10 via Windows Settings
The Windows Settings allows the user to change all the major settings related to your computer. You can even uninstall any of the applications installed in Windows. Similarly, you can even uninstall the OneDrive client from your Windows 10 PC using the Windows Settings options as shown in these steps:
- Press Windows Key + I on your keyboard to open Windows Settings on your PC.
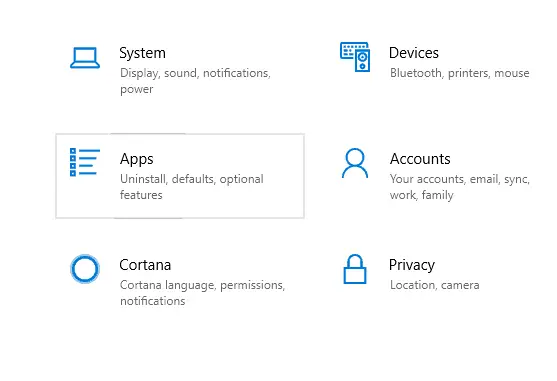
- In here, go to the Apps section which will show you a list of all the applications installed in Windows.
- Now, use the search option to look for Microsoft OneDrive.
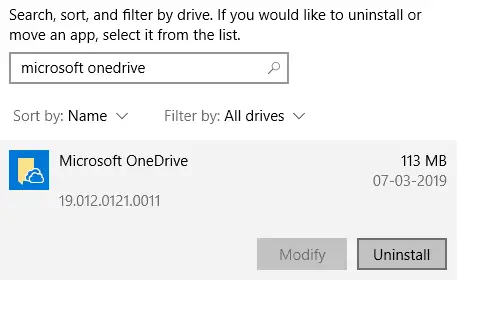
- Finally, click on Microsoft OneDrive and select Uninstall which will successfully remove OneDrive from your computer.
2. Using Command Prompt to Uninstall OneDrive
As shown earlier in this article, Command Prompt can be used for reinstalling OneDrive. Similarly, it can also be used by the user to uninstall the OneDrive client from Windows 10. This is possible by running a specific command in Windows 10 that completely removes OneDrive and its components from Windows. You can follow these instructions one by one to successfully uninstall OneDrive from your Windows 10 computer:
- First, use Windows Search to look for Command Prompt and launch it as an administrator.
- Now, inside the Command Prompt window, run either of the following commands according to the architecture of Windows installed on your computer:
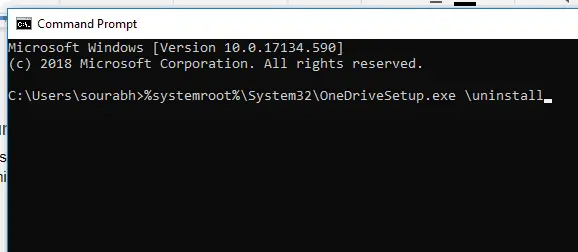
- For 32 bit Windows Users: %systemroot%\System32\OneDriveSetup.exe /uninstall
- For 64 bit Windows Users: %systemroot%\SysWOW64\OneDriveSetup.exe /uninstall
- Once you have typed these commands in Command Prompt, press the enter key to execute them after which the uninstallation process for OneDrive will be initiated on your computer.
- At last, reboot your computer which will successfully remove OneDrive from your computer.

