In this era of extreme competition between various tech giants, Microsoft still holds an edge in the corporate section of the world. There are various operating systems available in the market but not a single one of them comes close to Windows OS developed by Microsoft. The reason behind this is the simplicity and user-friendly UI of Windows. Although, Windows hasn’t always been as polished as it is now. There was a time users were favoring Linux or MacOS instead of Windows. But the scene changed with the release of Windows 10 in 2015. Windows 10 was a huge upgrade for users who were using the previous version of Windows. The main reason behind this is the many features which were introduced in Windows 10 which made it a lot user-friendly and easy to access. Features like Cortana, Xbox App, perfected multitasking and new settings UI were the centerpiece of attraction in Windows 10.
Table of Contents
What is Fast User Switching?
One of these features is Fast User Switching. As the name suggests, the feature allows the user to switch between multiple accounts without the hassle of signing out and then signing in again. The feature was implemented considering the existence of more than one user per system. This feature was developed to save time as well as the trouble of rebooting the system. This feature can help a singleuser or multiple users to use multiple accounts simultaneously which can increase the rate of work done in a particular frame of time.
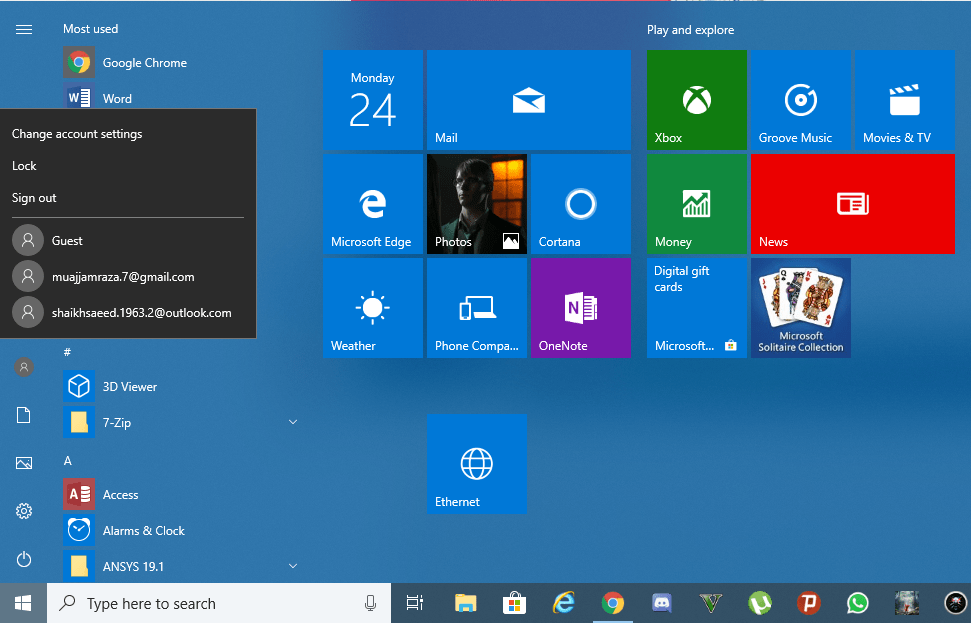
Microsoft has kept this feature enabled by default. But still, it is possible to tweak the state of this feature by performing some simple actions. So if you are a single owner of the system and you do not require this feature, you can disable fast user switching by following the methods provided below:
How to Disable Fast User Switching on Windows 10
Method 1: Using Windows Registry Editor
The word “Registry” means a place where all the records are kept. The same stands for the case of Windows Registry. Windows Registry is a tool which stores all the data concerning with various states of settings provided in the Windows. It is used by kernels, drivers and Windows integrated functions to obtain the data required for the operation of windows. The Windows registry editor is a critical tool which must be used carefully as the overall operation of the system depends on it. We will strongly suggest that you proceed carefully with the registry editing and always create a backup of the registry before editing because if something goes north, the OS might cease to function causing you a series of troubles.
To disable the Fast User Switching by using Windows Registry editing tool, Follow the steps provided below:
- Press “Windows Key+R”. This will open the “Run window”
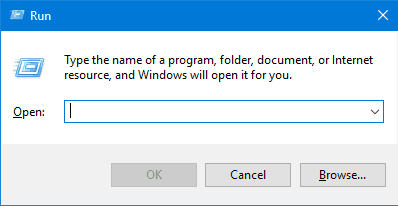
- Now type “regedit” in the space provided after “open” and hit enter. This will open the registry editor.
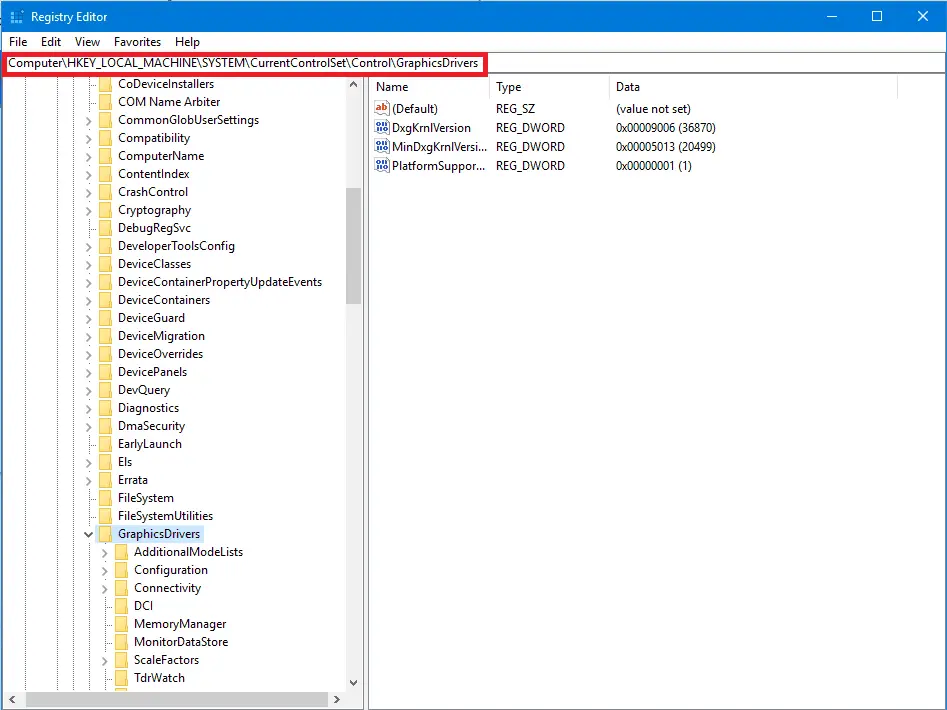
- Here you will see a hierarchically arranged folders which contain the codes required to recall the state of a particular setting/feature.
- Click on the address bar provided in the window. (Highlighted in the above image)
- Now select the complete address which is there already and clear it.
- Now copy and paste the following address.
ComputerHKEY_LOCAL_MACHINESOFTWAREMicrosoftWindowsCurrentVersionPoliciesSystem
This will lead you to the folder where the tweaking has to be performed.
- Here, you will see multiple values which are designated for various settings. Look for a value called “HideFastUserSwitching” in the list. If it does not exist, you can simply create the value. To create the value, simply right-click in the blank area and hover over “new”. This will open a side menu. Select “New DWORD 32-bit value” from the side menu.
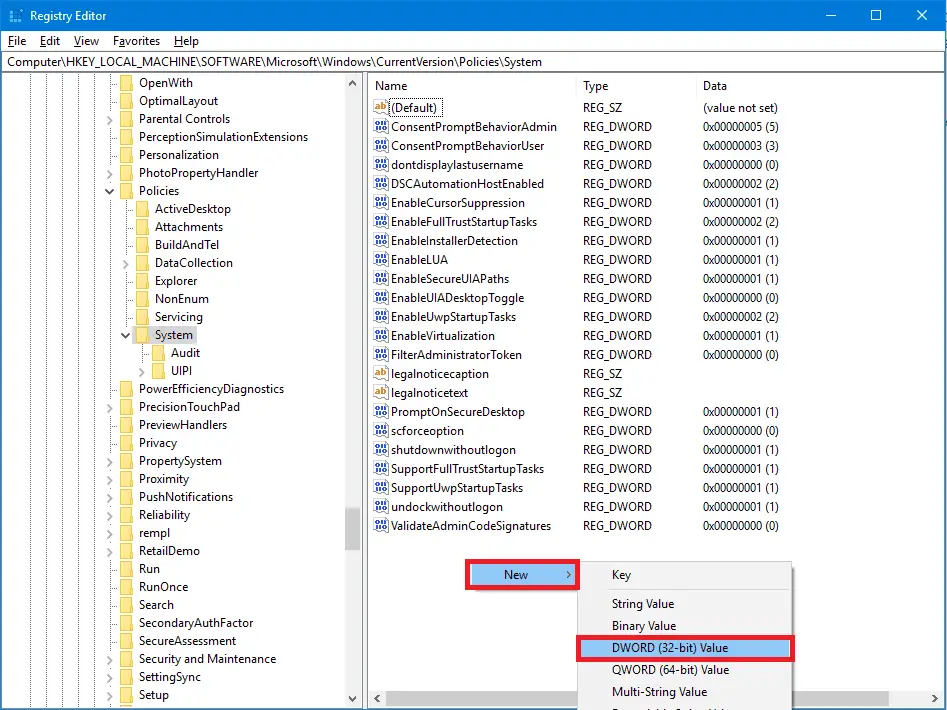
- Now, copy *HideFastUserSwitching* without asterisks and paste it as the name of the value.
- Now double click the newly obtained value to change its state. Here, you can toggle the state of the setting.
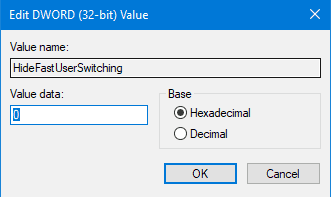
- Now, make sure that the base is set to “Hexadecimal” and change the value data to “1” to disable the fast user switching.
- Then press “OK”. Then close the registry editor.
- Windows requires a reboot to apply any recent changes made in the registry. Hence reboot your system.
- After the reboot, You will notice that the fast user switch is now hidden (disabled) in the start menu.
Method 2: Using Group Policy Editor
Windows Group Policy is a series of instructions provided to maintain a controlled use of the OS in a work environment where multiple systems are being used simultaneously which are connected and operated by a single server. The group policy can only be edited by the administrator of the system. Hence, you can only proceed with this method if you are the administrator of the system. Otherwise, you will require the admin password of the system to edit the group policy.
To disable the fast user switching using group policy editor, follow the steps provided below:
- Press the “windows key” and search “group”.
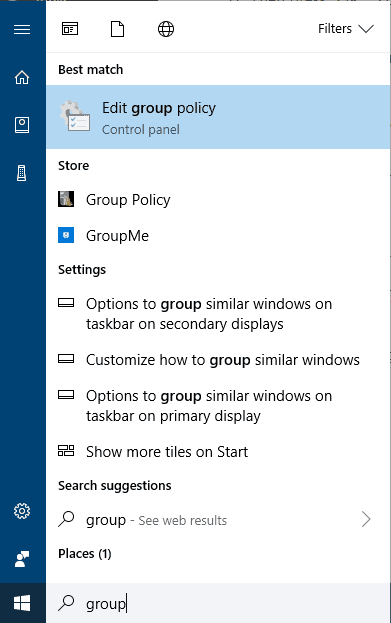
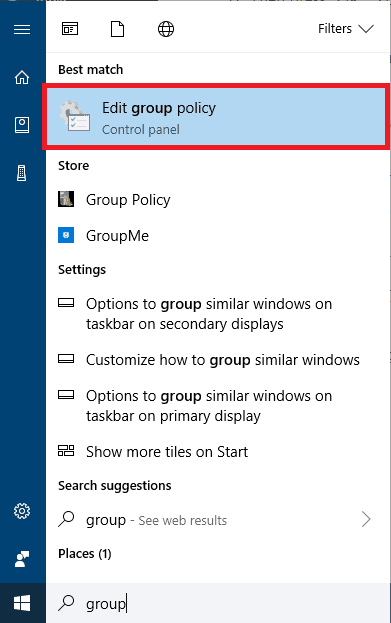
- Click on “Edit group policy” option from the results. This will open the group policy editor.
- Here, you can toggle various settings provided by the default administrator. The local group policy editor window will be like the image provided below.
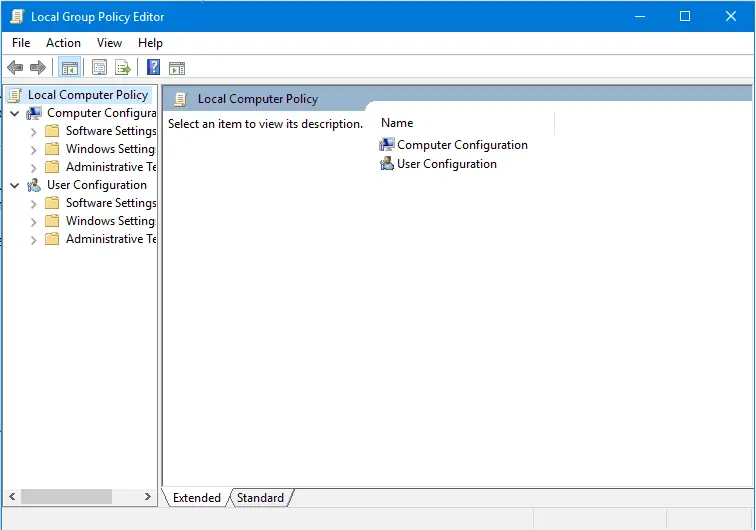
- Follow the path “Local Computer Policy> Computer Configuration > Administrative Templates > System > Logon”. It will look like this.
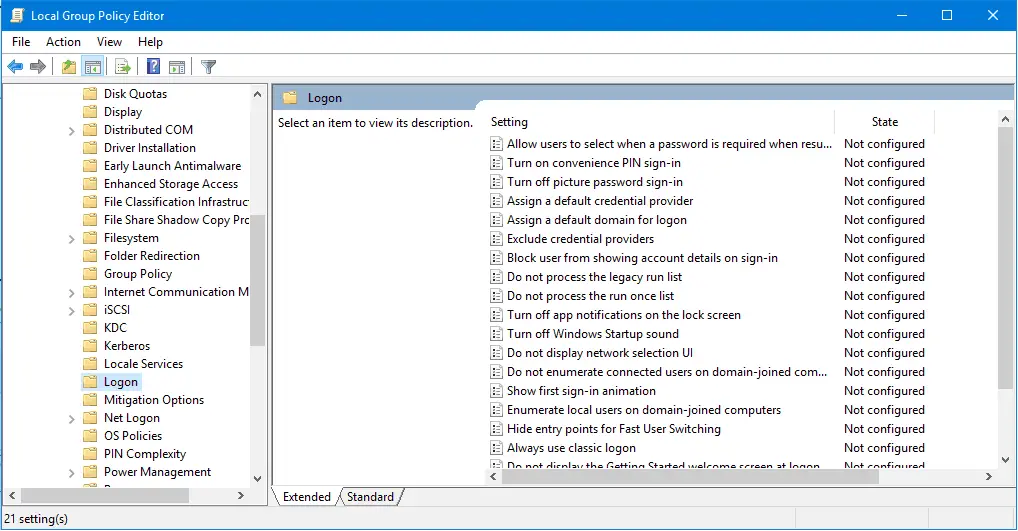
- Now, look for the “Hide entry points for Fast User Switching” option. This will allow you to change the current state of the setting.
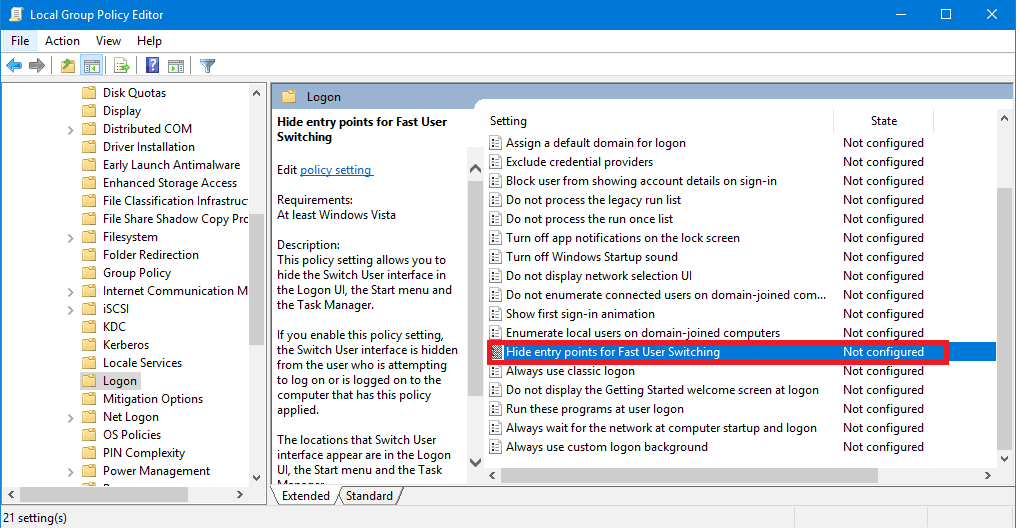
- Now, double-click the highlighted option. This will open a new window which will allow you to change the state of the setting.
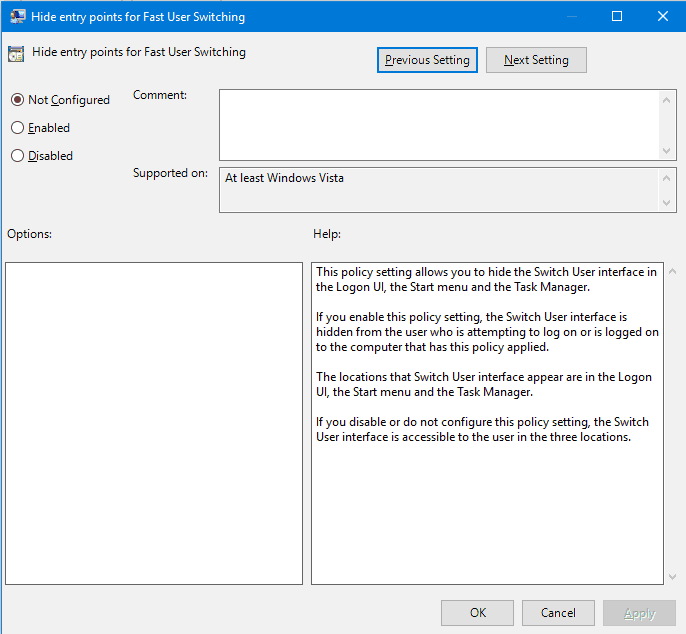
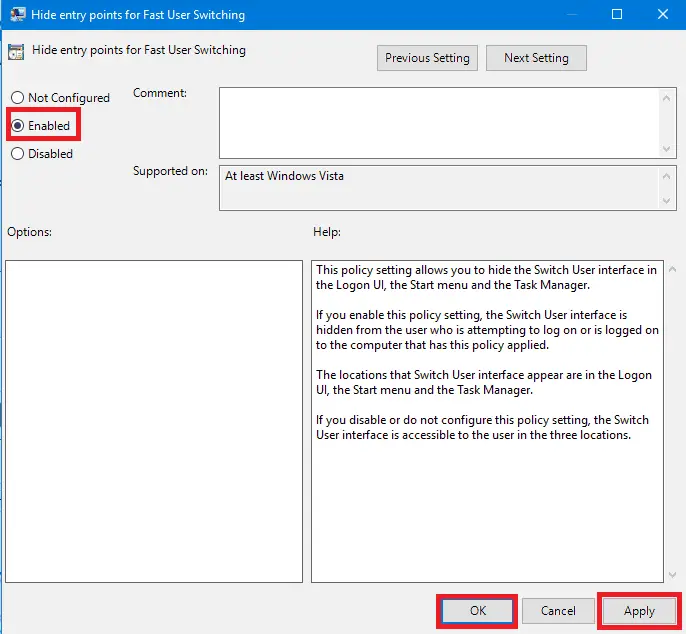
- Now, Make sure the “enabled” option is highlighted in the window. This will simply hide (disable) fast user switch feature. Click on “Enabled” then click on “Apply” Then click “OK” and proceed to close the group policy editor.
- Similar to the registry, Windows requires a reboot to apply any recent changes made in the Group policy editor, Hence reboot your system.
- After the reboot, You will notice that the fast user switch feature is now hidden (disabled) in the start menu.
That’s it, guys. By following simple steps provided above, you can easily Disable Fast User Switching On Windows 10. In case you ever want to enable the feature again, just follow the same steps and tweak the key points back to the original.

