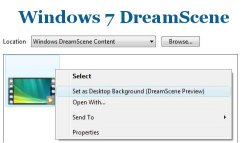
Dreamscene is one of most discussed feature of Windows Vista Ultimate Extra. Dreamscene allows you to set any video or animation as a desktop background on Windows Vista however Microsoft has not provided any such feature in its latest Windows Operating system Windows 7
We had provide workaround to get back dreamscene feature in windows 7 however many users has reported several issues like invisible desktop icon text etc. To remove and uninstall DreamScene from Windows 7, just download the following registry registration entries file which will clean system registry of any DreamScene registry keys and values.
Download Uninstall-DreamScene.reg
The Uninstall-DreamScene.reg will remove all registry keys that was added to system when installing DreamSccene patch. After cleaning system registry, delete following files
1. DreamScene.dll from %SystemDrive%\Windows\System32\ folder
2. DreamScene.dll.mui from %SystemDrive%\Windows\System32\en-US\ folder.
You must restart your computer before deleting above files.
Source: My Digital Life


1 thought on “Uninstall & Remove DreamScene From Windows 7”
TEMPORARY INVISIBLE TEXT FIX…WORKS AFTER RESTART:
-right click a video and set to desktop background
-set folder options to show hidden files
-go to…
C:\Users\#username#\AppData\Roaming\Microsoft\Windows DreamScene
-there should be 2 image files of the dreamscene running (1 hidden/greyed)
-set both files to “read only” & uncheck “hidden”
-right click desktop > personalise > desktop background
-under windows dreamscene, you should see both image files
-make sure both are checked by clicking check boxes next to them
-set Picture position: Fill
-save changes
NOTE: You can now set any dreamscene without text bug, however if you dont
do the above procedure everytime you set a different video, you will briefly see the
image of the first video you set at windows startup…therefore just delete both images
that was set to “read only” and start procedure again on new video.
Hope this helps