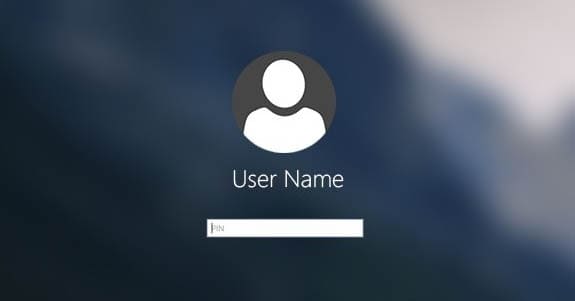
For the sake of security, Windows 10 has multiple ways using which the user can log into their user account. You can choose from multiple methods for login like password, PIN, biometric authentication, and even face unlock via Windows Hello. While these methods are highly secure and makes the signing/login process very fast, but it need special hardware like Windows Hello supported webcam or fingerprint readers which many Windows 10 might not have it. That’s where Windows 10 auto login feature comes handy, as the name suggests, this essentially allows you to automatically log in and save time while logging in.
What is Windows 10 Auto Login Feature?
The Auto Login feature of Windows 10 is a very simple yet a very useful and powerful option. It essentially allows you the user to use the computer without entering long passwords while logging in. Such a feature can save a lot of time especially when you’re the only person who uses your Windows 10 PC. Although, if you have multiple people using your computer, enabling Windows 10 auto login is not recommended and can compromise your important data. That being said, if you’re the only user and want to save a lot of time, then you can follow either of the following methods to enable Auto Login in Windows 10:
How to Quickly Enable Windows 10 Auto Login
Enable Windows 10 Auto Login via Control Panel
The Control Panel allows the user to play around with all of the settings in a Windows 10 computer. It also includes a whole section for User Accounts and their related settings. And this means that you can also use the Control Panel for changing the login settings in Windows 10. Therefore, if you want to enable Windows 10 Auto Login, the easiest way to do this is via Control panel. So, if you want to use the Control Panel to do the same, you can follow these steps one by one:
- While you can go into Control Panel and then navigate to the desired options, it can consume a lot of time. Therefore to quickly enable Windows 10 Auto Login, we will use Windows Run.
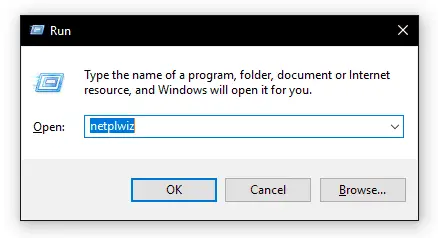
- First, press Windows Key + R on your keyboard and in here type netplwiz and press enter which will open a small window.
- Now, using the list under Users for this computer, select the user in which you want to enable Windows 10 Auto Login.
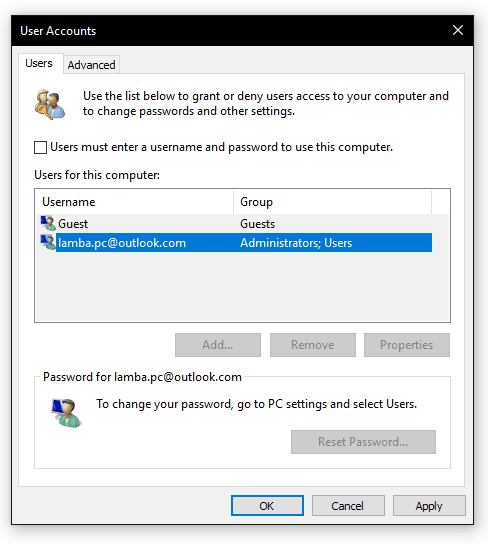
- After that, uncheck the Users must enter a username and password to use this computer option right above the list.
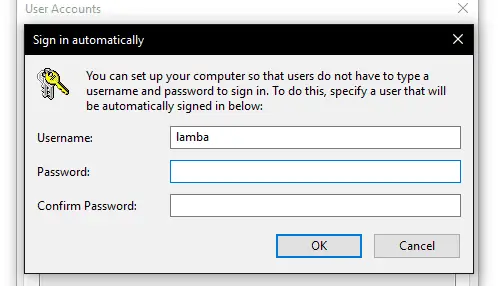
- Once you have done that, click on OK and it will then ask your current password for authentication. And after you have entered the password, Windows 10 Auto Login will be enabled for your user account.
Use Windows Registry Editor for turning on Auto Login in Windows 10
Windows has a registry key and a respective value for all the settings that you have configured in your PC. This also includes the account passwords which you are using as well as other related settings. Because of this reason, if you know the exact registry key for login settings, you can use the Windows Registry Editor for turning on Auto Login in Windows 10. For enabling Auto Login you have to simply edit the values of registry keys as shown in the following instructions:
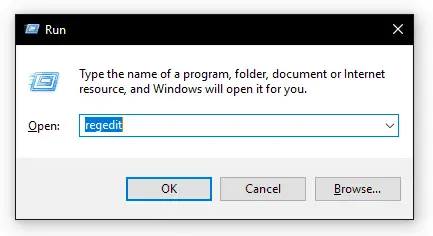
- To open Windows Registry Editor, first, open Windows Run by pressing Windows Key and R at the same time on your keyboard.
- Now, type regedit and press enter which will open Windows Registry Editor.
- After that, using the left side pane, navigate to HKEY_LOCAL_MACHINE\SOFTWARE\Microsoft\Windows NT\CurrentVersion\Winlogon.
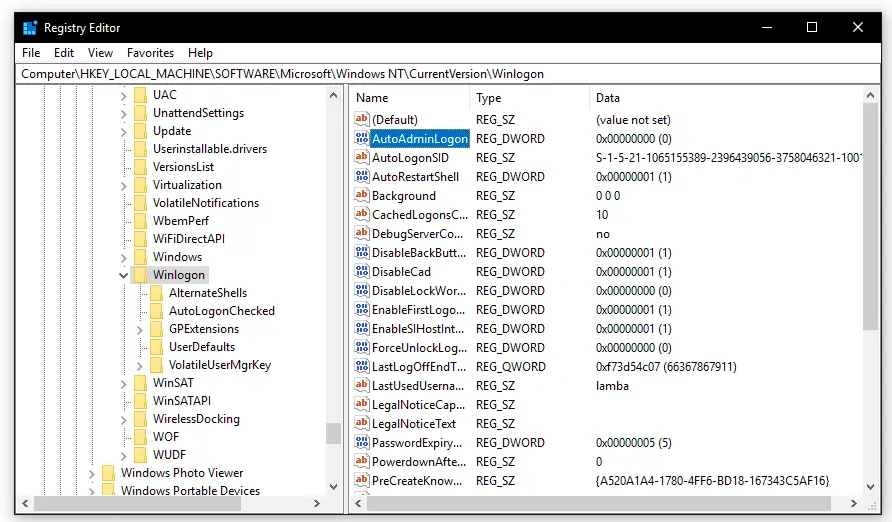
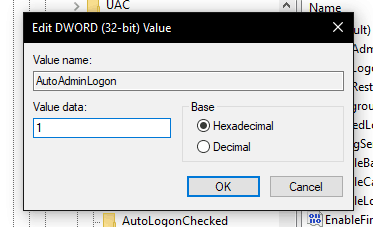
- In here look for an entry called AutoAdminLogon and double-click on it.
- Finally, change its value from 0 to 1 and click on OK to save it. After that, simply reboot your computer which will enable Windows 10 Auto Login in your PC.
Windows 10 Auto Login in System Settings
Apart from having the Control Panel, Windows 10 also has the system settings which allow you to toggle the major settings in your computer. When compared to the Control Panel, it has fewer options, but much easier to use due to a simpler UI. It also has the options and settings related to sign-in options which means that you can toggle Windows 10 Auto Login from system settings. You can do so by following the given step by step guide:
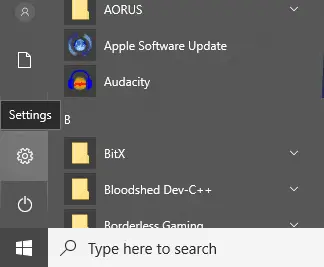
- Open the Start Menu by pressing the Windows Key on your keyboard.
- In here, click on the gear icon to access System Settings.
- Now, go into the Accounts section and open Sign-in

- In here, under the Require sign-in option select Never and save your settings.
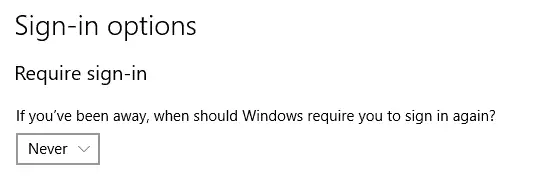
- Doing so will enable Auto Login for your user account in Windows 10.

