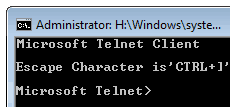
If you have been fan of traditional Microsoft Telnet client then you will be surprised to see that traditional Telnet Client is not available in Windows Vista & 7 by default and you have to manually install Telnet Client to use Telnet from command prompt.
There are many good freeware telnet clients like WinSCP but it will not be available when you are on some public computer or on friends computer in that case default telnet client may become handy. Here is small guide on how to enable Telnet on Windows 7.
How to Enable Default Telnet Client on Windows 7
1. Go To Start Menu and select Control Panel
2. Click on Programs in control panel
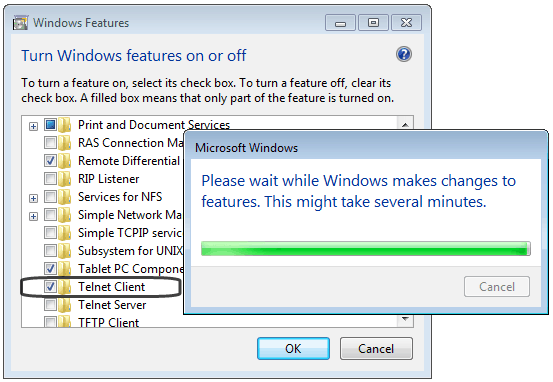
3. Now click on “Turn Windows Features On or Off” under Programs and Features
4. Scroll down in displayed list and check Telnet Client and click on OK

That’s’ it, Once windows has completed installation process to you can start using Telnet client.


11 thoughts on “How to Install Microsoft Telnet Client on Windows 7”
Hi. I got an error when trying to enable the telnet client.
“An error has occured. Not all of the features were successfully changed”
Is this because the UAC is disabled or why?
I tried enabling UAC but did not help.
Then i ran sfc /scannow in an elevated command prompt. It found errors and successfully repaired them. Rebooted and it worked like a charm.
Last night I used Orbit30’s tool to activate Windows 7 build 7600 16385. Now after restarting the activation of the OS was removed. So i suspect thet the tool from Orbit30 made some changes that prevented the telnet-client to be installed/enabled.
I had the same exact problem, followed Tharon’s advise and it solved my problem as well. Thank you for the tip!
UAC is throwing all the problems for me when I am trying this.
Will check for updates a little later.
thanks a lot………………..
Thanks a lot
thank you so much, i had to reconfigure a catalyst 2900 SERIES XL for my friends this evening, and my XP pro raid is failing, **fail**
Thanks Bro. It was really helpful.
cool.. its helpful.. thanks.
thankssssss
thanks