Have you just signed in to your Microsoft account and now want to delete the local user account in your Windows 11 PC? Here we’ve mentioned the best methods to remove user in Windows 11. Even if you want to delete accounts of your family members accessing the same system, this guide has got you covered.
However, removing a Microsoft account from your PC will require you to have a local account with administrative privileges. So, if you have signed in using your Microsoft account only and want to remove it now, first create a local user account in Windows 11 and then change the account type from Standard User to Administrator.
Once done, follow the methods mentioned below to remove a Microsoft user account from Windows 11. And, if you just want to delete an existing local user account, directly start with the step-by-step process. Here you go!
Table of Contents
How to Remove a Local User from Windows 11?
The process of deleting a local user account in Windows 11 is quite easy. All you have to do is, remove the user account from Settings and delete the user’s profile from C: drive. Here is how to do that-
Step 1: First, log in to your PC with administrative privileges
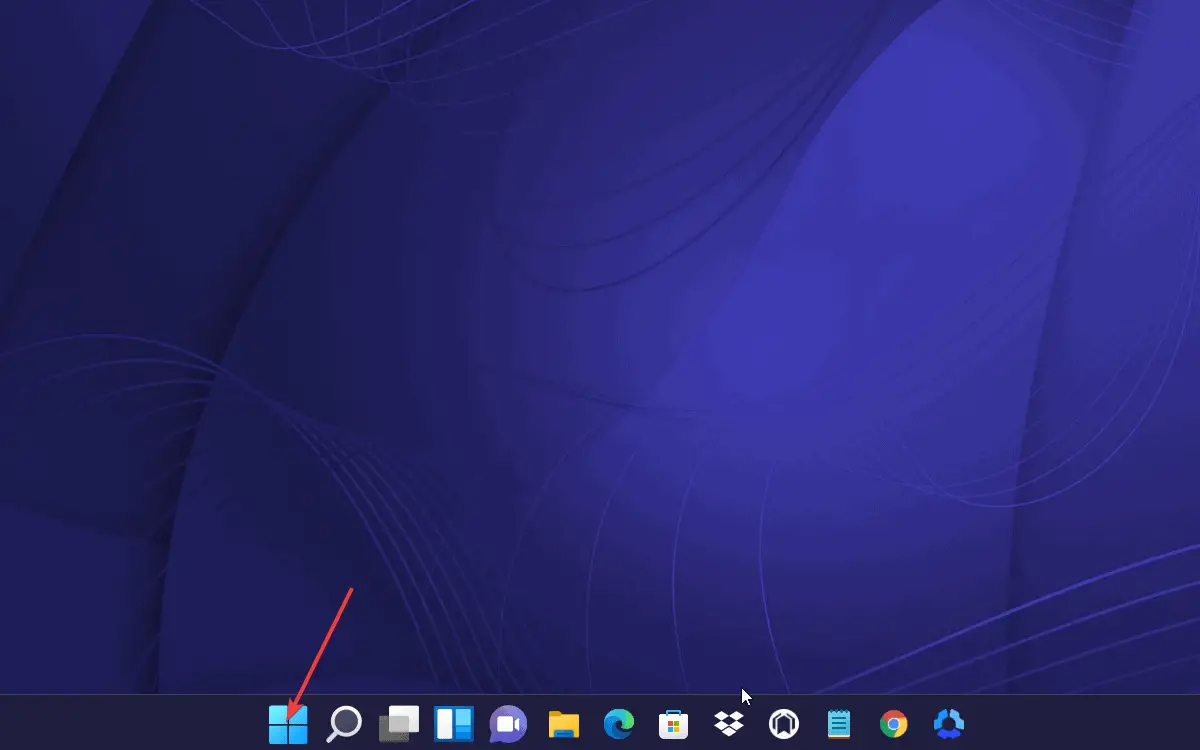
Step 2: Now, click on the Windows button from your taskbar and choose Settings
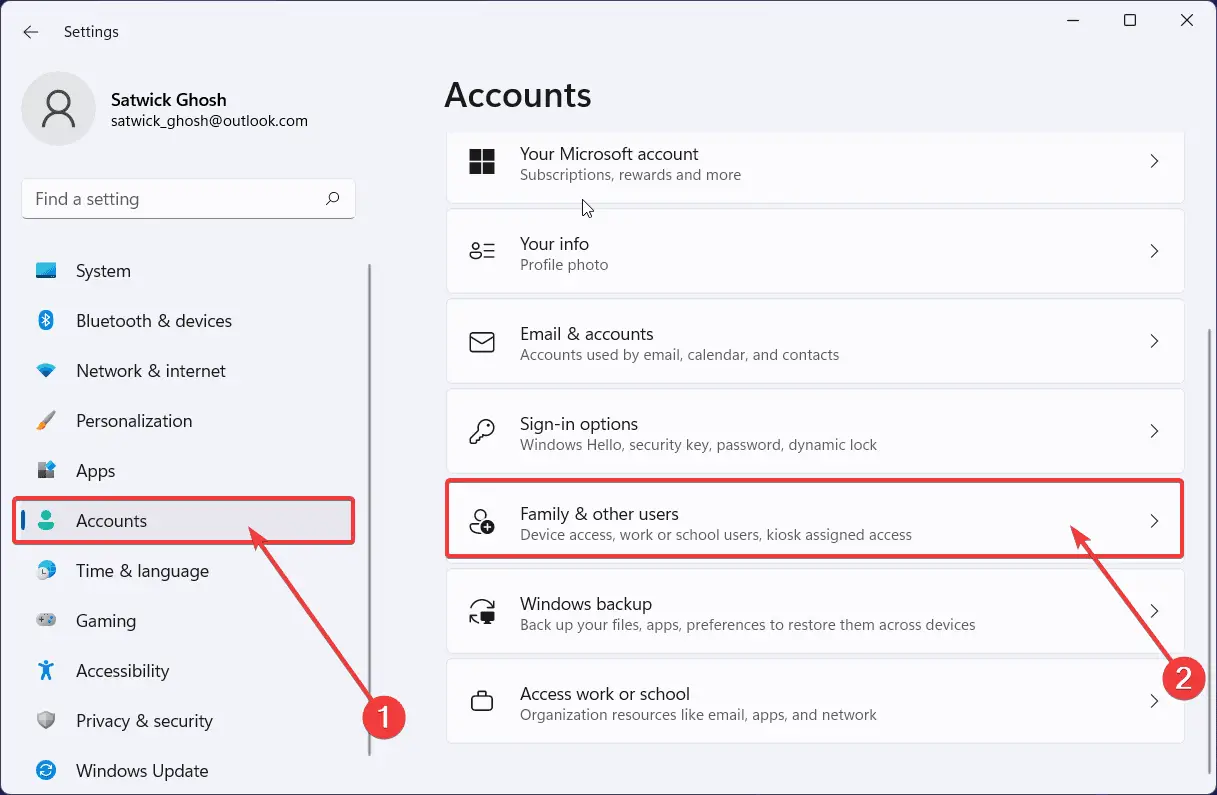
Step 3: In the Settings window, click on Accounts from the left pane
Step 4: Next, click on Family & other users from the right side
Step 5: Then, move on to the Other users section
Step 6: Find the user you want to remove and click on it to expand
Step 7: Once done, you’ll find the Remove button right next to Account and data
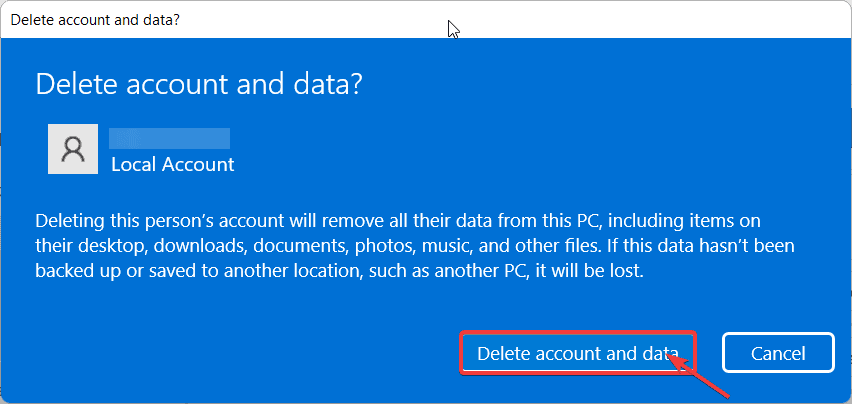
Step 8: When you click Remove, a notification will pop up asking for confirmation

Step 9: Choose Delete account and data from there
Note: Now, you’ve successfully removed the user from your computer management console. You need to delete the user’s profile now.
Step 10: Next, press the Windows logo key + E button to open File Manager
Step 11: Navigate to This PC and double-click on C: drive to open it
Step 12: Find the Users folder from the listed entries and double-click on it
Step 13: You’ll get folders for each individual user here; find the one you’ve just deleted
Step 14: Now right-click on it and choose the Delete icon
Finally, you’ve removed the user account and profile from your Windows PC. If you want to delete a Microsoft account, check out the below section.
How to Remove Microsoft User Account from Windows 11?
There are basically 3 methods to remove a Microsoft user account. Yes, you can do it from Settings, User Accounts manager, and Control Panel. We’ve explained each one in detail, have a look.
Note: As mentioned, if you don’t already have a local user account with administrative privileges, consider creating one first before you start with the below methods.
Method 1: Delete Microsoft User Account from Settings
This method is almost similar to removing a local user. However, remember that deleting an account from Settings will also remove all the data related to this account. Now follow the below steps to perform this method.
Step 1: First, you have to log in as an administrator using the newly created local account
Step 2: Now, press the Windows logo key + I button to open the Settings
Step 3: Next, find the Accounts option from the left side and choose Family & other users from the right side
Step 4: On the next page, navigate to the Microsoft account you want to delete
Step 5: Click on it next to expand the options
Step 6: After that, find the Remove button on the Account and data bar
Step 7: Now, click the Remove button and select Delete account and data from the pop-up notification window
Step 8: Finally, you’re done with removing the Microsoft user.
If you think this method is complex, follow our next method, which is far easier to perform.
Method 2: Remove Microsoft Account using User Accounts
Microsoft has done a number of changes to the new Windows 11 OS. Starting from the look to feature, you’ll find a number of unique additions. But its internal mechanics are still similar to Windows 10. Hence, managing the User Accounts from the panel is a no-brainer. Here is the process to do so-
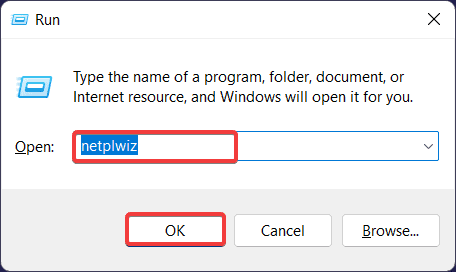
Step 1: First, press the Windows logo key + R button to open the Run dialog box
Step 2: Next, type in “netplwiz” and hit the OK button
Step 3: Now, you’ll enter the User Accounts panel
Note: Here, all the existing user accounts will be listed. You have to find the one you want to delete.
Step 4: Then, click on the user you want to remove
Step 5: Now, hit the Remove button given right under the list
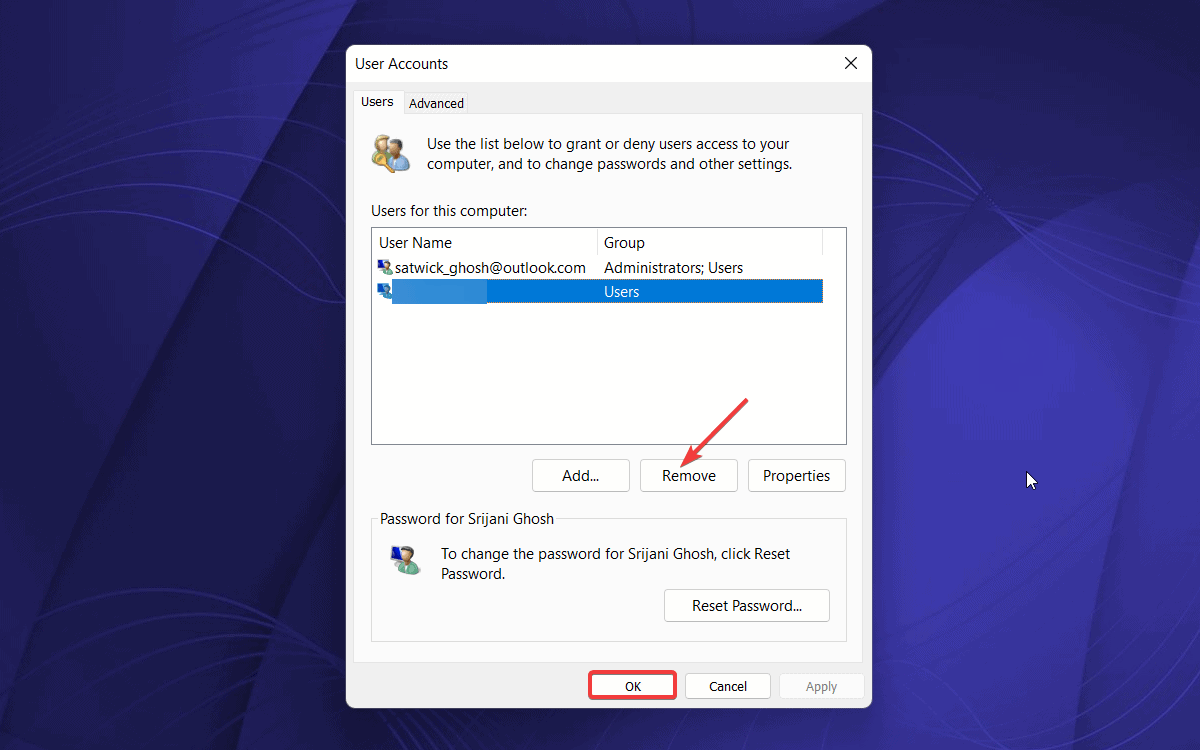
Step 6: You’ll be prompted again to confirm your decision; choose the Yes button
Step 7: Finally, click OK and then Apply to save changes
Now you’ve successfully removed your Microsoft user account with this method. If you’re technologically sound, try the alternative method mentioned below to remove every residue of your Microsoft user account.
Method 3: Use Control Panel to Delete Microsoft User
Deleting a Microsoft account comes at its own cost. You may lose important data in case you’ve not performed a backup yet. So, before you move forward with the below process, make a full backup of your data and files to restore them later in case required. Once you’re done with the backup, start performing these steps-
Step 1: First, click on the Search button from your taskbar
Step 2: Next, type in Control Panel and choose this system tool from the appearing results
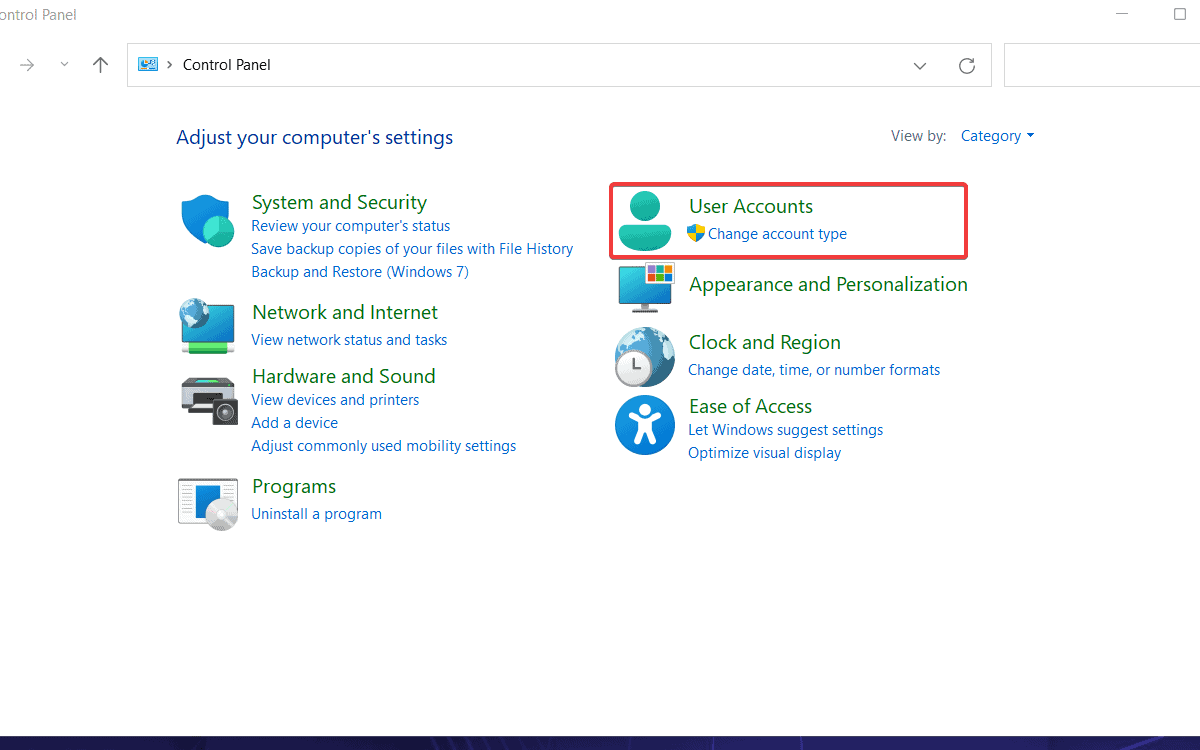
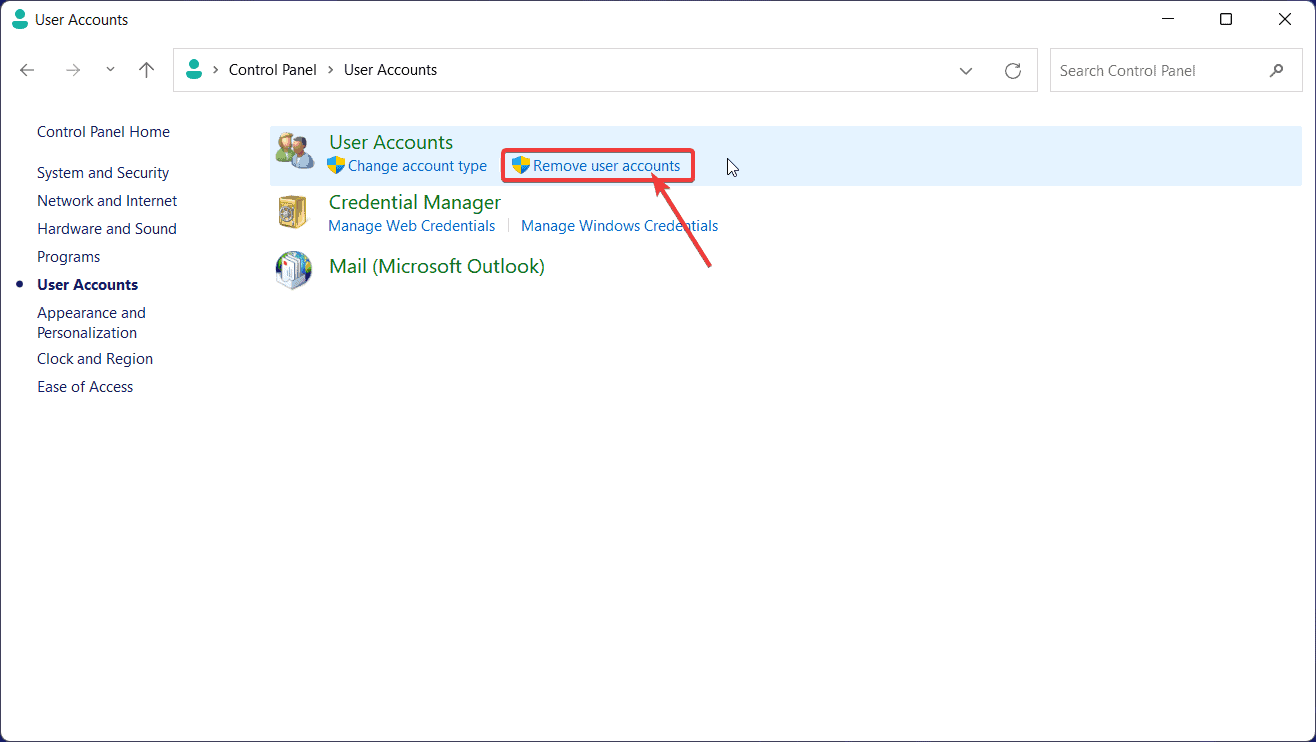
Step 3: In the Control Panel window, click on the User Accounts option
Step 4: Now, choose to Remove user accounts from the next window
Step 5: Under ‘Choose the user you would like to change’, a box will appear with all the existing user accounts
Step 6: Scroll down and select the one you want to remove
Step 7: Finally, select Delete the account option to discard this account from your PC
Step 8: You’ll be asked whether to Delete File, Keep Files or Cancel the process in the next window
Step 9: Select the suitable option as per your preference
That’s all! We’re finally at the end of our guide on removing a user from Windows 11. We hope you can now easily remove a local user or your Microsoft user account. Furthermore, if you just want to switch between your existing user accounts, click the Windows logo from the taskbar and then click on your present account name, followed by choosing the one you want to use. If you know another method to delete a Windows 11 user account, let us know through the comment box below.

