Every operating system involves a multitude of ways to preview and modify images. Windows features a dedicated ‘Microsoft Photos’ that takes this experience to a completely new level. The latest iteration – Windows 11 – has revamped its prebuilt “Photo” application with several user interfaces and performance upgrades.
With a completely unique viewing experience, intuitive design, editing capabilities, rounded corners, and a lot more, the utility is better than ever. Microsoft plans to make the ‘Photos’ app a default image previewer in Windows 11, which would allow you to create albums and explore multiple playback options. It also rejuvenates the classic collection feature from earlier versions.
Additionally, the app generates relevant albums through an intelligent algorithm, and you can even customize them as per your preferences. Talking about the new design aspects, the Microsoft Photos app in Windows 11 also consists of a floating menu involving editing controls. There’s also a slider at the bottom that allows you to navigate through different photos.
Table of Contents
Although the difference between the traditional ‘Windows Photos Viewer’ and the new ‘Photos’ app is very minimal on a macroscopic level, you may notice that the former is still integrated into the latest operating system for a handful of image extensions. This indicates that the classic ‘Windows Photo Viewer’ hasn’t been removed completely.
With that said, if you prefer working with images on the earlier interface, you’ve found a sweet spot. It’s possible to repurpose the ‘Windows Photos App’ as a default photo previewer in Windows 11. With the workaround given below, you can easily preview image files like JPG, BMP, and PNG through the Windows Photo Viewer app.
Restore Windows Photo Viewer in a Single Click on Windows 11
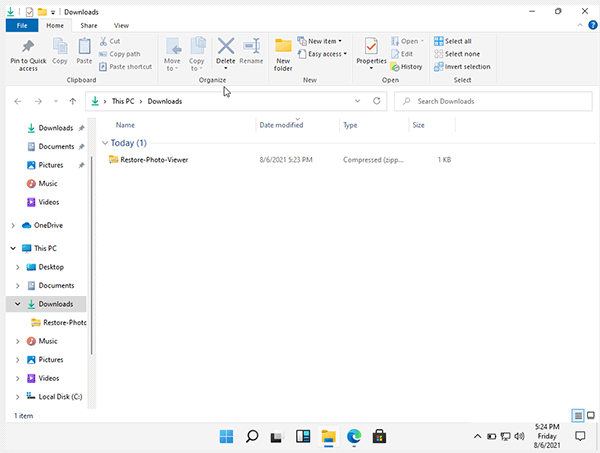
Firstly, download the ‘Restore-Photo-Viewer.reg’ registry file on your computer with Windows 11 installed on it.
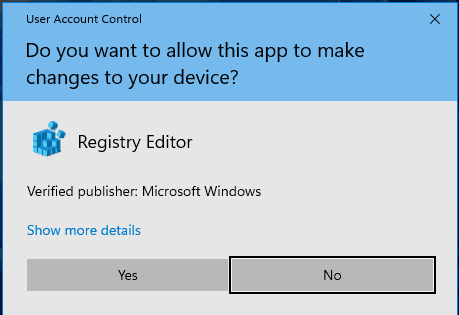
Click on the .reg file you downloaded to trigger a prompt where you have to choose the ‘Yes’ option to proceed. This registry file allows Windows Photos Viewer to recognize popular image extensions.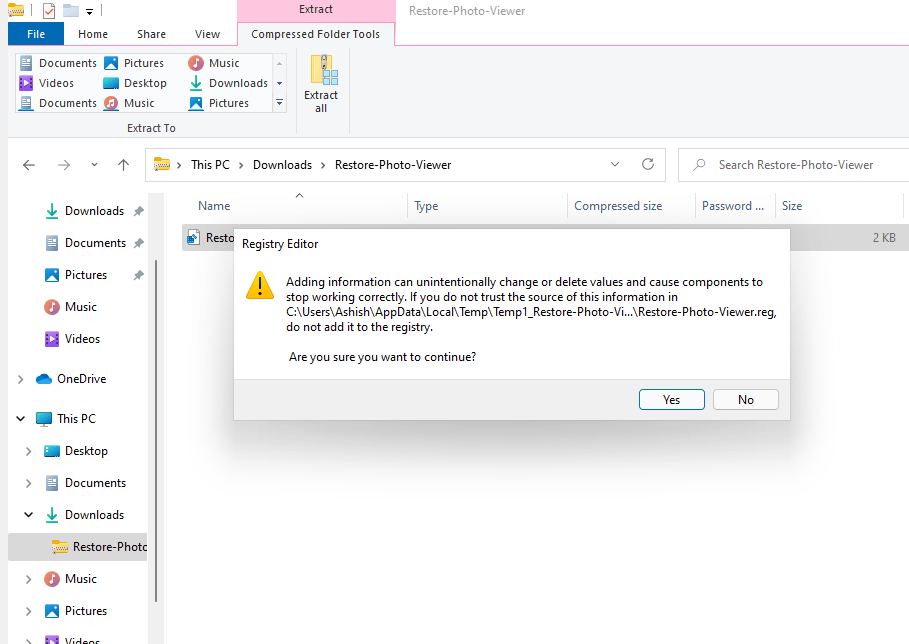
If you’re looking to preview some specific file extensions, you can edit the registry file in a notepad and omit or include extensions as per your requirements.
By default, the registry file will help Windows Photo Viewer identify JPG, GIF, PNG, BMP, JPEG, ICO, JXR, and TIFF file extensions. To make the process even more convenient, you can also set the app as your default photo previewer.
How to Set Windows Photo Viewer as Default in Windows 11?
While the aforementioned registry script allows ‘Windows Photo Viewer’ to identify nearly all the popular image extensions, you still have to specify the operating system to preview the images using this application instead of the brand new ‘Photos’ app. To make Windows Photo Viewer the default app for previewing images, follow the steps given below:
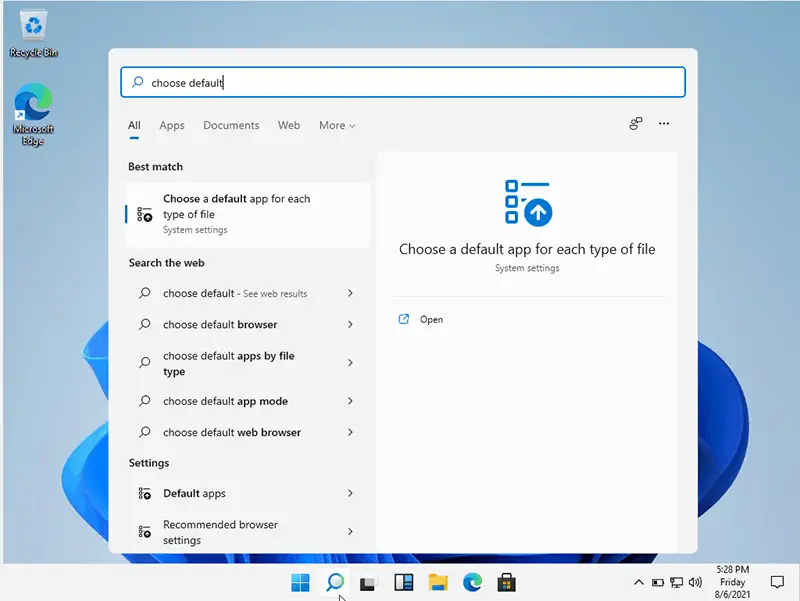
- Click on the Start button and navigate to the top section to locate the search bar. Type ‘Choose default’ in the input field and hit the enter key on your keyboard
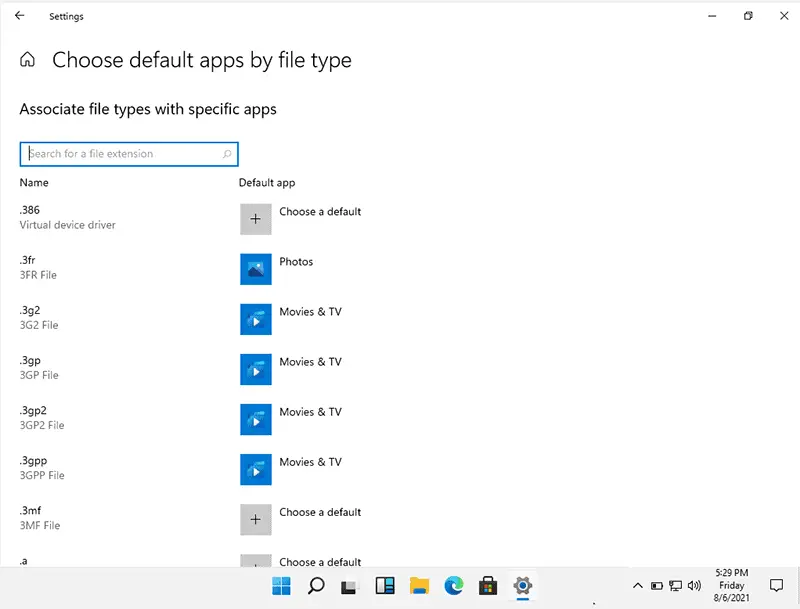
- A new interface named ‘Choose defaults by file type’ will open where you’ll see a dropdown menu with various file extensions like JPG, BMP, and PNG. Choose your preferred file extension and click on the button given below the dropdown.
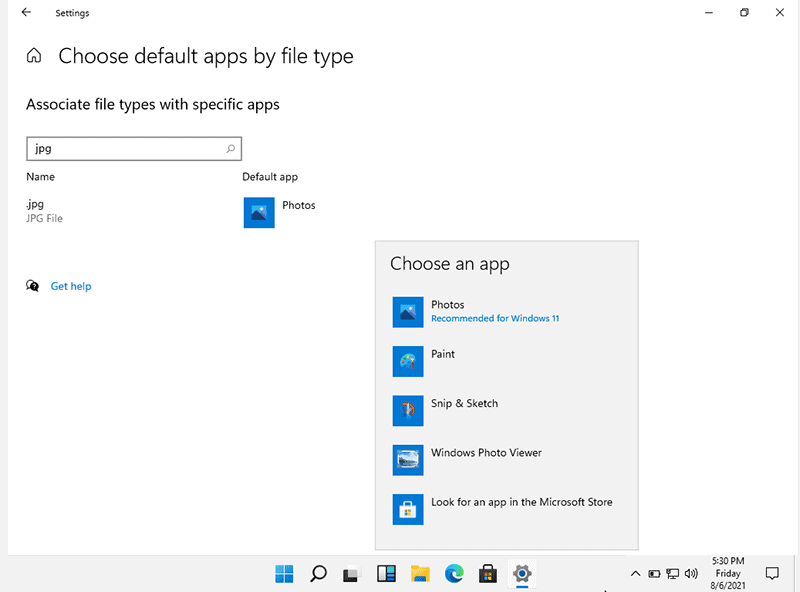
- Another floating window will ask you to choose a preferred app. From the list of available apps, choose the “Windows Photo Viewer” and tick the ‘Always use the app to open’ checkbox to set it as a default app for the purpose. This will allow you to specify the Windows Photo Viewer app as default for a specified extension. Rinse and repeat the process for all your desired extensions
- Lastly, open an image file by double-clicking and it should be opened through Windows Photo Viewer in your Windows 11 OS
With the steps given above, you can easily configure the Windows Photo Viewer app as default to preview image files in Windows 11. Let’s move on to the next section and know how to disable this app and regain access to the latest feature instead.
How To Disable Windows Photo Viewer in Windows 11?
If you want to roll back to the latest Photos app and give up on the classic choice instead, you have to download the ‘Disable Classic Photo Viewer’ registry file. Once you’ve downloaded it, double-click to reveal a prompt and choose the ‘Yes’ option to proceed further. This will disassociate Windows Photo Viewer from identifying the image extensions.
Now, to remove it as your default app for previewing images, right-click on any image file and choose the ‘Open with’ option, followed by clicking on the ‘Choose another app’ option. Among the list of various apps that appear in the dropdown, choose the new ‘Photos’ app and tick mark the ‘Always use this app to open’ checkbox.
Consider repeating the same procedure for other file extensions. Alternatively, you can also configure the default app for multiple extensions through the ‘Settings’ app on your Windows 11 operating system. This sums up pretty much everything you need to know about enabling Windows Photo Viewer in the latest iteration of the most popular consumer- and enterprise-grade OS.
Conclusion
Windows 11 comes with several major changes in its user experience and utility aspects. With several new applications like ‘Photos’ and ‘Snip and Sketch’, it aims to make your processes more convenient and hassle-free. However, if you still prefer previewing and editing images with ‘Windows Photo Viewer’ instead, this guide is certainly a helpful resource for you.
If you follow the steps mentioned above in the respective order, you should be able to regain access to the classic application without any failure. Additionally, to make the overall process more lenient, you can also set the application as default and save plenty of time. Therefore, make sure you follow the procedure given above properly.
Hopefully, you may have found the guide helpful in learning more about Windows 11 in general. Make sure you return again to enjoy more in-depth tutorials and guides like this.

