If your computer is managed by an Administrator, they might have given it a name during the time of Windows 11 OS installation. While you may not consider it necessary, changing your PC’s name is possible both before and after the installation of the operating system.
On the contrary, it is actually very helpful to name your PC as per your preferences, especially when you’re trying to send or receive files from other PCs in your network. Additionally, it also helps you separate your work and personal devices.
Regardless of the reason, you should definitely consider providing a meaningful name to your PC if you haven’t already. Here are several methods to change the name of your PC in Windows 11 without any complexities:
Table of Contents
How To Rename Your PC in Windows 11
While naming your PC, you can use any Latin letters, hyphens, and numbers. However, you’re not allowed to use any symbols or blank spaces. For instance, the “PC-1” is an acceptable name while “PC 1” isn’t. Talking about the methods to change PC’s name in Windows 11, you can approach it in several different ways like using settings app, PowerShell, Control Panel, or even Command Prompt. Let’s take a detailed look at each of these methods:
1. Using Settings App To Rename PC
Follow the steps given below to rename your Windows 11 PC using the Settings app:
- Access Window’s “Settings” app by pressing the Win + I key together. Alternatively, you can also click on the “Start” icon and access the Settings app from there

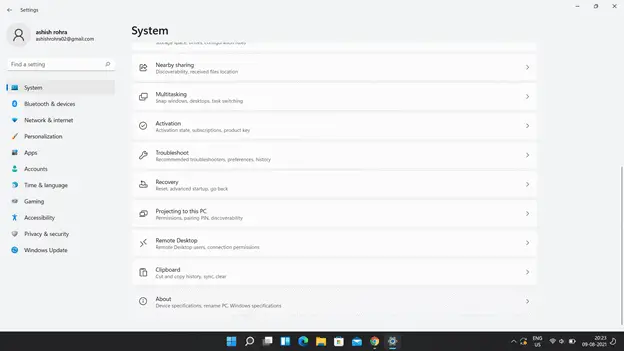
- When you’re on the Settings app interface, navigate to the “System” category and choose the “About” option from the list available in the center
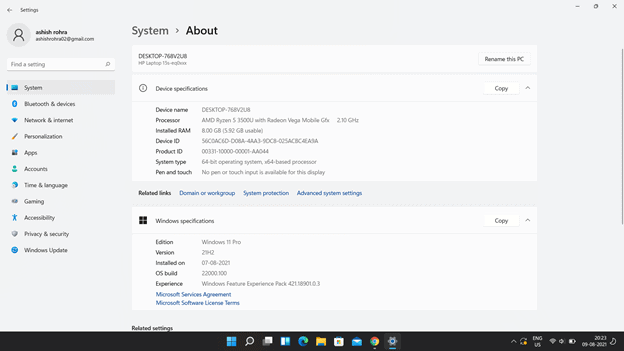
- Then, choose the “Rename this PC” button located at the top-right corner of the screen
- Now you’ll be asked to enter a new name in the input field on the new window using a combination of hyphens, letters, and numbers and click on the “Next” button to continue
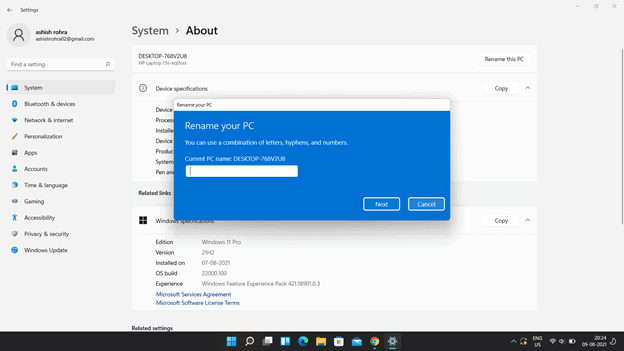
- Lastly, choose either the “Restart Now” or “Restart Later” option as per your preferences. Keep in mind that the new name will only be applied after you’ve restarted your PC
And that’s it. You’ve successfully changed your PC’s name in Windows 11 using the Settings app.
2. Using Control Panel to Rename Windows 11 Computer
You can also rename your PC running Windows 11 with the help of the control panel using the steps given below:
- Open the “Control Panel” app by accessing the “Run” dialog box using Win + R keys and typing “Control” in the input field, followed by hitting the enter key on your keyboard. You can also access the Control Panel through the “Start” menu
- Among the various options listed on the Control Panel’s window, choose the “System and security” option. Make sure you set the “View by” preferences as a category on the top-right corner to be able to access this option
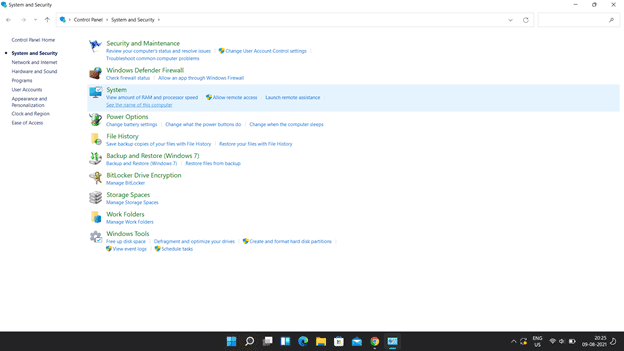
- Then, under the “System” section, click on the “Allow remote access” option
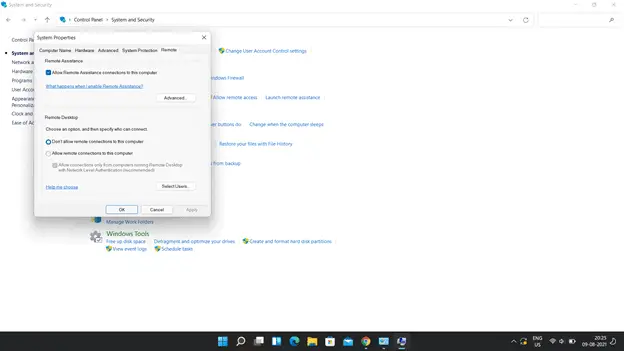
- A new window named “System Properties” will open where you need to switch to the “Computer Name” tab and then click on the “Change” button
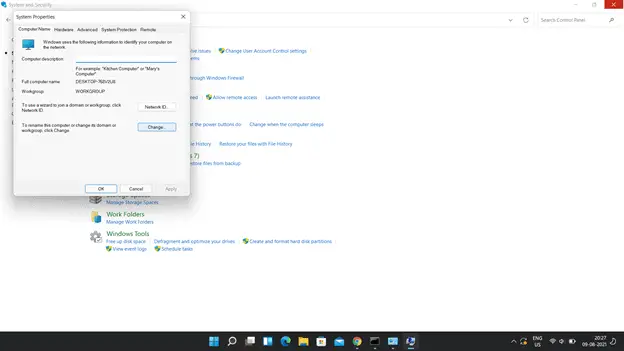
- Now, enter a new desired name in the input field under the “Computer Name” section and click on the ok button to proceed
Give a quick restart to your PC to apply the changes and your computer will be successfully renamed. You can also access the “System Properties” window without having to use the control panel by accessing Windows Settings on your computer.
3. Using Command Prompt to Change Windows 11 PC Name
As you may already know, the command prompt finds a host of applications in Enterprise activities. You can also rename your PC with the help of Command Prompt without using the visual interface of Windows 11 at all. There are certain commands that allow you to do so. Here are the required steps that you need to follow:
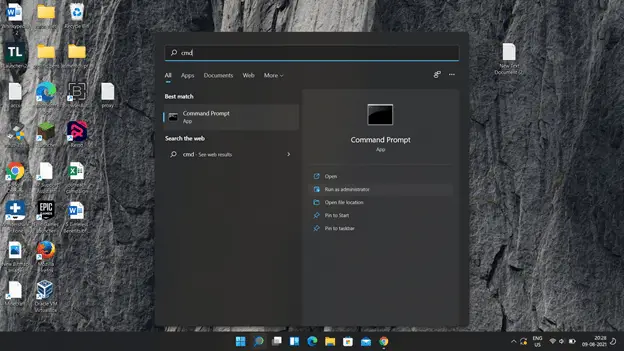
- Access the Command Prompt as an administrator by using the search function of Windows 11 and clicking on the “Open as Administrator” button
- Once you’re on the interface, type the command “wmic computersystem where caption=a rename b”, where A and B are your PC’s current and preferred names respectively and hit the enter key on your keyboard
- Perform a quick restart to save the changes and your PC will be successfully renamed
That’s all you need to do to rename your PC with the help of a command prompt. Let us now discuss another method to rename your Windows 11 PC using the PowerShell utility.
4. Using Windows PowerShell
PowerShell is yet another console-based tool in Windows Operating systems used majorly for networking and scripting purposes. Here’s how can you rename your PC with the help of PowerShell:
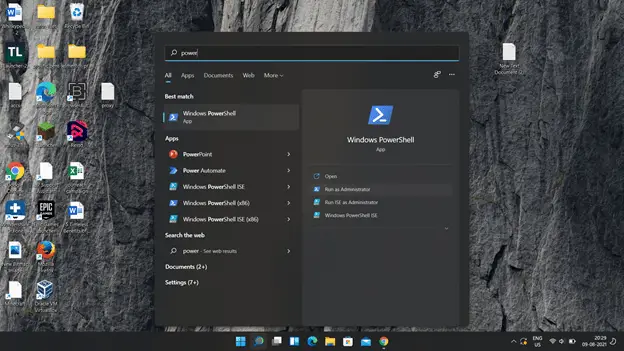
- Launch PowerShell by clicking on the search function and typing “PowerShell” and hit the enter key on your keyboard to launch the console
- Enter the command Rename-Computer -NewName “Your Desired Name” and hit the enter key on your keyboard

Lastly, restart your PC by navigating to the Start menu and clicking the Power button at the bottom-right corner
With just three simple steps, you can rename your Windows 11 PC with the help of PowerShell.
Final Words
If you have multiple PCs for work and personal purposes, you should definitely make sure that you name them properly to share files effortlessly between them. Renaming your PC also helps you make your experience more personalized.
As you read above, there are a multitude of ways to rename your PC in Windows 11. All the methods listed above are completely working and tested properly. Therefore, choose your preferred method and rename your PC right away.
Whether you want to use the Settings app or control panel, you can change your PC’s name effortlessly without any hassles.

