After the official launch of the first-ever preview build of Windows 11, a lot of users are keen to get their hands on the OS and experiment with it. However, as Windows granted access to the OS to selective users under their insider program, the audience seemed to have a mixed response about it.
With all the latest features and changes Microsoft brings with its latest release, it is evident that some of you might not be convinced with the newer user interface for varying reasons. On top of that, the fact that only a select number of CPUs support Windows 11 only makes things worse.
Table of Contents
With that said, if you’re also among the people who installed Windows 11 but couldn’t get it working properly due to insufficient system requirements, you’re surely not going to have a good time maintaining your daily workflow through the OS.
If Windows 11 doesn’t seem to be a good fit for you, consider downgrading to Windows 10 instead. This guide offers a complete step-by-step procedure to help you roll back to Windows 10 and get things working again.
How to Rollback Windows 11 to Windows 10
1. Reverting Windows 11 Upgrade to Windows 10 Through System Settings
If you installed Windows 11 through Microsoft’s Windows Insider Program, you have the liberty to revert to the earlier version. However, note that the process only works if it’s been less than ten days since you upgraded your system.
Moreover, make sure that after you’ve upgraded to Windows 11, you don’t remove the old installation files of Windows 10. These files can be located in a temporarily allocated disk space under the Window’s storage settings.
Therefore, unless you want to make Windows 11 the only primary OS on your computer, make sure you never touch those files. Let us now take a look at the stepwise approach to downgrade to Windows 10 using system settings:
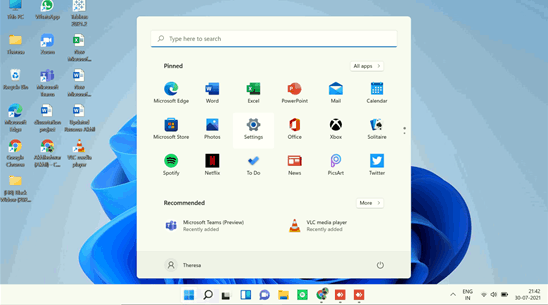
- Access the “Settings” app from the Start menu, and navigate to the “System” section, which should be open by default in most the cases
- Once you’re on the required interface, scroll down to locate the “Recovery” option and click on it
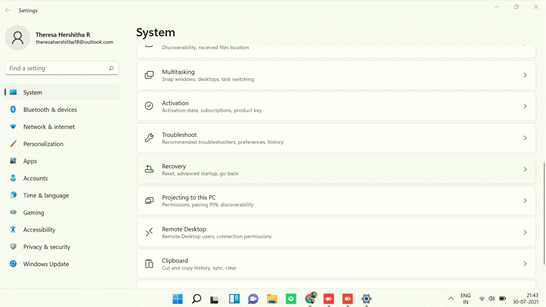
- In the recovery window, you have to choose the “Go back to a previous version of Windows” option

- Now, you’ll see a couple of warnings appear on your screen. Simply agree to all the warnings and the downgrading process will start automatically
- Wait for the process to complete and once everything is finished, you should be able to boot into Windows 10 again
While this process is very efficient and easy, it’s not a perfect choice for people looking to downgrade to a stable release. Moreover, if it’s already been more than ten days, this process won’t work for you at all.
That being said, to be able to downgrade to Windows 10 in such cases, you need to attempt a completely clean and fresh installation of the operating system using the media creation tool. Let us discuss this process in detail as well.
2. Creating Installation Media for Windows 10 to downgrade Windows 11
If you want to downgrade from Windows 11 using the clean installation method, you first need to make a backup of your data in case things go wrong. Keep in mind that the process will erase everything available on your storage drive.
Additionally, you’ll also require a USB stick to work as an installation media. As the data on the flash drive will also be deleted, make sure you take a backup of that too. Once you’ve made all the perquisites available, here are the steps you need to follow:
- Download the Media Creation Tool for Windows from Microsoft’s official website by clicking on the “Download Tool Now” button on the website
- Once the tool has downloaded, right-click and choose the “Run as Administrator” option and make sure your USB stick is plugged in properly
- When the tool launches, you’ll have to accept the license terms, followed by choosing the “Create Installation Media” option on the next page
- Now, you need to select your preferred installation settings. If you have no idea about what’s going on, it is better to proceed with the default selections
- Then, choose the “Create a USB flash drive” option on the next screen and click on the “Next” button to choose your desired drive to be used as an installation media
At last, all you need to do is click on the “Next” key again and the software will begin downloading a stable release of Windows 10 as per your system preferences and flash it to your USB stick. Once the process completes, your USB stick will be ready for installation.
3. Perform a Clean Install for Windows 10
Now when you have successfully created an installation media for Windows 10, it is now time to downgrade from Windows 11. To be able to do it, you’ll need to boot through USB on your computer. Here’s how to do it:
- Access the recovery settings on your computer by navigating to the “Settings” app, followed by the “System” option
- At the recovery page, you’ll see a section named “Advanced Startup”, and you need to click on the “Restart Now” button located next to it
- This will allow your computer to access the boot menu where you need to choose the “Use a Device” option and then select the USB stick attached to the computer that you used as an installation media
Once it’s done, you should be able to boot into the installation interface of Windows 10. Here, you need to accept the license agreement and proceed with the on-screen instructions to complete the installation of Windows 10.
Final Words
While Windows 11 offers several new and exciting features such as advanced security options and support for android apps, there are still several caveats for systems with lower configurations and unsupported hardware.
In such cases, it is better to downgrade to a stable version instead to be able to manage your regular workflow easily. Using the various methods listed above, you can easily downgrade or rollback from Windows 11 to Windows 10 without any hassles.

