Microsoft Windows being multi-user system, each user has its own files and folder (user folder) and Windows 10 offers extensive permission and ownership settings by which you can allow other Windows users to open, edit or delete by changing permissions.
Unfortunately, these meticulous permission settings often ends up causing problems for many Windows 10 users.
For example, even Windows user account with administrator rights when attempts to open a file or folder with different ownership is greeted with “You have been denied permission to access this folder” or “You don’t currently have permission to access this folder” Error.
If you are wondering what is denied permissions or dont have permission to access this folder error message and how to resolve it then continue reading.
What is “You don’t currently have permission to access this folder” Error?
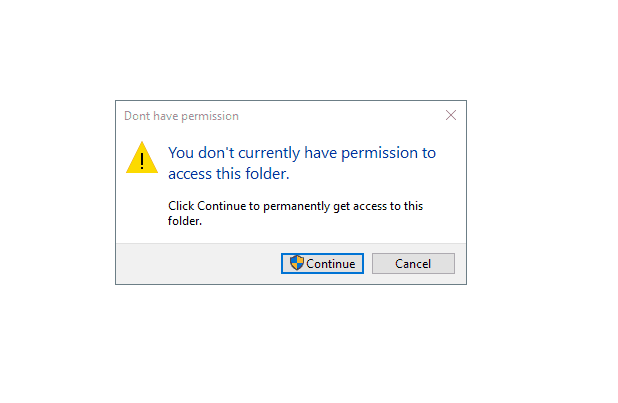
The above-mentioned error will popup while accessing the folder of a user on your Windows 10 for which you does not have the permission. But for some users, this error comes even if they have the permission, especially in case when you have recently upgraded your Windows to latest version.
The issues is also prominent for user account with administrator rights. The probable cause is corrupted permission in Windows File Explorer. Apart from that just like everything else in Windows has registry keys, folder permissions also have their registry values. And if the values of these keys are changed, you may face the “You have been denied permission to access this folder” error.
How to Fix You Don’t Currently have permission to access this folder Error
In order to successfully fix this issue in Windows 10, you have to get rid of its possible causes. Since it is caused due to either corrupted folder permissions or registry values, the solution is to fix them. But apart from that, there are some tools which allow you to do the same.
1. Change Folder Permission via File Explorer in Windows 10
The first thing that you can do is to change the permissions of the folder in which you are facing permission issues. But this method requires administrative rights in Windows 10, so if your account does not have those, this method might not work for you. In case if you do have admin rights and want to use this method to fix “you have been denied permission to access this folder” error, then you can follow the given instructions one by one:
- First, locate the folder in which you are experiencing this error and right-click on it and open its Properties.
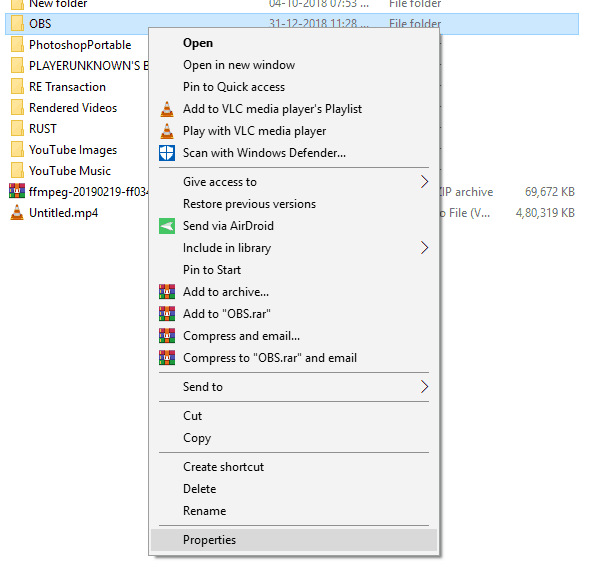
- In here, go to the Security tab and click on the Advanced option in the bottom right corner of the Properties window.
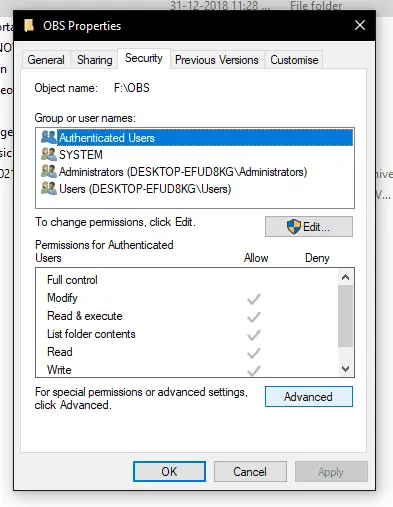
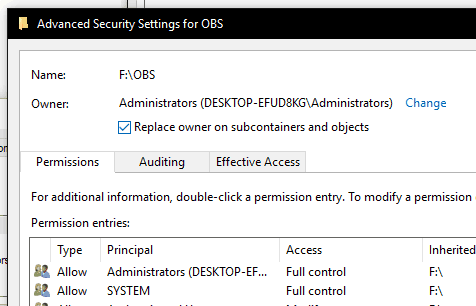
- After that, a new window will open on your screen. Inside this window, click on the Change option next to the Owner field which requires admin rights in Window.
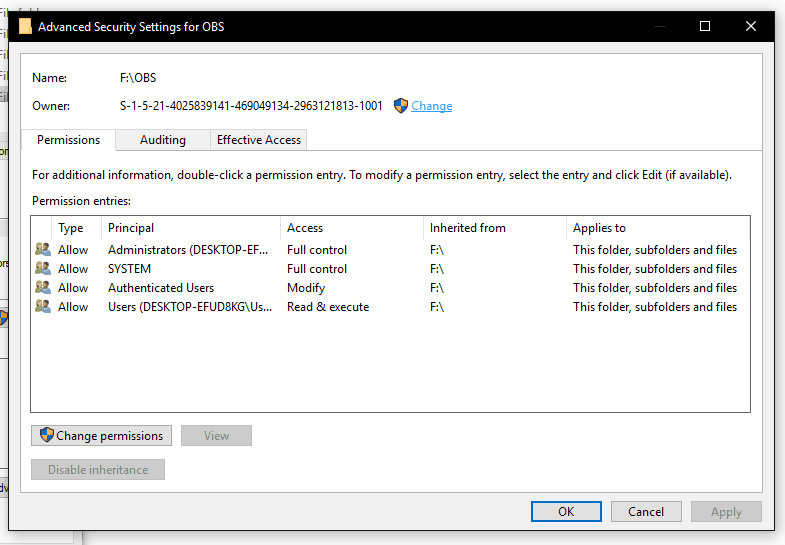
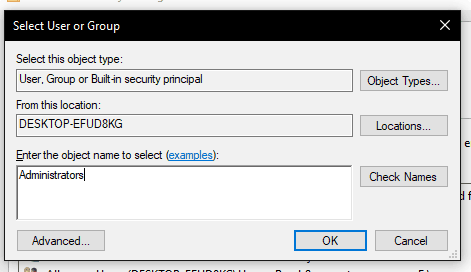
- Now, another window will open on your screen where you have to type Administrators in the Enter the object name to select section and click on the Check Names After that click on OK to save these settings and close this window.
- At last, select the Replace owner on subcontatiners and objects option right next to the Owner field and click on OK. Doing so will fix the denied folder permission issue in Windows 10.
2. Add Registry Values to Take Ownership of Folder
You can edit the registry values in Windows 10 to change a lot of things in a computer. While you can open the registry editor and do it manually, it can be a long process. Therefore, you can also use REG files in Windows to change registry values within a few seconds. And to change the registry values to take ownership in your computer, you can follow the given step by step guide:
- Open this link, and download the zip file on your computer which contains the required REG files.
- Now, extract this zip file in any location which will create a new folder.
- After that, double-click on the Install Take Ownership file from the extracted zip file. Doing so will open a Registry Editor dialog where you have to click on Yes which will change the required registry values.

- Finally, reboot your computer and then right-click on the desired folder and select Take Ownership which will fix the “You don’t currently have permission to access this folder”.
3. Close Shared Folder Sessions via Computer Management
The computer management tool in Windows has multiple important settings. It also includes things related to the folder permissions of Windows 10. One of such things in computer management is shared folder sessions. And many users who have successfully fixed the folder permission issue have reported that closing shared folder sessions can fix the issue. Therefore, if you are not able to access any folder in your computer due to permissions issue, then follow these instructions one by one:
- Press the Windows Key and X on your keyboard at the same time. Now from this list, select Computer Management.
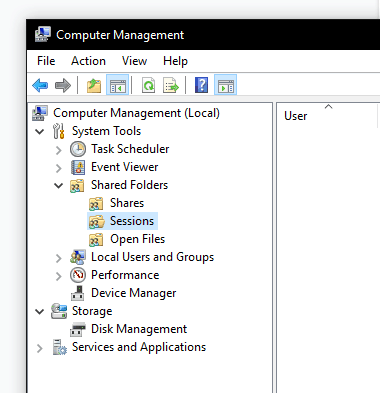
- After that, use the left side panel to navigate to System Tools > Shared Folders > Sessions.
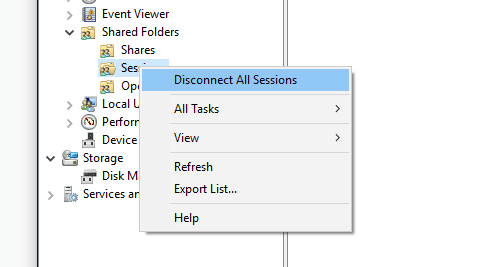
- Now, right-click on Sessions and select Disconnect All Sessions which will close all of the currently shared folder sessions on your device.
- Finally, go to the location of the folder which was causing the issue and try opening it which will fix the issue.
Final Words
Having take ownership option in right click context menu is the best way to solve “You don’t currently have permission to access this folder” error. Not only you can fix this error but can also take full control of the files or folder in question. Or if you are using public or university system then try manual method of adding your user account to object list under permissions security section.

