Windows 7 Beta 1 Build 7000 was leaked on 25th December 2008 2 week before actually announcement for Windows 7 Beta 1. There are thousands of users planning to install Windows 7 but considering it is still in beta stage it may have bugs and driver conflict issue hence upgrading your existing windows operating system is not advisable.
Best way to test and experiment Windows 7 is to install it as virtual machine which makes you free from need of Dual Boot as well as you can instantly switch between two operating systems or simultaneously operate Windows 7 (Guest OS) and Windows XP (Host OS).
After successfully installing Windows 7 on windows XP using Vmware Player I have decided to post detailed steps of how to install windows 7 on Vmware Player. This guide is not going to use Vmware Workstation to create Windows 7 virtual machine only Freeware Vmware Player and other freeware tool like Qemu.
Here is list of required softwares
1. Vmware Player it’s free, you can download from here
2. Qemu Open Source emulator for Windows to create empty virtual disk capatible to Vmware download from here
3. Widows 7 beta 1 ISO must required (32 bit or 64 bit)
4. Vmware Workstation files to use Vmware-vdiskmanager.exe (not required if you are planning to create virtual disk of size 2GB) you can also use Freeware Vmware Diskmanager GUI.
Create windows 7 folder in a drive where you want to keep all your windows 7 Virtual Machine files.
How to Install Windows 7 on Windows XP Using Vmware Player
1. Install Vmware Player on your Windows XP
2. Type run->cmd and change directory to Qemu (folder where qemu is extracted)
3. Now Type follow command to create Vmware compatible virtual disk of size 6 GB
qemu-img.exe create -f vmdk windows7.vmdk 6G
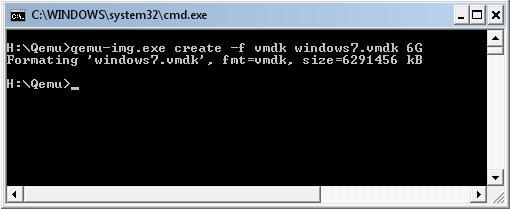
I have created virtual disk of size 10GB & divided into 2GB files using Vmware-vdiskmanager comes with Vmware workstation, Reason of doing this is that Windows XP doesn’t support files larger then 2 GB because of addressing issue.
You want to create virtual disk of size 15GB then type at command prompt cmd->dir to VMware workstation directory. and type following command.
vmware-vdiskmanager.exe -c -s 15Gb -a ide -t 1 -q windows7.vmdk

4. To create .vmx file for Windows 7 use can use online vmx file builder (VMX file is Vmware virtual machine core configuration file and each virtual machine has its own .vmx file.)
Enter Following information while using VMX builder.
Display Name: Windows XP
Guest OS: Windows XP Professional Edition
Memory: 512 MB (Windows 7 Requires Minimum of 512 MB RAM)
Check: Sync Clock, VMTools Reminder, USB Host, Autoconnect
Ethernet: Check ETH0, Address Type: Generated, Address (leave default), Connection Type: Bridged (more info)
Check Sound Card, Type: Ensoniq ES1371, Check Absolute Mouse, NVRam Filename: nvram, IDE0:Master: Checked, File Name: WinXP.vmdk, Device Type: disk, Mode: Persistent, Check: WriteThrough, AutoDetect, Start Connected, IDE1:Master: Checked Device Type: cdrom-raw, Mode: Persistent Check: WriteThrough, AutoDetect, Start Connected
OR you can download pre-configured windows7.vmx file from here.
5. Once you have created .vmx file save it in your windows 7 folder (virtual machine folder where all your Windows 7 Virtual machine files will be stored)
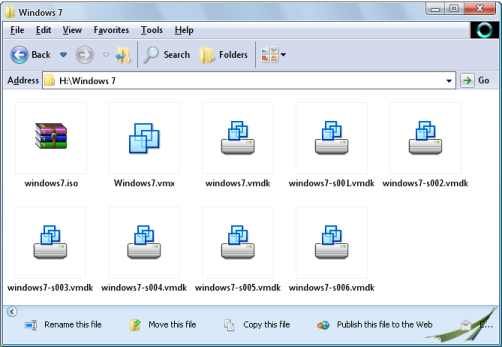
6. Now you should have Windows 7 folder with following files
a. widnows7.iso (windows 7 beta 1 iso file)
b. windows7.vmx file
c. windows7.vmdk files (empty virtual disk files)
Don’t forget to change
ide1:0.present = “TRUE”
ide1:0.fileName = “auto detect”
ide1:0.deviceType = “cdrom-raw”
ide1:0.autodetect = “TRUE”
ide1:0.startConnected = “FALSE”
To
ide1:0.present = “TRUE”
ide1:0.fileName = “windows7.iso”
ide1:0.deviceType = “cdrom-image”
ide1:0.autodetect = “TRUE”
ide1:0.startConnected = “FALSE”
In your windows7.vmx file if you have created by yourself. No need to do any thing if you have downloaded windows7.vmx from here. Above changes is done to use windows7.iso file as cdrom image file to let us install windows 7 on our virtual machine. Hence no need to burn windows7.iso file on DVD.
7. Now double click on windows7.vmx file and it will automatically open with Vmware player.
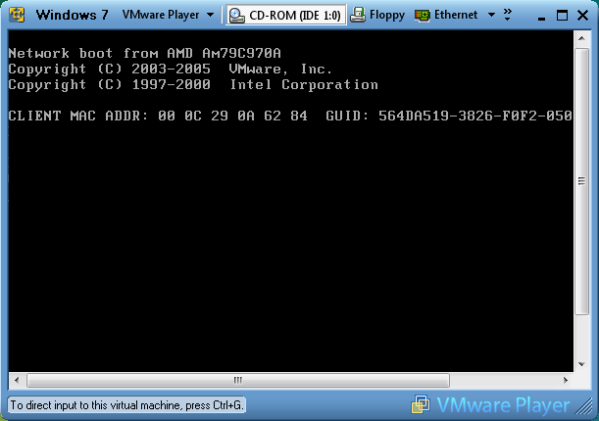
8. Vmware player will boot like normal machine and will detect windows7.iso file as soon as it finish booting. A prompt will be displayed to select option i.e to start windows 7 installation.
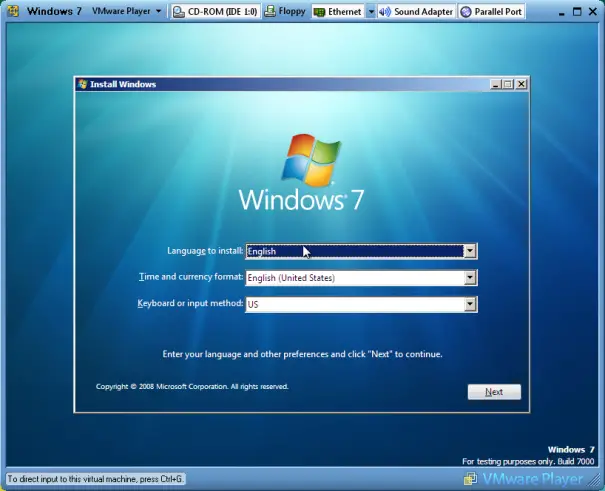
9. Complete the Windows 7 instillation steps and wait for installation to finish.
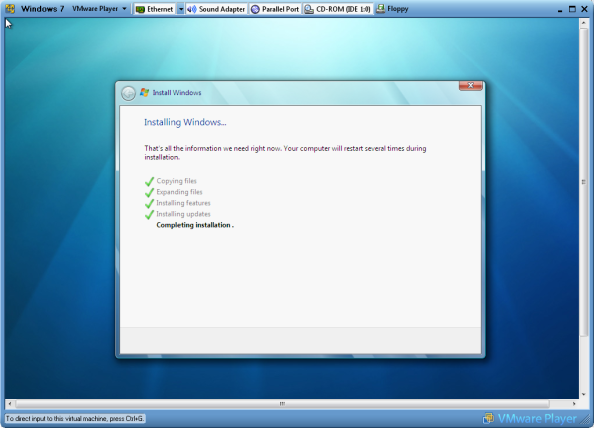
10. Once your Windows 7 boots for first time just make sure every thing is working fine by browsing Computer or Checking Program files.
11. Now its time to install Vmware tools. You need Extract Vmware tools from vmware workstation which contains windows.iso file. open this file with any iso opener like freeware CDimage. There are a few ways by which you can transfer the VMware Tools.msi file but I find the easiest is to just share it out from your host computer and connect via the network from your virtual machine. Once you have VMware Tools.msi on your virtual machine’s disk, double-click it and do a standard install.
12. To enable sharing between your Windows 7 and Windows XP copy following lines and add to your windows7.vmx file at the end (Assuming you need to share E: drive of your host operating system with windows 7)
sharedFolder0.enabled = “TRUE”
sharedFolder0.present = “TRUE”
sharedFolder0.writeAccess = “TRUE”
sharedFolder0.readAccess = “TRUE”
sharedFolder0.hostPath = “E:\”
sharedFolder0.guestName = “D”
sharedFolder0.eXpiration = “never”
sharedFolder.maxNum = “1”
Don’t forget to revert back the changes we had done in step number 6.
13. Now when you will start your Windows 7 you need to enable Vmware Player ->Share folders ->Check Always enable to enable sharing.
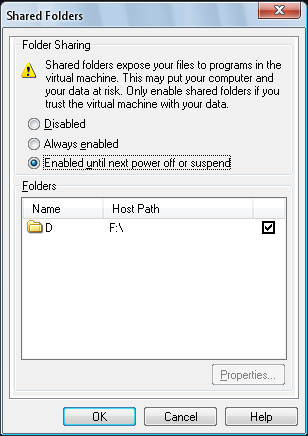
14. Now after your Windows 7 boots, access your share folder by Mapping shared folder from Network and Install Vmware Tools.msi.
That’s it, Now Your Virtual Windows 7 Machine on Windows XP is ready for Use.
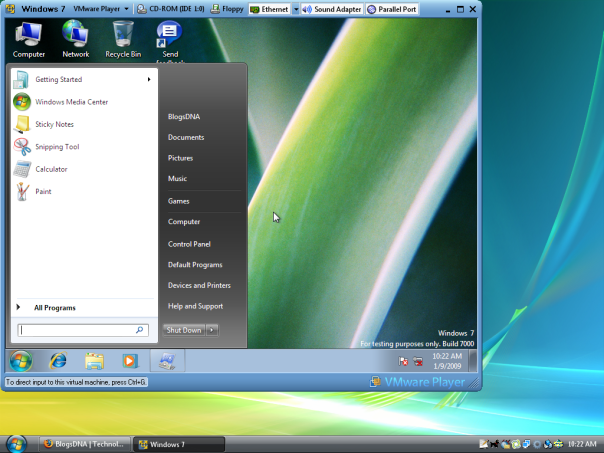
Please Note: I am running Windows XP SP 2 and using Windows Vista Transformation Pack so please do no confuse with screenshots, this is not Windows Vista.
Let me know if you have trouble in following any steps or any issue in installing Windows 7 on Vmware Player.


20 thoughts on “How to Install Windows 7 on Windows XP & Vista Using Vmware Player, A Complete Guide”
I find virtualbox much easier and since its opensource i like it. it works perfectly to virtualize puppy linux in xp, i will try win7 on it, but is there any way to get aero working with host os xp??????
@conqrr Yes we can get Aero in windows xp, Check out this http://www.ghacks.net/2008/12/25/windows-xp-aero/
Just install vitrualbox.. it will do everything
I have no network. Any ideas? I used your .vmx file.
r.
Found a solution on the WWW, change LAN interface to,
ethernet0.virtualdev = “e1000”
r.
One last note, the following site also creates working virtual ‘disks’ (2GB sized) for Windows 7. I’m sure the .vmx files created are also good,
http://www.easyvmx.com/new-easyvmx.shtml
Now I’m off to 7th heaven ;-).
r.
hi how do you delete the virtual drive with all the 30gb i created after testing windows 7?
Great work man,
It worked like a charm.
Though a point to note: Windows 7 will not install < 10 GB
Thanks for good blogpost.
I’ve installed Win7 to virtual machine that was created by easyvmx.com. Remember to set guest os to Windows Vista (winVista in vmx-file) and set virtual cpus to 1. Otherwise Windows 7 may work slowly.
I have two problems: USB devices are not recognized even if I connect them from VmWare Players USB device menus. I have understanded that I should set virtual machive to use USB 2.0. I don’t know what I should write to vmx-file or is that solution to problem. Please, could somebody tell me what Vmware Workstation or Server set to vmx-file then you install USB 2.0 device to virtual machine?
Second problem is parallel port: I have set /dev/lp0 as LPT1-device but vmware tries everytime open /dev/parport0 device. If I set device to “abc” then VmWare Player tries to open “abc”. It seems that lp0 is always converted to partport0. How I tell to vmware player that it should use /dev/lp0 device instead of /dev/parport0 device?
I wan’t to make this change because parport0 cannot be opened even if I have full rights to it, same problem was with printer installations and using lp0 was solution with them.
Thanks for everybody who can help me with these small problems.
How fast does ur computer have 2 b
For Larry and the USB issues:
Look at:
http://sanbarrow.com/vmx/vmx-usb-ports.html
For the VMX settings related to USB, this should clear that up for you.
A couple of changes to the predefined VMX:
1) Network:
The default is a NAT’d network connection, which will most likely not be what most users want. Put the line below in your VMX:
ethernet0.connectionType = “bridged”
This will cause the VM to pull an IP via DHCP from your router and on your local network. This will help to eliminate problems with Samba shares etc..
2) Priority
In addition to the changes previously mentioned you will get better performance with the following added to your VMX:
priority.grabbed = “high”
priority.ungrabbed = “high”
This will provided near physical performance. Only use on adequate systems or your host os may not keep up.
Installed vmware tools using VMware workstation and the network card no work, doesn’t seem to want to work
How does one install vmware tools so that the card works properly
I tried setting the base O/S to Win Server 2k8 and I got the sound card working, tried setting the base O/S to Windows Vista and no luck
I am running vmware workstation 6.5.1 build 126130
Thnx for your help :)
Hello
When I try to install windows 7 build 7048 iso on my laptop which has XP Pro installed using the VMware player by following the instructions and using the pre-configured windows7.vmx file and a windows7.vmdk 10G file created with Qemu I get the following fault messages :
No bootable device was detected
PXE-E53:No boot filename received
PXE-M0F:Exiting Intel PXE ROM
Operating System not found
I am sure that the windows 7 iso is ok as I can start to install it using an the iso on a 4.7Gb R/W disk.
Is this fault due to me having as SATA hard drive instead of an EIDE hard drive?
Hope someone can assist me as I am new to VMware products.
Many Thanks
My host system is Vista.
I did have the same problem with the messages:
No bootable device was detected
PXE-E53:No boot filename received
PXE-M0F:Exiting Intel PXE ROM
Operating System not found
Solution for me was to change the following in the vmx file:
ide1:0.startConnected = “TRUE”
When Windows7 was installed, I did not get the ethernet adapter working. The tip from DNOIZ was the golden one for me, Thanks a lot!!!
(change LAN interface to ethernet0.virtualdev = “e1000?)
WOULD THIS APPLIED IF I WANTED TO INSTALL XP ON VMWARE WITH THE CURRENT OS BEING WIN 7 BETA AND WHAT ARE THE STEPS TO INSTALL I TRY TO BUT , WHEN I START VM WARE DESTOP I GET
” NAVAGATION WEBPAGE WAS CANCELLED ” CAN YOU PLEASE HELP ME WITH THIS ITS DRIVING ME CRAZY!
wow… sorry. wrong language….
I really want to ask about this vmware player 2.01 which I use. I tried to install ubuntu on it but why it wont show any response after I open the vmx file for ubuntu? then I’ve tried press F2 so that the vmware player would boot via dvd but still o response. and i tried to close the application but the vmware said it was busy so i have to use end task. what’s with this vmware player? anyone can help me? i really want to try linux. i’m a newbie in this….
i am trying to create a disk with 2gb but the files of virtual empty disk not appear
no thanks. too much for test this “new kid”
better , purchase a spare HD for a few bucks and then install the thing on it. after some hours playing, return to your production machine. whatever OS it is now.
cheers.
>I have created virtual disk of size 10GB & divided into
>2GB files using Vmware-vdiskmanager comes with Vmware
>workstation, Reason of doing this is that Windows XP doesn’t
>support files larger then 2 GB because of addressing issue.
I have Windows XP SP2 and have many files >2GB, even a couple 40+ GB. Are you using NTFS?
Excellent work.
Thank you very much!