 The whole world is waiting for the official Stock ROM of Ice Cream Sandwich for Samsung Galaxy S2, which is expected to be released in the first quarter of 2012 and we are sure, not many of you would like to wait so long to enjoy awesome new Android experience.
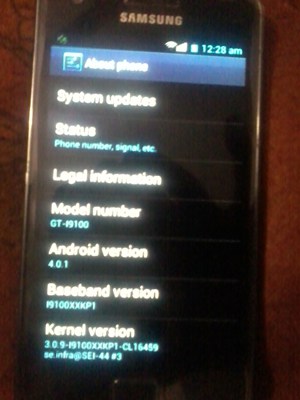
Today, SamFirmware released Custom ICS (4.0.1) ROM for Samsung Galaxy S 2, which I tried on my SGS II. I must say, it’s fantastic. Unfortunately, most of the features are not working on this ROM like, screenshot, gallery etc. But I must say, this ROM is worth trying for experiencing the ICS. This custom ROM do not needs your Galaxy S2 to be rooted.
In this article, I am going to explain step by step installation of Android 4.0.1 Ice Cream Sandwich in SGS II. Before that, I would like to make one thing clear, ICS Custom ROM is not completely functional ROM, most of the features are not working and it is not for the purpose of daily use, it is just for fun and testing purpose. Let’s begin with the tutorial:
Stuff required for Android 4.0.1 custom ROM installation
Download Android 4.0.1 Ice Cream Sandwich Custom ROM Package
Important Things
1. Please make sure your Samsung Galaxy S 2 is charged more than 70% for the successful completion of rooting process.
2. You need internet connection because there are few things, which need to be downloaded before us starting the rooting.
3. Don’t interrupt the rooting process in between, it may lead to bricking of your phone.
4. Patiently and lovingly follow the instructions given in this tutorial
Don’t forget to take backup of your phone, before performing the custom ROM installation
How to Install/Update Samsung Galaxy S2 to Android 4.0.1 Custom ROM
Step I:
I assume you had downloaded Ice Cream Sandwich Custom ROM Package, extract it. The password for extracting that compressed file is samfirmware.com. After extracting the zip file, you will get 4 different files with same extension i.e. “.md5”.
Step II:
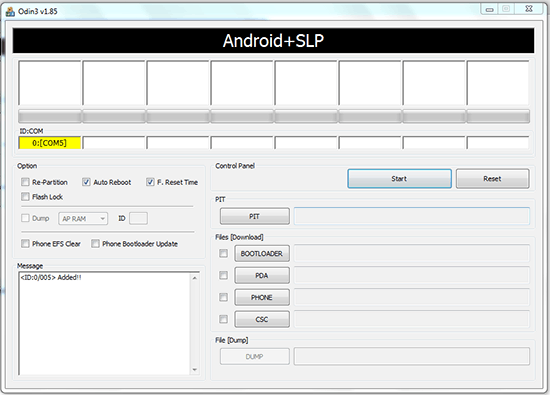
1. Make sure you had already installed Samsung Kies by now. Now open the Odin v1.85.exe. You will see the interface as shown below:
2. Restart your Android device using the following key combination:
Volume Down + Home Key + Power button
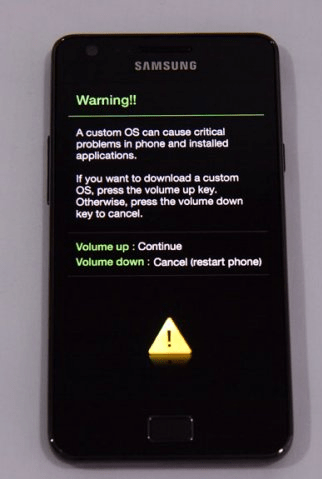
It will bring your phone into download mode; now click the volume up button to continue in download mode.

Connect your Samsung Galaxy S II with PC via USB cable. Please wait until the driver installation gets complete. After the completion of driver installation, You will see that the “COM Port Number” in the COM ID: column of Odin is now set. Please make sure that nothing is checked, except the “Auto reboot” and “F. Reset Time”check boxes. As shown below in the screenshot,

Step III:
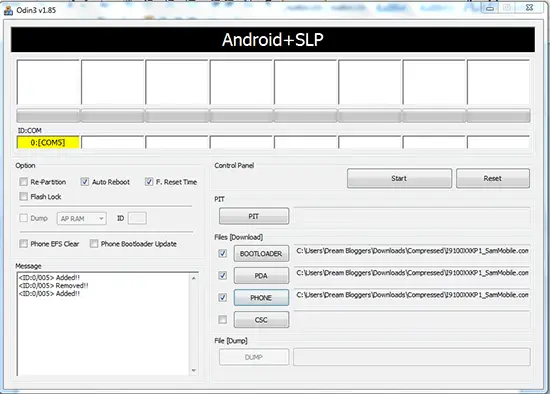
Now Click on second button “Bootloader” of Odin utility and select the
“I9100_APBOOT_I9100XXKP1_CL16459_REV02_eng_mid_ship.tar.md5” file.
Next, Click on “PDA” and select the
“I9100_CODE_I9100XXKP1_CL16459_REV02_eng_mid_ship.tar.md5” file.
Next, Click on “PHONE” and select the
“MODEM_I9100XXKP1_REV_02_CL1085642.tar.md5” file.

Now click on the “Start” button and wait until the process gets completed. Your phone will be automatically rebooted after the process gets completed. Detach your phone from PC. Close Odin!!
Step IV:
On the completion of above step, your phone will be restarted and will come to “Bluish screen”, feels like command prompt. You have to choose the “reboot system” and click “home key” button. You phone will restart again.
Step V:
Forcefully switch off your phone by long pressing the power button. Now again restart your phone in the download mode using the following key combination
Volume Down + Home Key + Power Button
Continue in the download by clicking the volume up button. Attach your phone with PC again and this time,
Click ONLY on “PDA” button and select the
“I9100_KERNEL_I9100XXKP1_CL16459_REV02_eng_mid_ship.tar.md5” file.
Make sure you chosen only PDA option, click on “start” button. This process with take only few seconds and your phone will reboot again.
Now you got a screen mentioning “Android is upgrading”. It will process about 85 (or 65 files, I don’t remember exact count). Then follow the phone setup wizard and enjoy the whole new Android experience.

If you face any problem while following this tutorial then comment below and we will help you out.
This was guest article by Rajan Balana, he is a Blogger as well as student. He loves to explore smartphones, tablets and Android. He does the gadget reviews at Dreambloggers.com and also covers Android News at Androidnew.com.


6 thoughts on “How to Install Android 4.0.1 ICS Custom ROM on Samsung Galaxy S2”
really a awesome a lot
why android version 4.0.1 after update external memory is not readable thank you
Hi nice article on S2 but can i upgrade Samsung Galaxy S1….
Hi nice article on S2 but can i upgrade Samsung Galaxy S1….
it looks like evrything is ok but my phone will not restart
Very nice article mate :)