The famous annoyance of Windows Error reporting of Windows XP is back in Windows 7. However in Windows 7 error reporting is enhanced to provide more robust options to users. Unlike Windows XP error reporting Windows 7 allows you to control how and what data to be reported when any error occurs.
Unfortunately Windows 7 error reporting doesn’t work as expected, most of the time it fails to provide any working solution to the problem occurred.
We are sure many of you would like to disable Windows 7 error reporting, for those users who don’t know how to do it here is simple how to guide on disabling Windows 7 error reporting.
How to Enable/Disable Windows 7 Error Reporting
Method 1: Using Action Center
1. Click on Control Panel from Start menu & go to Action center.
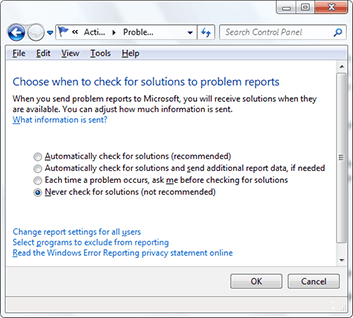
2. Expand Maintenance Tab and click on settings under “Check for solutions to problem Reports”.

3. Now check “Never check for solutions” options & Click on OK. If you need to disable for all users then click on “Change report settings for all users” and chose appropriate option.
Method 2: Using Local Group Policy Editor
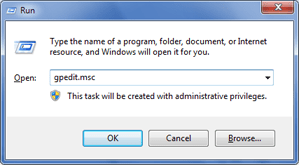
1. Press Win+R and type “gpedit.msc” at run command

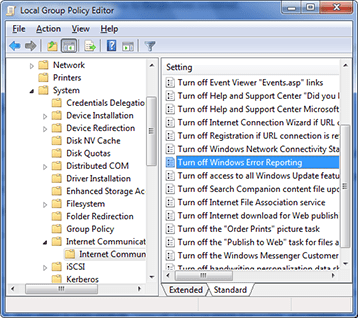
2. Now navigate to following Computer Configuration > Administrative Templates > Systems > Internet Communication Management > Internet Communication Settings from the left sidebar

3. Now select & right click on “Turn Off Windows Error Reporting” and Enable it from right pan. Click Ok & Apply.
That’s it.


1 thought on “How to Disable Windows 7 Error Reporting”
These steps were really very easy … I have already disabled them on my system ..
Best,
Daina