Windows 10 is definitely the best and most praised version of Windows so far. But still, there are a few issues that pop every now and then. These issues cause quite a bit of irritation to users on daily basis. One such issue is “Windows 10 search bar or search stops working”. This wasn’t a huge problem in the previous version of windows as users were barely using the search bar. But that can’t be said in case of Windows 10.

Microsoft introduced their own personal assistant “Cortana” in addition with the fresh and fluent start menu user interface in Windows 10. As a result, many users started using the personal assistant along with the search bar. The search bar in Windows 10 is a huge improvement as compared to the previous versions. This search bar is linked with Bing search engine and Microsoft store which automatically suggests searchable content which redirects the user to the result page or to the application which might be available on Microsoft store.
The search bar is a combination of billions of micro-processes. Hence it tends to display a couple of bugs every now and then. As a result, the search bar stops working and the user is left with a dissociated block on their home screen. If you are also experiencing a similar issue, check out some workarounds provided below to help you get through with the problem.
Table of Contents
Windows 10 Search Bar Not Working, How to Fix?
1. Restart Your Computer
Most of the time, the constant running of windows is the reason behind this problem. Hence, you can resolve the problem by simply rebooting your system. Rebooting the system will give the system a fresh start that it requires to work flawlessly.
2.Restart Windows Explorer
If you can’t afford to restart the system, you can simply restart the ‘Windows Explorer’ process from task manager. This will reboot the Windows Explorer only instead of the complete system. This is a lot quicker as compared to the system reboot. Thankfully plenty of issues like blank taskbar icons issue and start menu icons can be fixed with this solution.
To reboot Windows Explorer, Follow the steps provided below:
1. Press ‘Ctrl+Shift+Esc’. This will quickly open the task manager.
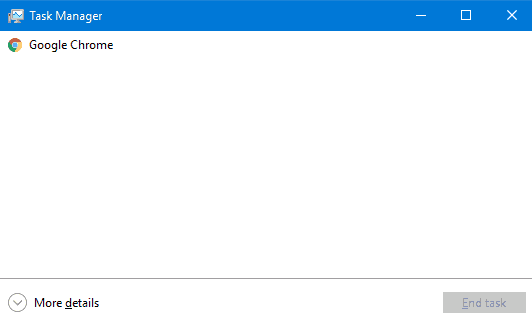
2. Click on ‘More details’ on task manager.
3. After that, head to ‘Processes’ tab. Here you will find all the processes which are currently active.
4. Look for “Windows Explorer” in the list of processes.
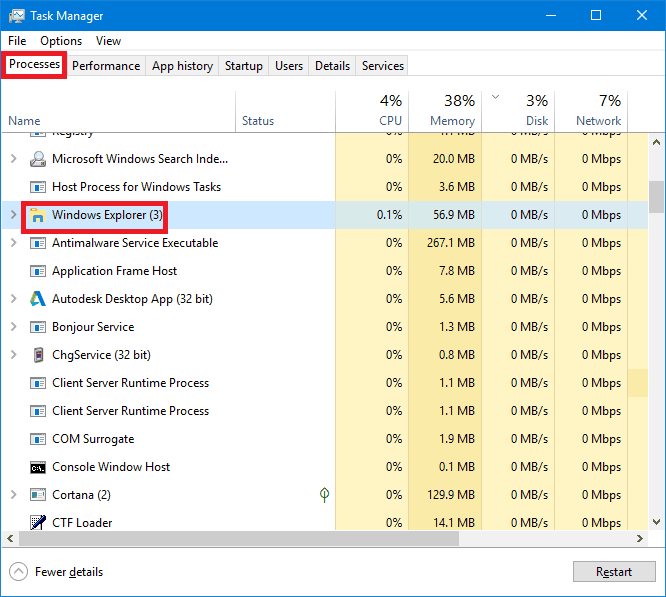
5. Right click on Windows Explorer and click ‘Restart’.

This will restart your Windows Explorer. Make sure to have no operation running in the background to avoid data loss.
3. Update your system
Microsoft takes care of the common windows problems all by itself. All you have to do is head to ‘Update and Security’ tab and click on ‘Check for update’. Windows will check for update and then automatically download and install the update on your system.
4. Use Windows Troubleshooter
If the above steps didn’t work out for you, you can use Windows troubleshooter to analyze and troubleshoot the problem.
To use Windows Troubleshooter for the problem, Follow the steps provided below:
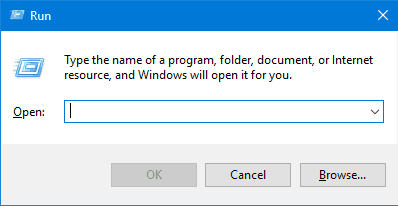
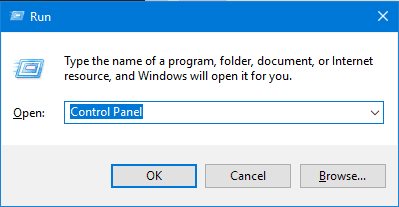
1. Press ‘Windows key+R’. This will open a ‘Run” Window.
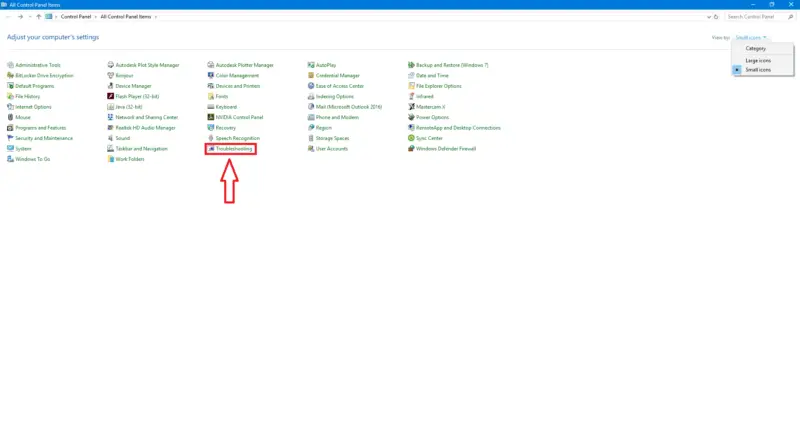
2. Type ‘Control Panel” in the window and hit enter. This will open control panel
3. In the control panel, set the ‘View by’ option to small and click on ‘troubleshooting’
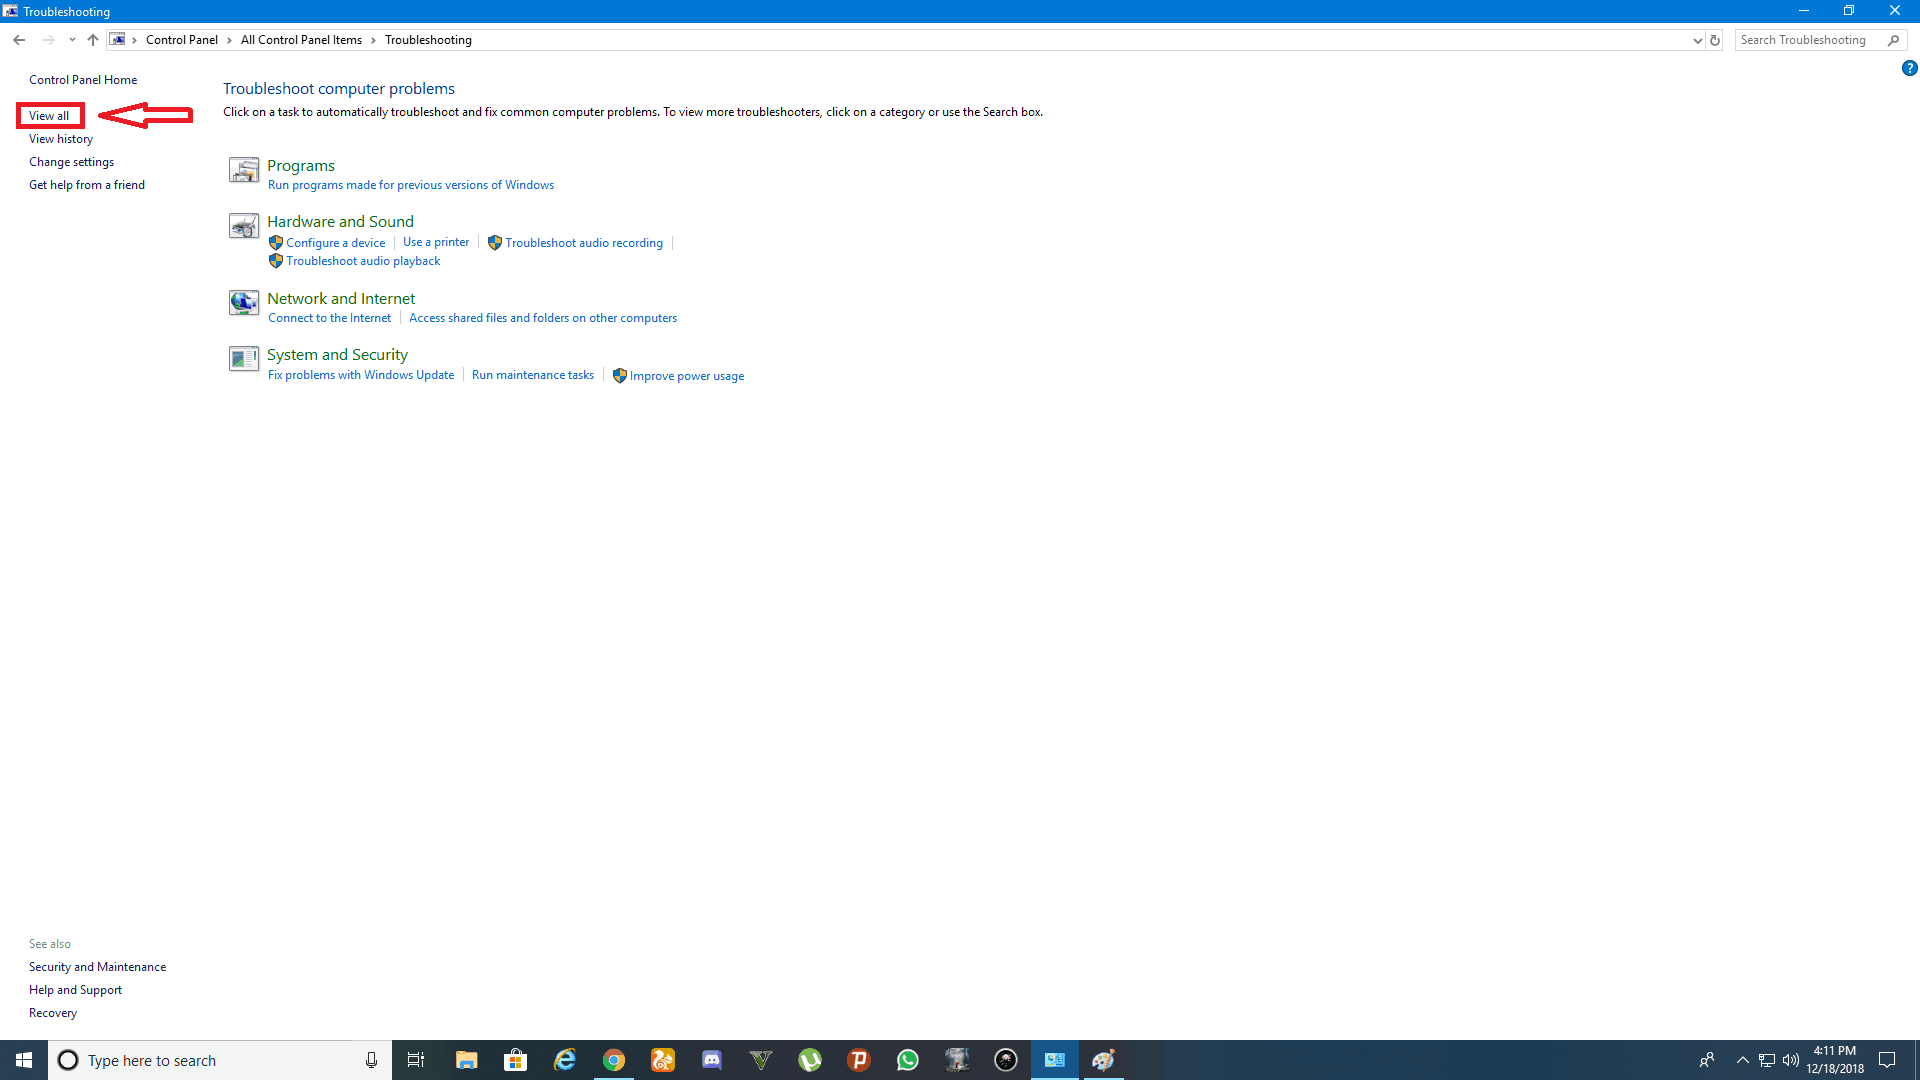
4. Click on ‘View all” option in troubleshooting window.
5. Select ‘Search and Indexing’ option from the list.
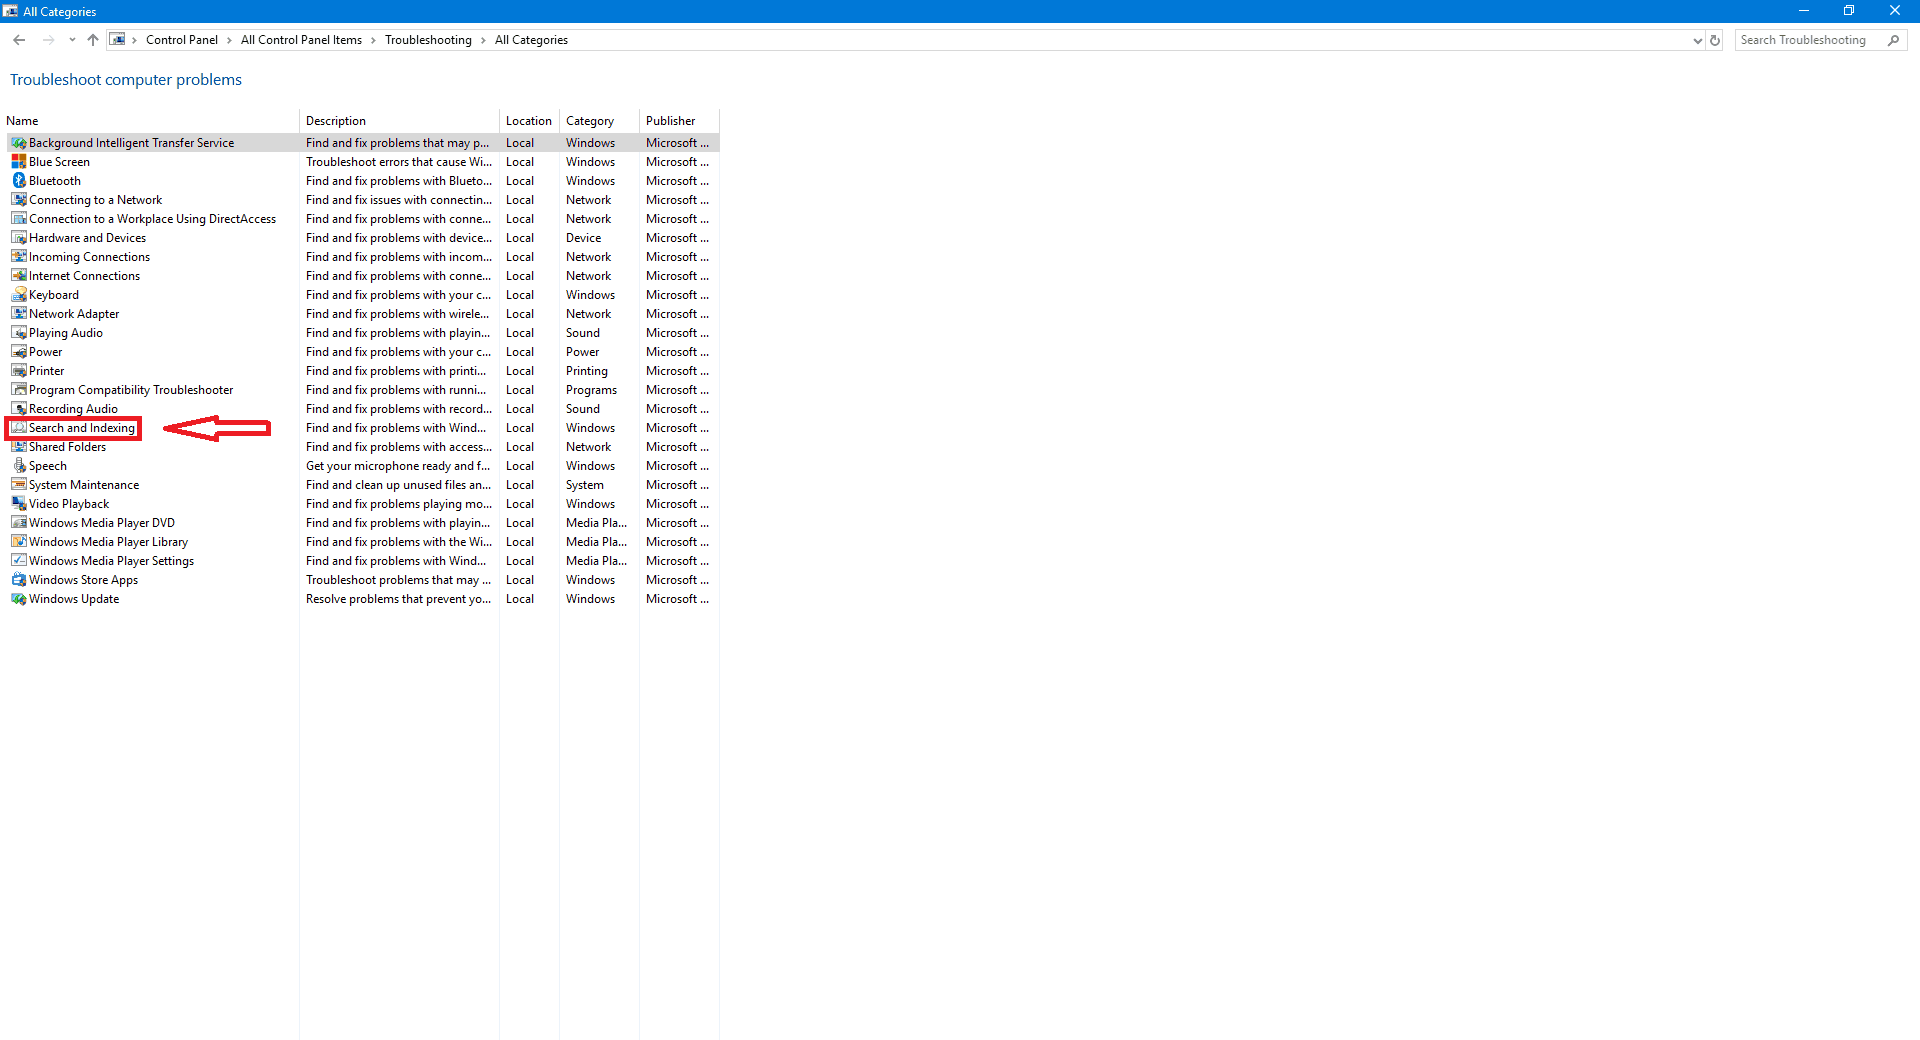
6. Run the troubleshooter. This will identify and solve the problem itself if possible.
5. Disable Third-party Antivirus Programs & Use Windows Defender Instead
Various third-party antivirus programs can also cause this trouble. The third-party antivirus programs have a high impact on RAM usage and have the ability to prioritize the background processes according to requirement. We will suggest you remove/disable the third-party antivirus programs and use Windows Defender instead. Windows Defender is a system integrated software hence it does not require a lot of resources to run. Also, Windows defender his quite developed and powerful in Windows 10 as compared to previous versions.
6. Modify Startup Type of Windows Search Service
Another reason behind this issue could be the startup type of Windows Search Service. In many cases, the Windows Search Service startup type is set to manual. Due to this, Windows doesn’t start the process automatically at the time of boot.
To solve this, follow the steps provided below:
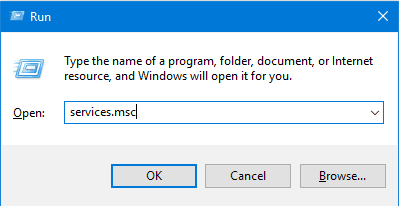
1. Press ‘Windows key+R’. This will open a ‘Run” Window.
2. Type ‘Services.msc’ in the window and hit enter. This will open the services tab.
3. Find ‘Windows search‘ in the list of services.
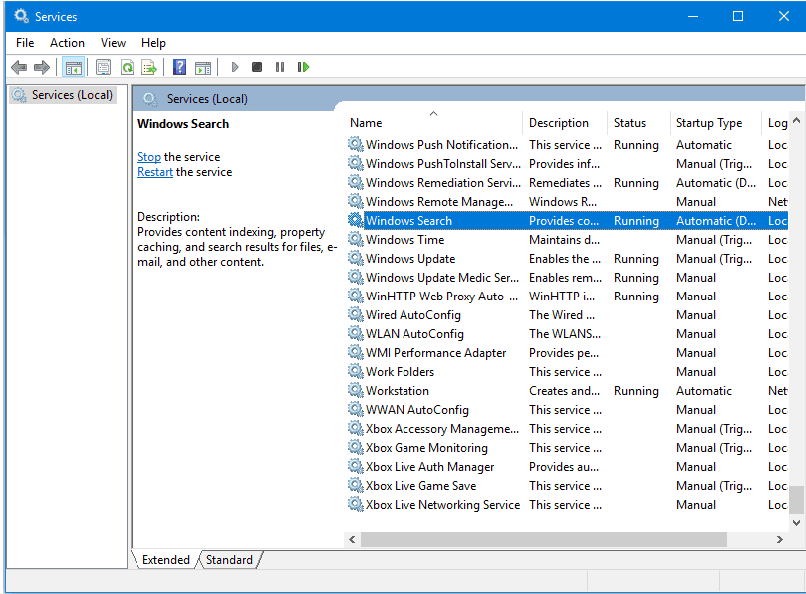
4. Right click on ‘Windows Search‘ and click on ‘Properties’ from the options.
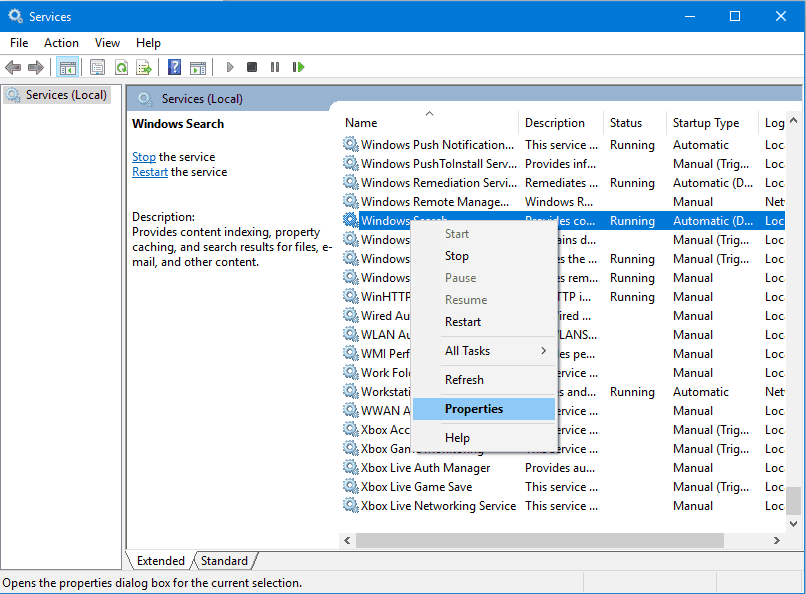
5. In the next window, make sure that the startup type is set to ‘Automatic’ and click ‘Start’ button if available. Then click apply.

This will ensure that the Windows search process begins at the time of boot.
7. Rebuild Your Index
Windows uses indexing to organize all the files and folders generated in the system for the easy search. This process is carried out in the background and generally doesn’t require the user’s attention. However, it is possible that some interference in the indexing procedure may cause an error in index generation. This will relatively affect Windows search service. To resolve the issue, the user has to rebuild the index manually.
To rebuild your index, Follow the steps provided below:
1. Press ‘Windows key+R’. This will open a ‘Run” Window.
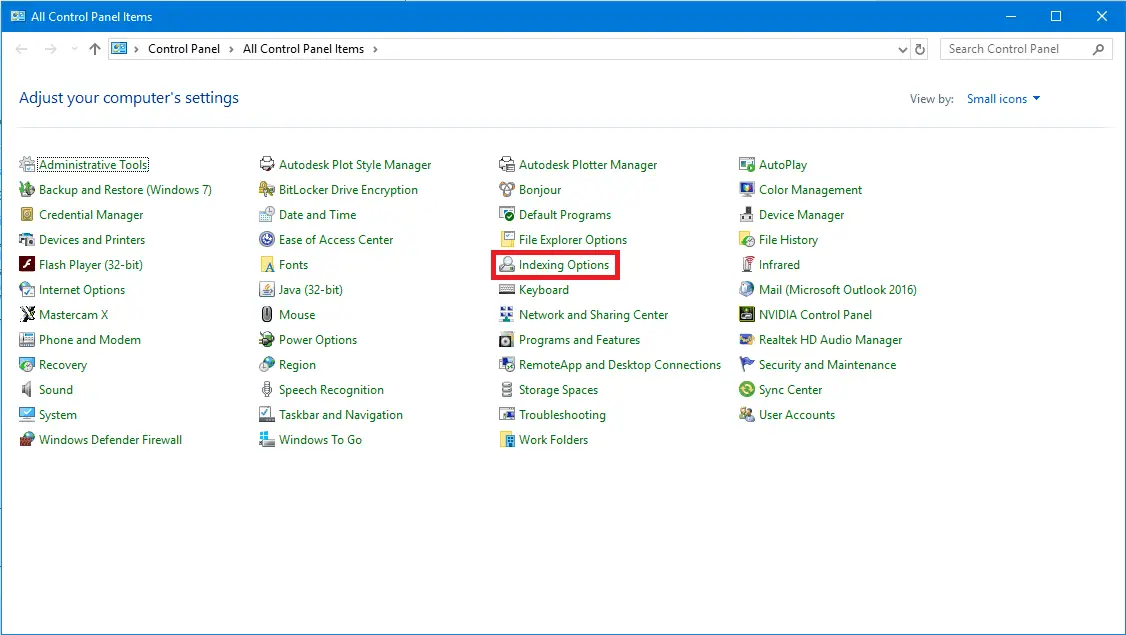
2. Type ‘Control Panel” in the window and hit enter. This will open control panel
3. In the control panel, set the ‘View by’ option to small and click on ‘Indexing options’
4. In the ‘Indexing Options’ window, click on advanced.
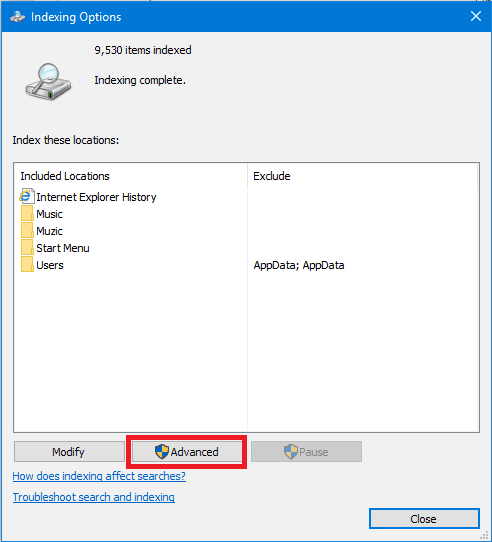
5. Then click on ‘Rebuild’
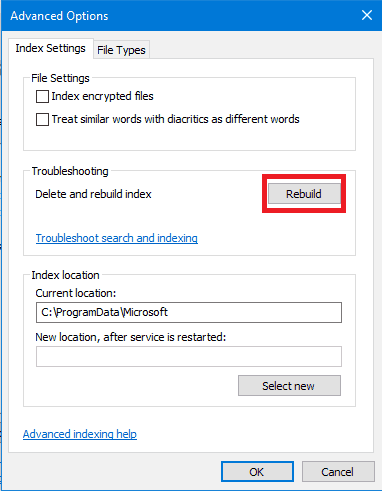
This will delete your previous indexing build and create a new one. This process takes quite some time. Make sure the process is not interrupted by any means to obtain successful results.
By following simple solutions provided above, you can easily solve the problem by yourself. If the above methods don’t help you, you might have to re-install Windows on your system again.

