Windows 10 is definitely the best and most praised version of Windows so far. The main reason behind this is surely the research and development of Windows 10 as compared to the versions that were released before. Microsoft pays a great deal of attention in the development and the security of Windows 10. Hence, Microsoft continuously pushes the updates for the operating system and by default, Windows 10 is set on “Auto-update” so the user does not get left behind. Despite the fact that these updates tend to improve the ergonomic relation of the user with the system, they also cause a lot of problems.
What causes Windows 10 to stuck at Reboot Loop?
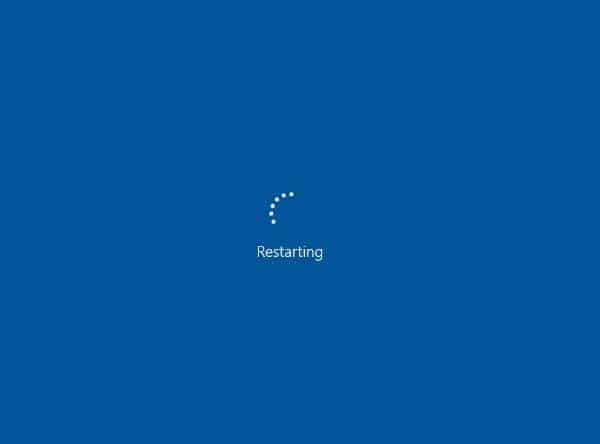
Windows users face various kinds of troubles and bugs in their system. Many of these problems are quite small and require a simple reboot to get fixed. Rebooting your system is the most common solution for many minuscule bugs. But, some of the users have reported the problem with the reboot procedure itself. The most common problem is “Windows 10 stuck at reboot“, basically Windows 10 will keep rebooting or doesn’t move ahead of the restart screen. It could occur in many ways such as a slow reboot or worse, no reboot at all. All the users can see is the Windows 10 loading icon going on in a timeless loop. This issue most commonly occurs after the installation of new windows 10 updates. It is because the updater has received an update for itself which could not be properly installed. This problem can be very frustrating for a user as the update procedure is already lengthy and sluggish.
If you are also suffering a similar problem, don’t worry. We have gathered a bunch of possible solutions that you can administer to resolve the problem. Follow the article to the end to acknowledge all the solutions.
Fix Windows 10 Stuck at Reboot Loop
Case 1: Windows 10 does not reboot at all (reboot loop)
This is the second case of the problem where the Windows 10 is stuck at reboot does not boot at all or keeps restarting repeatedly. The Windows 10 does not display any kind of error and all you can see is the infinite loop of windows loading icon. If you have encountered this case of the problem, follow the methods provided below:
Method 1: End the frozen process at reboot
It is possible that a particular process which is set to initiate at the time of boot has stopped responding and the system is waiting for the process to respond, keeping you in a tedious and neverending boot loop. You can resolve this by simply terminating the unnecessary processes by using the Task manager.
To apply this solution, follow the following steps:
- At the time of boot, Press “Ctrl+Alt+Det” in the sequence to pause the boot process and bring up the menu.
- Select “Task Manager” from the menu.
- Now, click on “Processes” option to see the list of all active processes.
- Now, terminate the processes which are not significant for the boot.
- Now, close the task manager to resume the system boot.
- The system must boot now without any issue. If the issue is resolved, you must remove the program that is causing the inactive process at the time of boot. You can straight up uninstall the program or remove it from startup services to prevent the further problem.
Method 2: Use WinRE (Windows Recovery Environment)
Windows recovery environment is a powerful tool provided by Microsoft which can repair the general issues which are causing the boot loop. Even if your system is not starting, you can enter WinRE by using the following method:
- Start your system
- Now, as soon as the Windows logo appears, Long press your system’s power key to force shut down the system. This is considered as “Unexpected shutdown”.
- Repeat this procedure 2 to 3 times. WinRE will start automatically if it detects two or more consecutive failed reboot.
- Now, once you have entered WinRE, Select “Troubleshoot” option from the menu
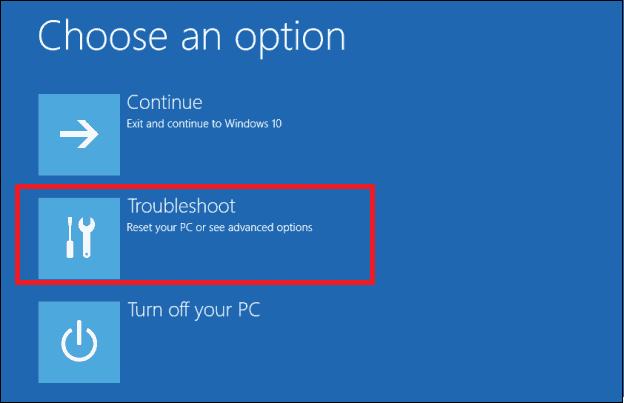
- Now, click on “Advanced options”.
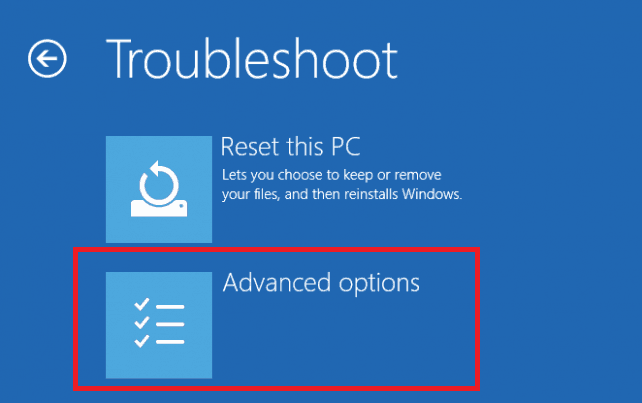
- Now, you will be able to see all the advanced troubleshooting options. Select “Startup Repair” from the options to initiate the troubleshooting process for Windows startup.
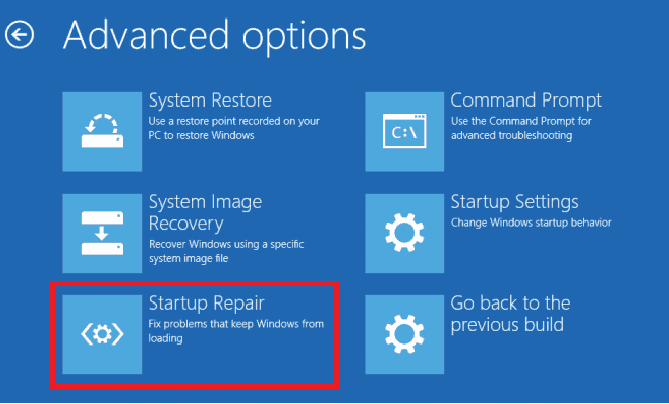
- Now, Follow the on-screen instructions to complete the startup repair. This will resolve the problem of the infinite boot loop.
Method 3: Using the Command prompt available in WinRE
There is an elevated command prompt available in WinRE. You can use the command prompt to execute some commands which can possibly resolve the boot problem. To do so. Follow these steps:
- Enter WinRE by following steps 1-3 mentioned in the above solution.
- Once you are in the WinRE, get to the advanced troubleshooting menu as explained above.
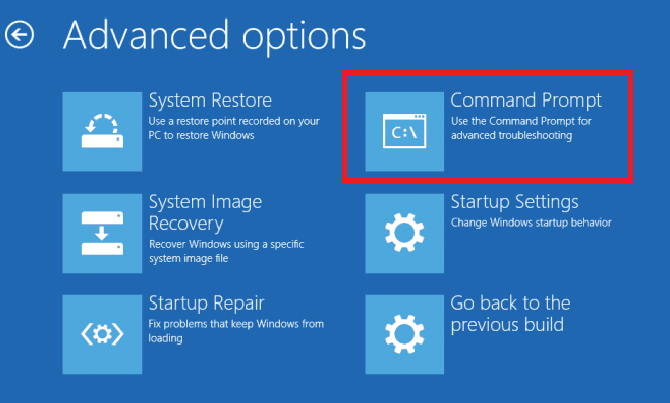
- Now, You have to select “Command Prompt” option from the advanced troubleshooting menu.
- Once the command prompt is opened, Enter the commands as explained in Method 2 of Case 1 to run an “SFC” scan.
- If the SFC scan doe not resolves the issue, you can reset the Software Distribution Packages by entering the commands elucidated in method 3 of case 1.
Case 2: Windows reboots eventually but takes a long time
This is the first possible state of the problem. In this case, the system takes a lot of time for the reboot but it gets booted up eventually. If you are undergoing this scenario, you should apply the solutions provided below.
Method 1: Use the Windows Troubleshooter
Microsoft has provided an integrated troubleshooter which is able to automatically identify the root of the problem and resolve it. You must have an active internet connection to utilize the troubleshooter to its full potential. All you have to do is follow the following the steps carefully :
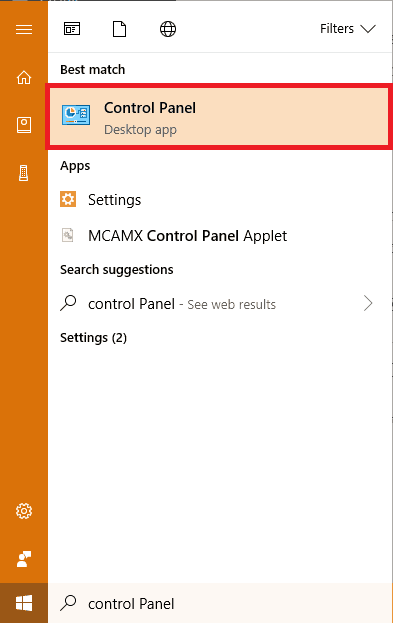
- Press “Windows key” to open the start menu. Type “Control panel”. Select the first result to open the control panel.
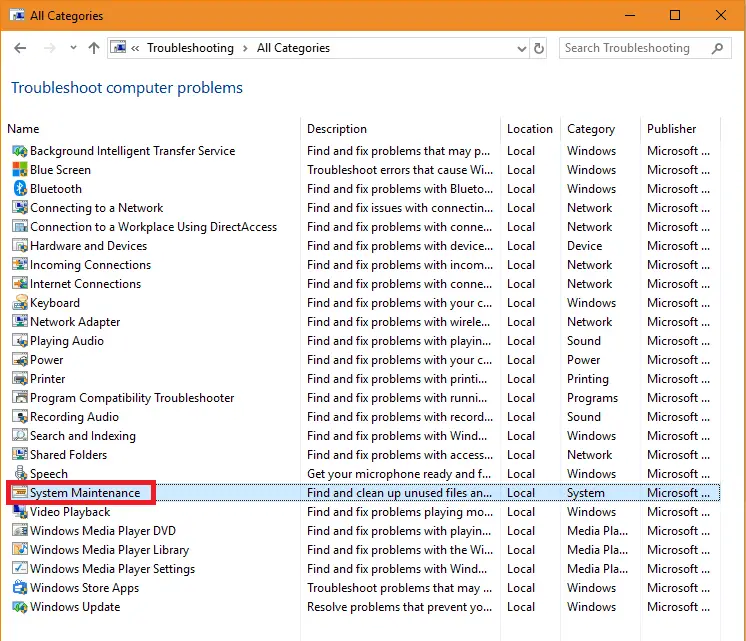
- Once you have opened the control panel, Make sure “View by” option is set to “Large icons”. Then select “Troubleshooting” from the control panel.
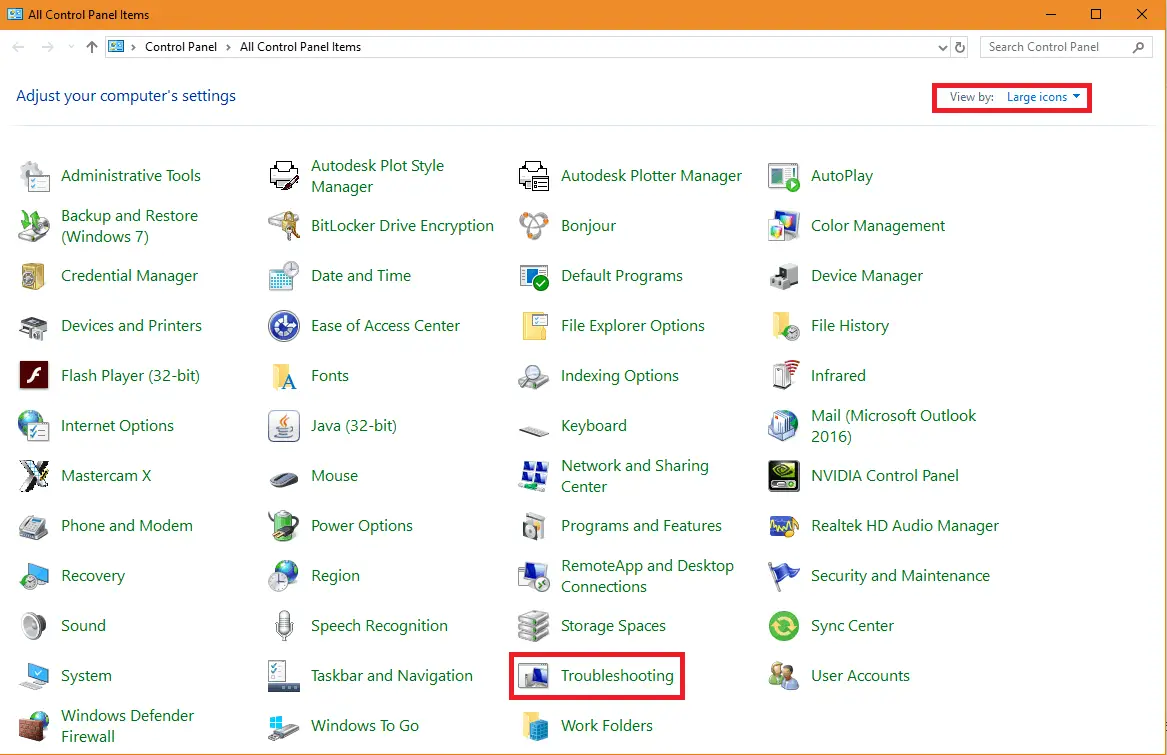
- Now, the troubleshooting window will be opened. Click on “View all” option provided on the right side.
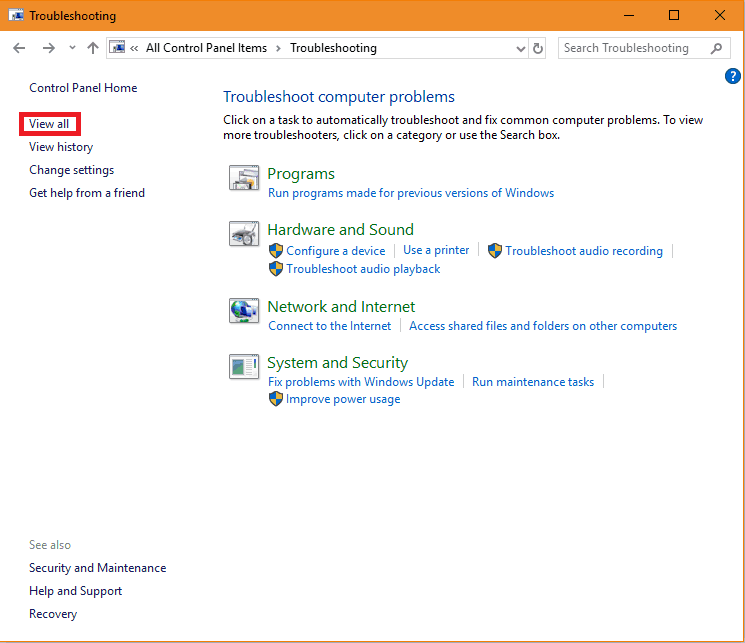
- Now, you will be able to see all the available options for troubleshooting. click on “System Maintenance” from the list.
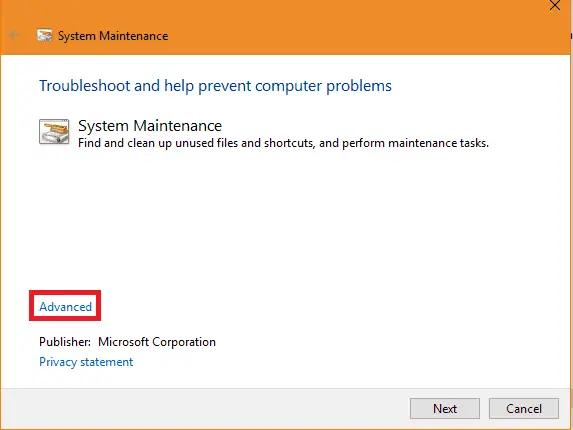
- Now, click on “Advanced”.
- Now, make sure that “Apply repairs automatically” option is checked and click on “Next”.
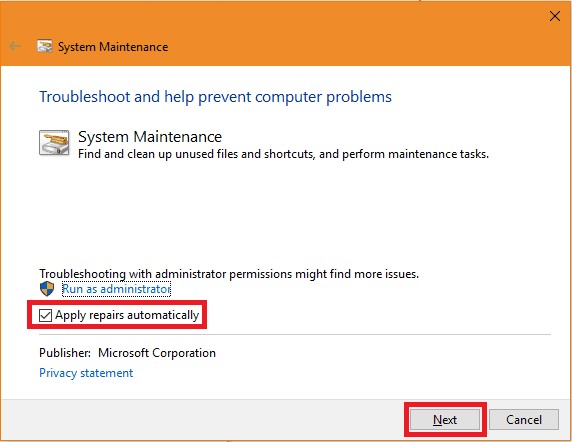
- Now, the troubleshooter will identify the cause of the problem and it will try to resolve it.
- Once the process has completed, close the window.
- Reboot the system afterward for changes to take effect.
Method 2: Execute the SFC (System File Checker) scan
You can execute a deep system scan by putting some simple commands in the command prompt.
To perform this scan, follow the steps provided below:
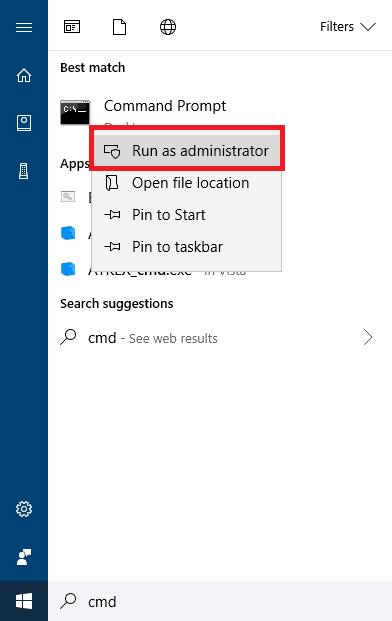
- Press “Windows Key” and type “Cmd”. The command prompt will pop up at the top of the list. Right click on the “Command prompt” and select “Run as administrator” to run the command prompt with administrator privileges.
- This will open the command prompt window as shown below.
- Now, you have the put the command in the command prompt (without asterisks) and press enter.
*sfc /scannow*
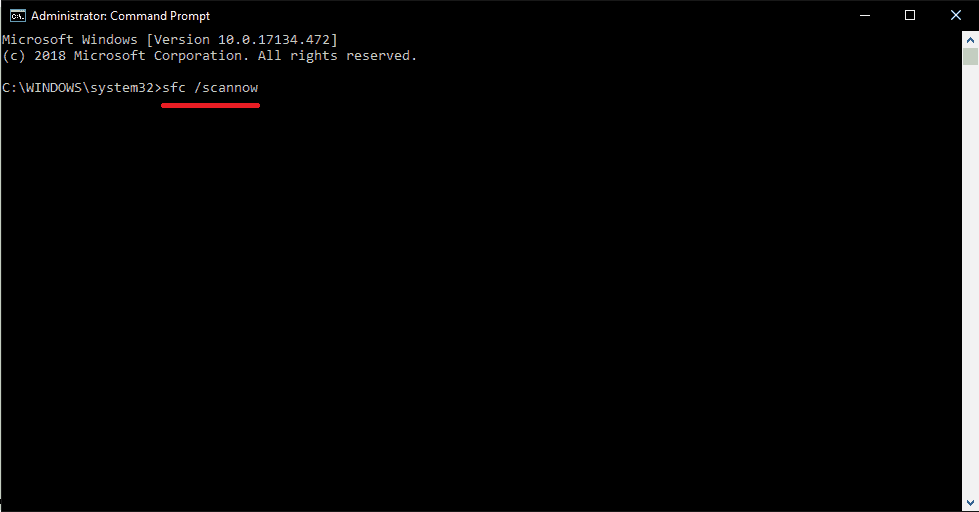
- Once you press enter, the system scan will be initiated. This process will audit all the system files for potential flaws and will try to resolve them. You must be patient as this scan requires around half an hour to complete.
- Once the scan is completed, close the command prompt and reboot the system. Your system will be rebooted like before.
Method 3: Reset the Software Distribution packages
The system might be stuck at reboot because of some interruption in the Windows update service. Most probably, there is a problem with Software Distribution packages which is causing you the trouble. If there is an error in Software Distribution packages, the updater is unable to identify the application which requires an update. As a result, Windows updater causes the boot loop. This problem can be simply resolved by resetting the Software Distribution packages. Once the packages are regenerated, the update will be able to check for the required updates which will, in turn, resolve the “Windows 10 Stuck At Reboot” problem.
To reset the Software Distribution packages, follow the steps provided below:
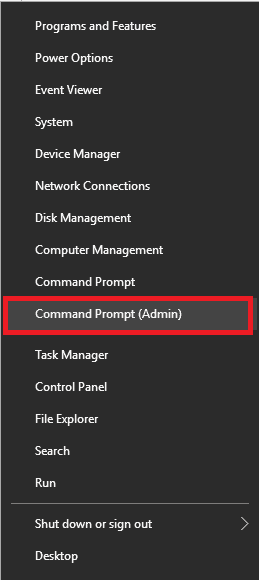
- Right click on the windows icon. Select “Command Prompt (Admin)” from the list.
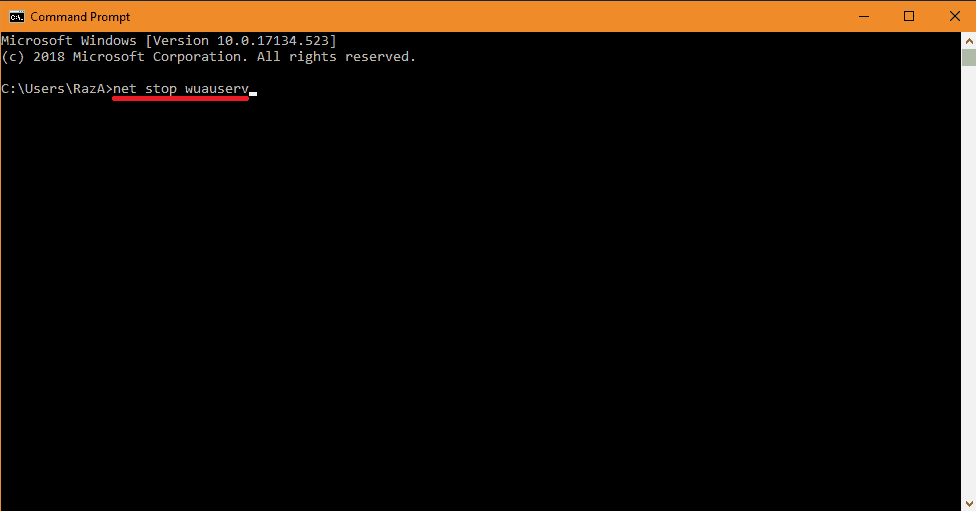
- This will open the command prompt. Now, Put the command *net stop wuauserv* and hit enter. This will stop the update service which is running in the background.
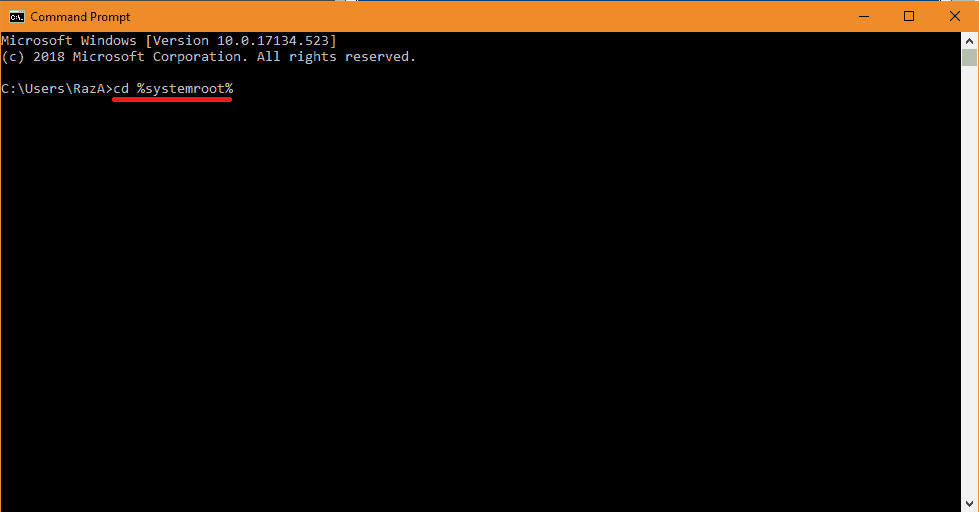
- Now, copy the command *cd %systemroot%* and right click in the command prompt to paste it. Once the command is pasted, press enter. This will allow the command prompt to make changes in the system’s root folder.
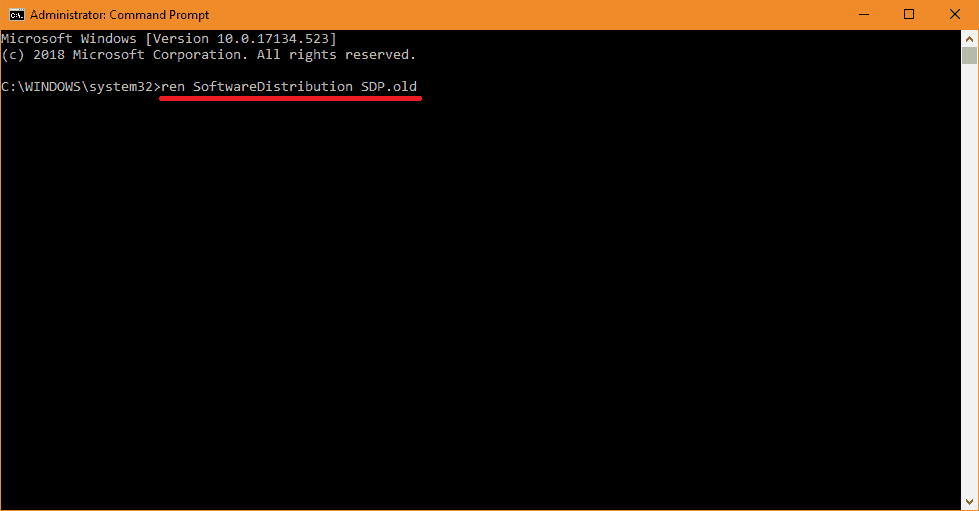
- Once this is done, copy the command *ren SoftwareDistribution SDP.old* and paste it in the command prompt. This will change the name of Software Distribution packages’ folder to SDP.old present is system’s root directory.
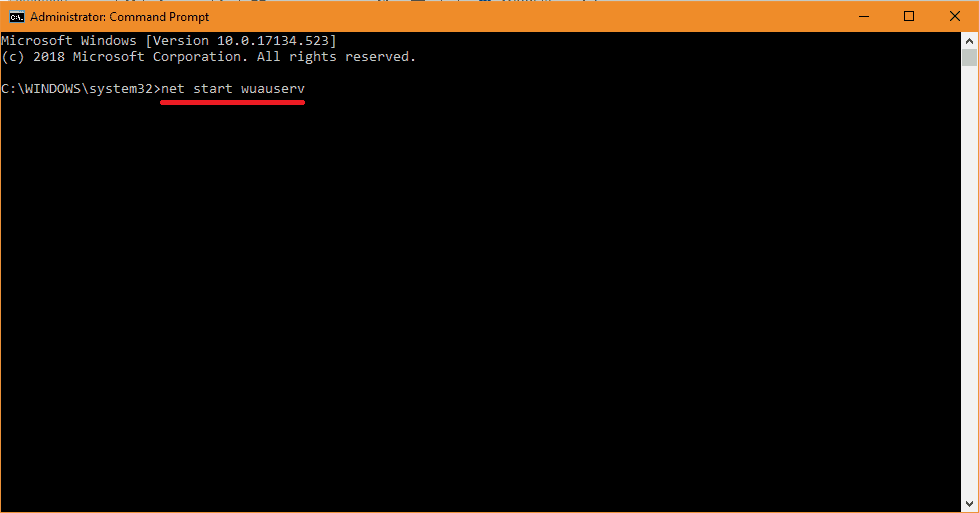
- Now, to finalize the process, simply copy the command *net start wuauserv* and paste it in the command prompt and press enter. This will enable the Windows update service.
- Now, reboot your system. Hopefully, the problem will get fixed.
Even after trying all the solutions if Windows 10 still doesn’t boot up properly then the last resort is to format and reinstall Windows 10 which might be a tedious process and you will need to create bootable Windows 10 media. Also if you haven’t taken data backup then better to use alternate options to copy your data first then formate and reinstall Windows 10.

